Unofficial fan-made guide. Not affiliated with Webelinx Games, the developer of Rooms & Exits: Escape Room Games.
Rebuilt frame by frame from a recorded playthrough of the current build — 9 minutes 59 seconds of footage, extracted at one frame per second and read at full resolution, cross-checked against a second recording of the same level. The code was read twice, from two separate recordings, and both agree. Everything on this page comes from that footage: where the recording cannot settle a detail, the page says so instead of guessing.
Chapter 2 · No Honor Among Thieves26 of 26 with full written steps · 26 with a video
Quick answer
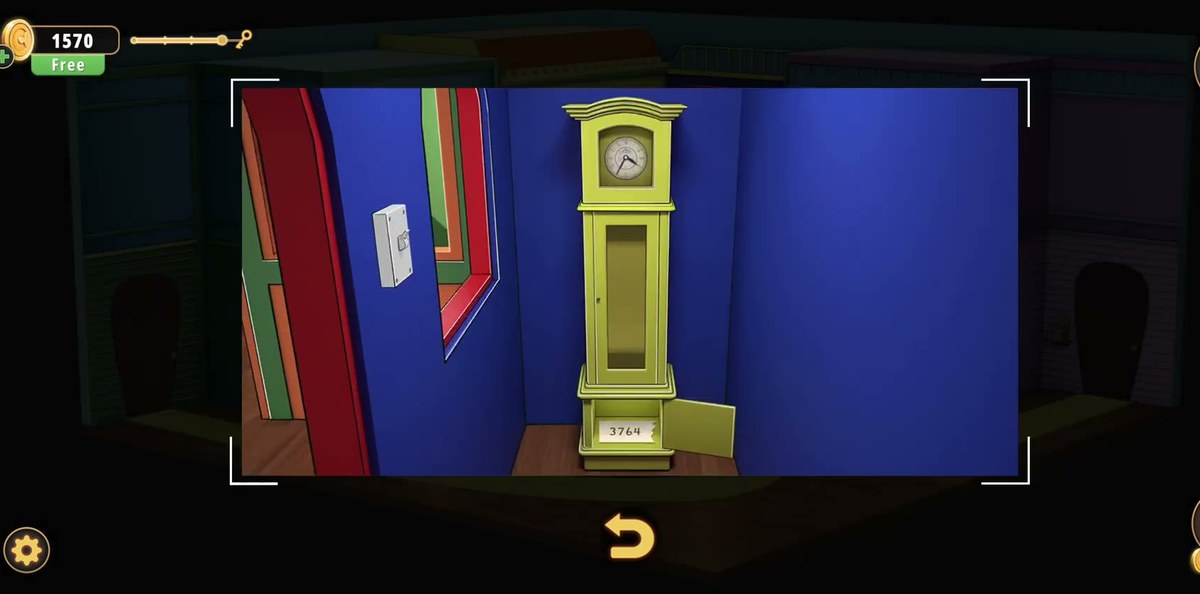
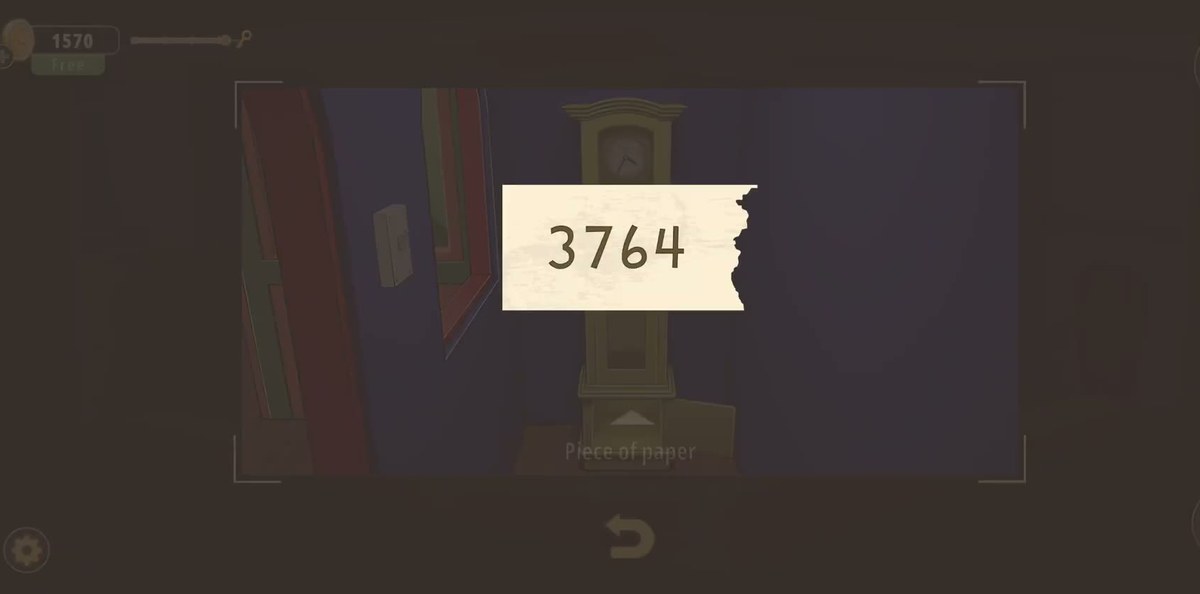
The only code in the Indoor Playground is 3764, and you do not find it in the playroom at all: it is written on a piece of paper inside the tall clock in the dollshouse section, which you reach through the tunnel behind the pulley plank. Finish worth +50 coins.
Collect the four coloured balls — the inventory counts them as Ball 4/4.
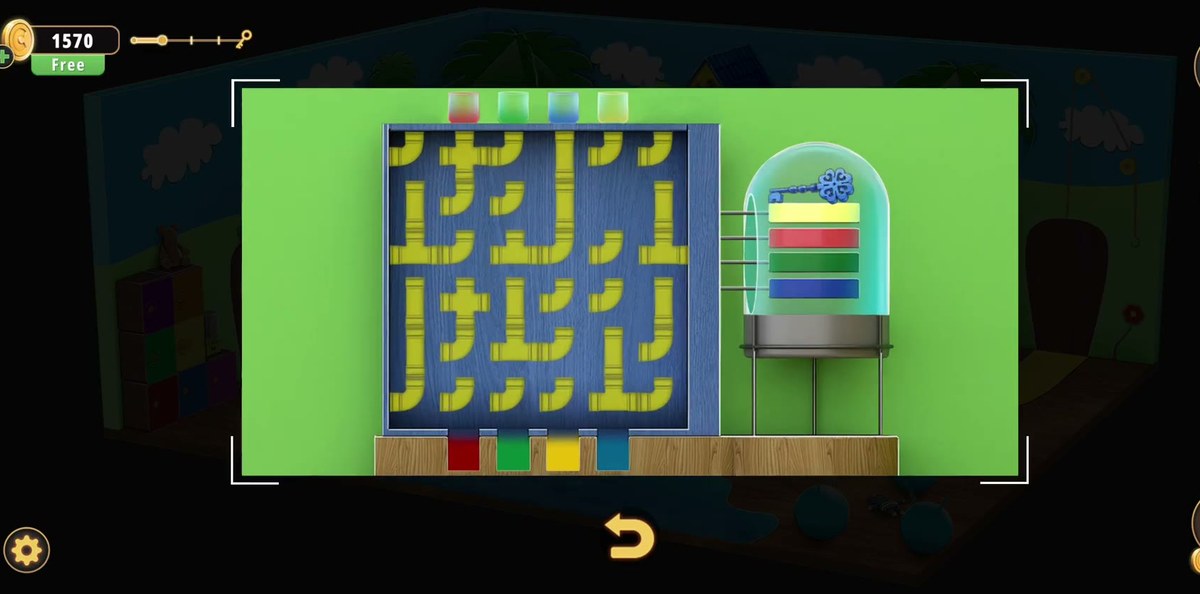
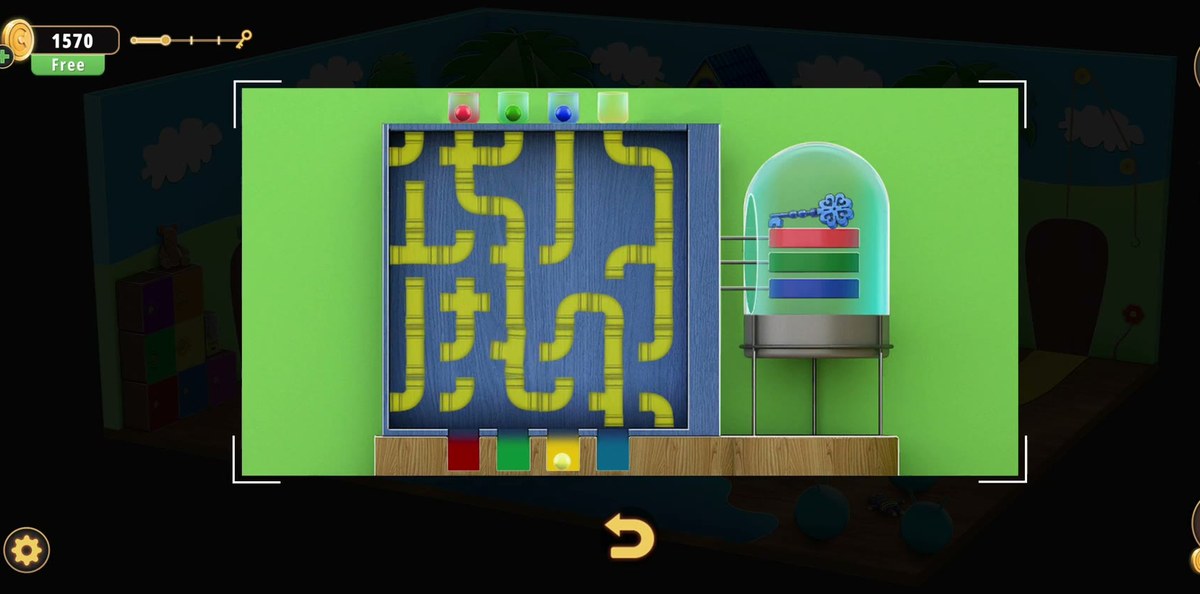
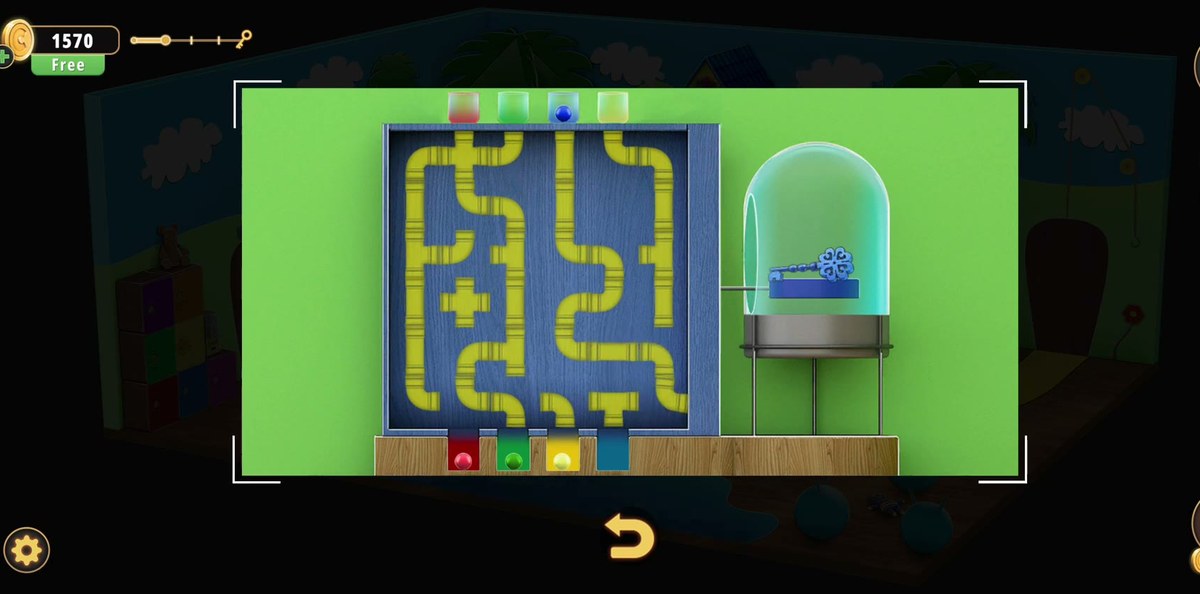
Load them into the four glass cups of the pipe board and rotate the pipes until every colour reaches its matching slot.
The dome opens: take the blue key.
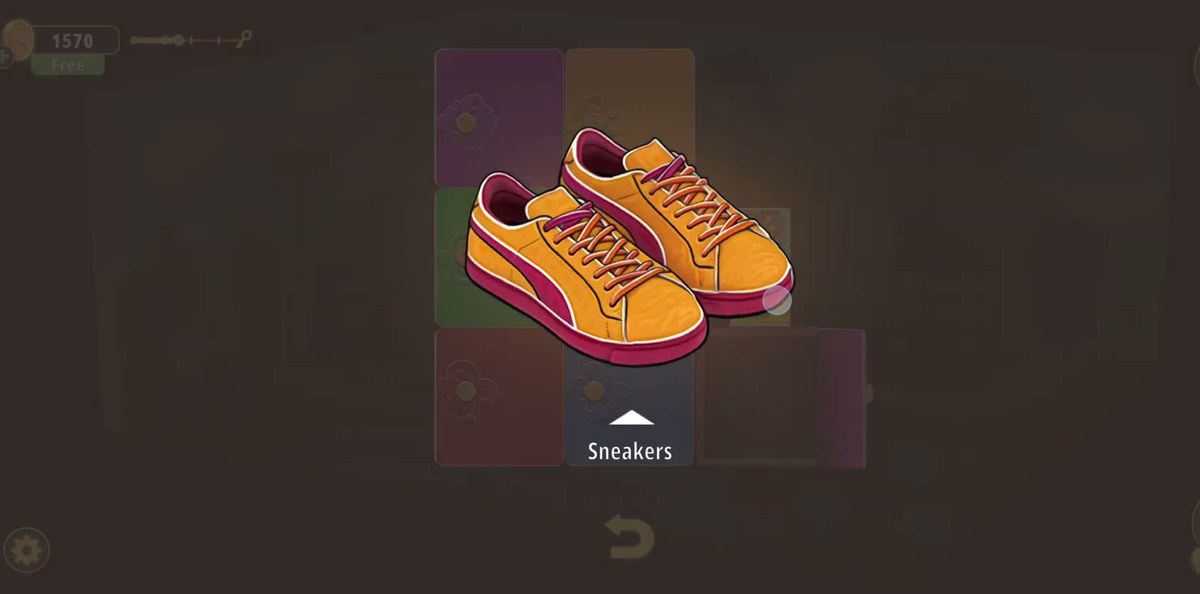
Use it on the purple cubby by the EXIT door → sneakers → Dismantle → shoelace.
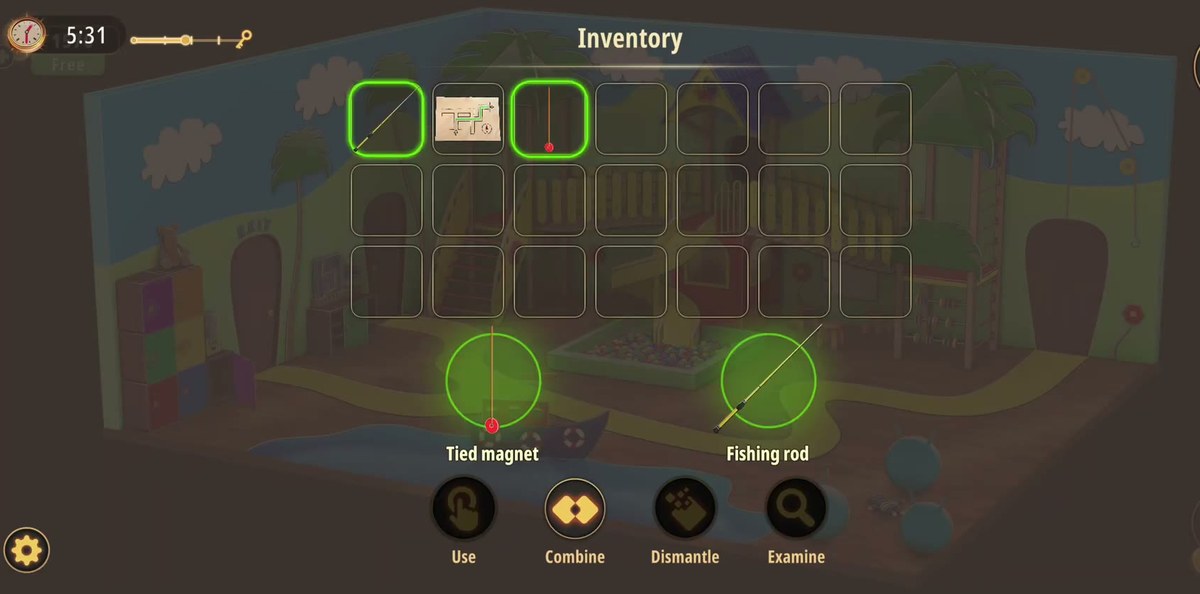
Combine shoelace + magnet → tied magnet, then tied magnet + fishing rod → fishing rod with magnet.
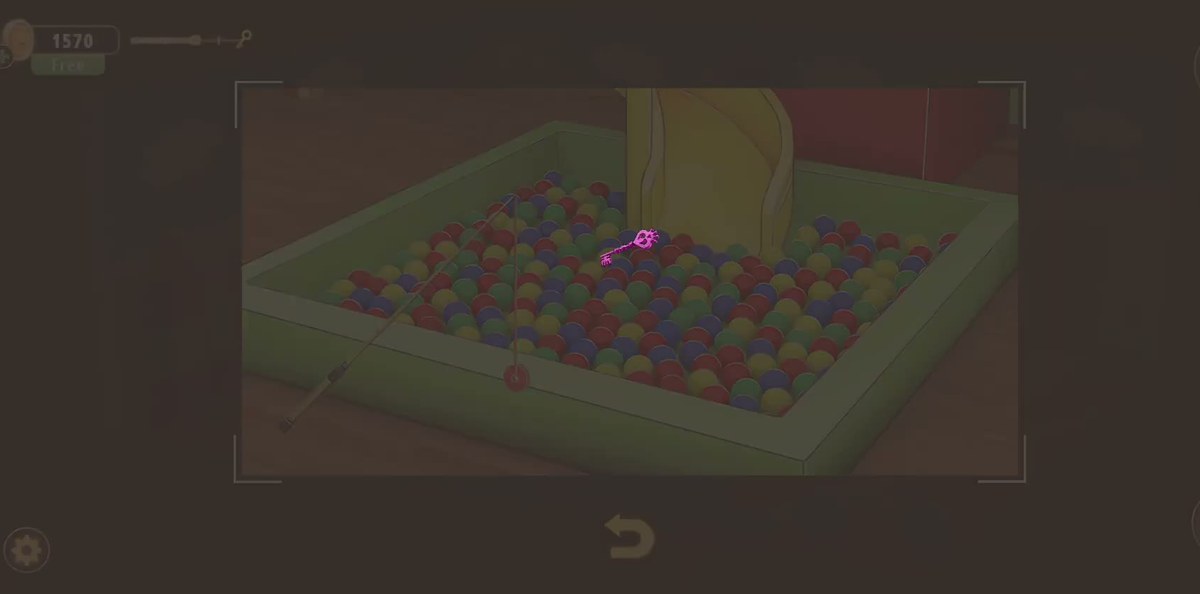
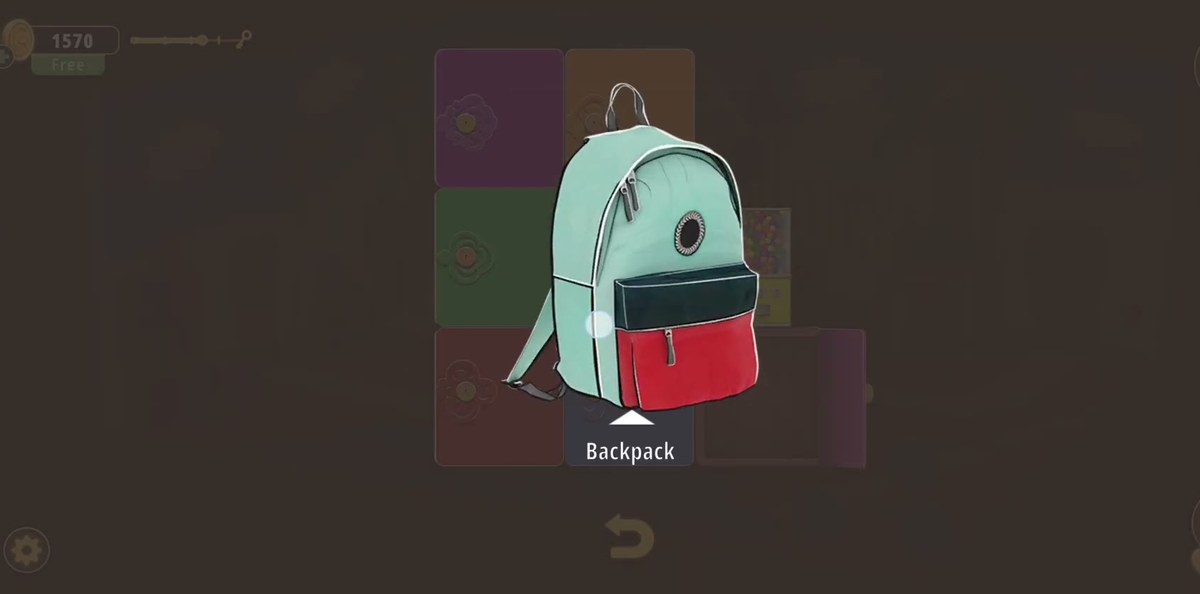
Fish the second key out of the ball pit and open the cubby with the backpack; it holds the light bulb.
Light the dark side room, read the paper in the clock: 3764.
Set the chest lock to 3764, take the key, use it on the EXIT door.
What this level actually is.
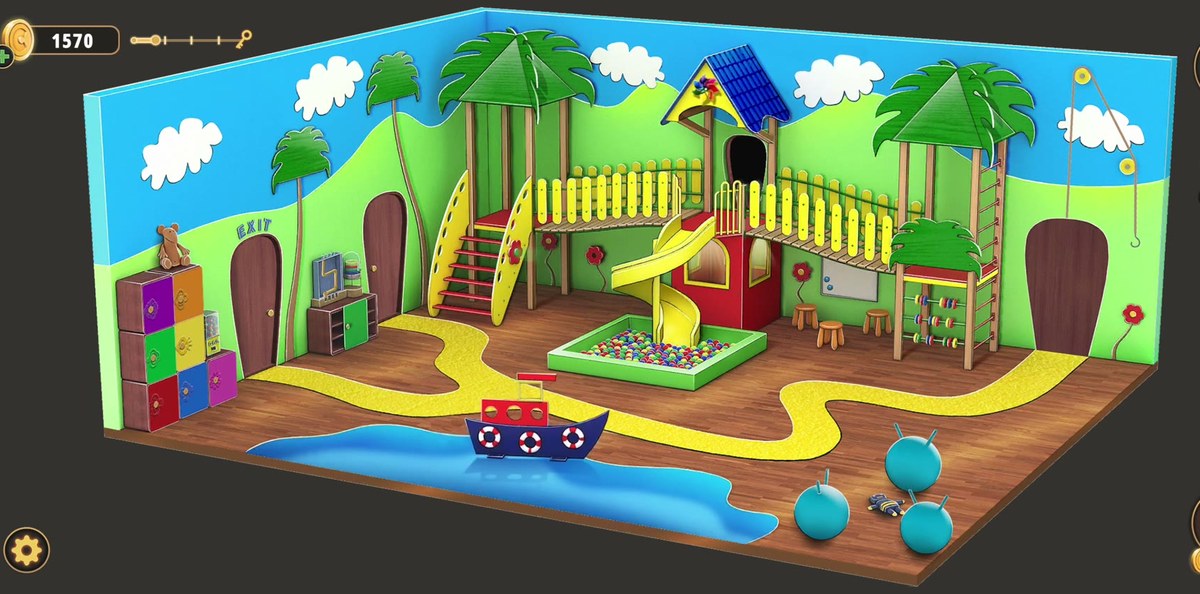
The Indoor Playground is a single soft-play hall dressed as a garden: sky and clouds painted across the top of the wall, hills and palm trees below, a wooden floor with a yellow path winding through it and a blue painted pond holding a toy boat. The centre of the room is one big climbing frame — red steps, yellow picket fencing, a walkway, a little playhouse with a blue shingled roof and a pinwheel, and a yellow slide that empties into a green-rimmed ball pit. Around the edges you get the props that matter: a stack of coloured cubby lockers with a teddy bear sitting on top, a gumball machine on a lime-green base, a whiteboard with magnets on it, three wooden stools, an abacus, three blue hopper balls on the floor and a pulley with a rope and hook up on the right wall.
It is a playground, not an arcade: there are no reflex games and no coin-op cabinets to beat. The arcade-style toys in the room — the gumball machine with its dials, the abacus, the boat with its life rings — are actually the clue hardware, and the level is a chain of three long puzzles that each hand you a key. What makes it feel much longer than it is, is that the playroom never tells you which prop is furniture and which is a lock. Everything looks equally decorative, so people tap the slide, the boat and the abacus for ten minutes and never touch the cubbies.
The other half of the problem is that the level has a second area at all. Behind the plank on the right wall there is a tunnel — the pulley lifts the plank, the dark opening shows an upward arrow, and the corridor beyond runs to a dollshouse street of little shopfronts. Inside those shopfronts are the desk room, the tall clock and the chest with four digit wheels. If you never find the tunnel you can finish the pipe puzzle, open both cubbies, take the backpack and still have no idea where the code is, because the code is not in the playground. It is in the clock.
Counting it honestly, the room has two real puzzles and one real code. The puzzles are the pipe board and the gumball dials; the code is 3764; everything else is a dependency check that exists to make you hunt for an item. That is not a complaint, it is just what the level is, and it explains why the walkthroughs that only list steps leave people stuck at the same two doors.
Step by step.
Step 1 · 0:02Read the room before you touch anything
Take the wide shot seriously, because the interface panel never covers it this cleanly again. Left wall: the cubby stack with the teddy on top, then the brown door with EXIT above it, then a small cabinet. Centre: the climbing frame, the slide, the ball pit. Right: the whiteboard and stools, the abacus, the three hopper balls and the pulley with its rope and hook. Floor: the yellow path and the painted pond with the boat.
The EXIT door is the door you leave through, and it will not open until the very end of the level. The pulley rope on the right wall is the thing almost nobody taps, and it is the entrance to the second half of the level.
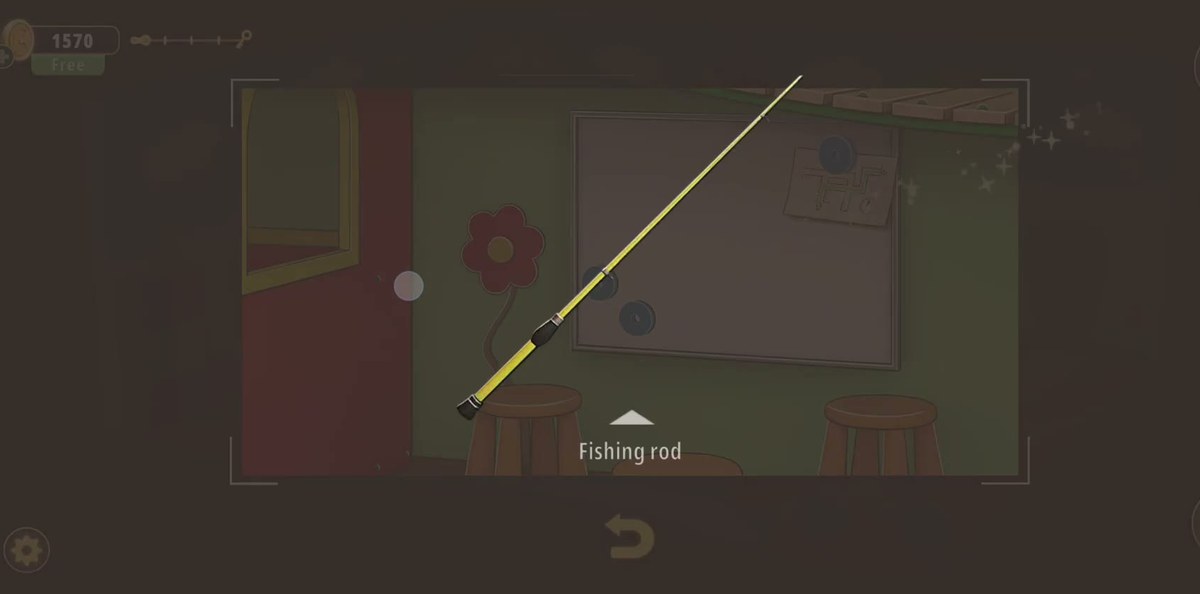
Step 2 · 0:09The fishing rod is leaning by the whiteboard
The first pickup of the run is the rod. It is propped between the left stool and the whiteboard on the green wall, and tapping it drops the label Fishing rod under it. It goes straight into the bag and then sits there for most of the level — you cannot use it on anything until you have made a magnet for the end of it, which is why the rod looks like a red herring for the first five minutes.
The same board gives you two more items in the same sweep: the red disc, which the game labels Magnet, and the sheet of paper with a maze drawn on it, labelled Drawing.
Step 3 · 0:19The four balls: red, green, blue and yellow
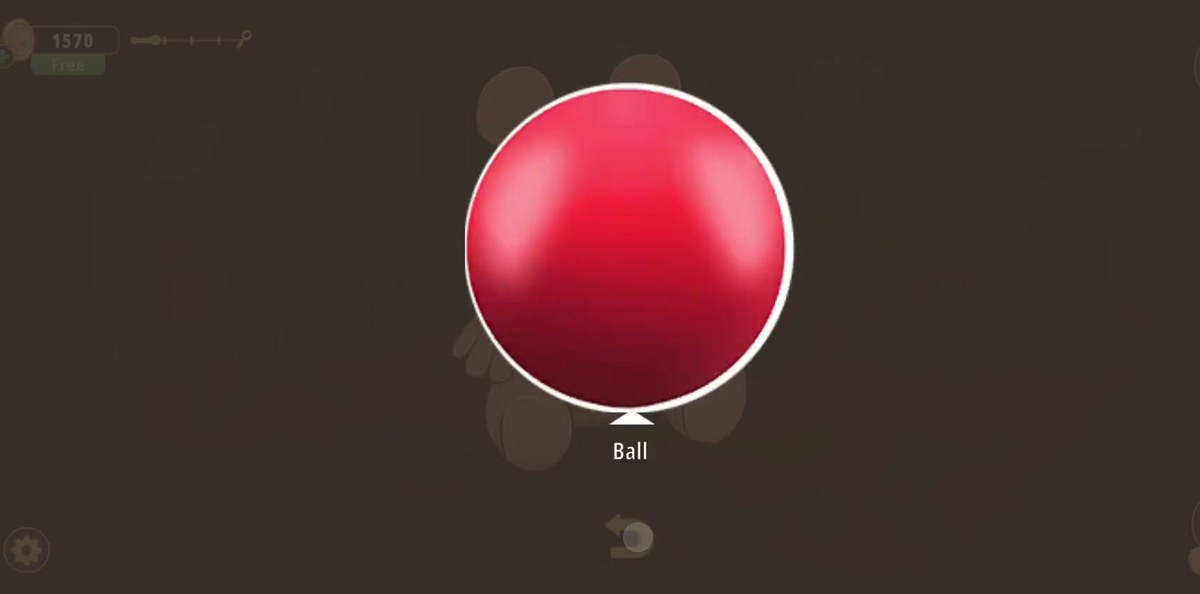
The pipe board wants four balls and the room only hands them out one at a time. The inventory slot shows them as Ball with a counter — 3/4 means you are one short — and only when it reads 4/4 is the puzzle actually solvable. Our recording takes one out of the play area and one out of the gumball machine; the rest come off the loose props in the same frame.
This is the single most common place to stall, because nothing in the room says "four". You can open the pipe board, see four empty cups, walk away and never connect the empty cups to the toys you have been ignoring.
Step 4 · 0:57The gumball machine and its three dials
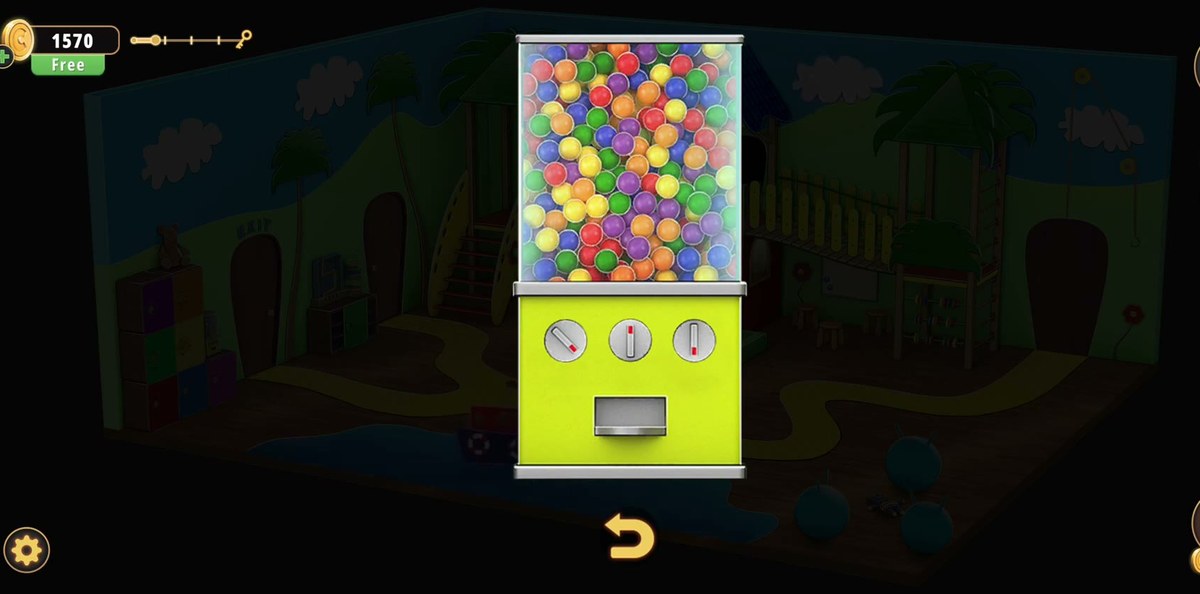
The gumball machine is not just a dispenser. Under the glass globe its lime-green base carries three round dials, each with a pointer and a small coloured indicator, plus the chute underneath. The dials are the lock; the chute is where the ball comes out once they are right.
The clue for them is in the room, not on the machine: the toy boat floating on the painted pond has three life rings along its side, and each ring carries a thin red mark at a different clock position. Copy the three positions from the rings onto the three dials — left ring to left dial, middle to middle, right to right — and the machine pays out.
We deliberately do not print the three angles here. Our capture is not sharp enough to read them twice with certainty, and a wrong angle is worse than no angle. Look at the rings, not at a screenshot.
Step 5 · 1:32The pipe board: four cups, one colour each
The pipe puzzle is mounted in the wardrobe-like panel between the doors. It has four glass cups along the top — red, green, blue, yellow, left to right — a blue board filled with yellow pipe segments, four colour slots along the bottom, and a glass dome on the right with a blue key sitting on top of it.
Load the balls into the cups first. Each cup takes the ball of its own colour, and the counter in the bag drops as you place them; if you are at 3/4 you cannot finish the board no matter how well you route the pipes.
Step 6 · 3:30Rotate the pipes until every colour lands
Tap a pipe segment to turn it, and work one colour at a time rather than trying to see the whole board at once. A ball only travels when its run is unbroken from cup to slot, so a single wrong corner anywhere along the route quietly stops it — and because four balls share the same board, fixing one route can break another. The recording spends nearly four minutes on this board, and that is normal: it is the longest single puzzle in the level.
When a colour is home it sits in its slot at the bottom and stays there. Use the settled slots as your progress bar.
Step 7 · 5:14The dome opens: blue key
With all four balls in their matching slots the glass dome on the right lifts and the blue key becomes takeable. It is the only thing the pipe board gives you, and it is the first of the level's three keys — which is why players who expect a code out of this puzzle spend a long time staring at the vessel looking for one.
Step 8 · 5:26Blue key → the purple cubby → sneakers
Take the key to the stack of coloured cubbies beside the EXIT door and open the purple door with it. Inside is a pair of sneakers, and this is the moment most players try to leave: shoes look like an exit item, the EXIT sign is right there, and the door does nothing.
The sneakers are not for walking. They are raw material.
Step 9 · 5:30Dismantle the sneakers, then combine twice
Open the inventory on the sneakers and press Dismantle. The shoes come apart into a shoelace, which is the only reason they exist. Then chain the two combines in this order: shoelace + magnet gives a tied magnet, and tied magnet + fishing rod gives the fishing rod with magnet. Order matters — the rod will not take the bare magnet, and the lace will not take the rod.
Read the verbs on the inventory screen once and remember them, because this level uses all four: Use, Combine, Dismantle, Examine. Most of the "the item does nothing" reports in this room are a wrong verb, not a wrong item.
Step 10 · 5:52Fish the second key out of the ball pit
Use the fishing rod with magnet on the ball pit under the slide. The line goes into the balls and comes back with an ornate key — the level's second key, and the one nobody expects, because the ball pit reads as scenery rather than a container.
This is also the step that proves the rod is not decoration. If your rod is still plain, your magnet is still a disc, or your sneakers are still shoes, the pit gives you nothing.
Step 11 · 6:00The second key opens the cubby with the backpack
Back to the same stack of cubbies: the key from the ball pit opens the door holding the backpack. Inside the backpack is the light bulb, and that bulb is the last tool the level gives you — there is no shop, no second room and no other source for it.
Step 12 · 7:40Through the tunnel behind the pulley plank
The second half of the level is behind the right-hand wall. Pull the plank with the pulley, and the opening underneath shows an upward arrow: that is a corridor, not a decoration. Walk it and you come out in a dollshouse street of little shopfronts — green, yellow, blue and purple fronts, sitting on the same wooden floor with the same yellow path running past their doors.
Nothing in the playground points at this tunnel. That is the design flaw that costs people the most time in this level, and it is worth saying plainly: if you have two keys, a backpack and no code, you have not finished the first half, you have not found the second.
Step 13 · 8:24Light the side room, then read the clock
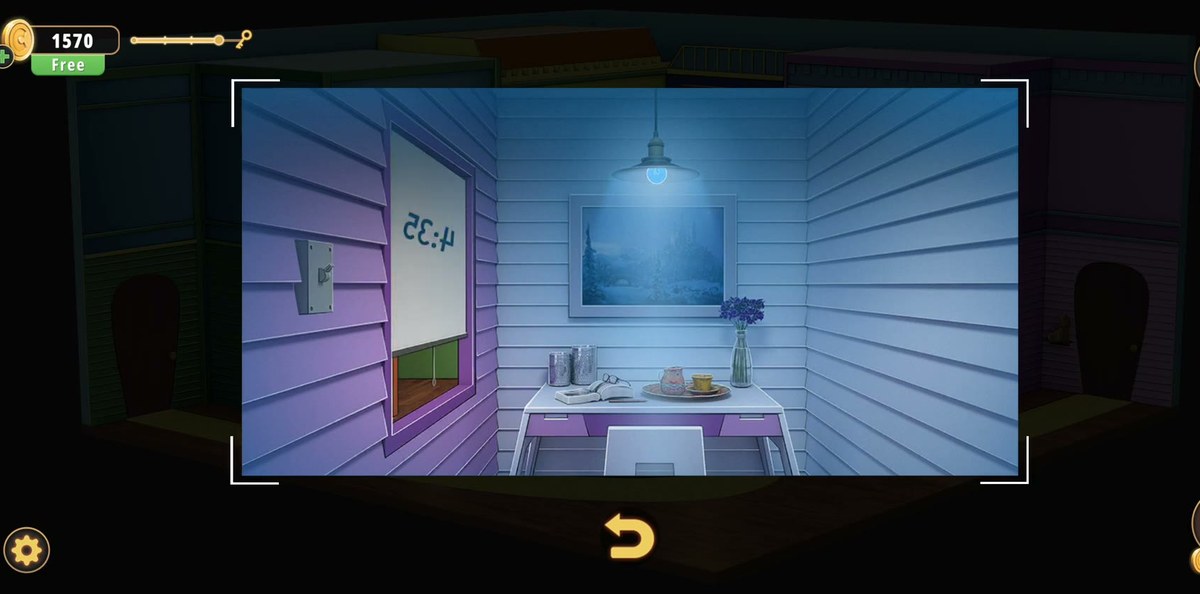
One of the shopfronts opens into a small room with horizontal panelling, a desk with a window behind it and a hanging lamp. This is where the level hides its only code, but you cannot read it while the room is dark: tap the desk and the character says the line that tells you what is wrong — "If only I could see better..." The light bulb from the backpack is what fixes that; get the room lit and the detail comes back.
What you are looking for is the tall lime-green clock standing against the wall. Its base has a compartment, and inside it is a piece of paper with four digits on it: 3764.
Step 14 · 9:15The paper reads 3764
The paper is an inventory item — Piece of paper — and the number is printed on it in four clean digits, left to right: 3 7 6 4. It is the only code in the level, and it is the one number you should write down before you leave the room, because the clock keeps it and there is no second copy.
Step 15 · 9:35Set the chest to 3764 and take the key
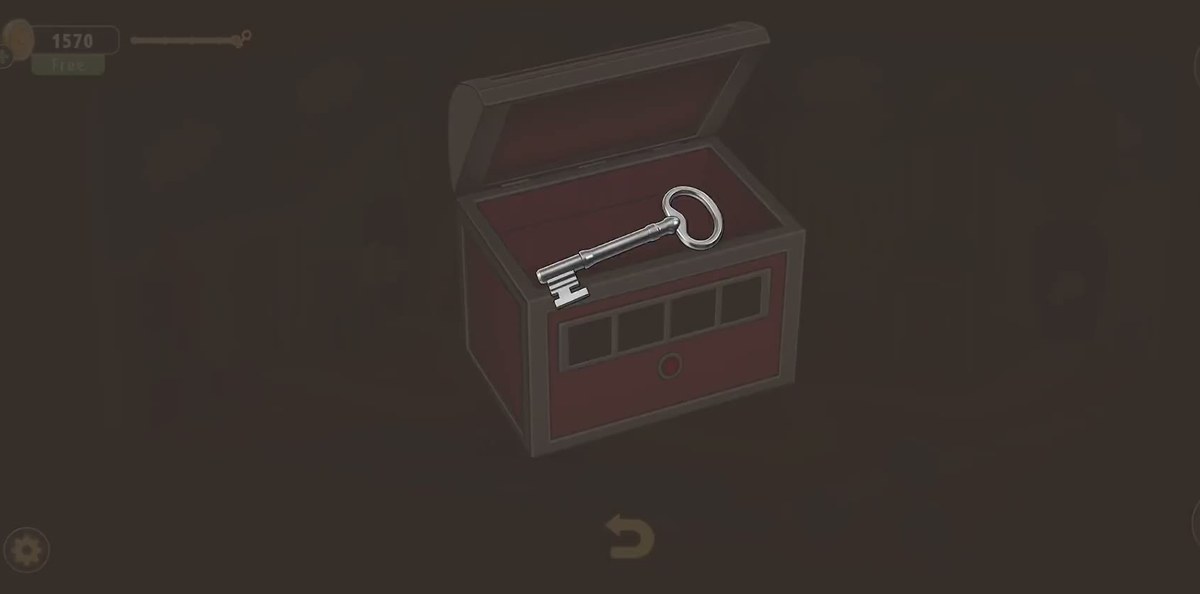
The lock is on the wooden chest in the dollshouse, not on the EXIT door. It has four digit wheels in a row on a red face plate with a button underneath; set them left to right to 3 7 6 4 and confirm. The lid lifts and there is a single key inside.
Do not walk back to the playground without it. The chest does not hand the key out twice, and the EXIT door will not move for anything else in your inventory.
Step 16 · 9:52Use the key on the EXIT door: +50 coins
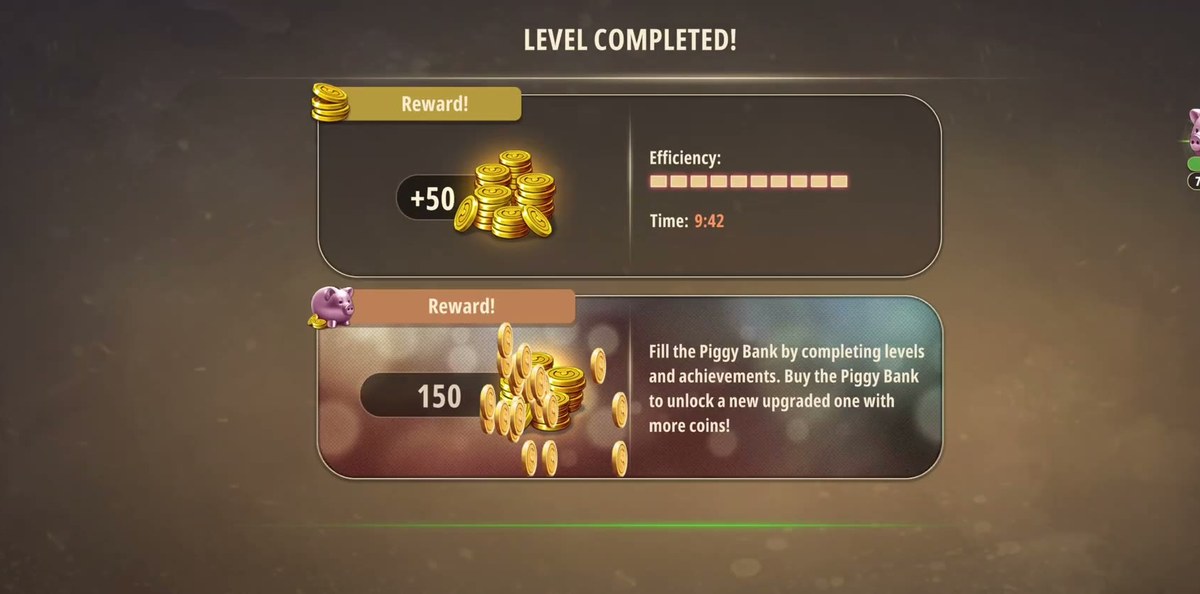
Walk back through the tunnel to the playground, open the inventory, select the key, press Use, then tap the brown door with EXIT written over it on the left wall. The camera pulls back and the level ends on the results panel: LEVEL COMPLETED, +50 coins and a time of 9:42 in our recording (a second, faster run of the same level finished at 6:39).
People get lost in the Indoor Playground because they treat the room as one puzzle with one answer. It is three chains that only touch at the cubby lockers, and each chain ends in something you can hold.
Balls → pipe board → blue key. Four coloured balls, four cups, four routes. Nothing else on the board matters until all four are loaded, and the board will not pay out until all four routes are clean.
Blue key → sneakers → shoelace → magnet → rod. The only reason the sneakers exist is to be destroyed, and the only reason the magnet exists is to be tied to the lace. The rod is the tool that turns the ball pit from scenery into a container.
Rod → second key → backpack → bulb → paper → chest → EXIT. This is the chain that hides the code, and it is the one that makes the level feel twice as long as it is, because it crosses into a second area that the playroom never advertises.
Looked at that way the level has exactly two puzzles — the pipe board and the gumball dials — and one number. Everything else is a dependency check dressed as furniture, which is why the same three questions come up under every video of this room: where are the balls, what is the second key for, and where is the code.
What we could not verify: the three angles on the gumball dials. The boat's life rings carry thin red marks at three different clock positions and the dials repeat them, but our capture is too small to read the rings twice with certainty, so this page does not print the angles — read them off the boat yourself. We also could not double-confirm which two props give the last two balls: our recording clearly shows the ball being taken out of the play area and out of the gumball machine, and the counter reaching 4/4, but the other two pickups happen too fast to pin to a single prop. And the light bulb fitting itself is a two-second beat in the footage; the room going from dark to lit is clear, the exact tap is not.
Where people get stuck.
The four balls. The pipe board shows four empty cups and the room never says "four". The inventory counter is the only progress bar you get: 3/4 means keep tapping props, 4/4 means go back to the board.
The boat. The life rings on the toy boat are the clue for the gumball dials, and the boat is small, low and easy to walk past. If the dials make no sense, you have not looked at the rings.
The sneakers. They look like an exit item because they are shoes and the EXIT sign is two metres away. They are not: Dismantle them.
The combine order. Lace first, then magnet, then rod. Trying to put the bare magnet on the rod does nothing, and the game gives you no error message — it just does not combine.
The ball pit. The rod with the magnet goes into the pit, not into the pond, the drain or the hoppers. The pit is the only container in the room with something metal in it.
The tunnel. The plank on the right wall lifts on the pulley and the opening under it is a corridor. Players who never pull it finish the first half of the level and then hunt for a code that is in a different room entirely.
The chest. The four-wheel lock is on the chest in the dollshouse, not on the EXIT door. Entering 3764 on the door does nothing because the door has no lock of its own — it wants the key the chest gives you.
Chapter 2 levels.
Chapter 2 opens with the Cell Phone Store and runs twenty-six rooms; the list below reflects what is written up so far. The Indoor Playground sits between the Pet Shop and the Restaurant.
Chapter 2 · No Honor Among Thieves26 of 26 with full written steps · 26 with a video
What is the code in Rooms & Exits Chapter 2 Level 9 Indoor Playground?
3764. It is written on the piece of paper hidden in the base of the tall lime-green clock in the dollshouse part of the level, the section you reach through the tunnel behind the pulley plank. Set the four wheels of the chest lock to 3764 and the chest opens onto the exit key. We read the paper twice, from two separate recordings, and both agree on 3764.
Where do I find the four coloured balls?
You need four, in red, green, blue and yellow, and the inventory tracks them as Ball with a counter such as 3/4. Our recording takes one out of the play area around the ball pit and one out of the gumball machine. The other two are in the same playground frame on tappable props: the blue hopper balls on the floor, the painted red flowers on the wall and the teddy bear sitting on the cubbies. Tap everything loose until the counter reads 4/4.
How does the pipe puzzle work?
The board has four glass cups along the top, one per colour, a grid of yellow pipe segments and four matching colour slots along the bottom. Drop each ball into the cup of its colour, then tap the pipe segments to rotate them until every colour has an unbroken run to the slot of the same colour. When all four are home, the glass dome on the right opens and the blue key is yours.
What do I do with the shoelace, the magnet and the fishing rod?
Dismantle the sneakers to get the shoelace, then combine the shoelace with the magnet to make a tied magnet, and combine that with the fishing rod to make the fishing rod with magnet. Use the rod on the ball pit: it fishes out a second key, and that key opens the cubby that holds the backpack.
Where is the blue key used?
On the stack of coloured cubbies beside the EXIT door. One of the purple doors is the one the blue key from the pipe puzzle opens: inside is the pair of sneakers. The sneakers are not an exit item, they are a source of laces, which is why players who try to leave with them get nowhere.
How do I finish the Indoor Playground level?
Take the key out of the open chest in the dollshouse, walk back through the tunnel to the playground, open the inventory, select the key, press Use and tap the door marked EXIT on the left wall. The level ends on the results panel with +50 coins; our recording clocked 9:42 of level time.
 GridPaw
 Shikaku
 Akari
 Kakuro
 Nonogram
 Nurikabe
 Pictomino
 KenKen
 Binary
 Star Battle
 Hashi
 Slitherlink
 Murder Sudoku
 Meowdoku
 Crazy Cleanup