 GridPaw
 Shikaku
 Akari
 Kakuro
 Nonogram
 Nurikabe
 Pictomino
 KenKen
 Binary
 Star Battle
 Hashi
 Slitherlink
 Murder Sudoku
 Meowdoku
 Crazy Cleanup
Rooms & Exits Chapter 2 Level 8 Walkthrough: Pet Shop
The Pet Shop is a chain of small locks that all end at one number: set the aquarium thermostat to 053.6 °F and a chest appears in the tank with the key inside it. Finish worth +50 coins.
- Open the cabinet drawer with the two green chevron buttons → pet food.
- Work the stacked cages and take the scissors from the tube beside them.
- Solve the dot panel in the back room → the wall niche opens → tap handle.
- Fit the handle to the sink, run the water and fill the blue dispenser.
- Clip the dispenser onto the parrot cage and let the bird drink.
- Open the cardboard box and read the fish temperature chart.
- Set the thermostat to 053.6 °F (the 12 °C row, the pufferfish) → the chest appears in the aquarium.
- Dismantle the chest → Key → use it on the green door → +50 coins.

What this level actually is.
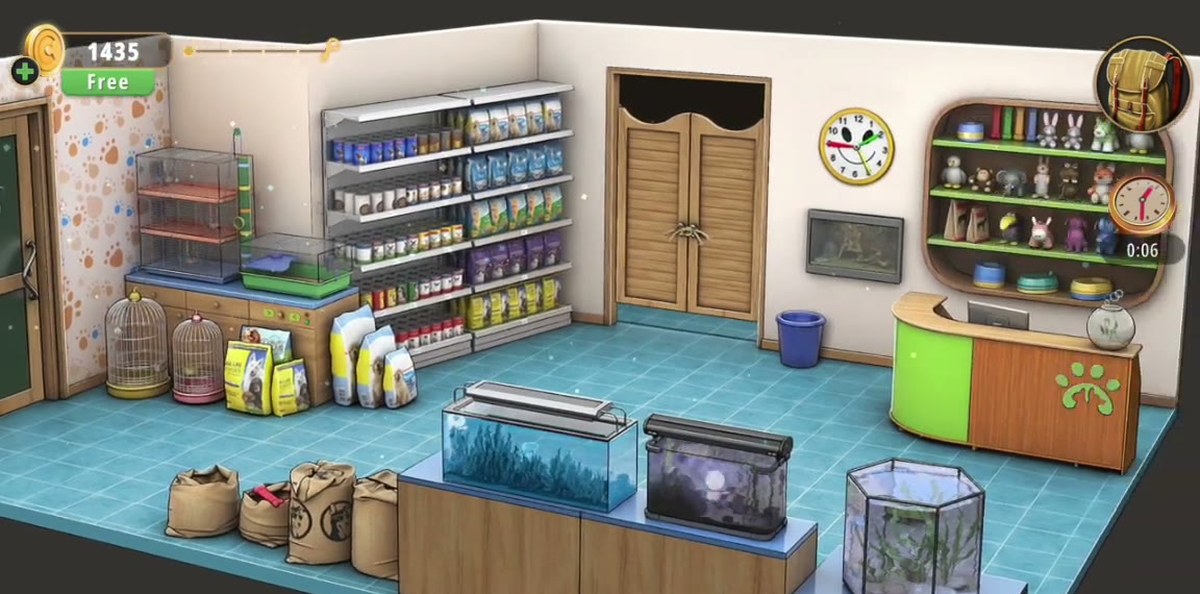
The Pet Shop is a single shop floor plus a stockroom behind it, and it is the busiest room Chapter 2 has given you so far. The front half is retail: shelves of food bags and toys down the left wall, a run of bird cages and empty display cages, a counter with three aquariums on it — two rectangular fish tanks and one hexagonal tank at the end — and a green door with a paw print painted on it on the left wall. The wallpaper is white with brown paw prints, which makes the room read as cheerful right up until you realise how little of it you can touch.
Behind the shop, through the doorway on the back wall, is the stockroom: white brick, blue tiles, a pedestal sink with no handle, a stack of feed sacks on pallets, a pet carrier on the floor, a framed fish poster and a framed bird poster, and a grey metal panel fixed to the wall with a grid of dots and a row of coloured buttons. Everything that gates the exit lives in one of those two rooms, and the two halves are connected by items rather than by a door.
The shape of the level is a funnel. The front room gives you the pet food and the scissors; the stockroom gives you the chart, the tap handle, the water and the parrot; and the aquarium gives you the only thing you actually need, which is the chest. The aquarium is also the part everybody gets wrong, because its thermostat is the one control in the game that does not accept the number written on your clue. The clue is in Celsius. The thermostat is in Fahrenheit. There is no unit switch, so the conversion column on the chart is not decoration — it is the puzzle.
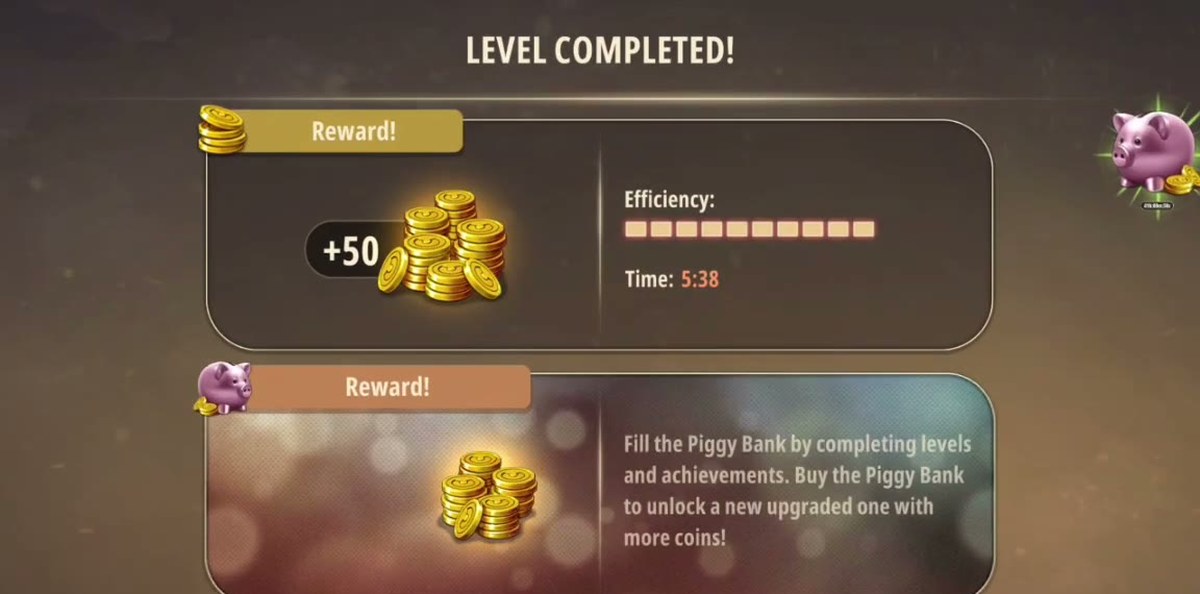
Our recorded run finishes the room in 5:38 of in-game time. That is not a fast time and it does not need to be: nothing in the Pet Shop is timed, there is no fail state, and the hint button is the only thing in the room that costs you anything.
Step by step.
The opening sweep is the only clean wide shot you get, so use it to build a map. Left wall: shelves of food bags, then the row of cages, then the green door with the paw print — that door is the exit and it will not open until the last minute of the level. Centre: the counter with the two rectangular fish tanks and the hexagonal tank on the right end, plus the yellow clock and the curved shelf of plush toys behind it. Back wall: the doorway into the stockroom, a small counter with a till, and the wall shelves above it. Floor: feed sacks, a blue bucket on its side, tiled blue and white.
Two things are worth noting now because they look like scenery and are not: the hexagonal tank at the end of the counter has a small control panel on its front, and the doorway on the back wall leads somewhere rather than being a painted flat.
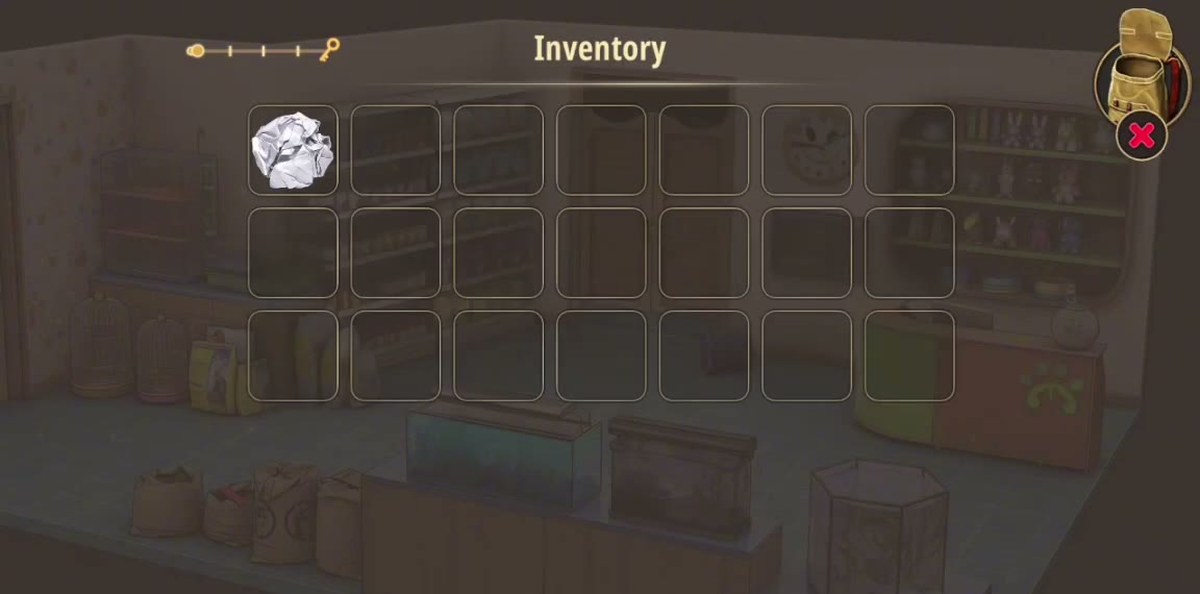
Open the inventory at the start and there is already one item in it: a sheet of paper with pencil sketches of dogs on it, six heads in two rows. It looks like the beginning of a breed puzzle, and every guide-shaped instinct says it should unlock something.
As far as the footage shows, it does not. The sheet is examined once at the start, sits in the bag for the rest of the run, and is never used on a lock, a panel or an animal. Treat it as background: if you are hunting for a six-dog combination somewhere in the shop, you are hunting for something this room does not have. The real clue sheet in the Pet Shop is the fish chart, and you do not find that one until the stockroom.
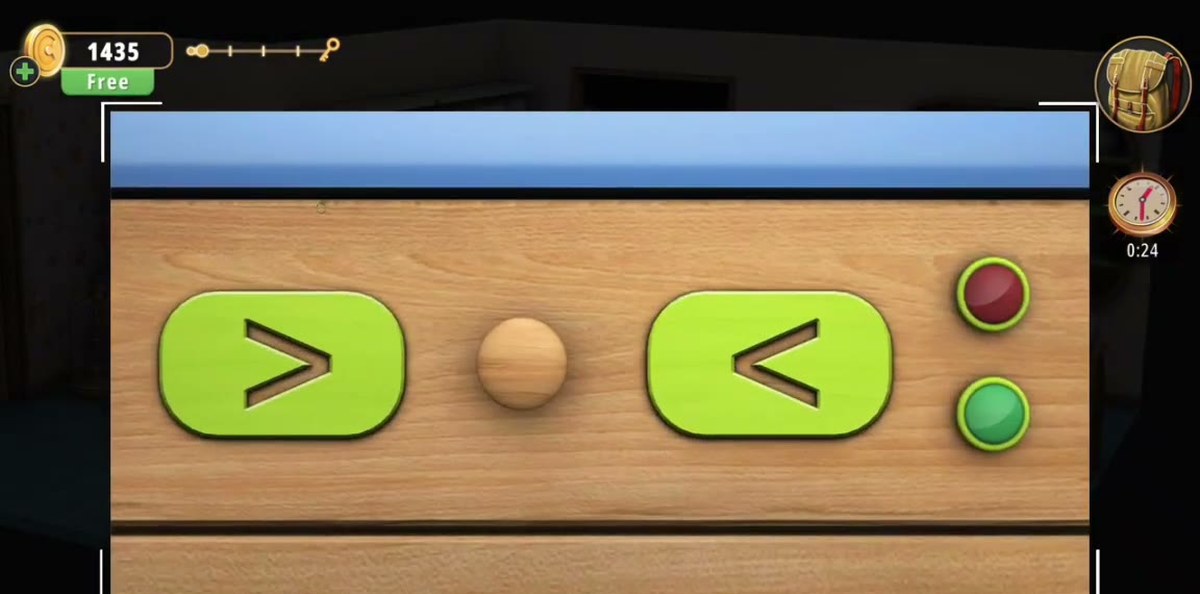
Under the curved shelf, between the plush toys and the till, there is a wooden cabinet with a blue-topped drawer. The drawer front is a control panel: two green oval buttons with chevrons on them, a small round knob between them, and a red light and a green light on the right-hand end.
Tap the chevrons. This is not a keypad and there is no number to find: in the recording it takes a handful of presses on the green buttons, with nothing to read and nothing to copy, and then the drawer gives. The red and green lights on the end of the panel are the only feedback the cabinet offers.
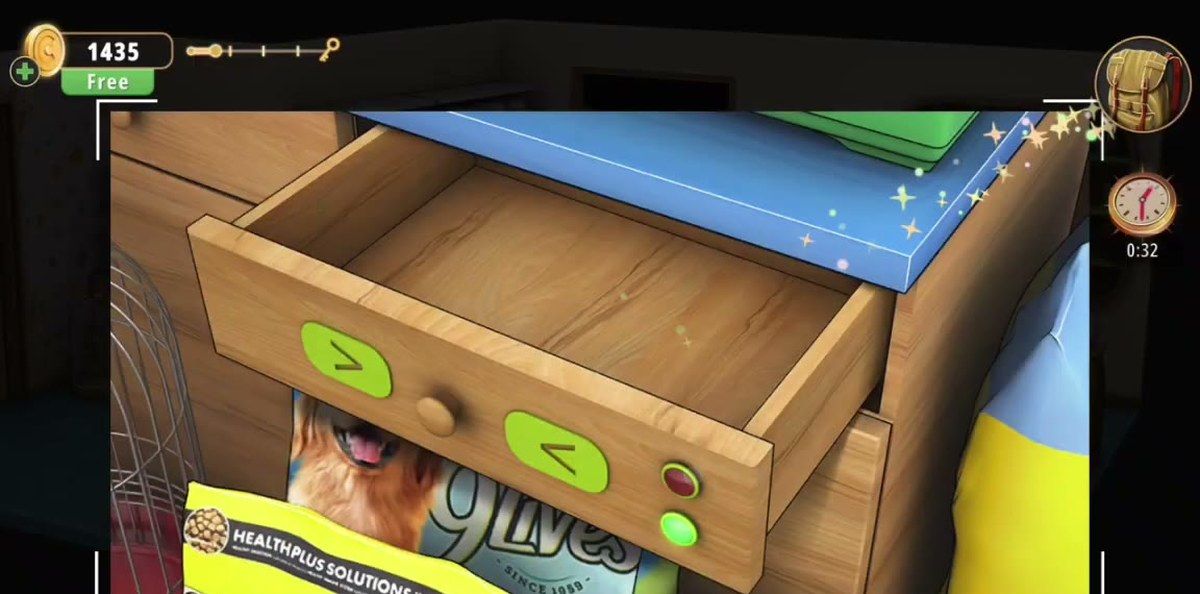
The drawer slides out and the game hands you a bowl of kibble with the label Pet food. It goes straight into the bag and the slot stays filled for the rest of the level.
The background behind the open drawer is worth a second look, because it explains a lot of confusion: the shelves behind the counter are stacked with real pet food bags, and the drawer's own contents are small by comparison. If you have been tapping the big sacks on the shelves and getting nothing, that is why — the sacks are set dressing and the drawer is the container.
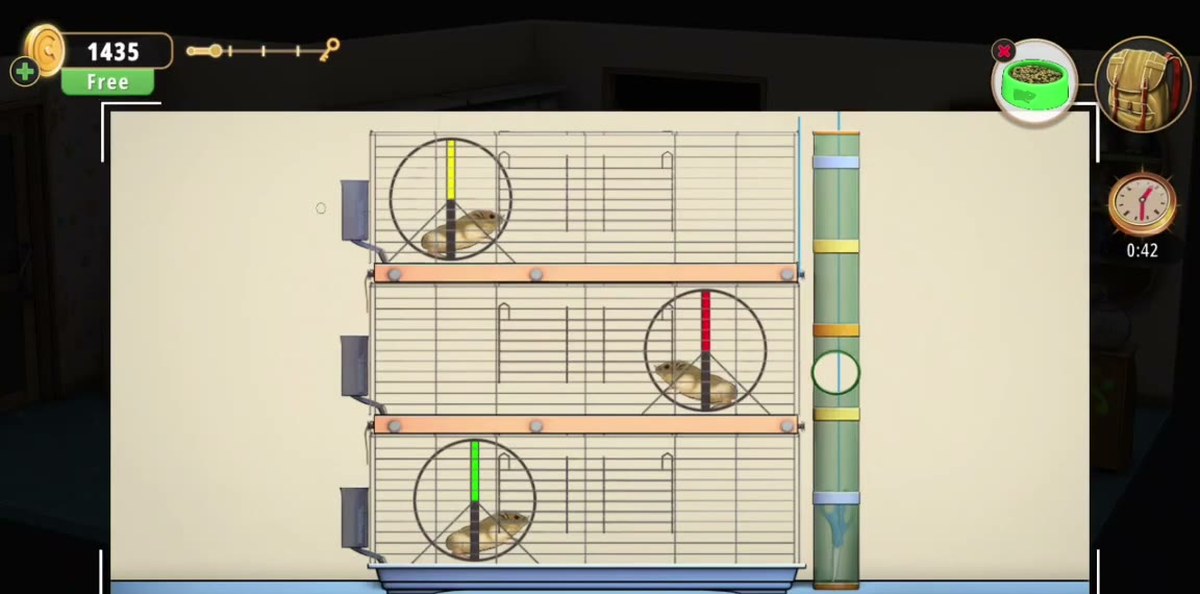
Next to the shelves is a stack of three hamster cages, one above the other. Each cage holds a hamster and a wheel, and the wheels are the coloured parts — yellow, red and green between the three cages in our capture. A clear plastic tube runs down the right-hand side of the stack, and there is a metal control on the frame that moves a pointer between the cages.
The tube is where the scissors are. In the 1080p cross-check you can see them sitting inside it, blue handles, tips down. Work the cage puzzle until the stack releases them and the scissors icon appears over the bag at the top of the screen — in our run that happens during the wide shot at about 1:26, after roughly forty seconds of cage work.
What the cage wheels are actually checking, we could not read off the footage: the recording cycles them, something lines up, and the tube opens, but there is never a rejection we could study. Copy the wheel colours from the cages, keep pressing until the pointer settles, and do not expect a code.
Go through the doorway on the back wall. On the right-hand wall of the stockroom, next to the stacked feed sacks, there is a grey panel: a grid of dark dots under a metal frame, a row of five coloured buttons beneath it — orange, green, red, blue and yellow, left to right — and a crank at the bottom.
The buttons toggle dots. Press one and a group of dots in the grid changes state; the crank at the bottom resets the board. Clearing the grid pops the wall niche open, which is the next step.
We are not going to print a button sequence for this one. Our two recordings both solve it, but neither shows a wrong state being rejected, so we cannot tell what the board is matching — whether it is a shape, a count, or simply clearing every dot. Press the coloured buttons and watch the grid; the pattern you are aiming at is the one the game shows you when the panel first opens. If you have the crank, use it, because a half-finished board is worse than a clean one.
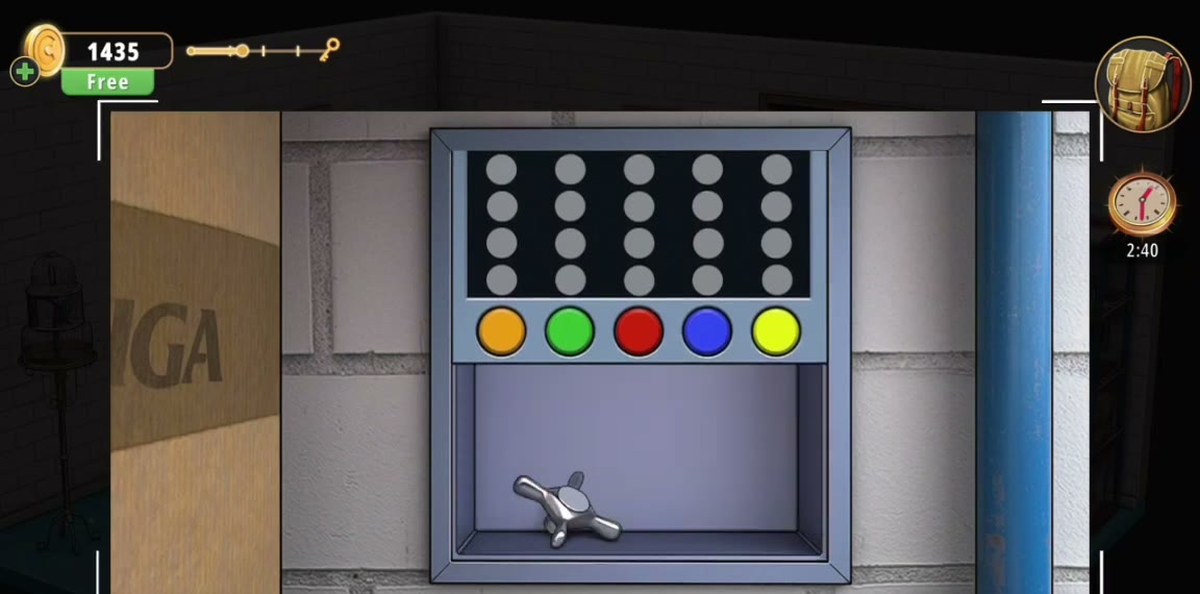
When the panel gives up, a compartment opens in the brick wall and inside it is a tap handle — four chrome prongs on a splined boss, the kind you fit to a pillar tap. Take it and it lands in your bag as a single item.
This is the item that makes the stockroom sink work, and it is the step most players skip because the niche is above eye level and the panel in front of it looks decorative until you press a button.
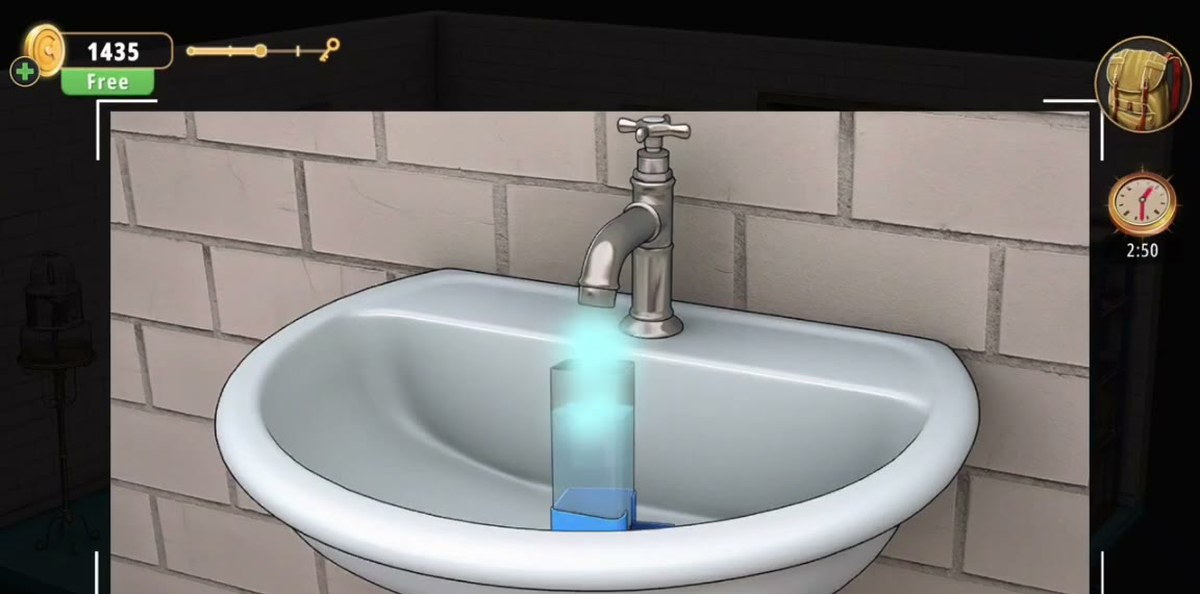
The pedestal sink on the left wall of the stockroom has a spout and no handle — that is the tell. Select the tap handle in the inventory, press Use, and tap the sink. The handle seats on the tap and the spout starts running.
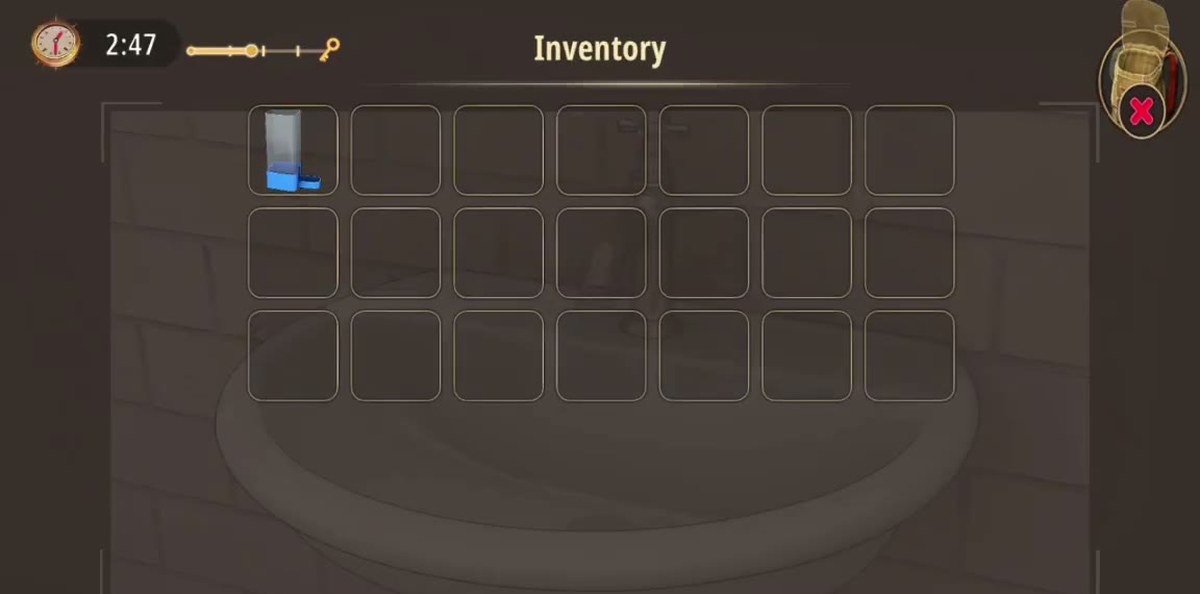
Now put the blue water dispenser in the basin: it fills from empty to full in one animation, with the water glowing blue as it goes in. Take it back out and it is in your bag, full, ready for a cage. You do not need to turn the tap off afterwards and nothing else in the room reacts to running water.
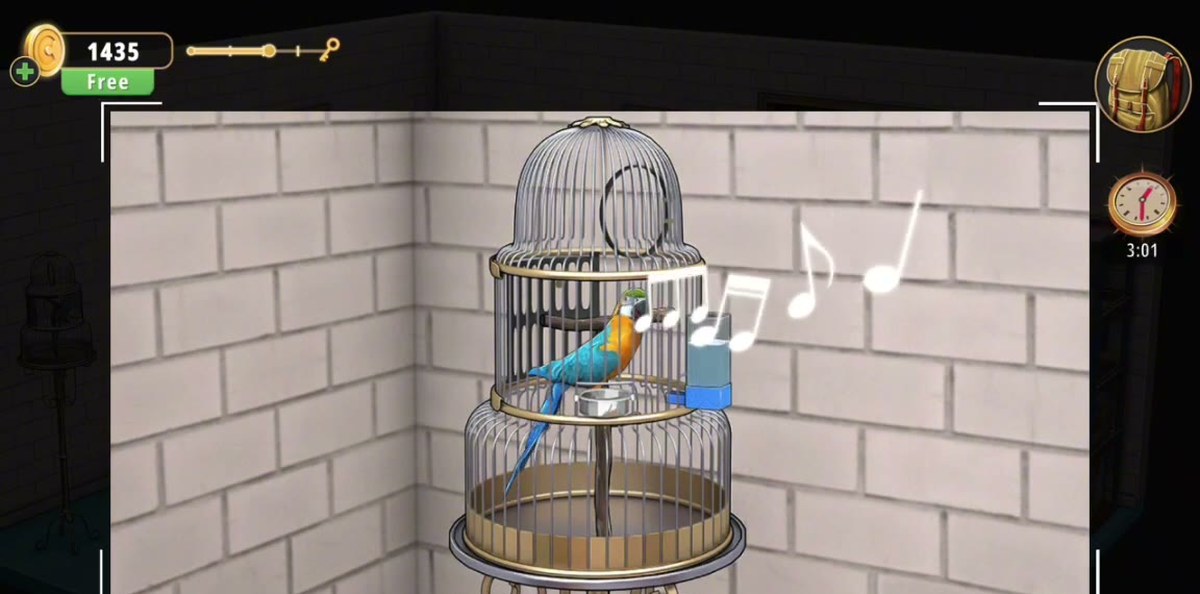
The ornate two-tier bird cage on the stand beside the sink holds a blue and yellow parrot. Use the full dispenser on the cage and it clips to the bars at perch height. The parrot leans over, drinks, and the game throws a handful of musical notes up around the cage.
That is the whole interaction — no code, no second step. It reads as a welfare task rather than a lock, and that is what it is: the water is the last thing the bird needs before the room lets you finish, and the notes are the confirmation that it counted. If you have a bowl of pet food in the bag and you are looking for somewhere to put it, this cage is not it; the parrot takes water only.
The last container is the taped cardboard box on the floor by the white brick wall. Open it and you get a folded sheet that goes into your bag as the fish chart. In the recording the box opens cleanly once the scissors are in the bag; we never see a cutting animation, so treat "have the scissors with you" as the safe order rather than a proven requirement.
Read the chart with Examine, not Use. It is the single most important thing in the level and it is easy to walk past, because the box looks like shipping clutter and the sheet looks like a packing slip until you unfold it.
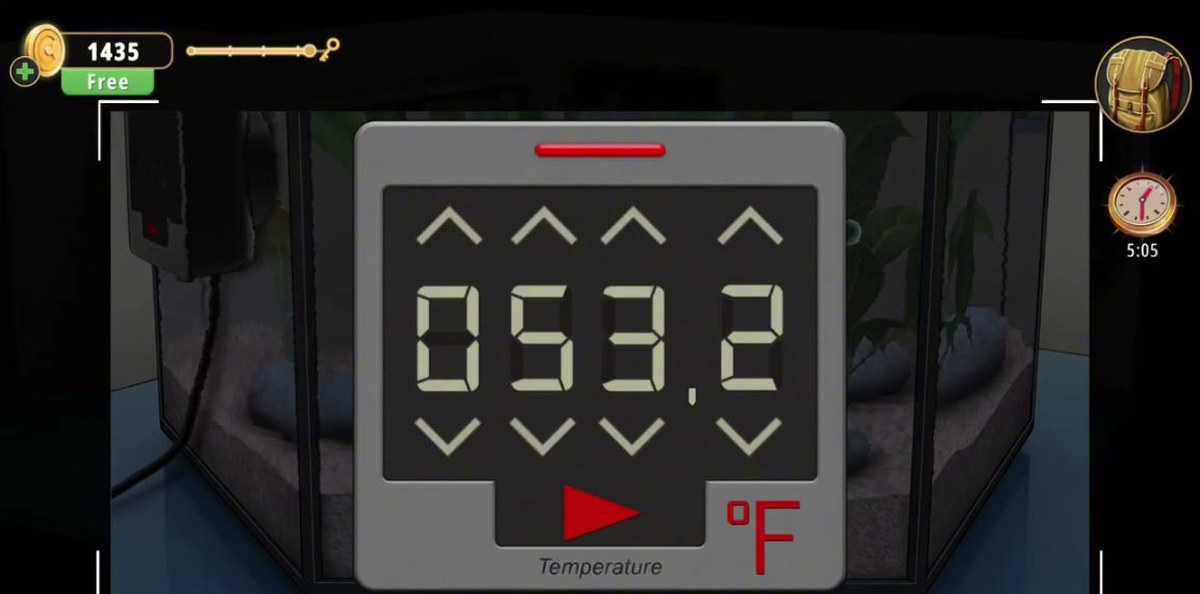
The panel on the front of the hexagonal aquarium is a thermostat with a red bar across the top, three up arrows above the display, three down arrows below it, a red triangle button and the word Temperature under that. The display is four seven-segment digits with a decimal point and a small red °F to the right.
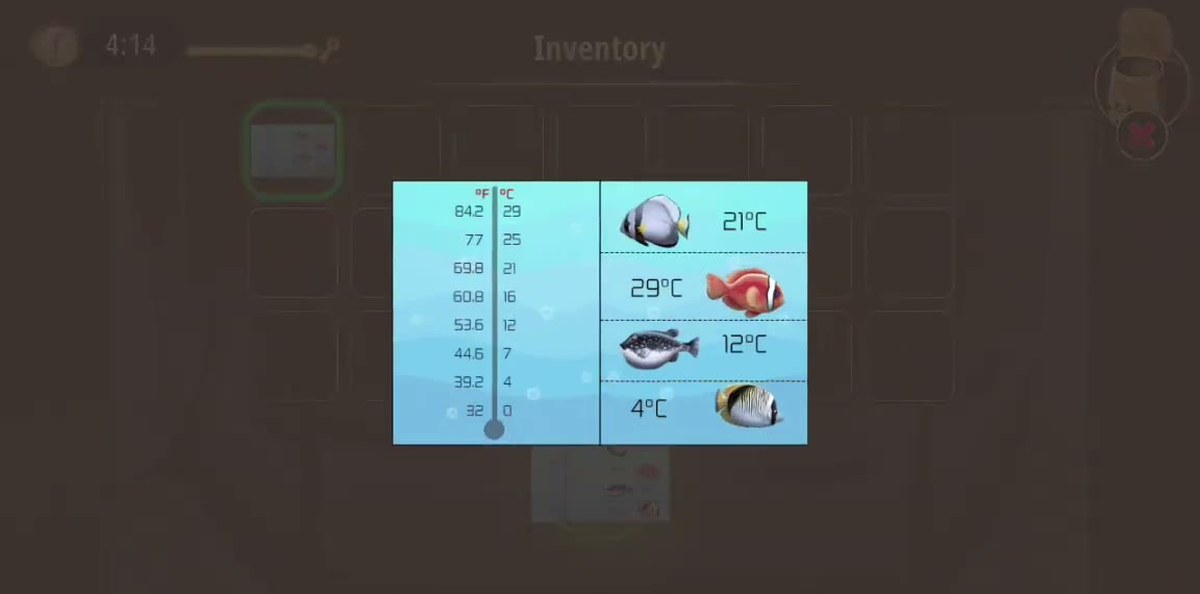
The chart gives you Celsius, because of course it does. The thermostat only takes Fahrenheit. Cross the 12 °C line — the spotted pufferfish — over to the left-hand column and you get 53.6. Type it as four digits: 0, 5, 3, 6, with the decimal point where the display puts it.
You do not have to type all four digits from scratch: the arrows step each digit up and down, and the decimal point is fixed. Set the leading 0 first, then 5, then 3, then 6, and the display should read 053.6 °F exactly. Watch the last digit as you step it — on a display this small a 5 and a 6 differ by a single bar, so check that the lower-left stroke of the digit is lit before you close the panel.
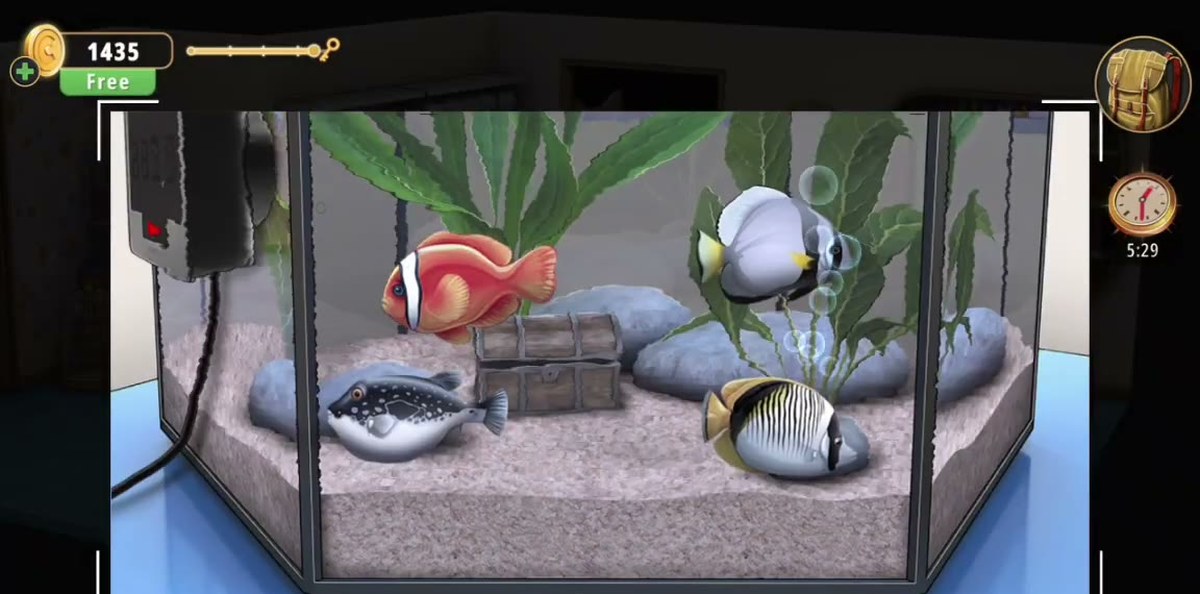
Close the thermostat and look at the hexagonal tank. A treasure chest is now sitting on the gravel among the plants, next to the fish — it is not there before you set the temperature, which is how you know the number took.
The tank itself is worth a look while you are in it: a clownfish, a pale banded fish, a pufferfish and a striped butterflyfish, which between them are the four fish printed on the chart. That is the level being tidy rather than a second puzzle — you do not have to match a fish to a temperature, you only have to match the pufferfish's row.
Take the chest out of the tank. It goes into the bag as Chest, and it does not open by tapping it. Open the inventory, select the chest, press Dismantle, and the chest is replaced by a single Key in the same slot.
This is the one place in the level where the verb matters more than the object. Players who press Use on the chest get nothing, because there is no lock in the room the chest fits — it is a container, so it has to be broken down. The same rule applies to any other container you pick up in Chapter 2.
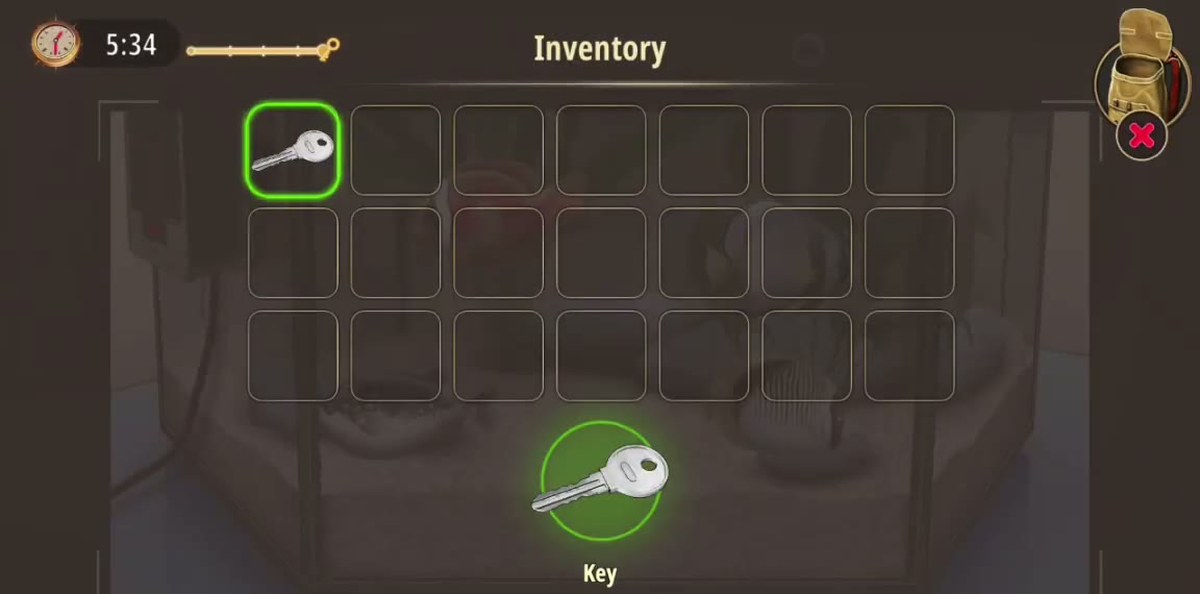
Select the Key, press Use, then tap the green door with the paw print on the left wall of the shop. An exit icon appears on the door, the camera pulls back to the wide room, and the level ends on the results panel: LEVEL COMPLETED, a reward of +50 coins and a completion time of 5:38 on this run.
Note that the exit is the green door on the left wall, not the doorway to the stockroom and not the shop front behind the counter. If the key does nothing, you are tapping the wrong opening.
The chart is a real conversion table.
This is the part that stops most people, and it stops them because they read the chart as four labels instead of one scale. The sheet has two columns. The right-hand column is four fish with a temperature in Celsius under each one — 21, 29, 12 and 4. The left-hand column is a printed Fahrenheit-to-Celsius scale running from 84.2 °F down to 32 °F, paired line by line with 29 °C down to 0 °C.
That is the whole trick. You are not meant to work out 12 × 9/5 + 32 in your head. You are meant to find the fish, read its Celsius number, then run your finger across to the Fahrenheit column on the same line. Here is the scale as printed on the sheet, transcribed line by line:
| °F (left column) | °C (right column) |
|---|---|
| 84.2 | 29 |
| 77 | 25 |
| 69.8 | 21 |
| 60.8 | 16 |
| 53.6 | 12 |
| 44.6 | 7 |
| 39.2 | 4 |
| 32 | 0 |
The four fish on the sheet sit at 21 °C, 29 °C, 12 °C and 4 °C. Only one of those rows is the answer, and the game tells you which one without saying a word: the tank in front of the thermostat holds a pufferfish, and the pufferfish is the 12 °C fish. 12 °C is the 53.6 line. Type 053.6 into the display.
Every pair in that table converts exactly, which is a good sanity check while you are standing in front of the panel: 53.6 °F really is 12 °C, and if the display shows a number that is not on the scale at all, you have moved a digit you did not mean to.
Where people get stuck.
- Reading the chart as four unrelated clues. The 12 °C next to the pufferfish is not a code on its own. The answer is the number on the same line in the other column, and the other column is the only one the thermostat understands.
- Looking for the chart in the shop. It is not on a wall and it is not in a drawer. It comes out of the taped box on the counter, and the box looks like packaging.
- Using the chest instead of dismantling it. The chest is a container, not a key. Dismantle turns it into the Key; Use does nothing anywhere in this room.
- Missing the tap handle. It is inside the wall niche that the dot panel opens, and the panel itself looks like part of the brickwork until you press one of the five coloured buttons.
- Filling the dispenser without the handle. The stockroom sink has a spout and no handle from the moment you arrive. If the tap does nothing, you have not fitted the handle yet — that is the order, not a bug.
- Feeding the parrot. The parrot takes water and only water. The bowl of pet food from the cabinet drawer is a separate item with no use in this room, and trying to use it on the bird is the most common dead end in the level.
- Tapping the wrong door. The exit is the green door with the paw print on the left wall of the shop. The stockroom doorway and the gap behind the counter are not exits, and the key does nothing on either.
- Hunting a six-dog code. The paper in your bag at the start shows dog sketches. Nothing in the Pet Shop asks you for a breed, a count or an order of dogs. It is a red herring and it stays one.
Chapter 2 levels.
The Pet Shop is the eighth room of Chapter 2. If you came here from the Food Court, the pattern is the same one this chapter keeps using: one clue sheet, one conversion, one container that has to be broken down.
- 1 Cell Phone Store guide
- 2 Cinemas guide
- 3 Pharmacy guide
- 4 Optical Store guide
- 5 Gym guide
- 6 Candy Shop guide
- 7 Food Court guide
- 8 Pet Shop you are here
- 9 Indoor Playground guide
- 10 Restaurant guide
- 11 DIY Shop guide
- 12 Jewelry Store guide
- 13 Grocery Store guide
- 14 Exchange Office guide
- 15 Fashion Store guide
- 16 Art Supplies Store guide
- 17 Shoe Store guide
- 18 Sports Store guide
- 19 Bookstore guide
- 20 Furniture Store guide
- 21 Household Appliances guide
- 22 Print Shop guide
- 23 Bakery guide
- 24 Toy Store guide
- 25 Restroom guide
- 26 Parking guide
FAQ.
What temperature do I set the thermostat to in Rooms & Exits Chapter 2 Level 8?
053.6 °F. The thermostat on the hexagonal aquarium only speaks Fahrenheit, and every fish on the chart is labelled in Celsius, so you have to use the conversion column printed down the side of the chart. The 12 °C row — the spotted pufferfish — is 53.6 °F, and the display takes four digits plus a decimal point, so you enter 0, 5, 3, 6.
Where is the fish temperature chart in the Pet Shop?
Inside the taped cardboard box on the floor of the back stockroom, against the white brick wall. Open the box and you get a folded sheet labelled as a fish chart: a Fahrenheit-to-Celsius scale down one side and four fish with their preferred temperatures on the other. Read it with the Examine button — the chart is the only place the game gives you the numbers.
What do I do with the tap handle?
Fit it to the sink in the stockroom. The sink has a spout but no handle until you put the chrome tap handle on it; once the handle is on, the tap runs and you can fill the blue water dispenser standing in the basin. The full dispenser then clips onto the parrot cage.
How do I open the drawer under the counter?
The drawer front has two green oval buttons with chevrons, a small knob between them, and a red and a green indicator light on the right. Press the chevron buttons until the drawer releases — it is a two-way selector rather than a code, and the lights tell you which side of the answer you are on. Inside is a bowl of pet food, which goes straight into your bag.
What is in the tube beside the hamster cages?
A pair of scissors. The three stacked cages each hold a hamster on a coloured wheel, and the clear tube clipped to the side of the stack is where the scissors sit. Work the cage puzzle and the scissors end up in your inventory — you can see the scissors icon appear over the bag at the top of the screen during the wide shot at about 1:26.
How do I get the key and finish the Pet Shop?
Set the thermostat to 053.6 °F and a treasure chest appears in the hexagonal tank. Take the chest out of the water, open the inventory, select it and press Dismantle to get a Key. Select the Key, press Use, then tap the green door with the paw print on the left wall. The level ends on the results panel with +50 coins.
How long does the Pet Shop take?
The recording finishes it in 5:38 of in-game time, which is about four minutes of actual footage once the cuts are taken out. Nothing in the level is timed and there is no fail state, so the only things that slow you down are the box on the counter and the Celsius-to-Fahrenheit step.
Previous room: ← Chapter 2, Level 7: Food Court
Next room: Chapter 2, Level 9 →