Unofficial fan-made guide. Not affiliated with Webelinx Games, the developer of Rooms & Exits: Escape Room Games.
Rebuilt frame by frame from a recorded playthrough of the current build — 11 minutes 10 seconds of footage, pulled at one frame per second (671 frames) and read at full resolution, once with text recognition and once by eye. Every number on this page was read twice from separate frames and agrees: 350, 53402, 1042 P-23 and ZCO. Where two reads disagreed — the digits on the payment card, the stripe counts on the colour panel, the number of flower tokens on the chalkboard — this page prints nothing rather than a guess, and the warning box below says so.
Chapter 2 · No Honor Among Thieves26 of 26 with full written steps · 26 with a video
Quick answer
The Food Court has three codes and one card. 350 at the till, 53402 at the back-office terminal, and ZCO on the final three-letter lock. Finish worth +50 coins.
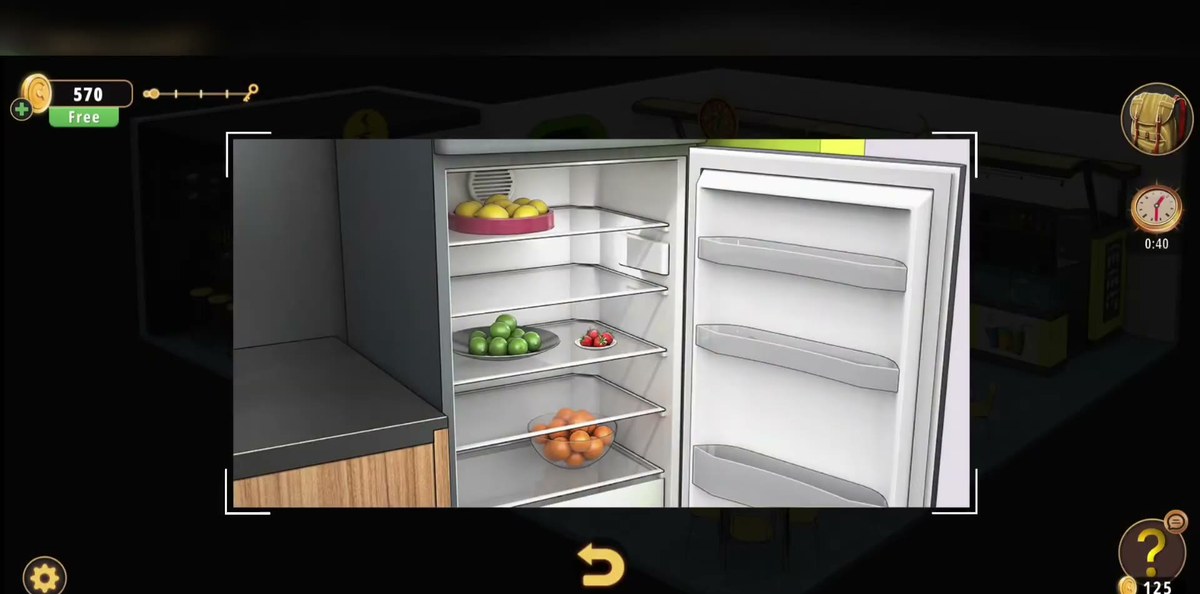
Open the fridge at the juice bar and take the fruit; the two berry pickups land in the bag as Strawberries and Raspberries.
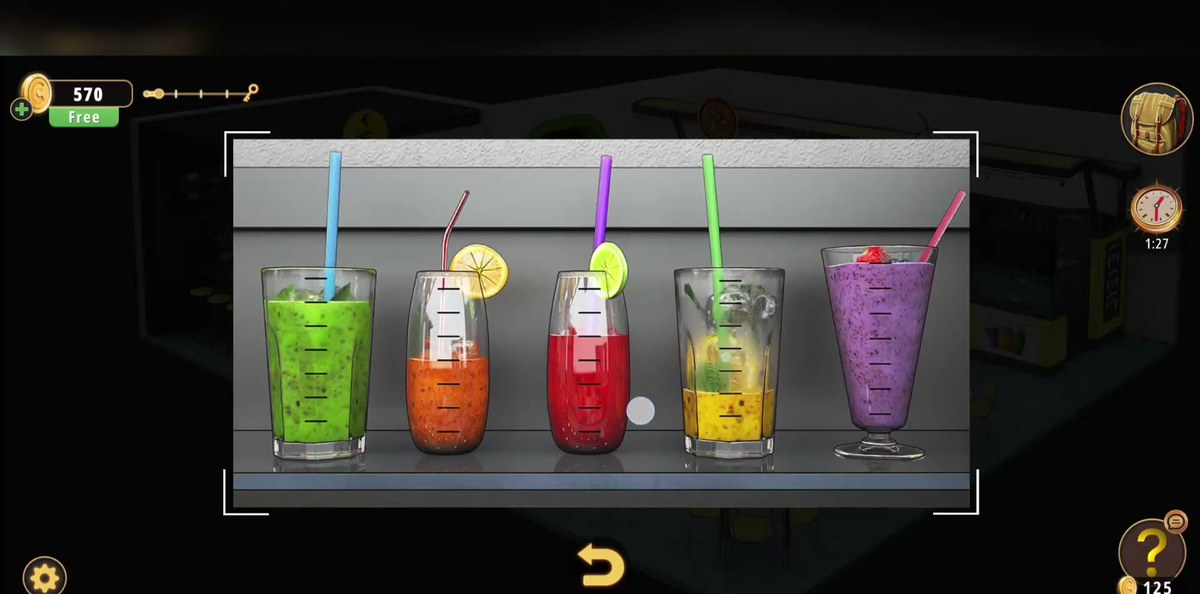
Five finished smoothies stand on the shelf — green, orange, red, yellow, purple.
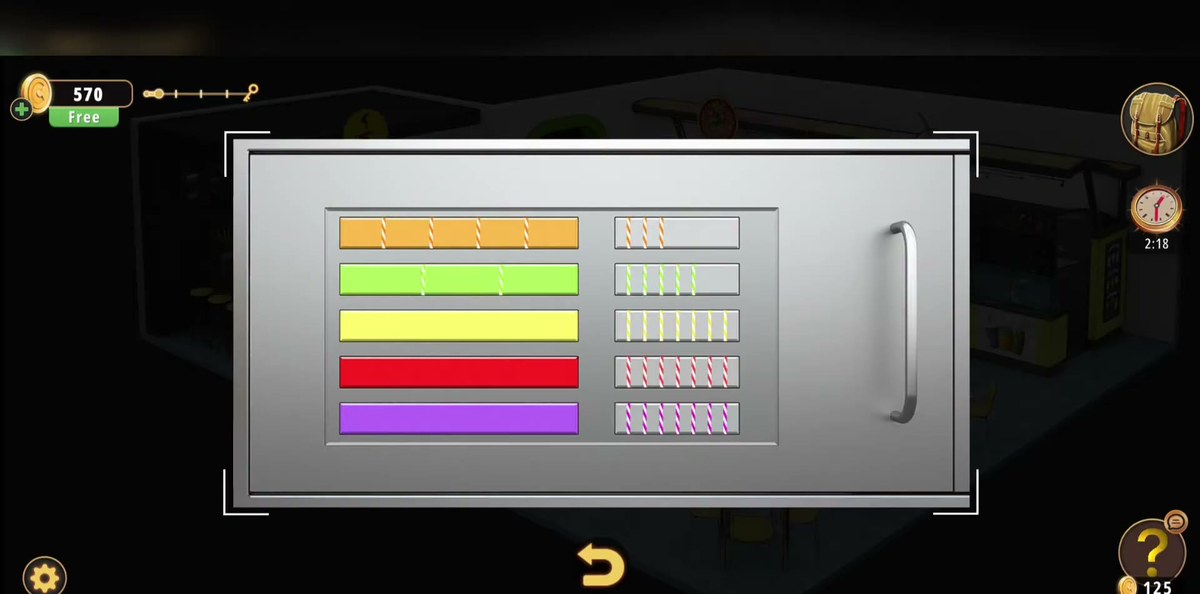
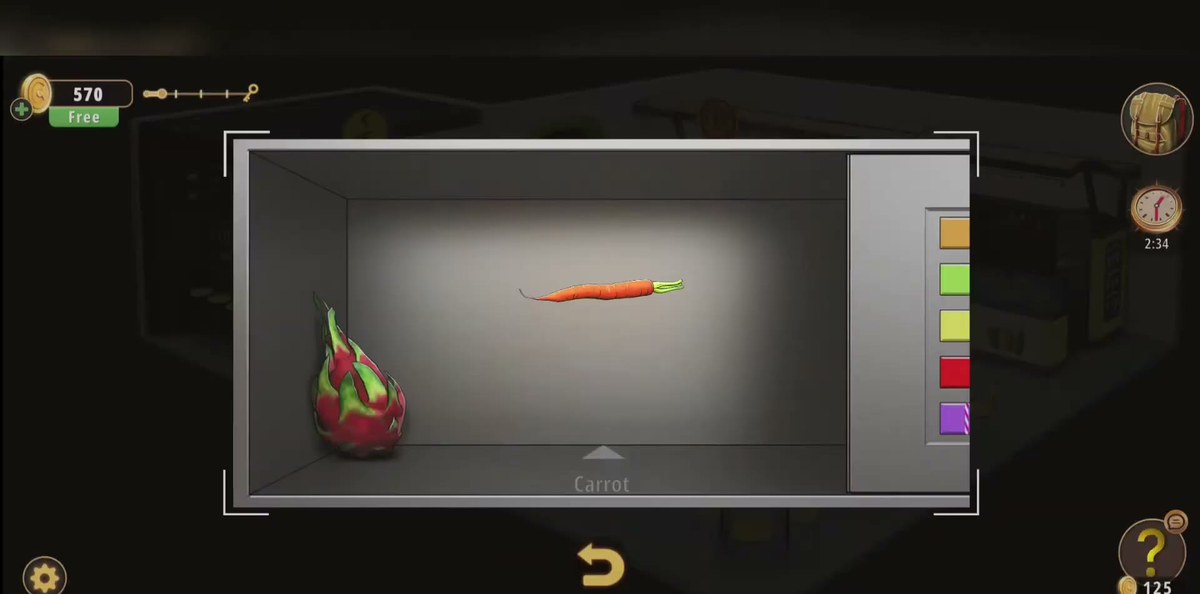
Open the five-colour front at the juice bar: a dragon fruit and a carrot are inside.
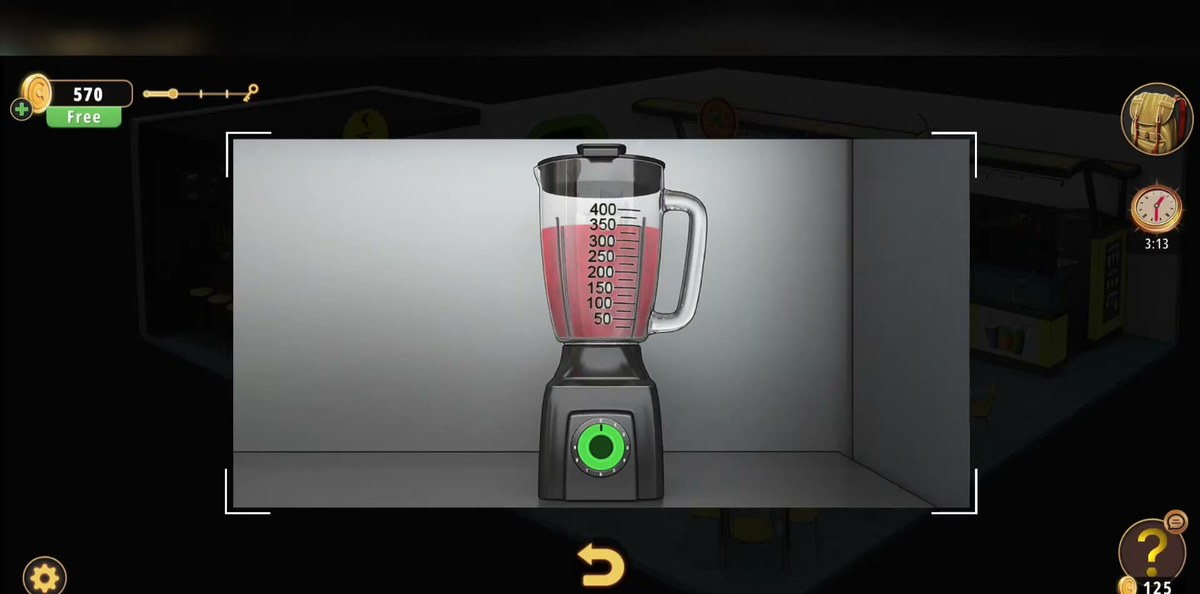
Blend the red smoothie and stop it on the 350 ml line.
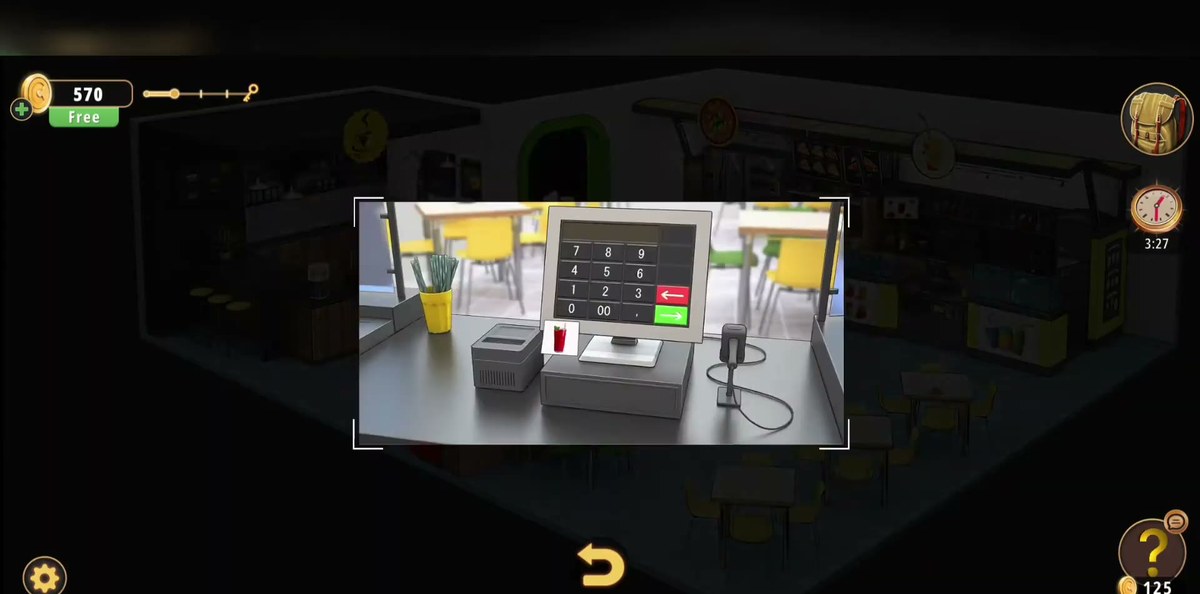
Type 350 into the till, then pay with the card labelled Payment card in the name of MARIA.
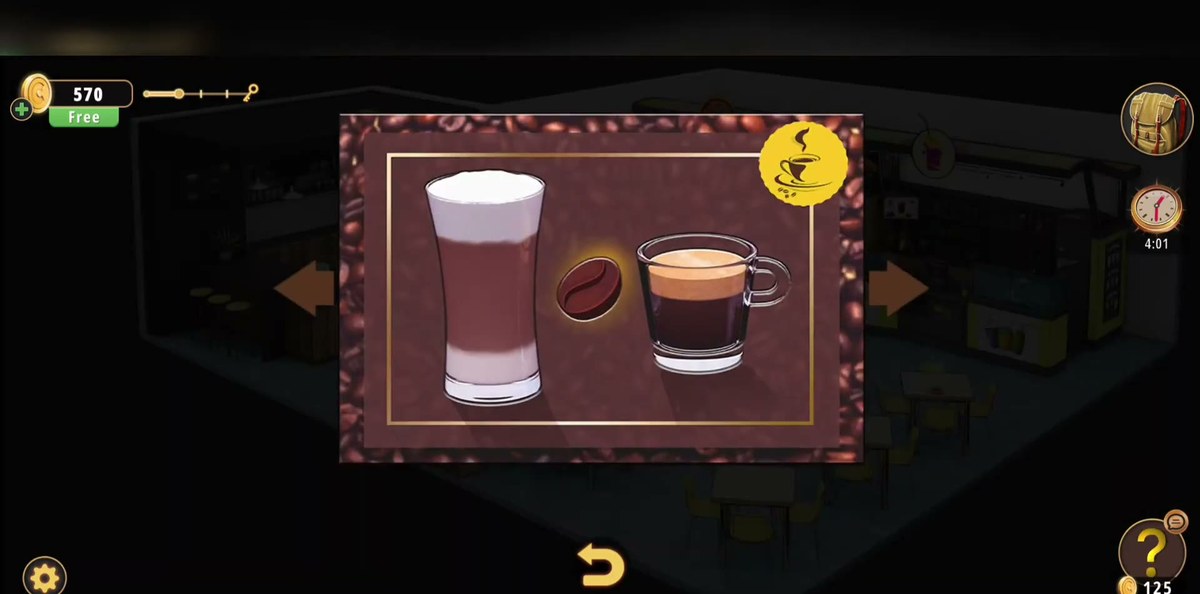
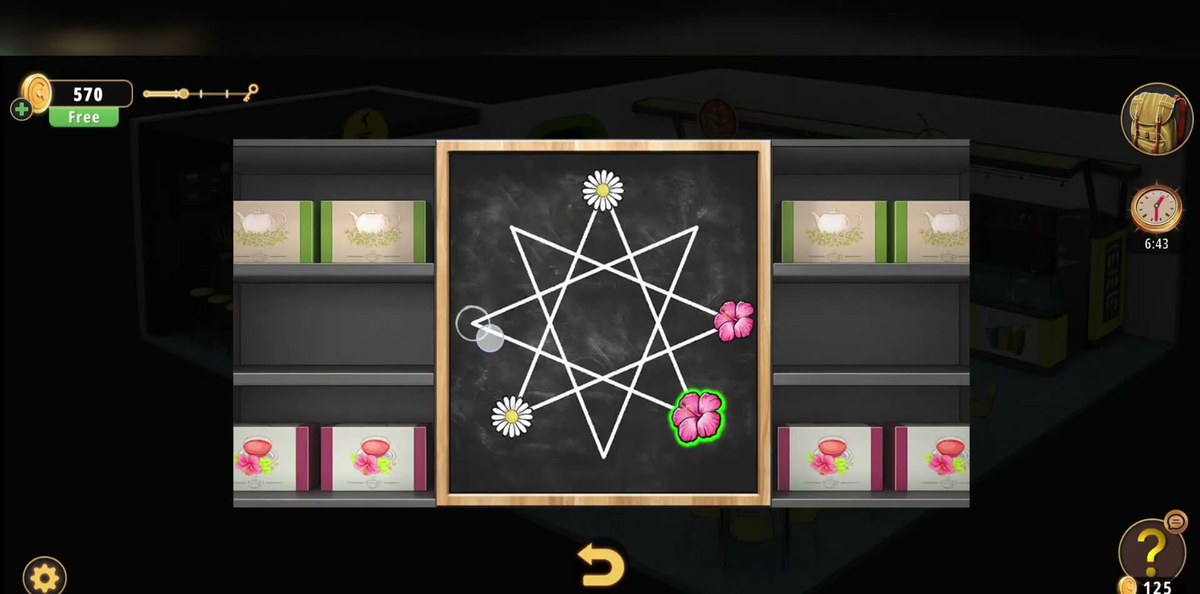
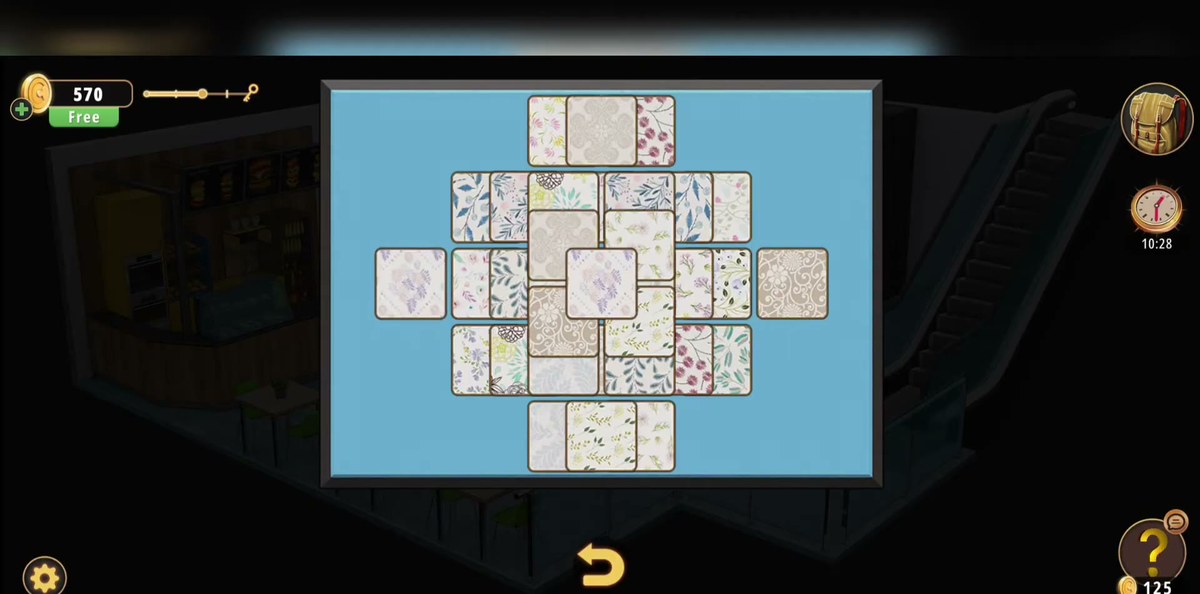
Clear the coffee shelf card (find the two drinks it shows), the flower chalkboard and the patterned-tile board.
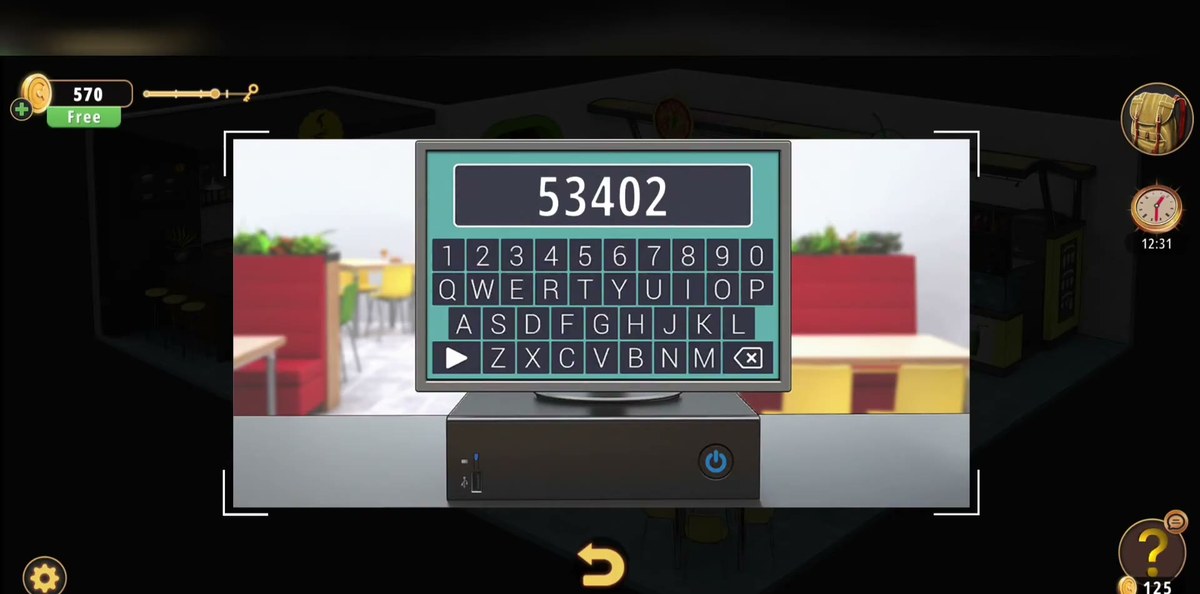
Type 53402 at the terminal behind the coffee bar → Name tag.
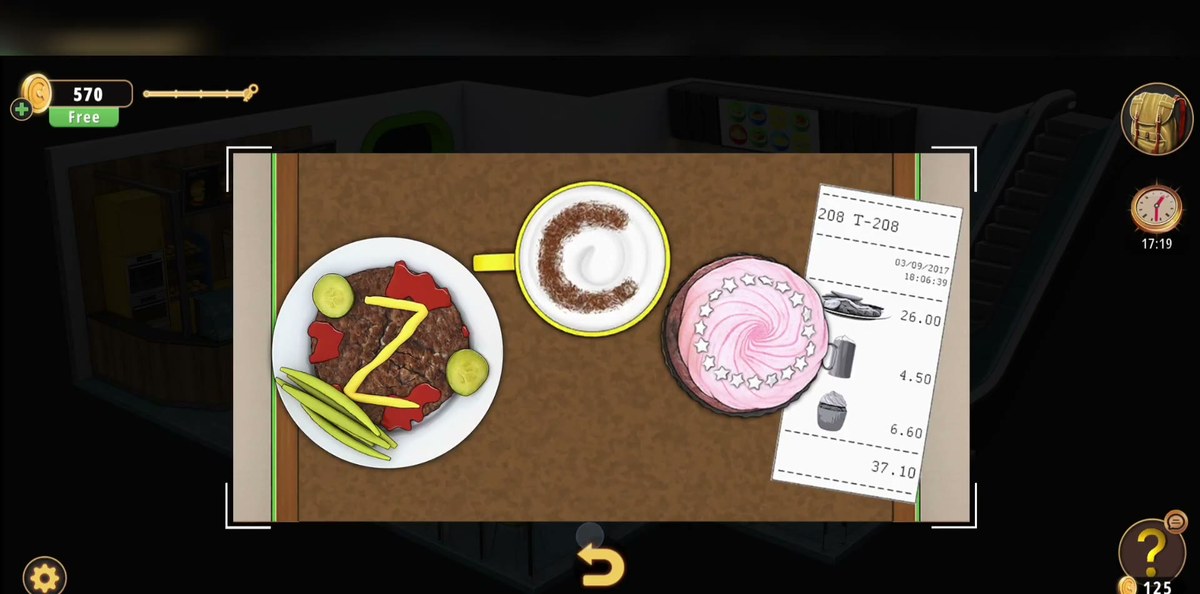
Read the table service: Z on the plate, C in the coffee, cupcake for the O. Type ZCO → results screen, +50 coins.
What this level actually is.
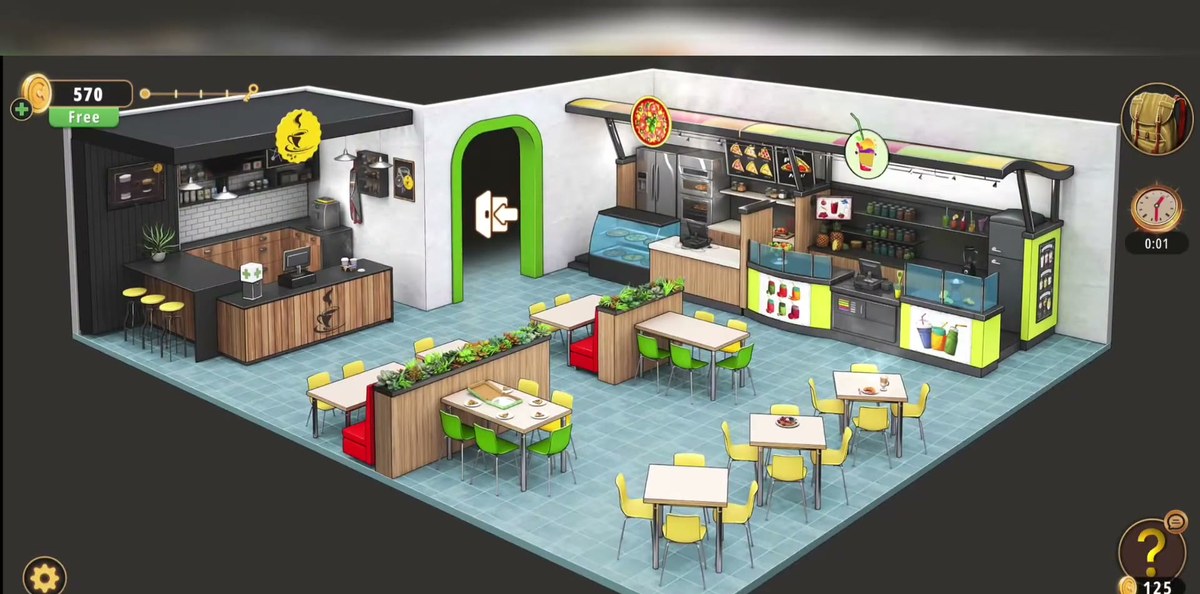
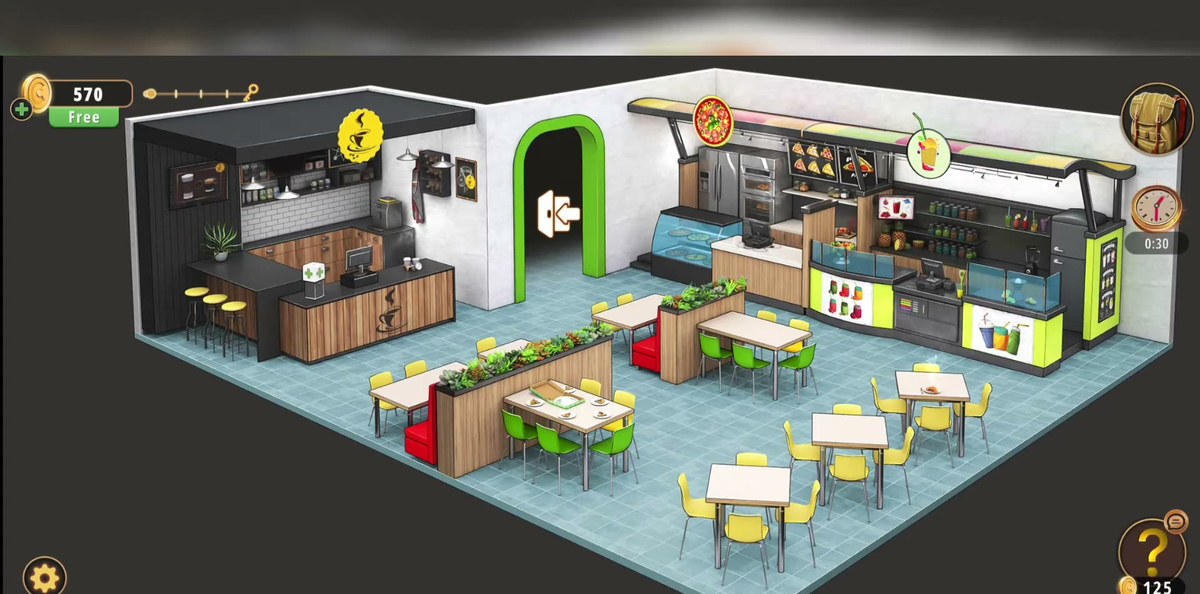
The Food Court is one big room pretending to be four small ones. It is a single isometric cutaway of a mall food court: a coffee bar on the left with three yellow stools and a wooden counter, a pizza counter and a dessert case on the right, a juice bar tucked into the far right corner with a blender and a till, and a dining floor in the middle with green and yellow chairs, planter boxes and red booths. A green archway opens toward the rest of the mall and an escalator climbs along the right wall.
What makes the room feel bigger than it is: every kiosk has its own little stack of puzzles, and none of them are numbered. You can open the fridge, pull a drawer, read a menu board and fill a blender before the level tells you what any of it was for. The game never lines the tasks up for you — the order below is the order the recording actually used, and it is a sane order, but it is not enforced. Nothing here can be failed and nothing is timed.
It also is not a serving game. There is no customer to satisfy, no order to carry across the floor on a tray, no queue to clear. The food is set dressing on top of a lockbox: a till that wants a number, a terminal that wants an ID, a chalkboard that wants tokens, and a last keypad that wants three letters. Once you stop looking for a service loop and start looking for locks, the court gets much smaller.
The one thing that genuinely is hidden is the relationship between the juice bar and the till. The blender is graduated 50 to 400, and whatever you blend ends up sitting at a readable level. That level is the till code. Nobody says so. You are supposed to notice that the only number you have produced in the room is the number the register is asking for, and the recording does exactly that: blend, walk to the till, type what the jug reads.
Step by step.
Step 1 · 0:01The title card, and the shape of the court
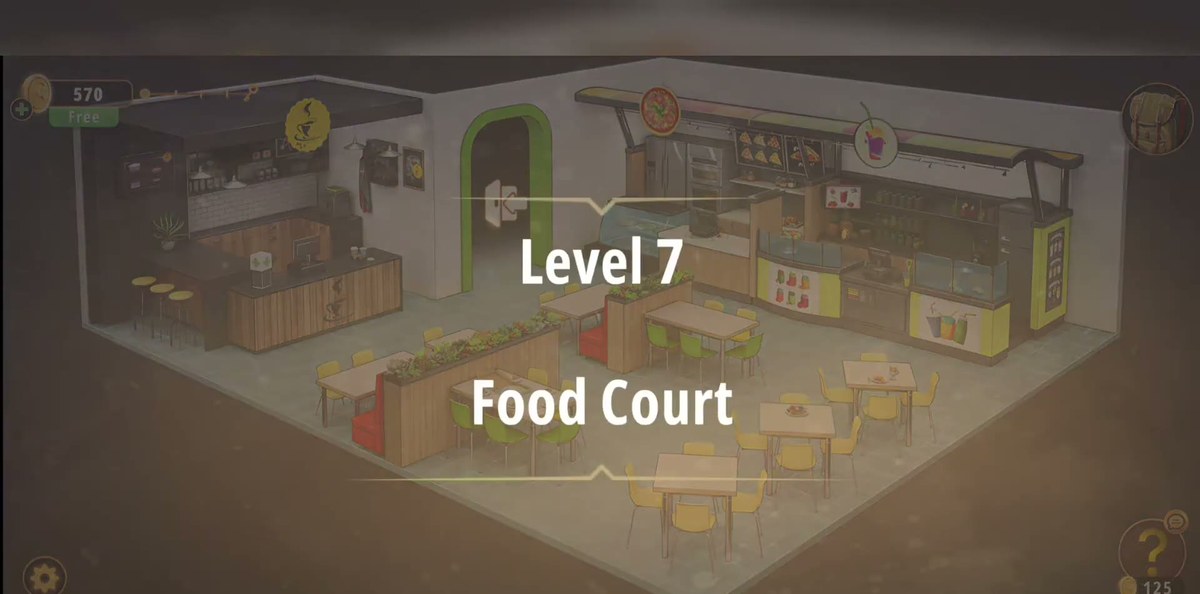
The level opens on a dimmed overhead shot with Level 7 and Food Court across the middle, then lifts to the full room. Use this first wide shot to fix the geography, because you will criss-cross it a dozen times: coffee bar left, pizza and dessert counters right, juice bar far right, seating in the middle, escalator on the right wall, green arch at the back. Everything you can tap is inside that frame.
Step 2 · 0:19The coffee bar: menu board, chalkboard and a name on an apron
Zoom the coffee kiosk first. There is a menu board over the counter listing the drinks with pictures, a blackboard beside it with a chalk cup, a doughnut and beans, shelves of cans and jars, a till and a monitor, and a grey-and-red apron hanging on a hook with NIK printed on the tab. Read the menu board now and remember it: the coffee shelf later asks you to pick drinks off a picture, and the board is the only place that names them.
Step 3 · 0:33The juice bar: fruit bowl, pineapples, blender, till
Pan right to the juice kiosk. It is the busiest counter in the room and the one that carries the level's first real code: a glass fruit bowl, whole and cut pineapples, three shelves of jars, a blender with a graduated jug, a till with a small monitor, a barcode scanner and a card reader. Take the whole counter in here — the fridge, the blender, the till and the colour panel are all on this one station, minutes apart.
Step 4 · 0:44Open the fridge and empty the shelves
The fridge at the juice bar opens to four shelves: a bowl of lemons, green apples and limes, a small plate of red berries, and a bowl of oranges, with a milk bottle in the door. Tap the produce and the pickups land in your bag with plain labels — Strawberries, Raspberries, and the rest of the fruit stack. Nothing here is a puzzle; this is the ingredient run that makes the blender useful.
Step 5 · 1:31Five finished smoothies, five colours
The shelf above the counter ends up holding five finished drinks, left to right: green with a blue straw, orange with a lemon slice, red with a lime slice, yellow with a green straw, purple with berries and a pink straw. Every glass carries three measurement lines. Treat the row as a colour legend for the juice bar — the same five colours turn up again on the metal panel a minute later.
Step 6 · 1:56The five-colour front on the metal unit
Beside the juice bar there is a brushed-metal unit with a vertical handle: five coloured bars down the left — orange, green, yellow, red, purple — and beside each one a grey gauge filled with matching stripes. It is the same five colours as the smoothie shelf, in a different order. The recording works this panel and it opens, but we could not read the rule that links the two, so this page does not invent one.
Step 7 · 2:13Inside: a dragon fruit and a carrot
The panel swings and the compartment behind it holds exactly two things — a dragon fruit on the left and a carrot beside it, which the game labels as you take it. Neither shows up anywhere else on the shelf, so both are ingredients the blender run did not cover. Take them; if a recipe in this room wants a colour you have not got, this drawer is the answer.
Step 8 · 2:52The blender: stop the jug on 350
This is the number the whole first half hangs on. Put the fruit in the blender and it fills with a red smoothie. The jug is graduated in fifties from 50 to 400, and you can watch the liquid climb while it blends. The recording stops it with the drink sitting on the 350 line. That is not decoration and it is not a coincidence: it is the only figure the room gives you before the till asks for one.
Step 9 · 2:59The till: type 350, green arrow
Tap the register monitor at the juice bar. The screen is a plain keypad — 7-8-9, 4-5-6, 1-2-3, 0, 00, comma, a red back-arrow and a green confirm arrow — with a single display line over it. Press 350 and the line reads 350. Check it against the jug before you confirm: the back-arrow deletes one digit at a time, so a wrong press costs you one tap, not the whole entry.
Step 10 · 3:04Pay with the card named MARIA
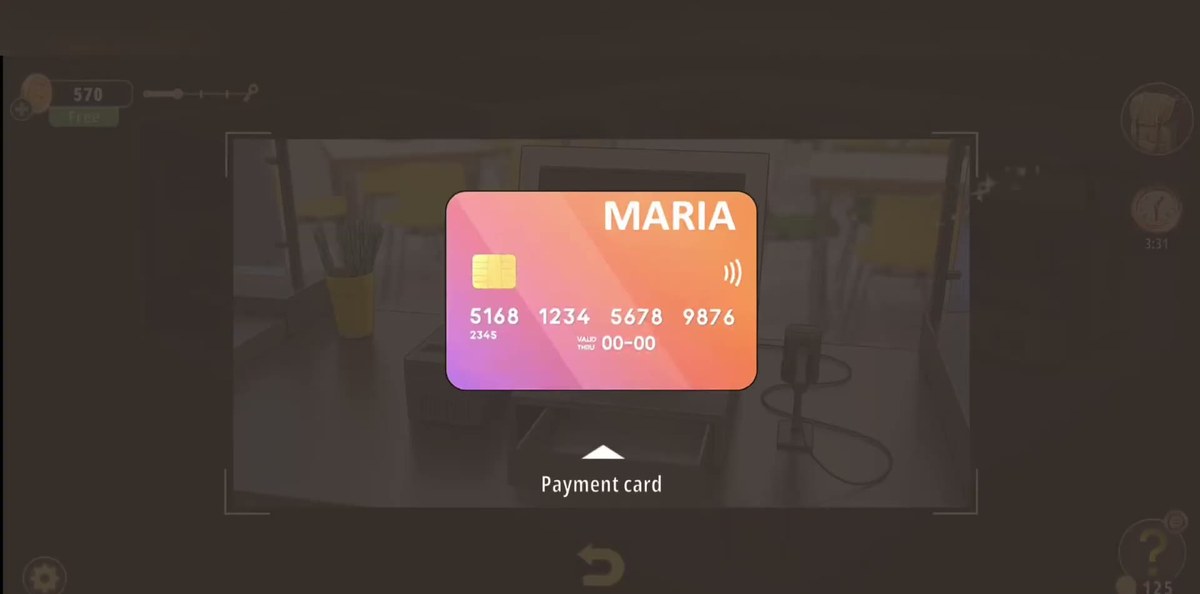
Confirming 350 does not open the drawer — it asks for payment. Open the bag and use the item labelled Payment card: a purple-to-orange card in the name of MARIA, with a gold chip, a contactless mark and VALID THRU 00-00. Run it on the reader and the sale clears. The card is an inventory item, not a floor pickup, so if the till is waiting, you already have what it wants.
Step 11 · 3:20The coffee shelf: three shelves, nine glasses
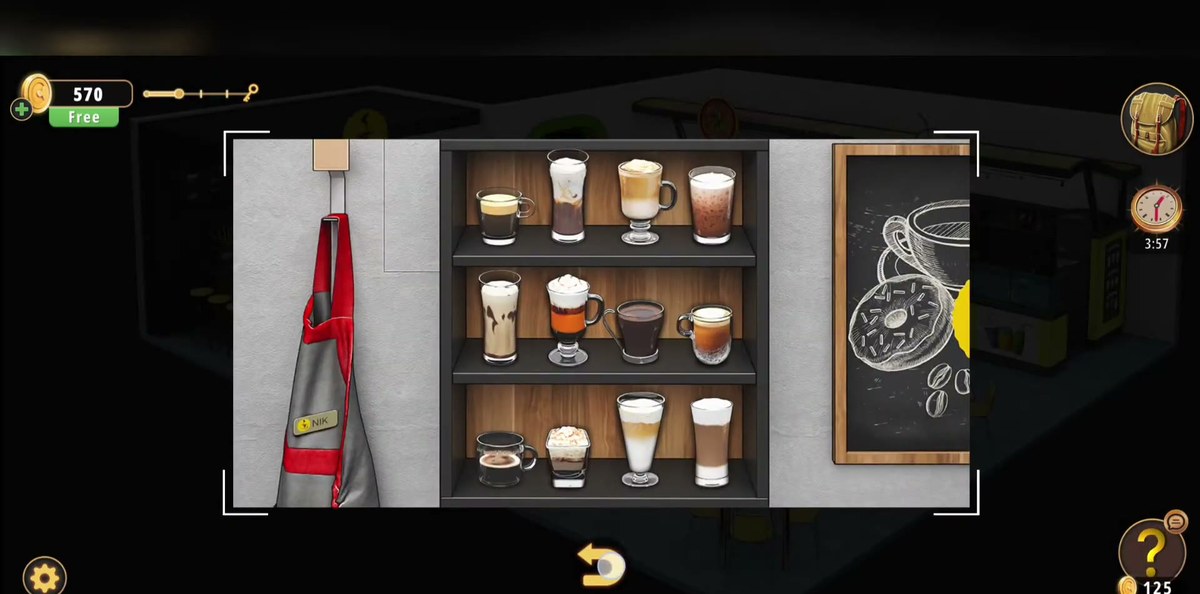
Back at the coffee bar, the shelf unit beside the apron holds nine finished drinks, three to a shelf, every one a different build: espresso with crema, layered lattes, a stemmed glass with cream, a dark mug. This is the reference wall for the next step. Read it shelf by shelf rather than as a crowd — the game will show you one or two of these glasses and expect you to find them again.
Step 12 · 3:24The drink card: find the two glasses it shows
Tapping the shelf opens a card with a coffee-bean border showing two drinks — a tall layered glass and a small cup with crema — with a coffee-cup stamp in the corner. The card is a photograph, not a puzzle: your job is to find those two exact glasses on the three shelves and tap them. The recording goes straight to the pair, and both light up when they are right. Match the layers, not the glass shape; several glasses share a silhouette.
Step 13 · 4:32The chalkboard star, and the wooden spoon it pays out
On the shelf between the green tea boxes and the pink ones there is a framed chalkboard with a white star and flower tokens clipped around it — white daisies and pink hibiscus. You place tokens, the board reacts, and when it is satisfied the chalkboard clears and the compartment behind it holds a single wooden Spatula. Our capture could not settle the placement rule, so work it by trial: the boxes either side are the only colour reference on the shelf.
Step 14 · 6:42The patterned-tile board
A light blue board holds a block of square tiles, each printed with its own botanical pattern — leaves, petals, dots — laid out in a cross. Tap the tiles you have matched and they vanish from the board; clear the block and a fresh arrangement is dealt in its place, so budget more than one round. The recording spends over a minute here because the patterns are small and several are near-identical; work from the outside in so the middle does not collapse into a mass of similar flowers.
Step 15 · 8:27The terminal: 53402
The monitor on the back counter behind the coffee bar boots to a teal screen with one input field and a QWERTY keyboard. Type 53402 — the field reads 53402 — and confirm with the green triangle. This is the one code in the Food Court you cannot derive from anything in the room; it is just the ID the terminal expects. Accepting it drops a Name tag into your bag.
Step 16 · 9:45The slip numbered 1042 P-23
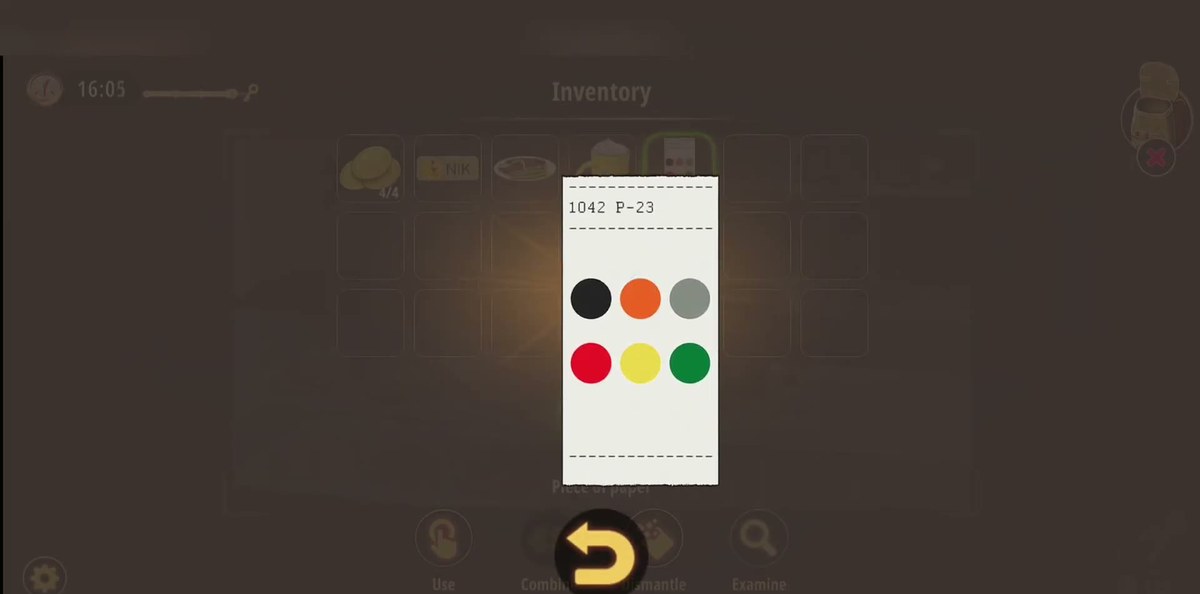
Somewhere in the run you pick up a Piece of paper. Examine it: the header reads 1042 P-23 on a dashed line, and underneath there are six coloured dots in two rows of three — black, orange, grey over red, yellow, green. It looks like a table map or a job ticket. Our recording never shows it being used on a lock, so treat it as a note rather than a key; if you are stuck at the end, it is not the thing you are missing.
Step 17 · 10:53The table: Z, C and O
Now look at the served table, because this is the last lock's clue and it is easy to walk past. Three items, left to right: a plate with a Z piped in mustard over the patty, a coffee cup with a C drawn in the foam, and a round cupcake. The bill beside them is the order slip 208 T-208, dated 03/09/2017, with three lines — 26.00, 4.50, 6.60 — and a total of 37.10. Three items, three letters, reading order.
Step 18 · 11:00The three slots: type ZCO
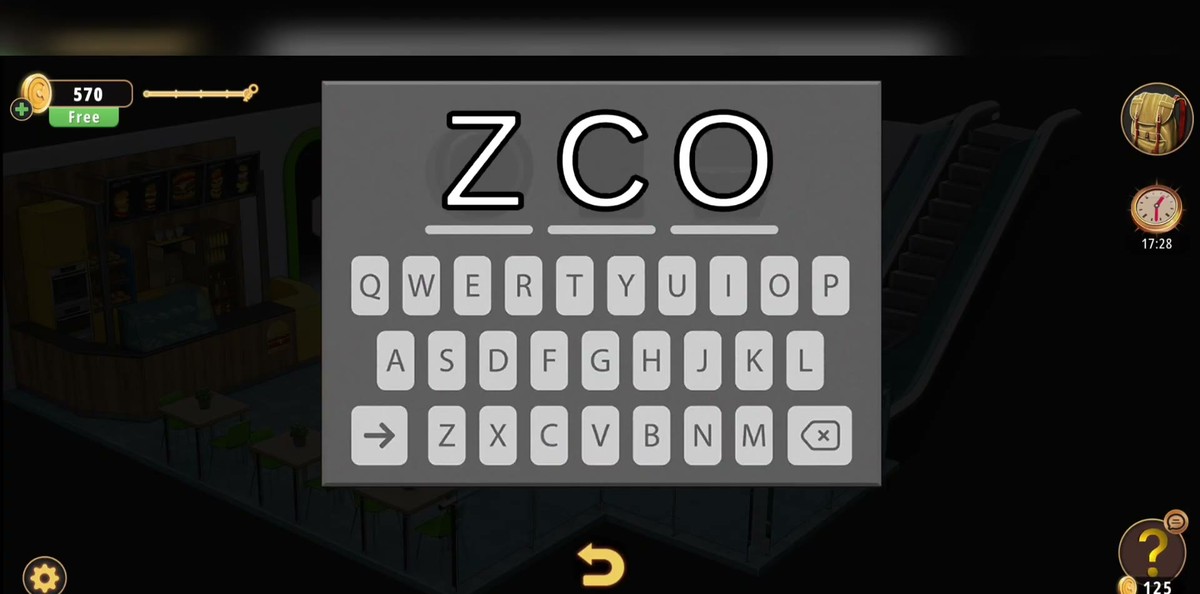
A keyboard rises over the mall view with three slots above it. Type the letters in the order you read them off the table: Z, then C, then O. The slots fill one at a time and the screen holds the three letters — ZCO — with no prompt and no error message. If you get nothing, you have the order wrong, not the letters: the plate comes before the cup, and the cupcake is last.
Step 19 · 11:06Level completed: +50 coins
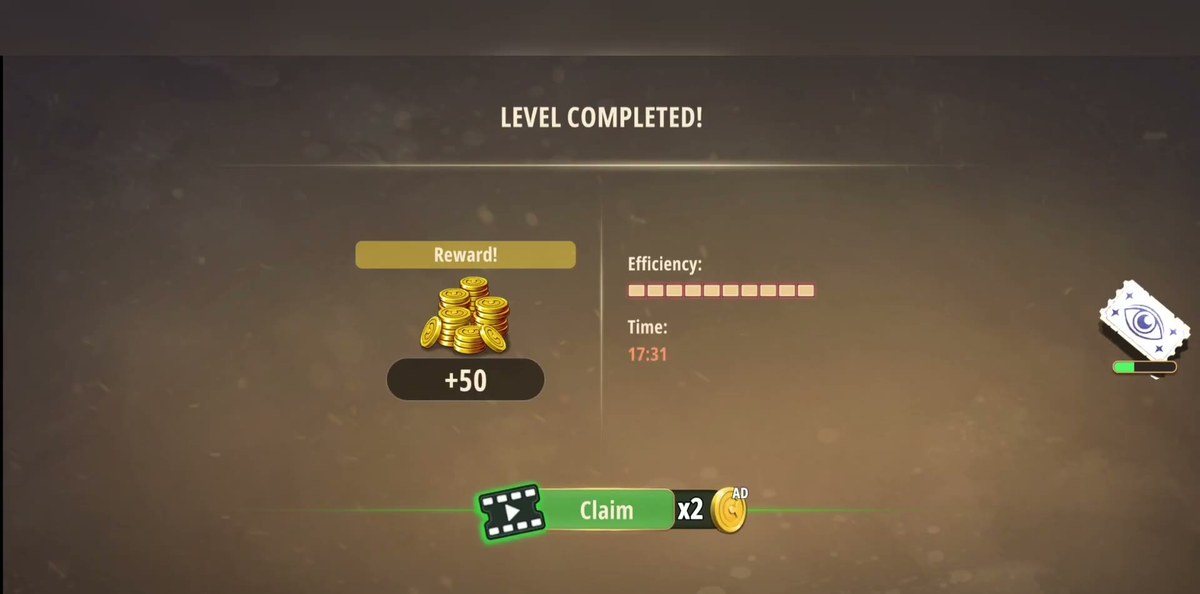
The screen fades to the results panel: LEVEL COMPLETED!, a Reward! line with a pile of coins and +50, a full efficiency meter, and Time: 17:31 on the in-game clock even though the video is only eleven minutes long — the recording is played faster than real time in places. Claim the coins and the court is done. Nothing carries over but the coins.
Almost everybody who gets stuck in the Food Court gets stuck in the same place: they have found two numbers and cannot tell which lock takes which. Put them in this order and the room stops fighting you.
350 — the till. Comes from the blender jug. It is the only number you can physically produce in the juice bar, and the register is the only lock in the room with a plain keypad.
53402 — the terminal. Comes from nowhere. It is not hidden on a wall, not printed on the slip, not on the menu board. The monitor behind the coffee bar simply wants an ID, and 53402 is it. Do not spend twenty minutes looking for a five-digit clue; there isn't one.
ZCO — the final lock. Comes from the table service, and only after you accept that the sauce on a plate is a letter. Three items, three slots, left to right.
The payment card is the fourth piece and the easiest to miss, because it is already in your bag. It is not a pickup, not a clue and not a code — it is the thing the till asks for between the number and the drawer.
Where people get stuck.
The blender level. The jug is the clue and it is very easy to blur past. If you fill it and walk away without reading the line, you will hunt the room for a number that is sitting in front of you.
The colour panel. Five colours here, the same five on the smoothie shelf, in a different order. It is tempting to read it as a straight sequence and start pulling things in drink order. Our recording does not support that, and we have not published a sequence — if you are stuck here, the panel is not gating the ending.
The coffee shelf card. Two glasses, nine candidates, several near-identical. Match the layers and the garnish, not the outline of the glass.
The chalkboard. The tokens are fiddly and the board gives little feedback. Nothing else in the room depends on it except the wooden spatula it pays out, so it is safe to leave and come back.
The slip. 1042 P-23 has six coloured dots and looks exactly like a code. In this recording it never opens anything. Do not build a theory around it.
The last keypad. Three slots, and the answer is three letters you have already seen. People lose the order, not the letters — plate, then cup, then cupcake.
What we could not verify: the rule behind the five-colour panel. Two separate reads of the striped gauges disagreed on how many segments each colour carries, so no count is printed here. The same applies to the payment card number, which read differently in different frames — only the name MARIA is repeated consistently. The chalkboard's token layout was too small to read twice, and the six coloured dots on slip 1042 P-23 are described but not interpreted. The scale by the pizza counter also reads 420.30 g and $59.26 in several frames, but the recording never shows that display being used on a lock, so we have left it out of the walkthrough rather than invent a step for it.
Chapter 2 levels.
The Food Court is the seventh room of Chapter 2, between the Candy Shop and the Pet Shop. The list below reflects what is written up so far.
Chapter 2 · No Honor Among Thieves26 of 26 with full written steps · 26 with a video
What is the till code in Rooms & Exits Chapter 2 Level 7?
350. You do not find it written anywhere: it is the level of the smoothie you blend at the juice bar. Fill the blender until the red drink sits on the 350 ml line, then type 350 on the register keypad at the counter and press the green arrow.
What is the computer code in the Food Court?
53402. The monitor on the back counter, behind the coffee bar, opens a QWERTY keyboard and a single input field. Type 53402, confirm, and a Name tag drops into your inventory.
What is the three-letter code at the end of Chapter 2 Level 7?
ZCO. The last lock is a keyboard with three slots. The table service you assemble carries the three letters in reading order: a Z piped in mustard on the plate, a C in the foam of the coffee, and the round cupcake. Type Z, C, O and the level ends.
Where do I get the payment card?
The card is in your inventory, labelled Payment card, and it is in the name of MARIA. The till asks for payment right after you enter 350, and using the card on the register clears the sale. You never have to hunt for it on the floor.
What is the piece of paper numbered 1042 P-23?
It is a printed slip that goes into your bag as Piece of paper. The header reads 1042 P-23 and underneath there are six coloured dots in two rows of three. Our recording never shows it being used on anything, so this page does not claim it opens a lock.
How long does the Food Court take?
The recording runs 11 minutes 10 seconds of video and the in-game clock reads 17:31 on the results screen. Nothing in the level is timed and there is no fail state; the time goes on criss-crossing the court between four kiosks.
 GridPaw
 Shikaku
 Akari
 Kakuro
 Nonogram
 Nurikabe
 Pictomino
 KenKen
 Binary
 Star Battle
 Hashi
 Slitherlink
 Murder Sudoku
 Meowdoku
 Crazy Cleanup