Rooms & Exits Chapter 2 Level 17 Walkthrough: Shoe Store
Unofficial fan-made guide. Not affiliated with Webelinx Games, the developer of Rooms & Exits: Escape Room Games.
Rebuilt frame by frame from a 7 minute 37 second recorded playthrough of the current build, extracted at one frame per second and read at full resolution, with a second recording used to cross-check the results screen. Everything printed on this page was read off the footage twice from separate frames: the 96 grid, the 31 / 23 / 18 panel, the 2120 till and the five symbols on the note. Two things are deliberately not written as answers, because our capture never settles them: the exact arrow sequence on the golden box, and the order in which the four symbol plates have to be read. Where that happens the page says so rather than guessing.
Chapter 2 · No Honor Among Thieves26 of 26 with full written steps · 26 with a video
Quick answer
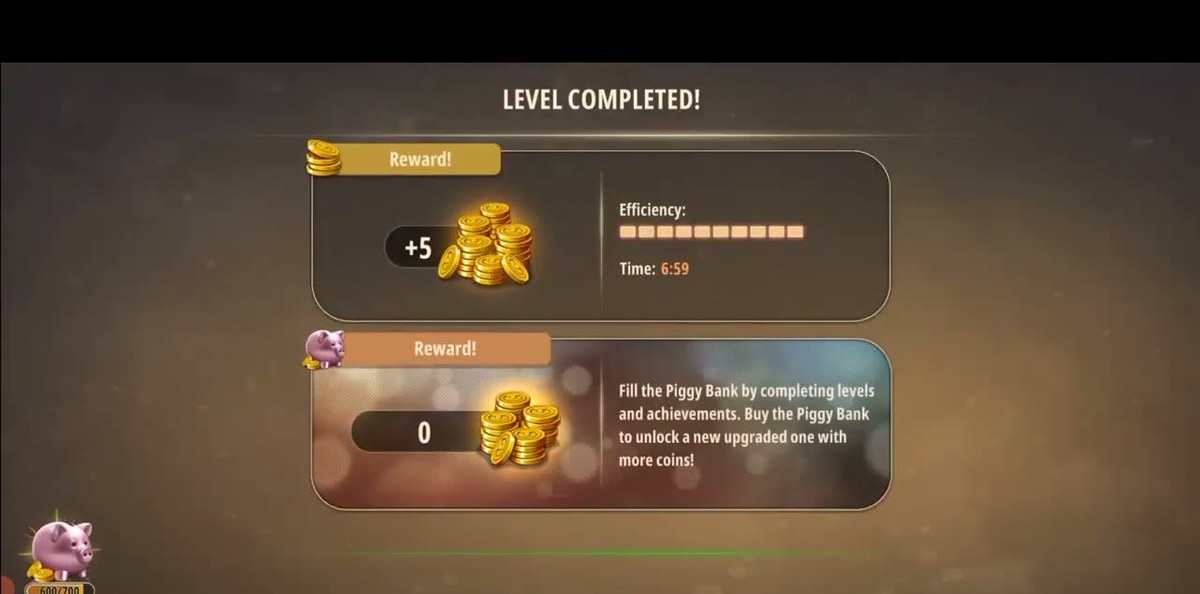
Three numbers run this level: 96 for the red arithmetic box, 2120 for the till, and 31 / 23 / 18 for the wall panel. Finish worth +5 coins, at 6:59 on the clock.
Open the white cabinet, work the golden box and take the scissors and the shoes.
Tap the red box on the counter, read the grid and type 96 → scroll → dismantle it → piece of paper.
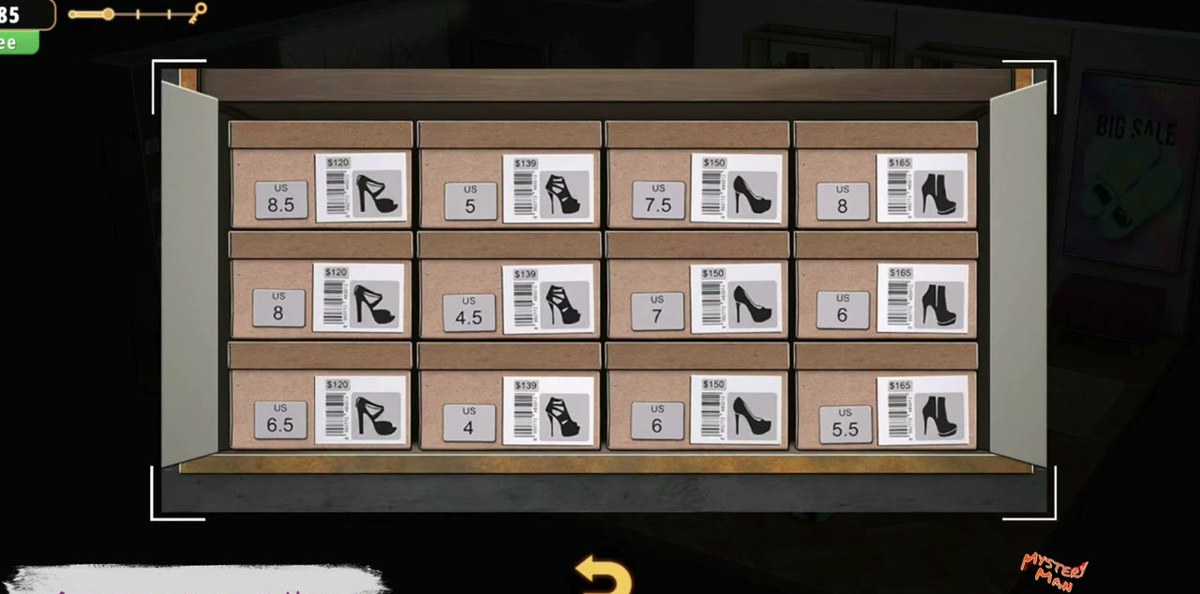
Clear the shoe-box wall (ARRANGE LOWER TO HIGHER, US 4 to 8.5) → plug.
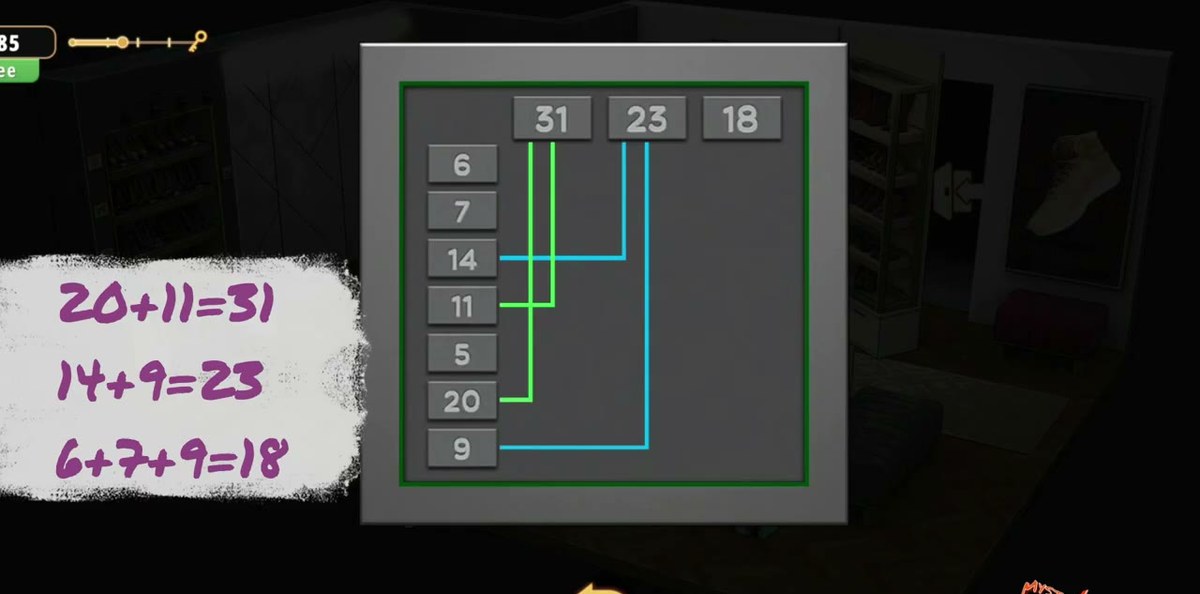
Link the wall panel: 20 + 11 = 31, 14 + 9 = 23, and 6 + 7 + 5 = 18.
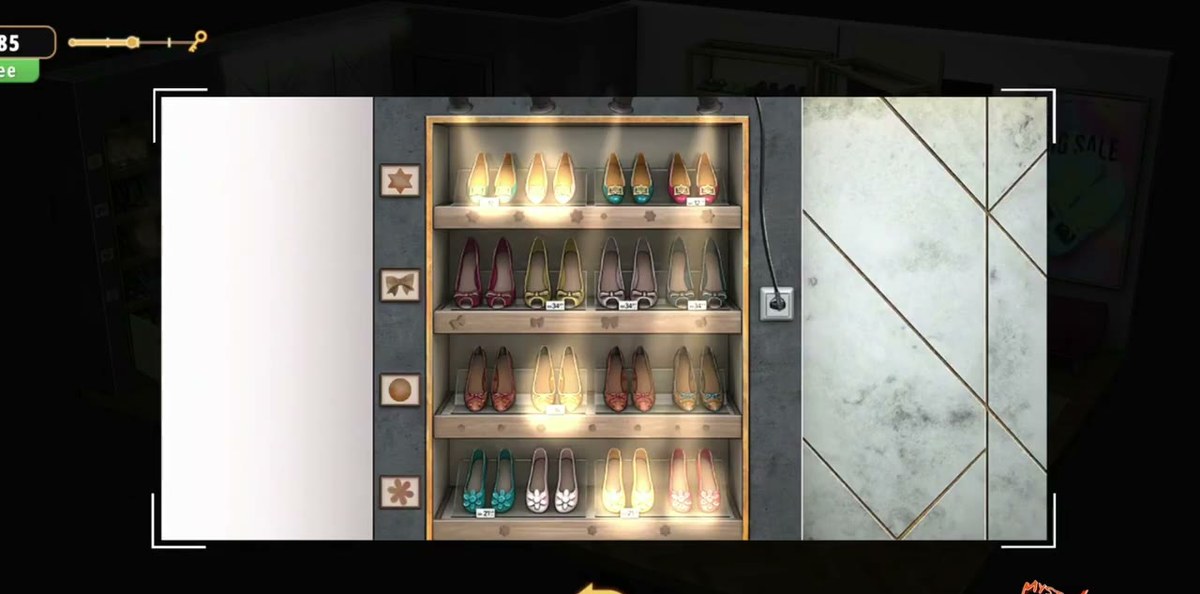
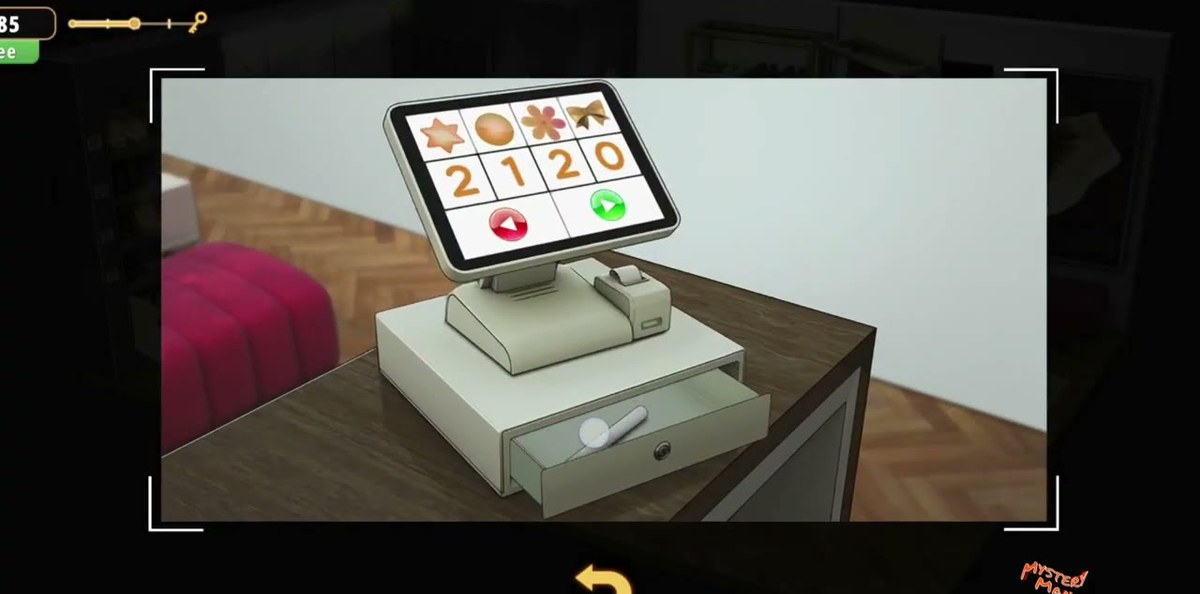
Read the four symbols over the shoe display and enter 2120 on the till → the drawer opens.
Light the candle with the matches, clear the back room, and combine pencil + piece of paper for the five-symbol row.
Match the shoes to the soles, take the shoelaces, combine them with the sneaker, put it on the display stand → key card → exit door.
What this level actually is.
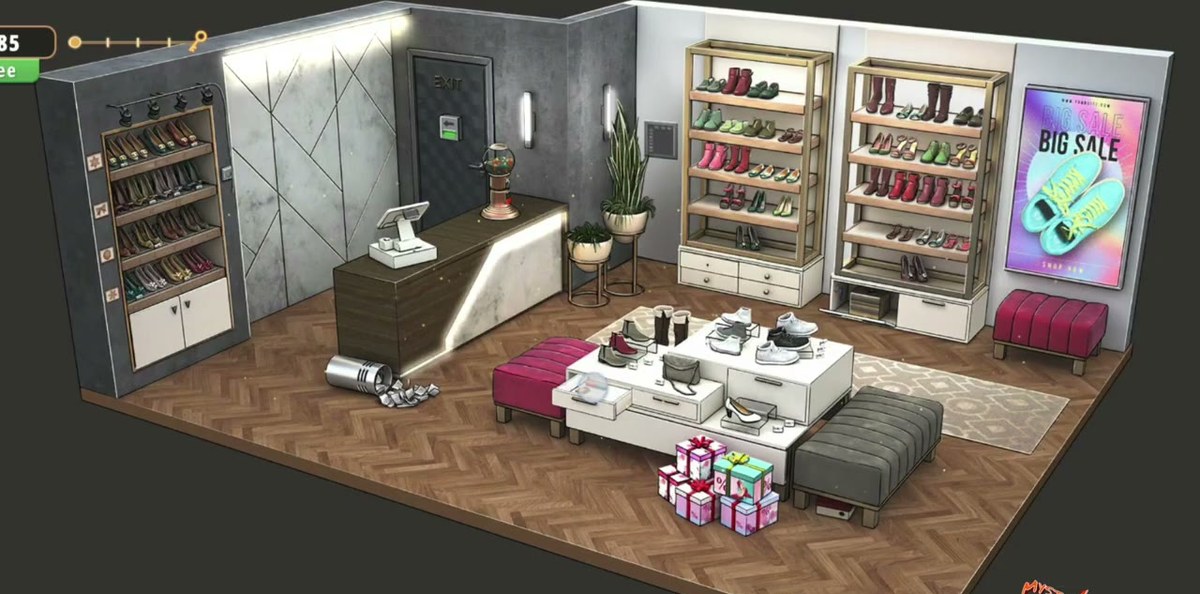
The Shoe Store is level seventeen of Chapter 2 and it is the biggest room in the chapter so far. It is a real boutique rather than a puzzle box: a glass display counter runs along the left with a golden wooden box sitting inside it, a low table in the middle of the floor holds a pair of pink sandals and a stack of wrapped gift boxes, and the whole right-hand wall is a shoe display lit from underneath with a row of symbol plates mounted above it. Behind the counter there is a till, a SALE poster and a doorway through to a stockroom, and the front of the shop is a glass door with EXIT over it.
That layout is the reason the level feels long. It is not one chain of three locks in one small room; it is two rooms plus a stockroom, with roughly twenty inventory items passing through your bag and at least four separate puzzles that do not depend on each other. You can solve the arithmetic box without ever looking at the shoe-box wall, and you can clear the number panel without knowing that the till exists. Nothing in the game tells you what order to do any of it in, and the inventory fills up with things whose use only becomes obvious ten minutes later.
What holds it together is a single idea the level keeps repeating: a number written somewhere in the room, and a lock that wants that number. The four-row grid on the red box is a pattern that has to be continued. The wall panel is three sums that have to be linked. The till is four symbols that have to be counted. The shoe-box wall is ten boxes that have to be ordered. Once you notice that the room is made of number puzzles, the Shoe Store stops being a scavenger hunt and becomes a list of small arithmetic problems with a stockroom attached.
The recording finishes the room in 6:59 of level time. Players who get stuck here almost always get stuck in one of two places: they never find the note that explains the red box's rule, or they walk past the till because it looks like scenery. Both are covered below, and both are cheap to fix once you know what you are looking at.
Step by step.
Step 1 · 0:04Read the room before you touch anything
The first wide shot is the only one you get without an inventory grid over half the screen, so use it. Left wall: the glass counter, the open white cabinet above it, the golden box inside, the till further along. Middle: the low table with the pink sandals and the wrapped gift boxes. Right: the shoe display, lit from under every shelf, with four symbol plates on the wall above it. Back right: the doorway into the stockroom. Front: the glass door you will leave through, which does nothing at all until the very last step. Everything on the left side of the room is number puzzles; everything on the right is the display you read a code off. That split is worth holding on to for the next seven minutes.
Step 2 · 0:14The low table: pink sandals and a pile of gift boxes
The first thing the recording taps is the table in the middle of the floor. The pink braided sandals lift straight into the inventory with the label Sandals, and the wrapped gift boxes around them turn out to be props — you can tap them, they do not open, and nothing in the level ever asks you to come back to them. Take the sandals and move on. The gift boxes are the first of several decorative objects in this room that look interactive and are not; the Shoe Store is generous with those, and the fastest way through it is to stop tapping things that have no highlight.
Step 3 · 0:17The white cabinet and the golden box
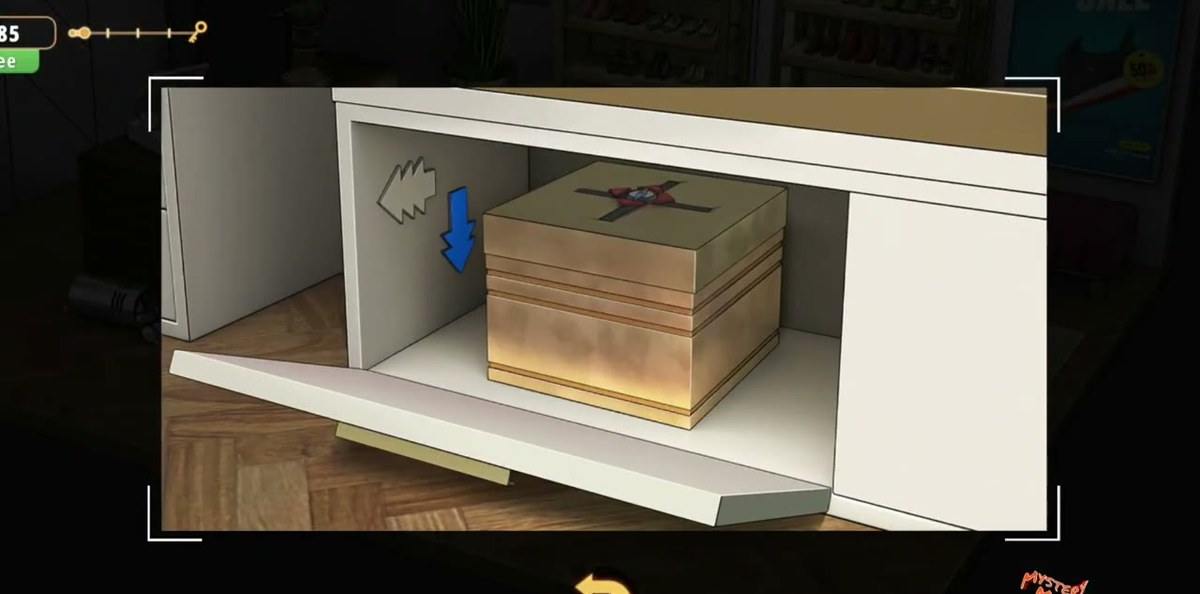
Above the counter there is an open white cabinet, and inside it sits a golden wooden box with a carved lid. This is the first real lock in the level. The box is a flat square with a cross-shaped channel cut into the top of it and a red-and-blue dial in the middle, and the recording spends the better part of half a minute turning it before the lid gives. What falls out of it, along with the Scissors you will need later, is the first of the level's two cutting tools — the Shoe Store runs on scissors, and you will use them on a scroll before the level is out.
Step 4 · 0:20The dial on the golden box
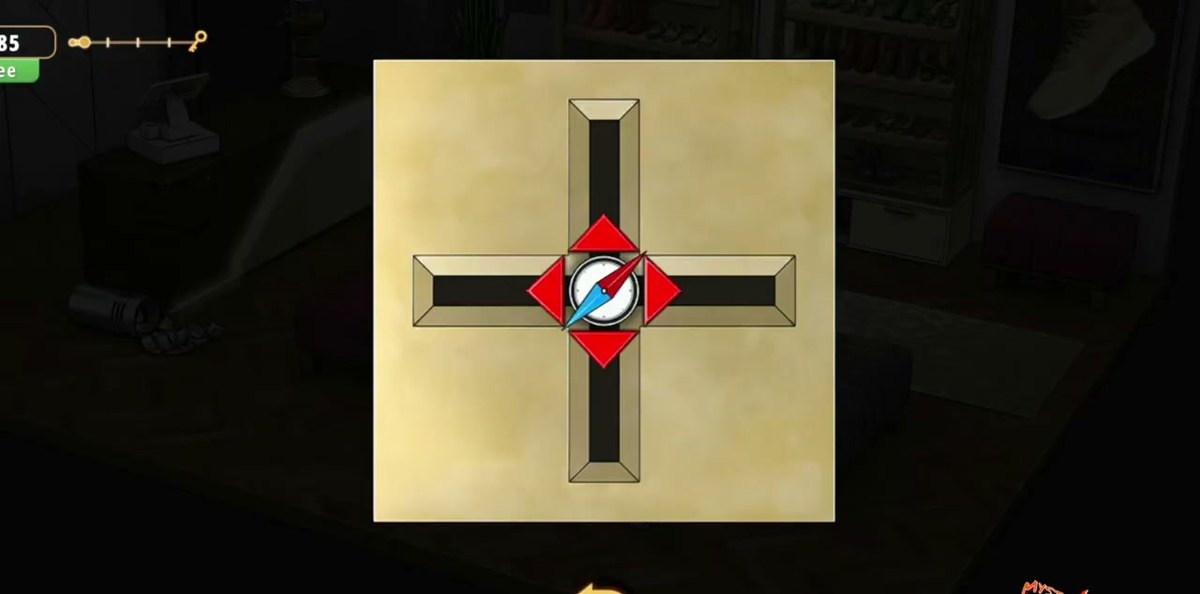
Zoomed in, the lid is a metal plate with a compass-style dial: a red arm, a blue arm and a white arrow in the middle, sitting in a four-way channel. Turning the dial swings the arms around the cross until the plate releases. Our capture shows the dial being worked for a long stretch and then the box opening, but it never shows a rejected position being held long enough to tell you what the plate is checking — so we have not written a sequence here that we could not read twice.
What we can tell you is what it is not: there is no clue for this dial anywhere in the room. It is a mechanical puzzle, not a code, and the answer is in the turning rather than in a note. If you are stuck on it, keep rotating until the arms seat in the channel; the box opens on the plate and hands you the scissors.
Step 5 · 0:46Scissors in the bag, then the first pair of shoes
By 0:46 the inventory holds the Scissors, and by 0:51 it holds Shoes as well. Both are ordinary pickups — you tap, the item rises out of the frame with its label underneath, and it goes into the bag. The reason to call them out is that the Shoe Store's inventory is not a tidy list of keys: it fills up with shoes, sandals, a sneaker, shoelaces, a broom, a brush, a dustpan, a hammer, a piggy bank, a candle, a plug, a handle and a pencil, and most of them are ingredients for something later rather than things you use where you find them. Take everything the game offers; there is no inventory limit and no penalty for carrying.
Step 6 · 1:02The red box: a four-row grid and the answer 96
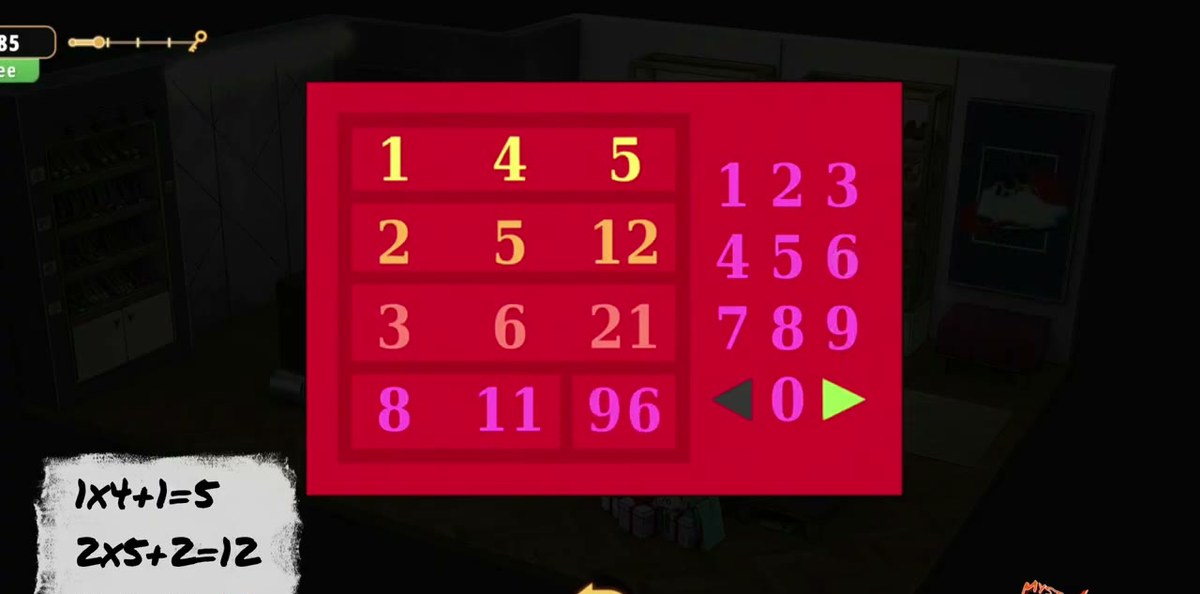
This is the puzzle most people search for, and it is the one the level is most generous about. On the counter there is a red panel with a grid of numbers and a keypad on the right. Read the grid down the rows:
1 4 5
2 5 12
3 6 21
8 11 ?
The rule is multiply the first two numbers, then add the first one again: 1×4+1=5, 2×5+2=12, 3×6+3=21. The last row is 8×11+8, which is 96. The game prints the whole rule on a scrap of paper that appears beside the box — 1×4+1=5 on the first line, 2×5+2=12 on the second, and 8×11+8=96 in red at the bottom — so you do not have to deduce it, only read it. Type 96 on the keypad and press the green arrow.
Step 7 · 1:11The scroll, and what the scissors are for
The box opens on a rolled Scroll. Take it, open the inventory and press Dismantle on it: the scroll unwinds into a flat Piece of paper. This is the first place in the level where the verb wheel matters, and it is the step people skip — a scroll looks like a finished object, so it sits in the bag doing nothing while the player hunts for a clue that is already in their possession. The paper is the thing the pencil will be used on later, and it is also the thing that ends up carrying the five symbols for the locker.
Step 8 · 1:36The shoe-box wall: ARRANGE LOWER TO HIGHER
The wall of shoe boxes next to the display is a sorting puzzle. The game prints ARRANGE LOWER TO HIGHER across it, and the ten boxes are labelled with US sizes — 4, 4.5, 5, 5.5, 6, 6.5, 7, 7.5, 8 and 8.5 — with four price stickers between them: $120, $139, $150 and $165. Sort by the US size on the label, not by the price, and not by the colour of the box. The prices run in the same direction as the sizes, which makes them look like a second sort key and is exactly why people get this wrong: the instruction is about size, and the sticker is decoration.
Step 9 · 2:02The plug, and the socket by the display
Clearing the shoe-box wall is what the recording does just before the Plug turns up at 2:02. The plug goes into the socket on the wall beside the shoe display, and the recording does that at about 3:50 — a long time after picking it up, which is why it spends most of the level sitting in the bag looking useless. If you are following along and cannot find where it goes: it is the socket at the end of the display wall, at the height of the lowest shelf, not the one behind the till.
Step 10 · 3:01The number panel: three totals and seven numbers
On the wall by the shoe display there is a grey panel with three totals along the top — 31, 23 and 18 — and a column of numbers down the left: 6, 7, 14, 11, 5, 20, 9. The note pinned beside it carries the sums in handwriting: 20 + 11 = 31 and 14 + 9 = 23. You solve it by dragging a line from each number in the left column to the total it belongs to.
The third total is the one that catches people out, because the note's last line is written in a hand that reads like 6+7+9 — and 9 is already spent on 23. The panel is what settles it: seven numbers, two totals taking two each, leaves exactly three for the last one, and those three are 6, 7 and 5. Drag 6, 7 and 5 to 18 and the panel lights up.
Step 11 · 3:52The four symbol plates on the display
Beside the shoe display, mounted on the wall, there are four framed plates, and each one carries one of the symbols that turns up on the till: a star, a bow, a circle and a flower. They are the only labelled thing on that wall and the shoes on every shelf are lit from underneath so the plates stand out against the dark. What we could not settle is the order they hang in: our two reads of this wall disagree, one going top to bottom and one matching the row on the till screen. So use the plates to learn which four symbols are in play, and take the order from the till's own symbol row.
Step 12 · 4:06The till: four symbols, four digits, and 2120
The till sits on the counter past the red box. Zoomed in, the screen shows four symbols across the top — a star, a circle, a flower and a bow — with four digit boxes underneath, one per symbol, and a red and green arrow at the bottom. Those are the same four symbols as the framed plates beside the shoe display. The recording works the four boxes one at a time and leaves them reading 2 1 2 0, then presses the green arrow and the drawer springs open. If you only remember one thing from this page, remember the four digits: the boxes are the only place they have to go, and the drawer is the only thing they open.
Step 13 · 4:15Candle and matches
By 4:15 the bag holds a Candle and a box of Matches, both picked up around the counter. Combine them from the inventory and you get a lit candle. The recording does this at 4:17 and then walks straight into the stockroom, which is the only part of the level where a light source is worth carrying; the front of the shop is lit, the back is not.
Step 14 · 4:42The stockroom
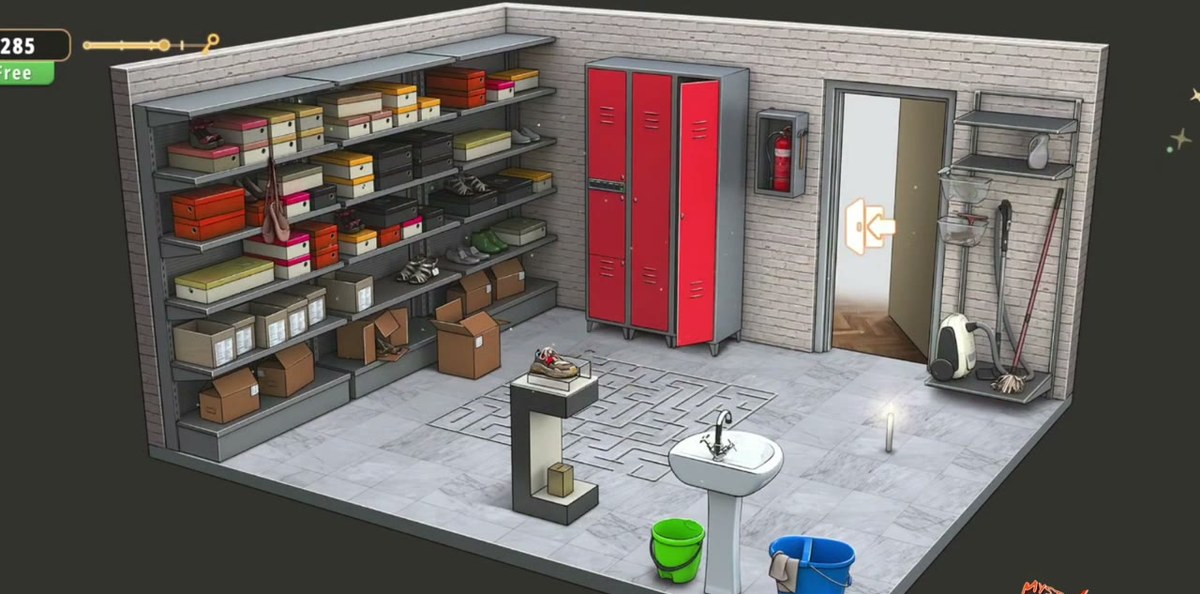
Through the doorway at the back there is a second room: metal shelving stacked with boxes, two red lockers, a sink with a mirror over it, buckets and cleaning supplies on the floor, and a black-and-white tiled floor with a maze pattern cut into one corner of it. The stockroom is where the second half of the level happens, and it is also where the level stops being about numbers. The two red lockers are the thing to remember — one of them carries the five-symbol lock that the pencil and paper are for.
Step 15 · 5:00The cleaning kit: broomstick, brush, dustpan
The stockroom hands out a run of cleaning items — a Broomstick, a Brush and a Dustpan — and the recording combines the broomstick with the brush and the dustpan rather than using them where they lie. There is also a Hammer, a Piggy bank and a Coin in this stretch. None of them are used where they are found: the coin comes off the floor and travels with you, the hammer stays in the bag, and the piggy bank is a container rather than a puzzle. Take all six. The Shoe Store never punishes you for carrying too much, and it does punish you for walking past something you will have to come back for.
Step 16 · 5:24Handle and pencil
Two small pickups finish the stockroom: a Handle at 5:24, which is the sort of item you only understand when you find the drawer it fits, and a Pencil at 5:27, which is the most important object in the back half of the level. The pencil is worthless on its own. With the piece of paper from the scroll, it becomes the clue for the locker.
Step 17 · 5:38Pencil on paper: the five symbols
Open the inventory, select the Pencil, press Combine and pick the Piece of paper. The paper fills with a row of five symbols, left to right: a star, a club, a triangle, a crescent moon and a diamond. That row is the code for the five-symbol lock on the red locker in the stockroom. Read it off the paper while you are standing at the locker — the symbols are drawn small, and the crescent in the fourth position is easy to mistake for a letter C.
Step 18 · 6:12The shoe-to-sole matching board
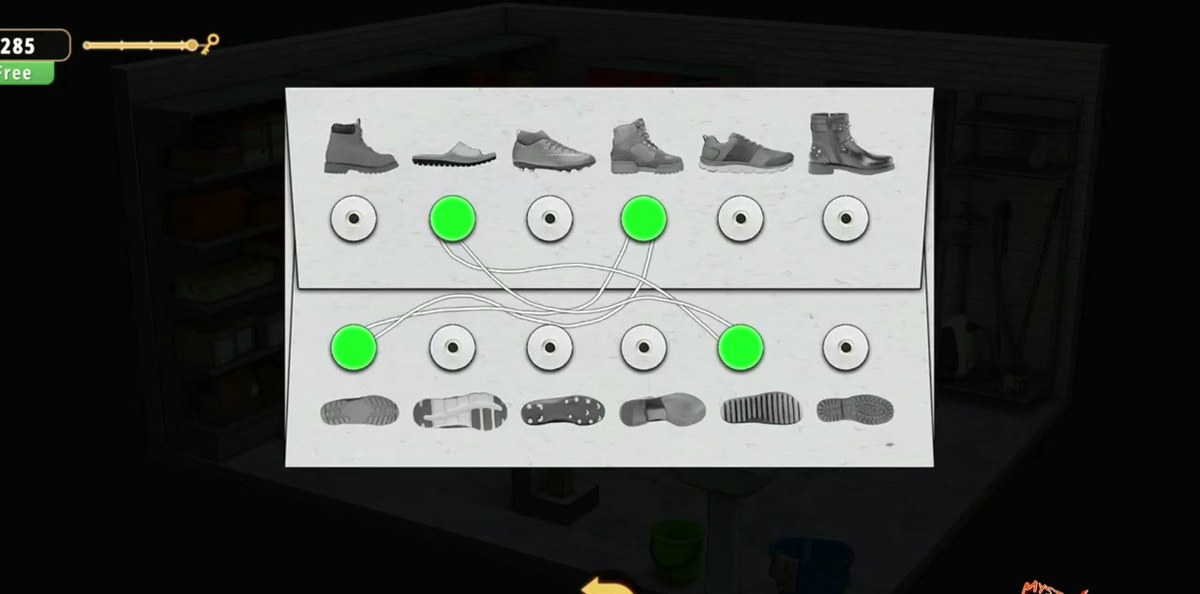
Back out in the shop there is a board with six shoes along the top and six soles along the bottom, each with a green button under it. Tap a shoe, tap the sole that belongs to it, and the pair locks in. Six shoes, six soles, and every sole is used exactly once — so if you get to the last pair and the sole you need is gone, you have mismatched earlier and need to clear the row. The recording works left to right and clears it in about a minute.
Step 19 · 6:40The maze board
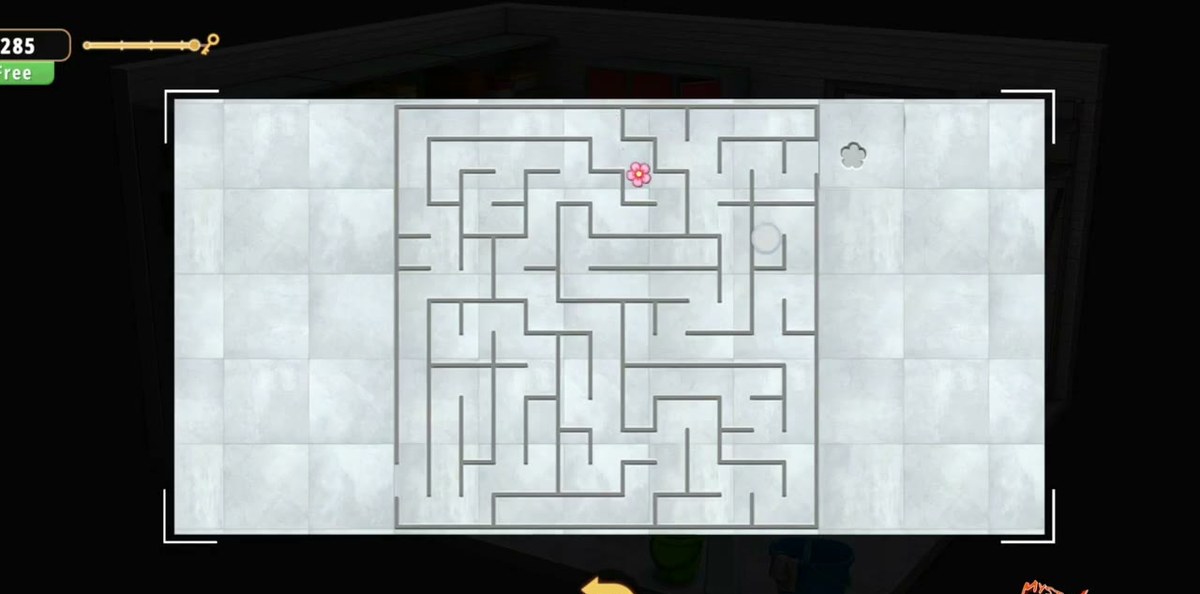
One more puzzle sits between the sole board and the sneaker: a maze drawn as a plan view, with a small pink marker that you drag through it. The recording works the marker from the opening on one side to the middle without touching a wall, then takes what the maze releases. If a drag jumps a wall the marker resets, so move it a corridor at a time rather than in one sweep — the walls are thin at this zoom level and a fast drag will cut a corner.
Step 20 · 6:58Shoelaces, then the sneaker on the stand
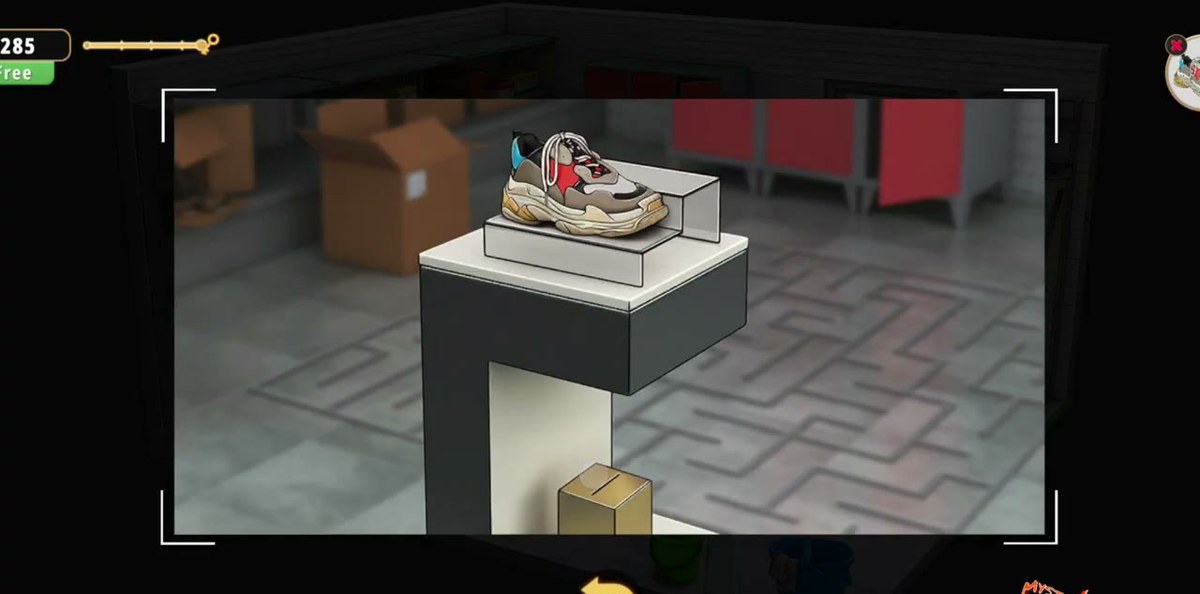
The Shoelaces arrive at 6:26, once the board is clear. At 6:58 there is a Sneaker on a display stand in the middle of the shop floor — the single item on a pedestal, not one of the pairs on the shelves. Take it, then combine Shoelaces with Sneaker in the inventory. What you get back is a finished sneaker, and the stand is the only thing in the room that wants it: use the sneaker on the stand and the pedestal opens.
Step 21 · 7:33The key card and the glass door
The pedestal gives up a Key card. Select it in the inventory, press Use, and tap the glass door at the front of the shop — the one with EXIT over it that has refused to do anything for the last seven minutes. The camera pulls back to the wide room and the level ends. Nothing else in the room needs to be finished first: the sandals, the shoes, the broom and the hammer are all optional once the key card is in your hand.
Step 22 · ResultsWhat the level pays out
The results screen reads LEVEL COMPLETED! with a +5 coin reward at the top, an efficiency bar beside it, Time: 6:59, a second reward panel showing 0 against the piggy bank, and a Claim button that offers a doubled reward for an ad. The coins go into the same piggy bank as the rest of the chapter. Nothing about the Shoe Store carries over into level 18 except that balance.
Seven locks, one page. If you only want the numbers, this table is the whole level:
Lock
Where it is
Answer
Where the clue comes from
Golden box dial
White cabinet above the counter
not published — mechanical
No clue in the room; rotate until the plate seats
Red arithmetic box
Counter, right of the cabinet
96
Handwritten note beside the box: 1×4+1=5, 2×5+2=12, 8×11+8=96
Shoe-box wall
Left of the shoe display
US 4 → 8.5
Overlay text: ARRANGE LOWER TO HIGHER
Number panel
Wall, next to the display
20+11=31, 14+9=23, 6+7+5=18
Note pinned beside the panel
Till
Counter, past the red box
2120
Four symbol plates beside the shoe display
Red locker
Stockroom
star, club, triangle, crescent, diamond
Pencil combined with the piece of paper
Display stand
Shop floor, centre
sneaker + shoelaces
Shoelaces from the sole board, sneaker from the stand
The table is also the answer to the question everyone asks about this level: how many codes are there? Two pure number codes — 96 and 2120 — plus one arithmetic panel that is a code in all but name, one sort, one mechanical dial and one symbol sequence. The Shoe Store is not a level with a single big password; it is a level with a shop's worth of small locks on it.
Why 96 is the answer, and not 92 or 88.
It is worth spelling out, because the arithmetic box is the one puzzle in this level where a wrong answer looks reasonable. There are three worked examples on the grid and one that is not worked:
1 4 5. 1 × 4 = 4, plus 1 = 5.
2 5 12. 2 × 5 = 10, plus 2 = 12.
3 6 21. 3 × 6 = 18, plus 3 = 21.
8 11 ?. 8 × 11 = 88, plus 8 = 96.
The rule has to hold for all three examples or it is not the rule, and it does: in every row the third column is the first two multiplied, with the first column added back on top. That is also why 8 × 11 alone — 88 — is the common wrong answer: the third term is visible on the grid and invisible in a hurry. If you typed 88 and nothing happened, you stopped one step early.
The order that works.
The Shoe Store does not enforce an order, but it has a natural one, and following it means never carrying an item you cannot use yet:
Front of shop, left to right. Take the sandals from the table, open the cabinet, work the dial and take the scissors. Then clear the red box with 96 and dismantle the scroll into the piece of paper.
The shoe-box wall. Sort it while you are still near the counter; that is where the plug comes from.
The panel. Link 20+11 to 31, 14+9 to 23 and 6+7+5 to 18.
The display wall and the till. Read the four plates, then key 2120 into the till. Plug in the socket on the same wall.
The stockroom. Light the candle, take the cleaning kit, the coin, the handle and the pencil. Combine the pencil with the paper, read five symbols, open the red locker.
Back to the shop floor. Clear the shoe-to-sole board for the shoelaces, combine them with the sneaker, place the sneaker on the stand, take the key card, open the door.
Two of those steps can be swapped without consequence — the shoe-box wall and the number panel do not depend on each other, and the till does not care whether you have cleared the panel. The one hard dependency is at the end: the shoelaces come from the sole board, the sneaker comes from the stand, and the key card comes from putting the two together. If you are missing the shoelaces, you have not finished the board.
Where people get stuck.
The note beside the red box. It appears when you zoom in and it is easy to miss because it sits low and to the left. Without it the grid is just four rows of numbers. With it the box is a reading exercise.
The scroll. It is a scroll until you press Dismantle. Players who never open the inventory on it end up with no piece of paper, and no piece of paper means no pencil clue, and no pencil clue means the locker stays shut.
The till. It looks like a prop. It is the second number lock in the level and the only place 2120 goes. If you have read four symbols and cannot think where to use them, the answer is the machine on the counter, not the panel on the wall.
The four plates. They are small and they sit in the dark beside the display, and the recording has to step in close to read them. If the till is blank, look at the wall beside the shoes rather than at the shoes — but take the digit order off the till screen itself, not off the wall.
The shoe-box wall. The price stickers make it look like a two-key sort. It is not. ARRANGE LOWER TO HIGHER, and the lower number is the US size.
The third total on the panel. 6+7+5, not 6+7+9. The note's handwriting makes the last digit look like a 9 and the panel will not accept it twice, because 9 is already on 23.
The exit. The glass door needs the key card in hand and used. Tapping the door with the card still in the bag does nothing, exactly like every other door in this game.
What we could not verify: the arrow dial on the golden box. The recording turns it for the better part of a minute and the lid releases, but no rejected position is ever held long enough for us to read what the plate is checking, and there is no note anywhere in the room that refers to it. We have described how to work it rather than printed a sequence we could not read twice. The same caution applies to the four symbol plates beside the display: our two reads of that wall disagree on the order they hang in, so we publish the symbols and the till code (2120) and leave the mapping between them out of the guide. Treat 2120 as the code that worked in this recording, not as a rule we could prove.
Chapter 2 levels.
Chapter 2 runs twenty-six rooms under the name No Honor Among Thieves. The grid below shows what is written up so far.
Chapter 2 · No Honor Among Thieves26 of 26 with full written steps · 26 with a video
What is the arithmetic box answer in Rooms & Exits Chapter 2 Level 17?
96. The grid is 1 4 5 / 2 5 12 / 3 6 21 / 8 11 with the last cell empty, and the rule is multiply the first two numbers and add the first one again: 1×4+1=5, 2×5+2=12, 3×6+3=21, so 8×11+8=96. The game prints the rule on a note beside the box. Type 96 and press the green arrow.
How do you solve the 31 / 23 / 18 number panel?
Drag a line from each number in the left column to the total it belongs to. 20 + 11 = 31 and 14 + 9 = 23 are written on the note pinned beside the panel; the last total, 18, takes the three numbers that are left over — 6, 7 and 5. Seven numbers for three totals means the third answer is forced once the first two pairs are taken.
What is the till code in the Shoe Store?
2120. The till shows four symbols across the top — a star, a circle, a flower and a bow — with a four-box digit field under them, and those are the same four symbols as the framed plates beside the shoe display. Enter 2, 1, 2, 0 and the cash drawer springs open. Our two reads of the plate wall disagree on the order the plates hang in, so this page gives you the four digits rather than a symbol-to-digit mapping we could not confirm twice.
What order do the shoe boxes go in?
Lowest size to highest. The game prints ARRANGE LOWER TO HIGHER across the wall, and the ten boxes are labelled US 4, 4.5, 5, 5.5, 6, 6.5, 7, 7.5, 8 and 8.5, with four price stickers between them: $120, $139, $150 and $165. Sort by the US size, not by the price.
What are the symbols on the shoe-store note?
Five, left to right: a star, a club, a triangle, a crescent moon and a diamond. You only see them after you combine the pencil with the piece of paper in the inventory. That row is the code for the five-symbol lock on the red locker in the stockroom.
Where do I get the key card to leave the Shoe Store?
From the display stand after you place the sneaker on it. Take the sneaker off the pedestal, combine it with the shoelaces from the shoe-to-sole board, then use the finished sneaker on the stand. It releases a key card; use that on the glass exit door.
How long does Chapter 2 Level 17 take?
The recording finishes the Shoe Store in 6:59 of level time for a +5 coin reward. Nothing is timed and there is no fail state, so the only thing that really costs you time is entering the till code before you have read the four symbols off the display wall.
Do I need to finish everything in the shop to leave?
No. Once the key card is in your hand the glass door opens, and the sandals, the shoes, the broom, the brush, the dustpan, the hammer and the piggy bank are all optional. They feed other puzzles inside the level, not the exit.
 GridPaw
 Shikaku
 Akari
 Kakuro
 Nonogram
 Nurikabe
 Pictomino
 KenKen
 Binary
 Star Battle
 Hashi
 Slitherlink
 Murder Sudoku
 Meowdoku
 Crazy Cleanup