Rooms & Exits Chapter 2 Level 12 Walkthrough: Jewelry Store
Unofficial fan-made guide. Not affiliated with Webelinx Games, the developer of Rooms & Exits: Escape Room Games.
Rebuilt frame by frame from two independent recordings of the current build — a 9:13 playthrough extracted at one frame per second (four frames per second through the exit door) and a 7:28 playthrough used as a second read. Every code, counter and door digit printed here was read off the screen at least twice, and where our two recordings disagree — the four green door panes settle on a different set in each run — the page says so instead of picking one; anything that could not be read twice is listed under "What this page could not verify" rather than printed as a fact. On-screen text was read with optical character recognition on the raw frames, not typed by hand, and the step timestamps point at the exact second in the embedded video.
Chapter 2 · No Honor Among Thieves26 of 26 with full written steps · 26 with a video
Quick answer
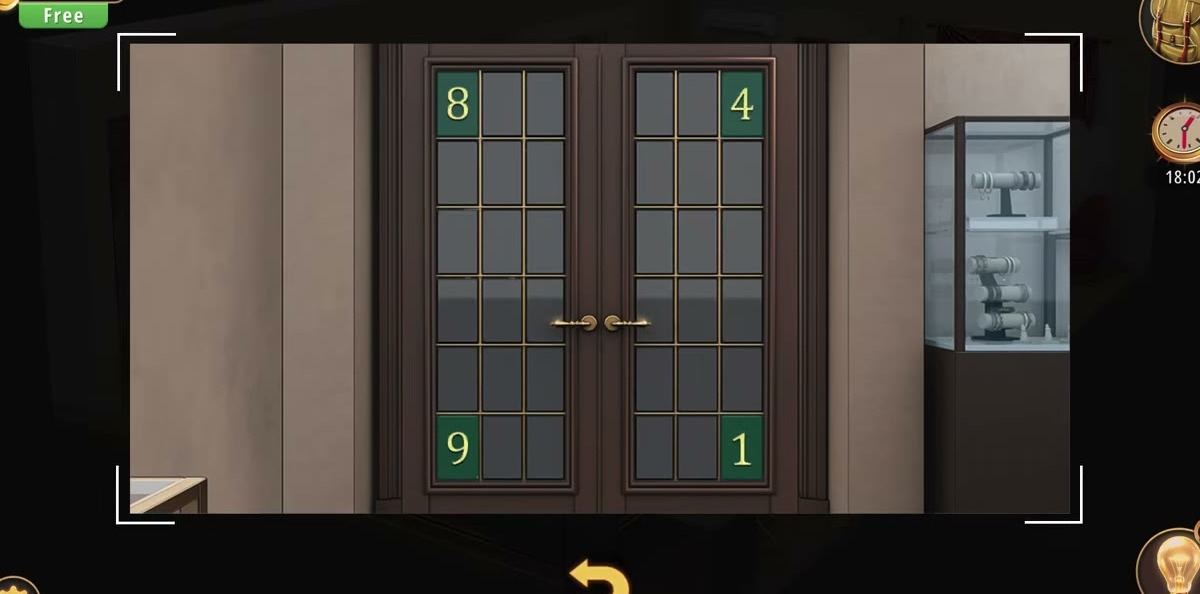
The exit code is the four digits printed into your finished watch jigsaw, entered on the four green panes of the double door — our two recordings read 8 · 4 · 9 · 1 and 8 · 6 · 9 · 1, so the set is not fixed between runs. Finish worth +50 coins.
Open the drawer under the counter → Key. Take the Wallet off the display case → Dollar bill.
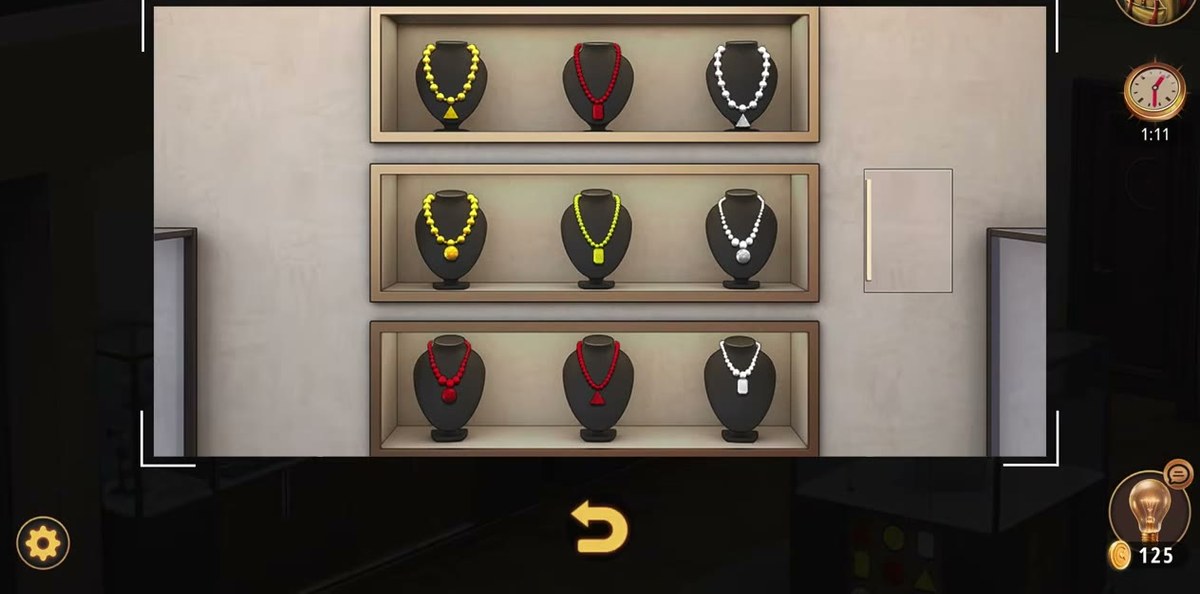
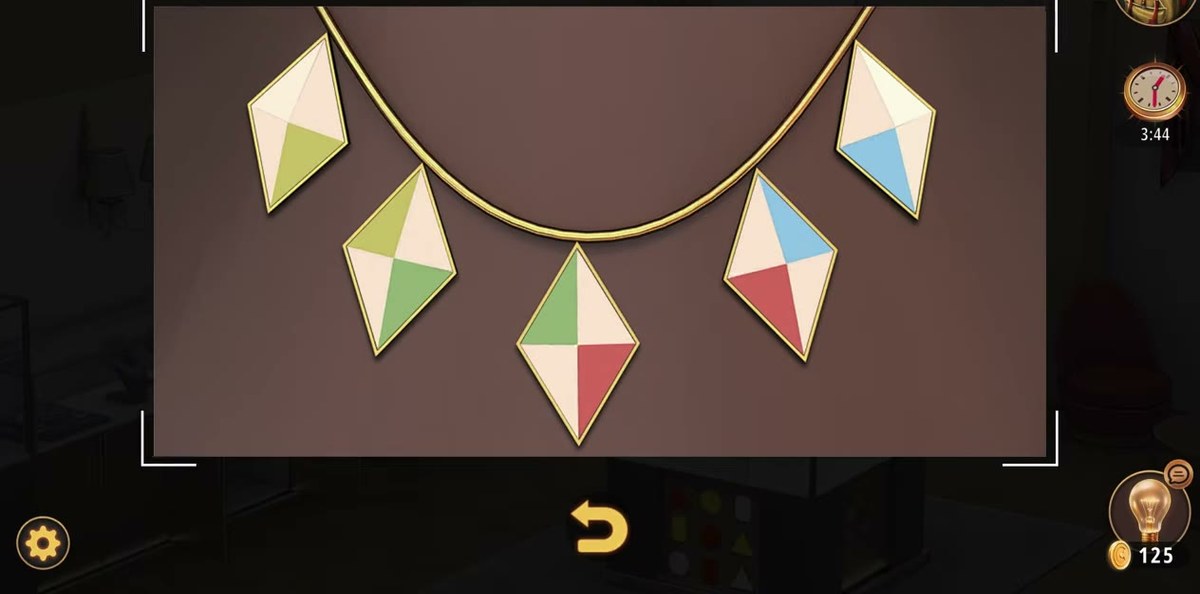
Clear the necklace wall (nine necklaces, three rows of three) and the five-pendant necklace colour puzzle.
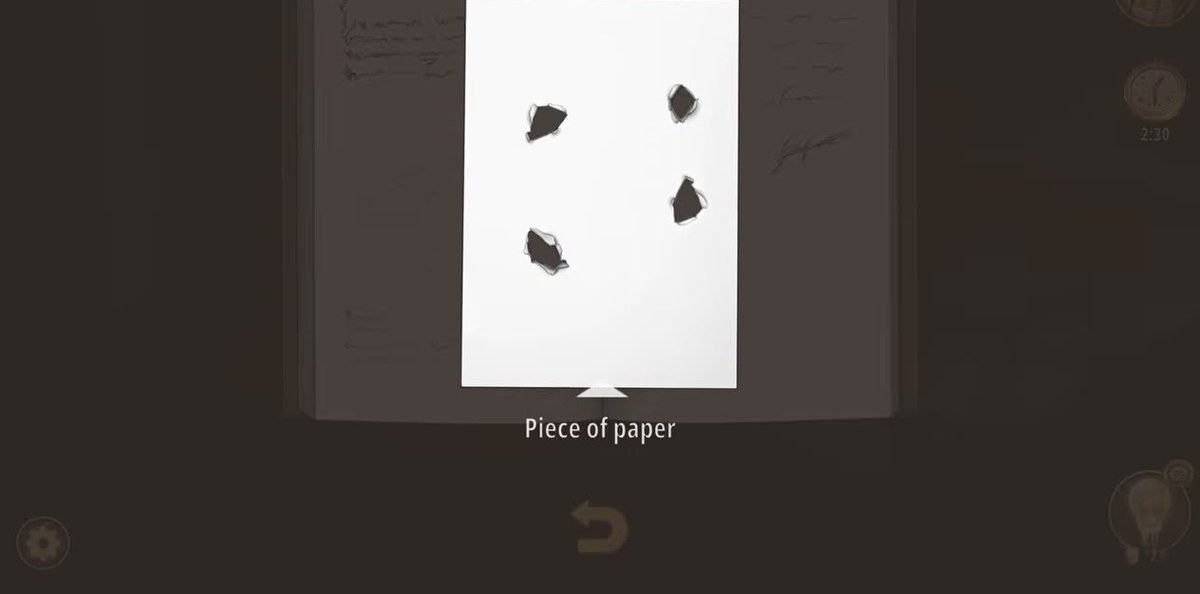
Collect the seven watch puzzle pieces — the counter on the watch panel runs 5/7 → 7/7. The last one is cut from the Piece of paper with the Scissors.
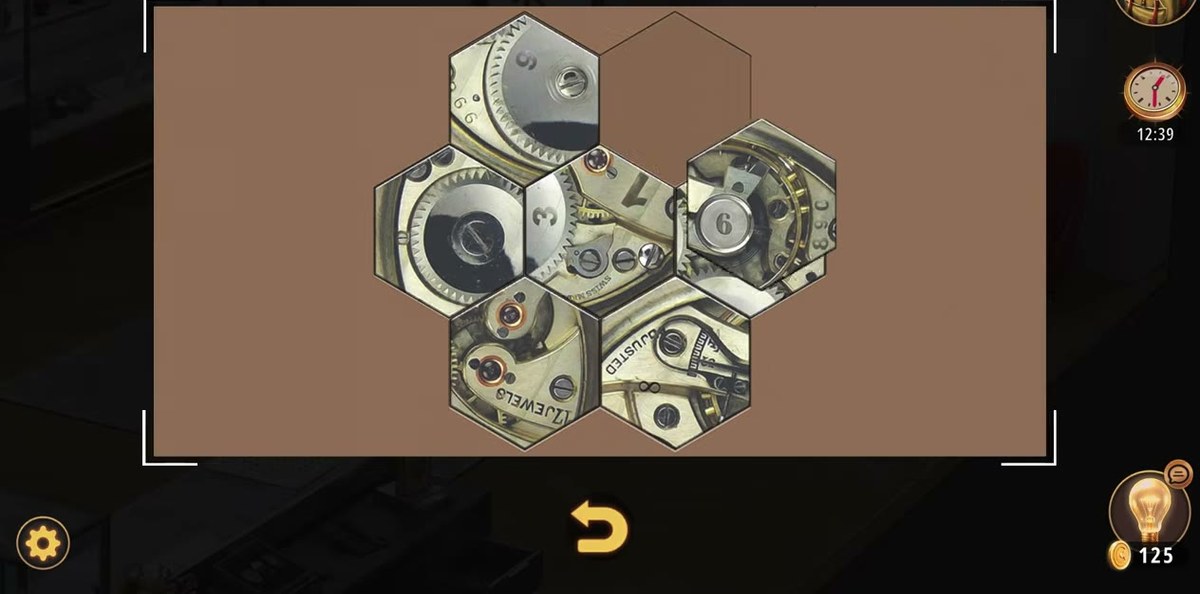
Assemble the hexagon jigsaw; the finished picture carries four digits printed into the artwork — those are your door code.
Set the four green door panes to those four digits. In our first run they settled on 8 / 4 / 9 / 1, in our second on 8 / 6 / 9 / 1 — same panes, one digit apart.
Use the Key from the scale drawer on the door → +50 coins.
What this level actually is.
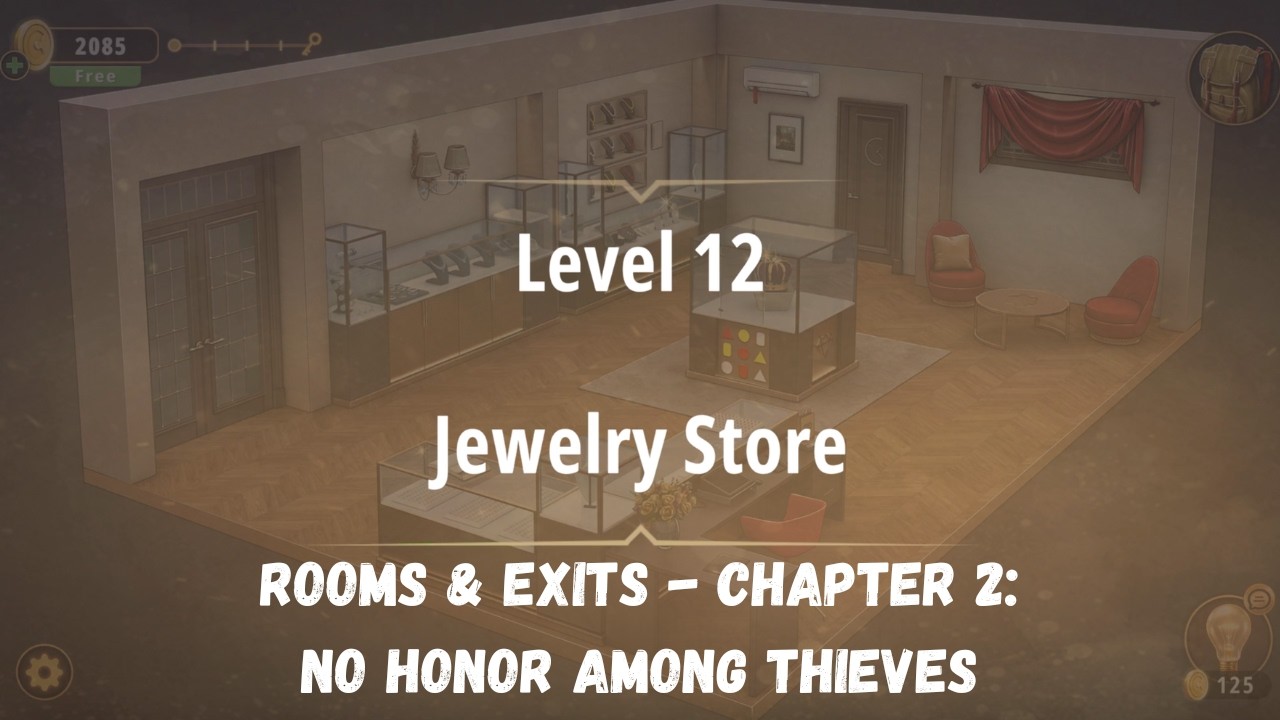
The Jewelry Store is the twelfth room of Chapter 2 and the biggest one so far: not a single puzzle box with a door on it, but a working shop with a till, a scale, four kinds of display case, a lounge and a wall clock. The camera is isometric and fixed, the room is one open floor, and almost everything you can see is either a container or a lock. That is what makes it feel enormous on a first run — there is no corridor telling you where to go next, and the level never blocks you from walking past the one object that matters.
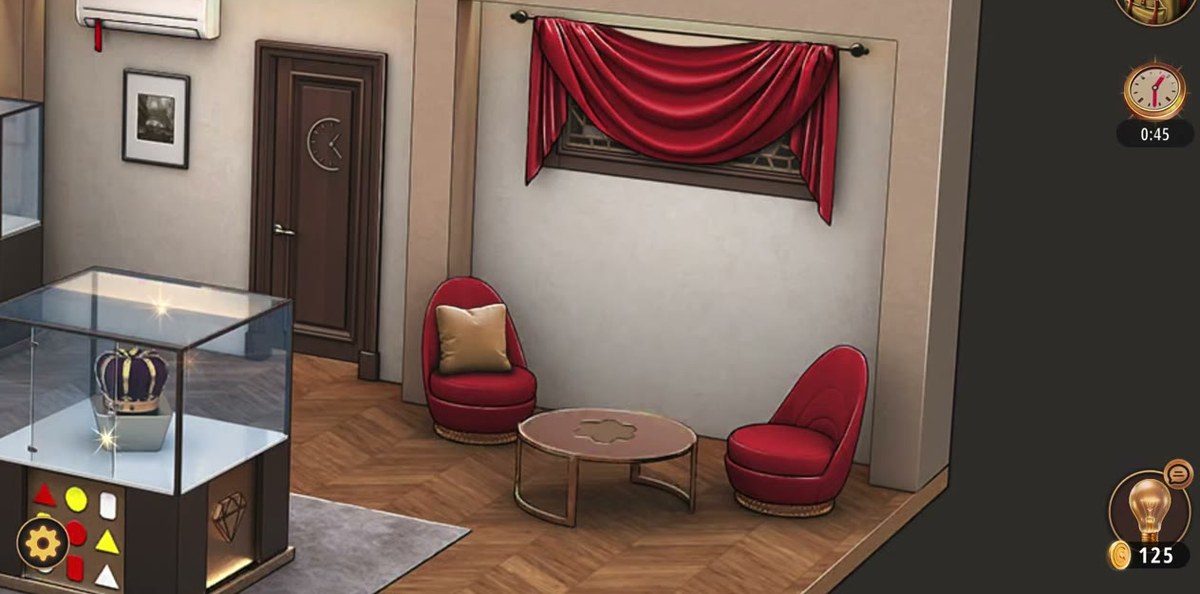
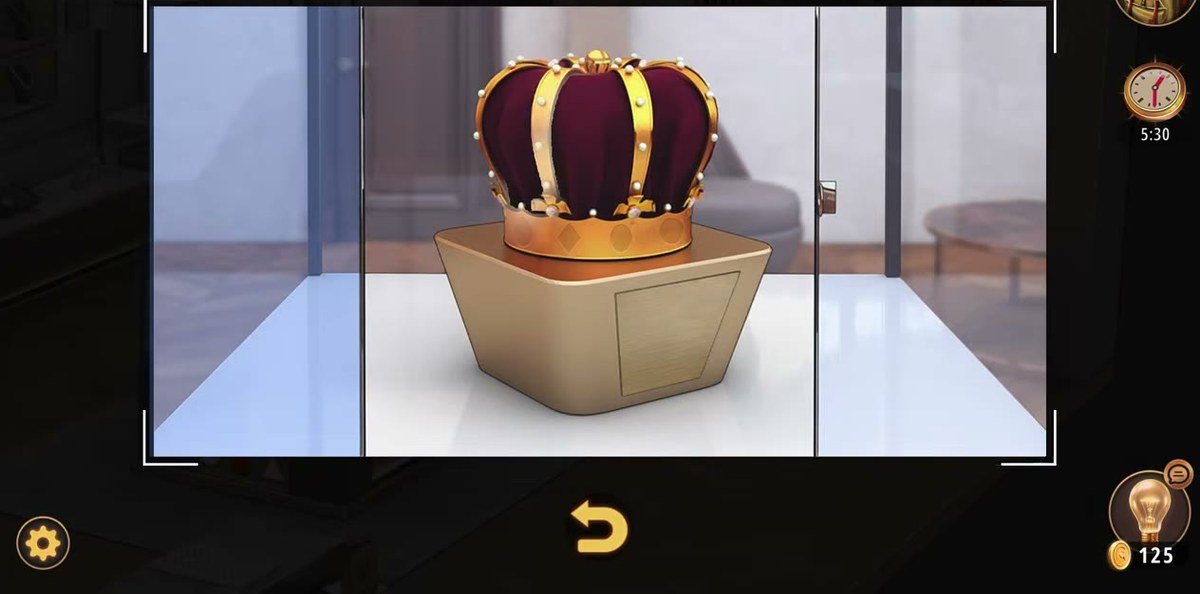
The layout, left to right and front to back. Along the left wall: a run of low glass display counters with drawers underneath, lit from below, and a tall narrow case standing between them. In the middle of the floor: the crown case, a cube of glass on a dark plinth, with a gold crown on a gold pedestal inside and coloured geometric panels on the plinth's face. Behind it, a dark wooden door with a clock-face emblem on it, an air-conditioning unit above and a framed picture beside it. Front centre: the service counter with a till, a digital scale, a mouse and a small tray of rings, with a red office chair behind it. Right: a lounge of two red armchairs around a round coffee table, a window with heavy red curtains, and a cuckoo clock on the wall. The wall rack of necklaces is on the back wall, and the double doors you leave through are on the same wall as the crown case, at the front.
Two things about the room shape the whole level. First, the shop is full of things that look like clues but are containers: the till, the scale, the jewellery boxes, the display drawers. Second, the actual answer for the exit is not written anywhere in the room — it is printed into a jigsaw you assemble yourself. That is the single most important thing to understand before you start: you are not looking for a code, you are building one.
The map: what is where.
If you only read one part of this page, read this. Every interactive object in the Jewelry Store, and what it is for.
Object
Where
What it gives you
Cash register
Service counter, front centre
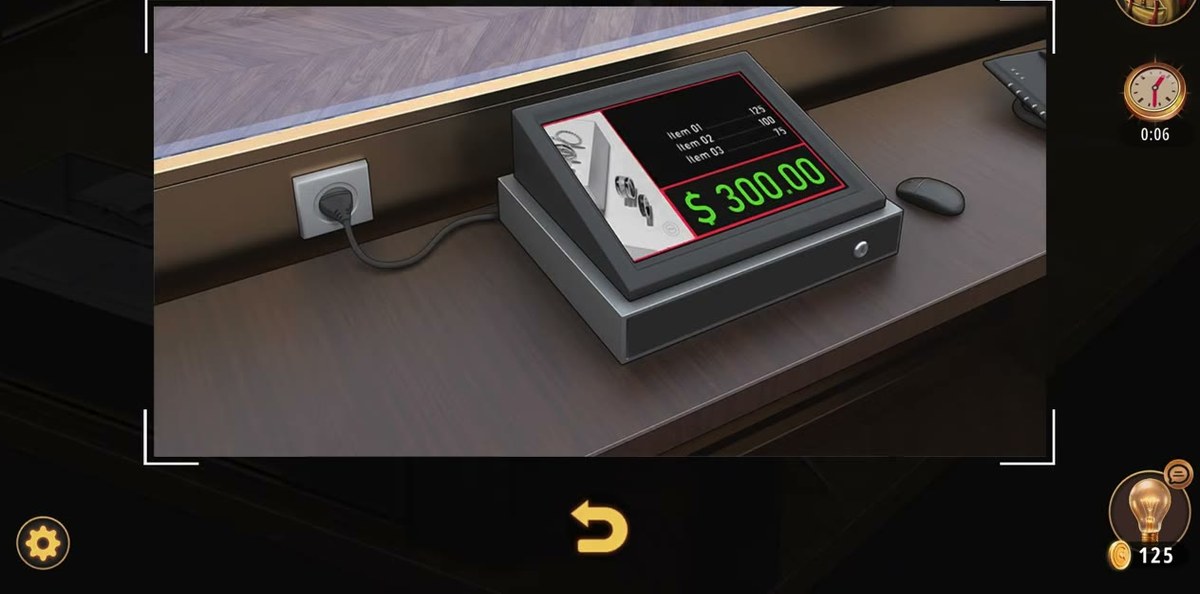
A receipt-style panel with three line items and a $300.00 total. Scene dressing: it never takes an input.
Digital scale
Counter, right of the till
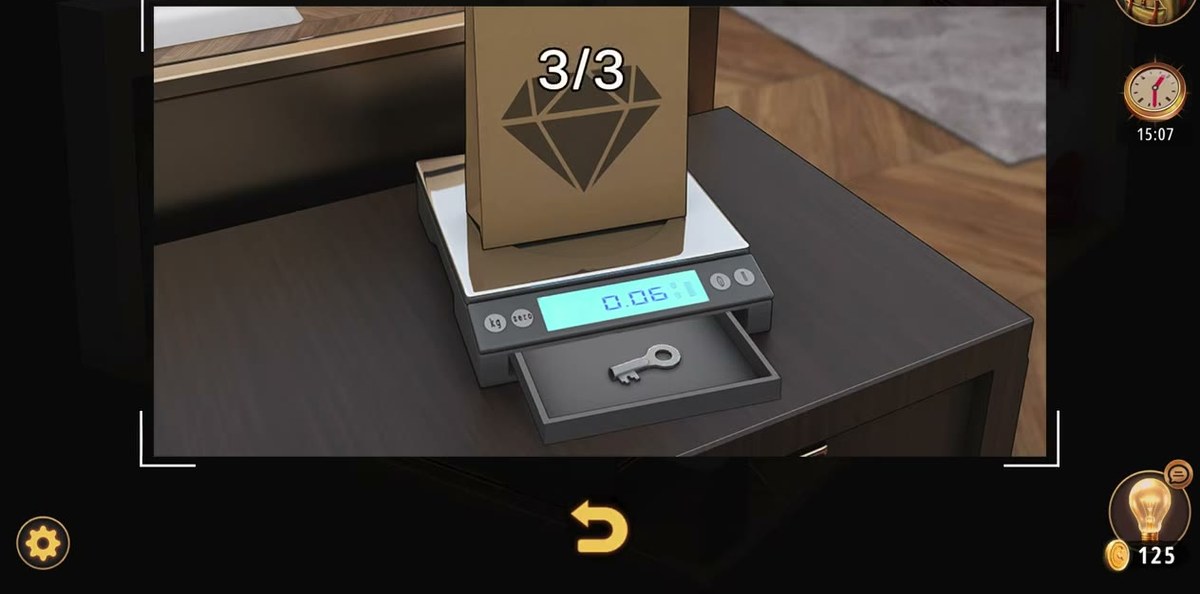
A weighing puzzle. At 3/3 its drawer opens with a Key inside.
Counter drawer
Under the till
The first Key of the level.
Display case
Left wall, mid-height
Wallet → Dollar bill (a $100 note).
Necklace wall
Back wall
Nine necklaces, three rows of three: the colour-position puzzle.
Crown case
Centre of the floor
The crown, and the jewel you take away from it.
Cuckoo clock
Right wall
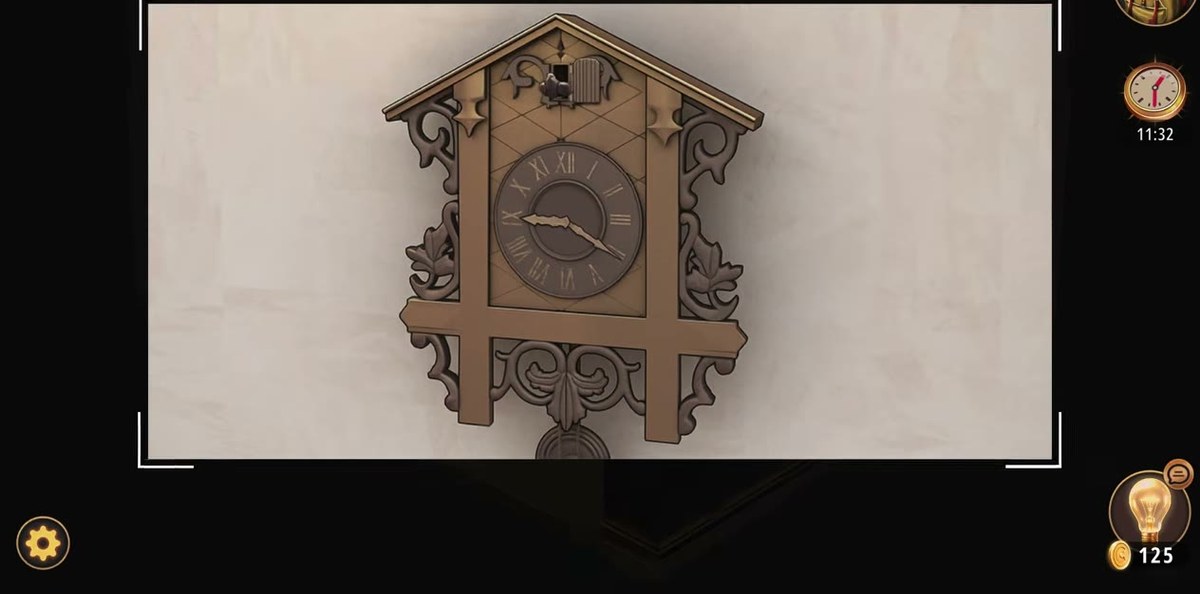
Roman-numeral face and a pendulum — a time clue, not a lock.
Watch display
Right of the crown case
Watch boxes; one is empty, and a 5/7 counter tracks your pieces.
Hexagon jigsaw
Table between the armchairs
Seven tiles of a watch mechanism: the source of the door code.
Double door
Front wall
Four green panes on dials plus a key lock: the exit.
Step by step.
Step 1 · 0:04Read the room before you tap anything
The opening wide shot is the only clean view you get of the whole floor, so use it. Left: counters, drawers, a tall narrow case. Centre: the crown case on its plinth, the wooden door behind it, the air-conditioning unit above. Front: the service counter with the till, the scale and the chair. Right: two red armchairs, a round table, the curtained window, the cuckoo clock. Back: the necklace rack. The double door at the front is the exit, and in our run it stays shut until the last two minutes, so treat it as scenery for now.
Step 2 · 0:08The till, the scale, and the difference between them
Tap the till and the screen fills with a receipt panel: three line items numbered Item 01, Item 02 and Item 03, two prices visible, and a total of $300.00. It is the most code-looking thing in the room and it is not a code — nothing in either recording types it anywhere. Tap the scale next to it and you get a proper puzzle: a pan, a kilogram readout sitting at 0.00, and a small brown box with a diamond logo already on the pan. Leave the scale alone for now; you will come back when you have something worth weighing.
Step 3 · 0:16Open the drawer under the counter: the first Key
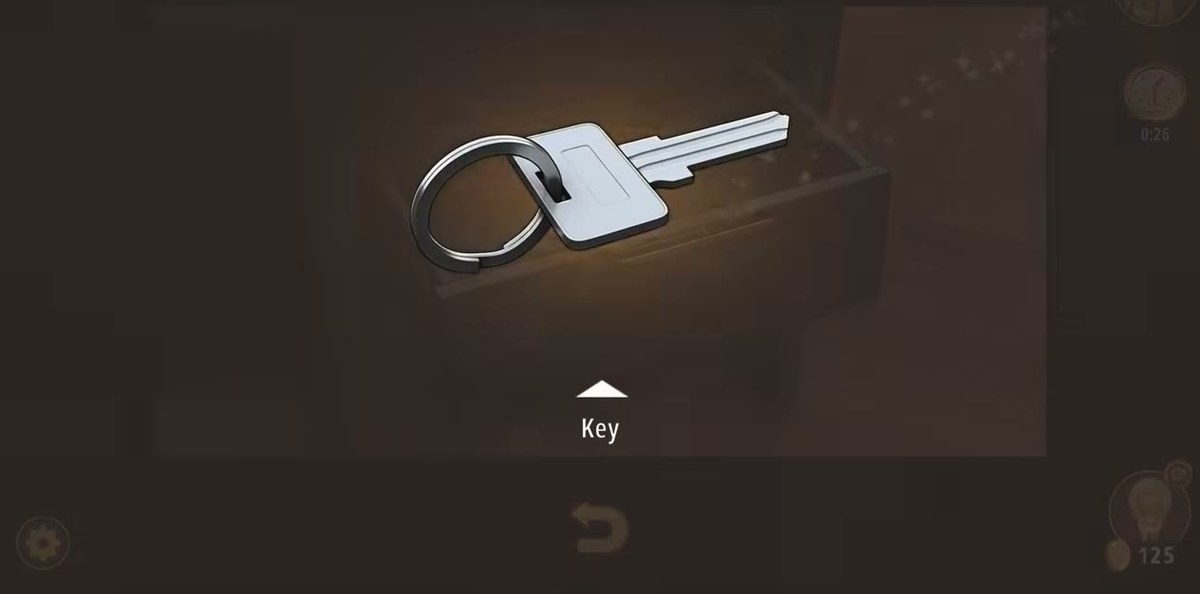
The drawer under the display counter is already slightly out when you zoom it, and there is a single silver key with a ring on the end lying on the dark lining. Tap it, and the game drops a label under it reading Key before it goes into the bag. This is the first of two keys in the level and the only one you can pick up without solving anything — it is the level's way of teaching you that drawers open.
Step 4 · 0:27The Wallet on the display case, and the $100 note inside it
On the glass top of the left-hand display case there is a red wallet. Tap it and it goes into the bag labelled Wallet; examine it and you are looking at a $100 note, printed with the serial-style lettering and the words ONE HUNDRED DOLLARS. The note stays in the inventory as Dollar bill. Money is a running motif in this room — the till shows $300.00, the wallet holds a hundred — and every one of those figures is set dressing. The only number that opens anything is the one you build yourself later.
Step 5 · 0:42The necklace wall: nine busts, three colours, one colour rule
The back wall holds nine necklaces on nine black busts, three rows of three. They come in three colour families — gold-yellow, red and white-silver — and the rack lets you swap any two of them. The object of the puzzle is colour placement, not necklace design: a colour that sits on one side has to be answered by the same colour on the necklace directly opposite it. The efficient way in is to sort by family first, because swapping two necklaces that share a colour family is almost always wasted: pick the odd one in each row out, park it opposite its match, and work outward. Trying to memorise nine designs at once is what makes this rack feel impossible.
Step 6 · 2:20The five-pendant necklace: four triangles per pendant
The second colour puzzle in the room hangs on a chain rather than sitting on a bust: five rhombus pendants, each split into four triangles by a gold cross, coloured green, red, blue and cream. Click a triangle and it rotates through the palette. The rule the recordings show is opposition again — the colour on the lower half of one pendant has to be answered by the same colour on the upper half of its neighbour — so read the chain as five pairs rather than five separate objects. This is the puzzle people bounce off hardest, because the colours are muted and the change is a single triangle at a time; work left to right and finish each pendant before touching the next one.
Step 7 · 2:02The sketchbook on the counter is the colour key
Before you touch the pendants, open the book lying on the counter. It is a designer's sketchbook: jewellery shapes drawn in pencil on both pages, the sort of thing you would walk past in any other room. It is the reference sheet for the colour work in this room — the pendant shapes and the plinth panels are drawn in it — and it is the only object in the Jewelry Store that tells you something without giving you anything. If the pendant puzzle feels like guesswork, this is the page you are missing.
Step 8 · 3:20The watch display and the 5/7 counter
Right of the crown case there is a watch counter: an open black box holding classic watches, and three smaller boxes beside it, one of which is empty on purpose. Tap the panel above them and you get the level's progress meter — a watch icon and a fraction. It reads 5/7 the first time you open it, 6/7 for most of the run and 7/7 on the frame where the last piece goes in. That fraction is the single most useful thing in the room: it tells you how many pieces are still hidden and stops you hunting when there are none left.
Step 9 · 4:58The cuckoo clock is a time clue, not a lock
The wall clock above the lounge is a carved cuckoo clock with a Roman-numeral face, a pendulum and a bird in the door. It is fully interactive and it is not a code panel: the hands can be read and the pendulum can be looked at, and none of it takes a number. What it does give you is a time, and the room has two other clocks in it — the emblem on the wooden door and the watches on the counter. If a lock in this level ever asks you for a time, this is where the time comes from.
Step 10 · 5:06The briefcase with the flame mark
On the shelf under the counter there is a black briefcase with a printed mark on the front: a red flame, a plus sign and a silver disc. Its clasp is a three-wheel number display. In our footage the player spins the wheels through 1-2-1, then 0-1-2, then a 5-5 pair before leaving it, and the recording never shows the accepted combination twice, so this page does not print one. If you are stuck here, this is the one lock in the Jewelry Store whose answer we could not confirm.
Step 11 · 5:18The hexagonal piece with the banknote portrait
The first puzzle piece you pick up is not obviously a puzzle piece. It is a hexagon of printed paper showing part of a banknote portrait — the same note design as the $100 in the wallet — sitting in a dark recess where you would expect to find a coin. That is the joke of the level: the watch jigsaw is not a picture of a watch at all, it is a picture of money with a watch mechanism printed over it. Once you know that, the rest of the pieces read as banknote fragments rather than gears.
Step 12 · 5:21The hammer and the framed watch picture
The Hammer is used on the framed picture of a golden wristwatch on the wall — not on the doors, and not on the clock. Two hits, top-left corner then bottom-left corner, break the frame away and leave a clean pentagonal cavity in the plaster behind it. That cavity is the only pentagon-shaped hole in the room, and it is where the piece from Step 11 came from. If you have been swinging the hammer at the wooden door with the clock emblem, you have been hitting the wrong surface.
Step 13 · 5:45Scissors plus Piece of paper equals the seventh piece
This is the step that makes the level click. The Piece of paper in your bag is a plain white sheet with four punched holes, and it is not a clue — it is raw material. Open the inventory, select Scissors, select Piece of paper, press Combine: the sheet is cut down into the missing Puzzle part, the inventory flashes, and the watch counter jumps to 7/7 on the same frame. The four holes are the ones the scissors use as a guide, which is why the sheet looked like a code sheet when you first picked it up at 2:01.
Step 14 · 5:54Assemble the seven-tile watch jigsaw
Take every piece to the table between the red armchairs. The board is seven hexagons, and the picture they make is the inside of a mechanical watch: brass wheels, ruby jewels, and three strings of text — SWISS MADE along the top, 17 JEWELS across the middle, ADJUSTED at the bottom. Do not try to place pieces by the artwork alone. Use the text as a spine: the three word-bands each cross two or three tiles, so once you have a tile carrying a fragment of SWISS MADE you know it belongs on the top row, and the same for the other two bands. Our recording goes from two empty hexagons at 6:20 to a complete picture at 6:35 doing exactly that.
Step 15 · 7:39The watch box: five coloured studs, starting at red
Under the watch in its box there is a row of five pentagon studs — red, blue, yellow, red and green. They are the lock on the box: press them in the right order and the lid gives up the Cross, a gold cross that goes straight into the bag. The order is a colour sequence rather than a number, and the sequence is not written on the box; the one fixed point we can confirm is that it starts at the red stud on the left. A wrong press resets the row, so commit the order before you start tapping.
Step 16 · 8:03The watch boxes open
With the cross in the bag, the watch display is no longer a lock. The big black box opens to two silver wristwatches, and the three small boxes beside it — one square-faced, one white, one black — open in the same pass. This is the only part of the Jewelry Store that behaves like a reward screen: nothing here takes an input, and nothing here is needed for the door. It exists to show you what the jigsaw was a picture of.
Step 17 · 8:15The crown case, the ribbon and the remote
The crown case is a glass cube with a keyhole lock on its right-hand edge, not a number wheel, and the crown on its pedestal is the last thing you look at before the exit. The Ribbon in your bag came off the air-conditioning unit earlier: the Remote is dead when you find it, it works once you Dismantle the Camera for its Batteries, and switching the AC on drops the red band into your hands. The crown itself takes the jewels you have collected — the Jewel in your inventory is what comes back off it.
Step 18 · 8:30Fill the scale to 3/3 and take the second Key
Back to the counter. The scale wants three items on the pan: put them on one at a time and the counter above the display steps 1/3, 2/3, 3/3. On 3/3 the drawer under the scale slides open and there is a silver key inside it. In our footage the pan ends up holding the brown diamond-logo bag and the readout sits around 0.06 kg — the weight is being displayed, not asked for, so you never have to guess a number here. This is the key you leave through the door with.
Step 19 · 8:50Read the four digits off the finished jigsaw
Go back to the completed picture. With all seven pieces down, four digits are printed into the artwork, and they are the ones you need. Nothing frames them for you and there is no magnifier — the reason players finish the jigsaw and still stand at the door is that they expect a separate clue to appear, and it does not. The code is the picture, and it is not the same picture every run: our two recordings ended on 8 · 4 · 9 · 1 and 8 · 6 · 9 · 1. Write your four digits down before you close the puzzle — the panes are dialled one at a time and you will be walking back and forth otherwise.
Step 20 · 8:58Set the four green panes, then use the Key
The exit is a dark wooden double door, three by three glass panes on each leaf. Four of those panes are green instead of glass, and each one carries a gold digit that changes when you tap it: they are dials, not a display. Cycle each pane to one of your four jigsaw digits — in our first run the panes settled on top-left 8, top-right 4, bottom-left 9, bottom-right 1 on the frame before the door gave way; in our second run the same four panes were dialled to 8 / 6 / 9 / 1. The door does not open on the code alone: open the inventory, select Key, press Use and then tap the door. It swings open, the camera pulls back, and the results panel lands with +50 coins and 18:11 on the clock.
Step 21 · 9:12The results screen: +50 coins
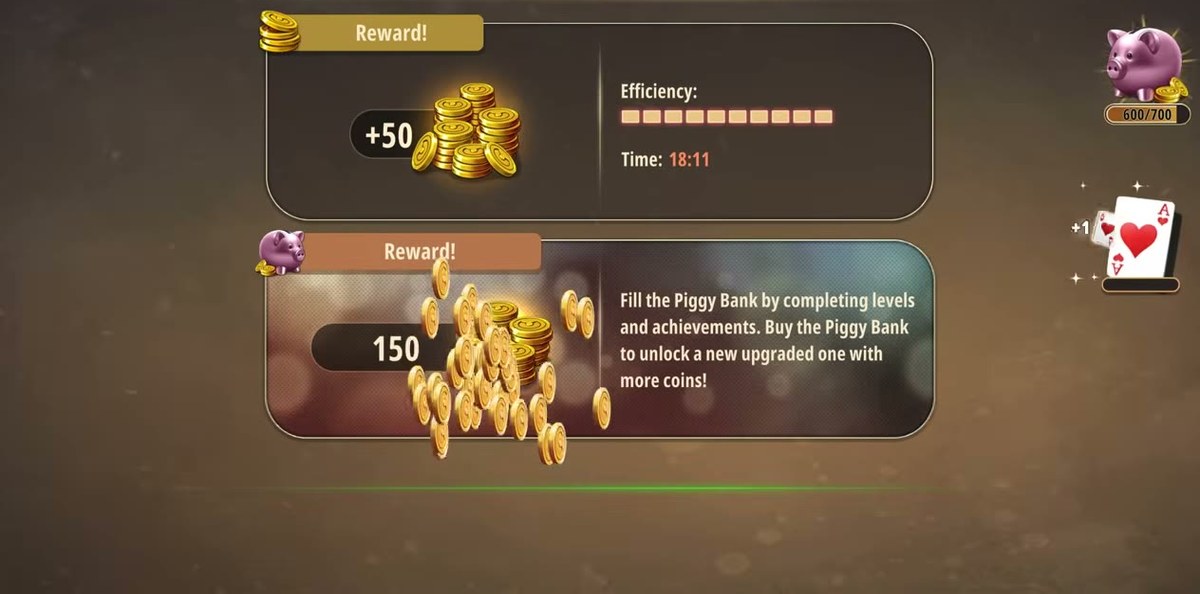
The level ends on the standard Rooms & Exits results panel: LEVEL COMPLETED, a coin stack with +50, an Efficiency bar and a Time field reading 18:11 — the in-game clock ticks 18:01 to 18:08 in the seconds before the door opens, so the panel is reading the same timer. The piggy-bank strip on the right reads 600/700. Nothing you found in the shop is carried forward, so if you were saving the Dollar bill for a rainy day, it is gone.
The single most common way to waste ten minutes in the Jewelry Store is to treat the exit as a keypad. It is not. The double door has two independent locks stacked on top of each other, and they are solved in a fixed order.
The four green panes. Four of the eighteen glass panes are green and carry a digit each. Tapping a pane advances its digit; the door accepts the four digits your jigsaw prints (8 / 4 / 9 / 1 in our first run, 8 / 6 / 9 / 1 in our second). This is a code lock with no keypad and no display — the panes are the display.
The key lock. With the panes set, the door still will not move. The key from the scale drawer releases the latch, and only then does the leaf swing.
In the recording the order is unmistakable: the panes are cycled to their four values at 8:58, the inventory is opened at 9:04 with Key selected, the door is tapped, and the level completes at 9:12. If you have the code and the door still feels dead, you are missing the key, not the number. And if you have the key and the door still feels dead, you have one of the four panes on the wrong digit — a single wrong pane is enough to hold the whole door.
Where people get stuck.
The till. A screen showing Item 01, Item 02, Item 03 and $300.00 looks exactly like a puzzle input and is not one. There is no keypad anywhere in this room that takes a dollar amount, and the $100 note in the wallet is not a payment. If you are hunting for a place to type 300, stop.
The paper. The Piece of paper reads as a torn page from the sketchbook, and its four holes read as a template. It is neither: it is the raw material for the seventh jigsaw piece — scissors plus paper, in the inventory, and the watch counter hits 7/7. Players who try to line it up against the door are chasing a step that does not exist.
The jigsaw before the pieces. The board will let you work on it with five pieces in the bag, and the picture will look nearly done, but the digits only appear once all seven are placed. Watch the 5/7 → 7/7 counter instead of trusting your eye.
The necklace rack. Nine necklaces, three colours, and a swap interface with no undo. Sort by colour family before you start moving anything; swapping two same-family necklaces is the move that turns a five-minute puzzle into twenty.
The pendants. Each pendant is four triangles, and every click changes exactly one of them. It is slow by design. Do not rotate a pendant you have already finished to "check" it — you will knock it out of position and have to rebuild it.
The key. There are two keys in this level and they are visually similar: one from the counter drawer at 0:16, one from the scale drawer at 8:30. Only the second one is the exit key. If the door refuses you with a key in the bag, check which key you are holding.
What this page could not verify: four things. (1) The three coloured-shape panels on the crown case plinth are clearly a reference for the colour puzzles, but we could not read the exact mapping from the footage — the pattern is small and partly in shadow. (2) The briefcase's three-wheel lock: the wheels are seen at 1-2-1, 0-1-2 and 5-5, but no accepted combination is legible twice, so no number is printed for it. (3) A three-digit sign hangs on the wall behind the red armchairs and our two crops of it disagree — one reads 137, another 187 — so treat it as unread and do not build a solve around it. (4) The four digits engraved into the finished jigsaw artwork: the engraving is too small to read cleanly in our capture, and our two runs ended on different sets (8 · 4 · 9 · 1 and 8 · 6 · 9 · 1), so this page sends you to your own picture instead of printing one code that would be wrong for half of you. Everything else here — the counters, the item names, both door sets — was read off the screen at least twice.
Chapter 2 levels.
Chapter 2 runs twenty-six rooms through the mall; the list below reflects what is written up so far.
Chapter 2 · No Honor Among Thieves26 of 26 with full written steps · 26 with a video
What is the door code in Rooms & Exits Chapter 2 Level 12?
There is no single code to copy: the four green panes of the exit door are dials, and the digits you need are printed into the picture you assemble from the seven watch pieces. Our two recordings of this level settled the panes on 8 · 4 · 9 · 1 in one run and 8 · 6 · 9 · 1 in the other — the same four panes, one digit apart — and both runs opened the door once the Key was used. Read the four digits off your own finished jigsaw and dial the panes to those.
Where does the door code come from?
From the watch jigsaw. Assemble the seven hexagonal pieces on the table between the red armchairs and the finished picture carries four digits printed into the artwork; those four digits are the door code. Nothing in the room writes the code out for you — you manufacture it, which is why the exit looks impossible until the jigsaw is done. And because our two runs ended on two different sets, a code copied from any guide is a coin flip: read your own artwork.
How do I open the door — with the code or with the key?
Both. The four green panes take the digits from your jigsaw, and the key from the scale drawer then releases the door itself. In our recordings the panes are set first, the inventory is opened, Key is selected and used, and the door swings open on the results screen. One wrong pane holds the door even with the key in hand.
How many watch puzzle pieces are there?
Seven. The watch panel in the middle of the room counts them for you: it reads 5/7 when you first open it, 6/7 for most of the assembly and 7/7 on the frame where the last piece goes in. The jigsaw itself is seven hexagons showing the inside of a mechanical watch — gears, jewels, and the words SWISS MADE, 17 JEWELS and ADJUSTED.
What is the digital scale for?
The scale on the counter under the till is a container, not a clue. Put items on the pan and a counter above it steps up; at 3/3 the drawer under the scale slides open and hands you a silver Key. Our footage shows the pan holding a brown paper bag with a diamond logo and the display reading around 0.06 kg when the counter is full.
How do I solve the necklace rack?
The wall rack holds nine necklaces on nine busts in three rows of three, in three colour families: gold-yellow, red and white. You swap necklaces pairwise, and the rack is checking colour positions rather than necklace designs — the rule our recordings show is that a colour on one side has to be answered by the same colour directly opposite it. Sort by colour first instead of swapping at random and the rack clears quickly.
What are the five coloured studs under the watch?
They are the lock on the watch box: five pentagon-shaped buttons in red, blue, yellow, red and green under the watch. The order is a colour sequence rather than a number, a wrong stud resets the row, and the first stud in the recorded solve is red. Clearing the row gives you the Cross, not the watch itself.
How long does the Jewelry Store take?
Our full run shows 18:11 on the game's own timer at the results screen, which is the longest room in the first half of Chapter 2. Nothing in the level is timed and there is no fail state, so the only thing that really slows you down is hunting for the exit code before the jigsaw and the paper are in your hands.
What do I get for finishing the Jewelry Store?
The results panel pays +50 coins and shows the level clock at 18:11. Nothing you collected carries over — the necklaces, gems and tools all stay in the shop.
 GridPaw
 Shikaku
 Akari
 Kakuro
 Nonogram
 Nurikabe
 Pictomino
 KenKen
 Binary
 Star Battle
 Hashi
 Slitherlink
 Murder Sudoku
 Meowdoku
 Crazy Cleanup