 GridPaw
 Shikaku
 Akari
 Kakuro
 Nonogram
 Nurikabe
 Pictomino
 KenKen
 Binary
 Star Battle
 Hashi
 Slitherlink
 Murder Sudoku
 Meowdoku
 Crazy Cleanup
Rooms & Exits Chapter 2 Level 11 Walkthrough: DIY Shop
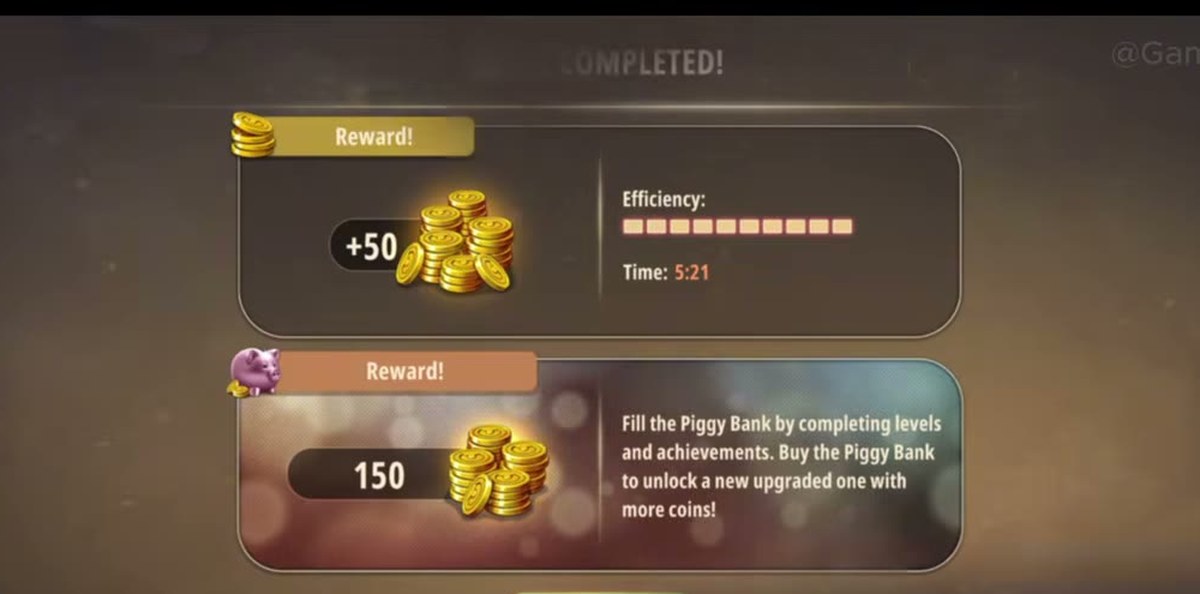
The DIY Shop runs on four numbers and one word: 51432 on the sticky note, 42130 on the five-dial combination lock, GDC on the letter lock and 954 on the tracing paper. Finish worth +50 coins.
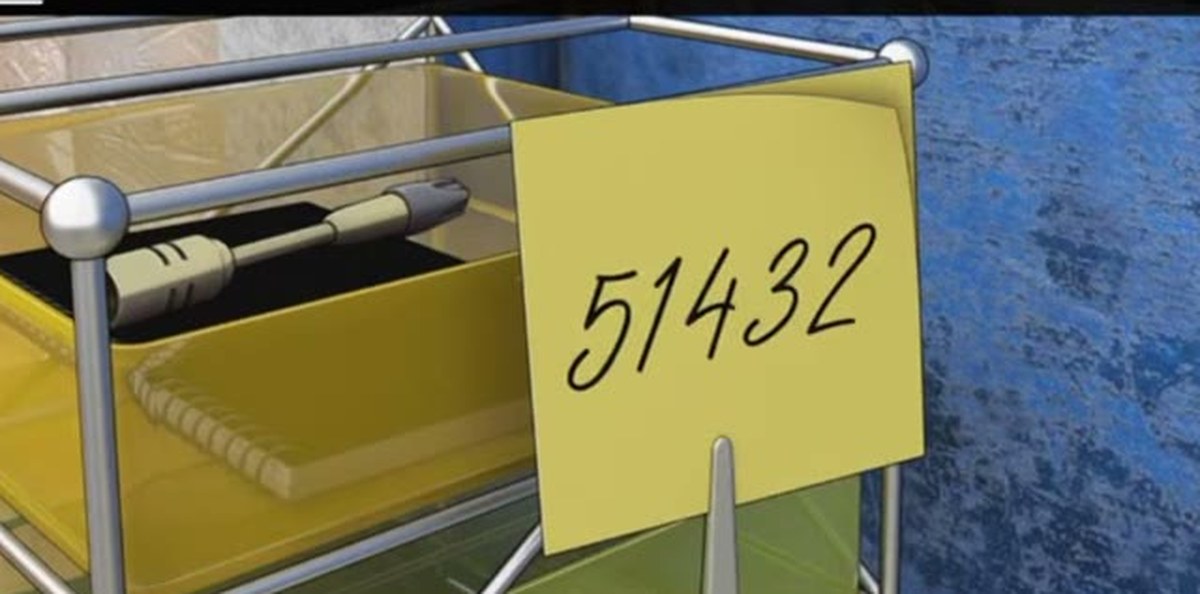
- Read the yellow sticky note clipped to the trolley → 51432.
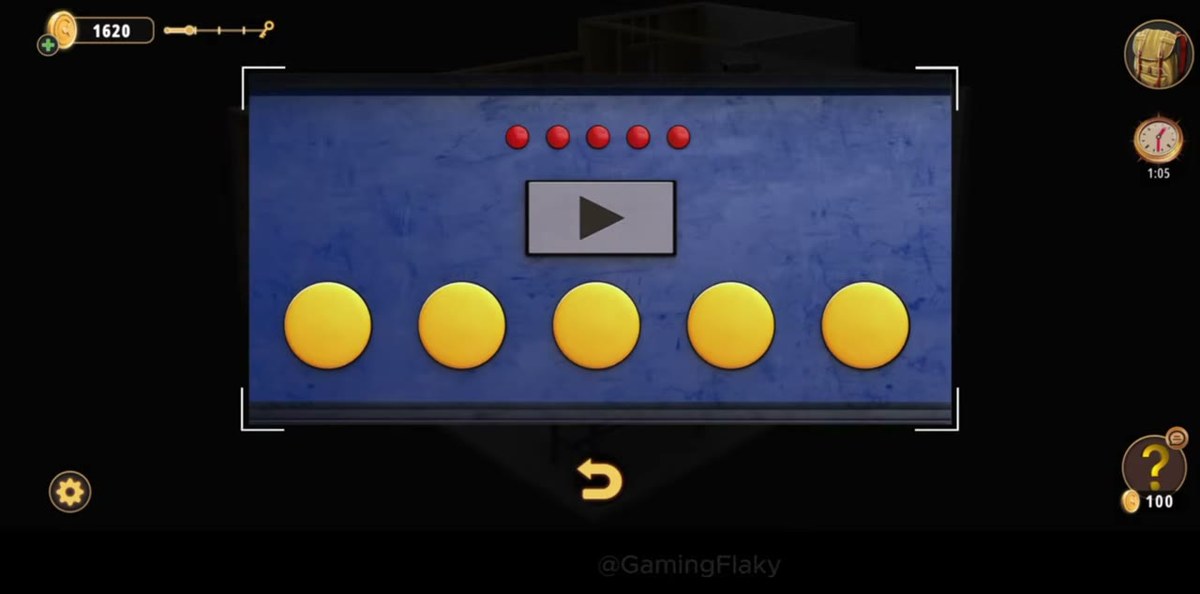
- Press the five yellow buttons on the blue panel in that order (counted 1–5 from the left: 5, 1, 4, 3, 2) → the tool chest drawer opens → Hammer.
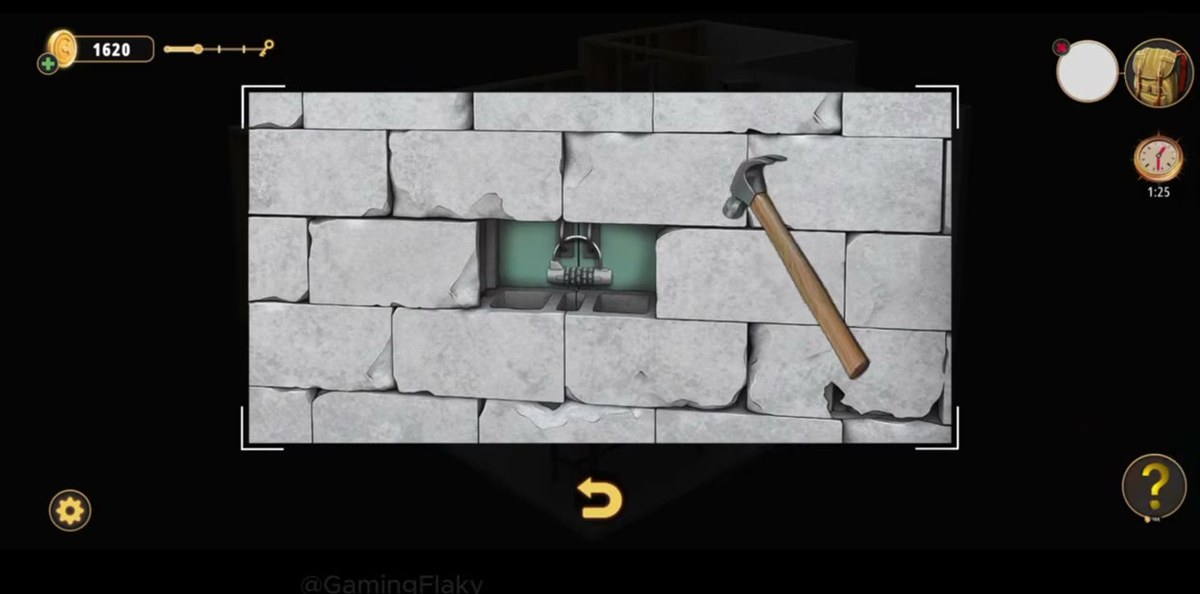
- Hammer the brick wall → a recess with a five-dial combination lock.
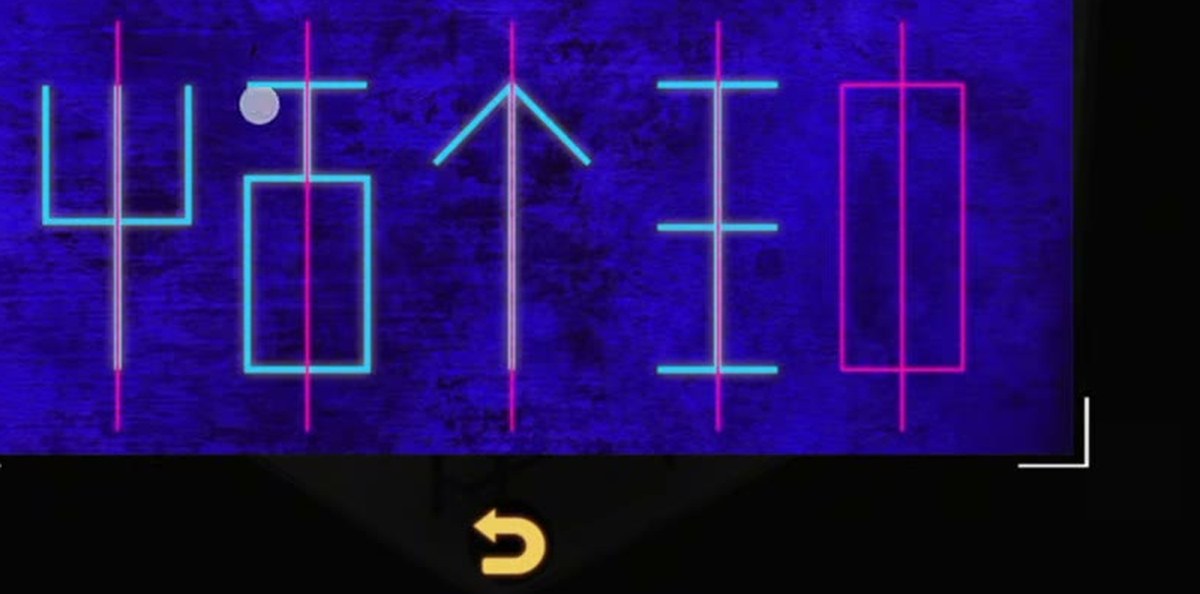
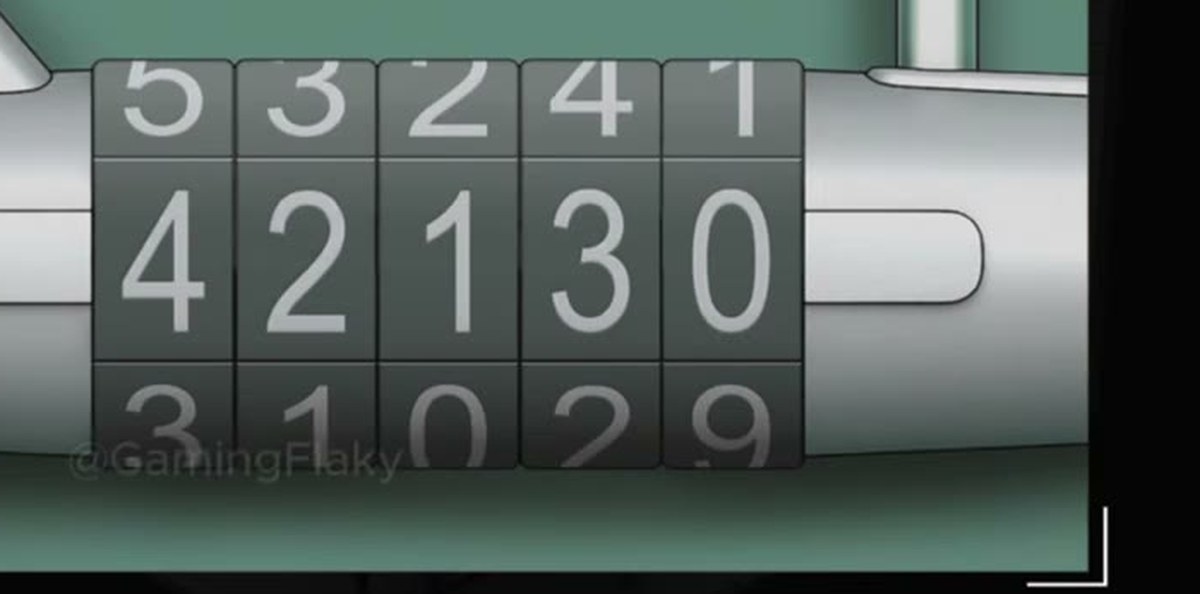
- Use the UV lamp on the blue neon board, then set the dials to 42130 → the green cabinet opens → Blowtorch part.
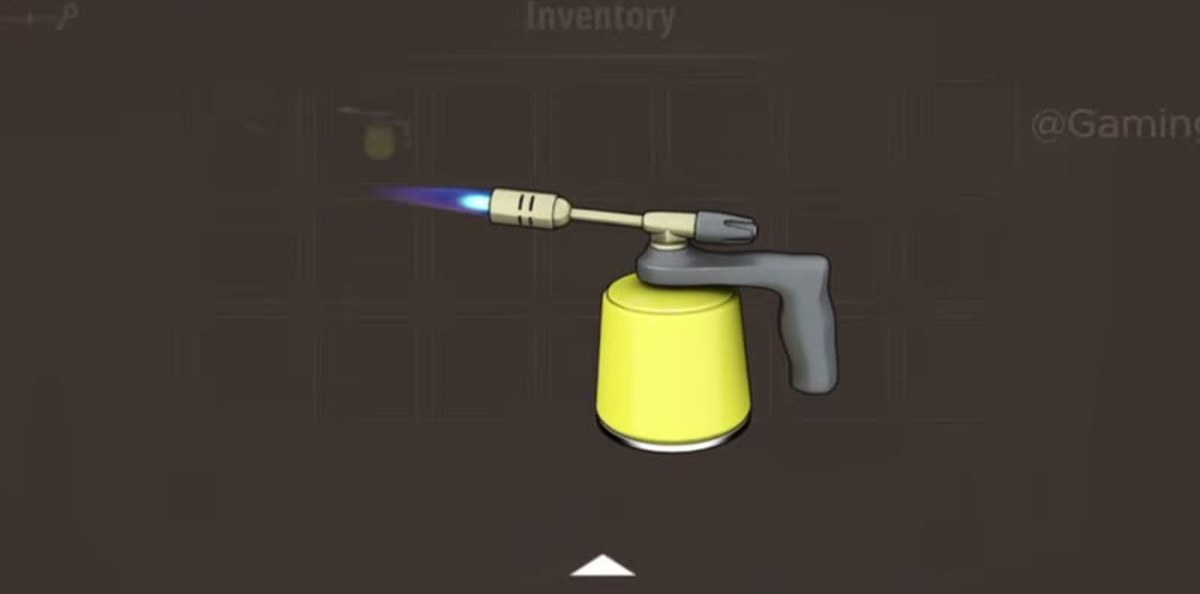
- Combine the Blowtorch part with the other two blowtorch pieces → Blowtorch, then with the Lighter → Lit blowtorch. Dismantle the Hanger → Hook.
- Burn the floor grate, hook out the Key, open the blue tool chest drawer → Blueprint.
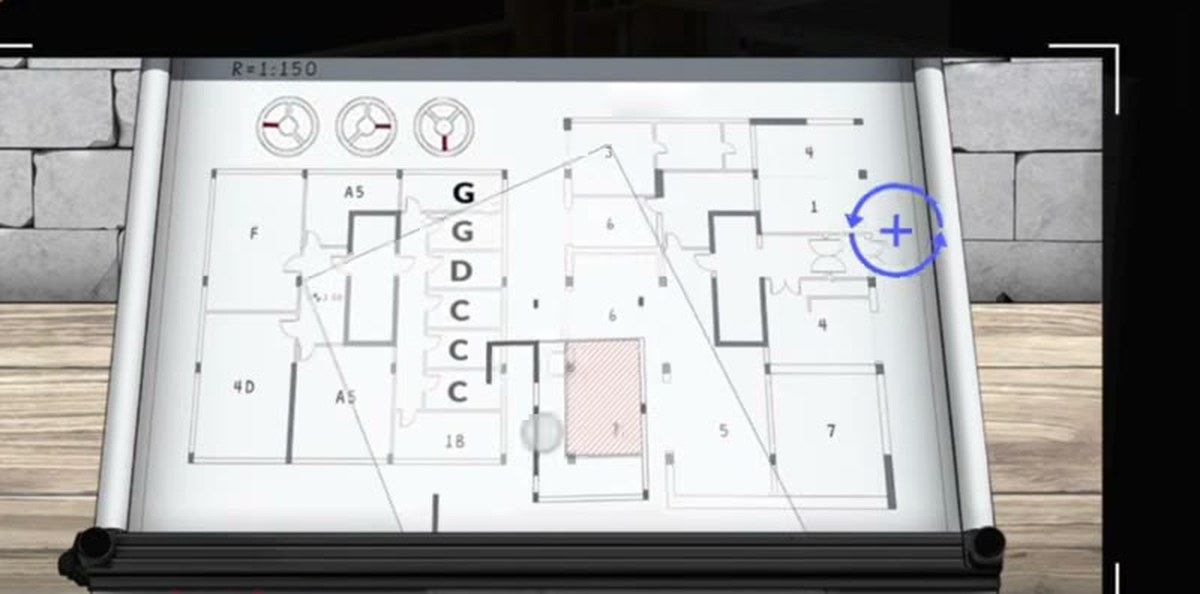
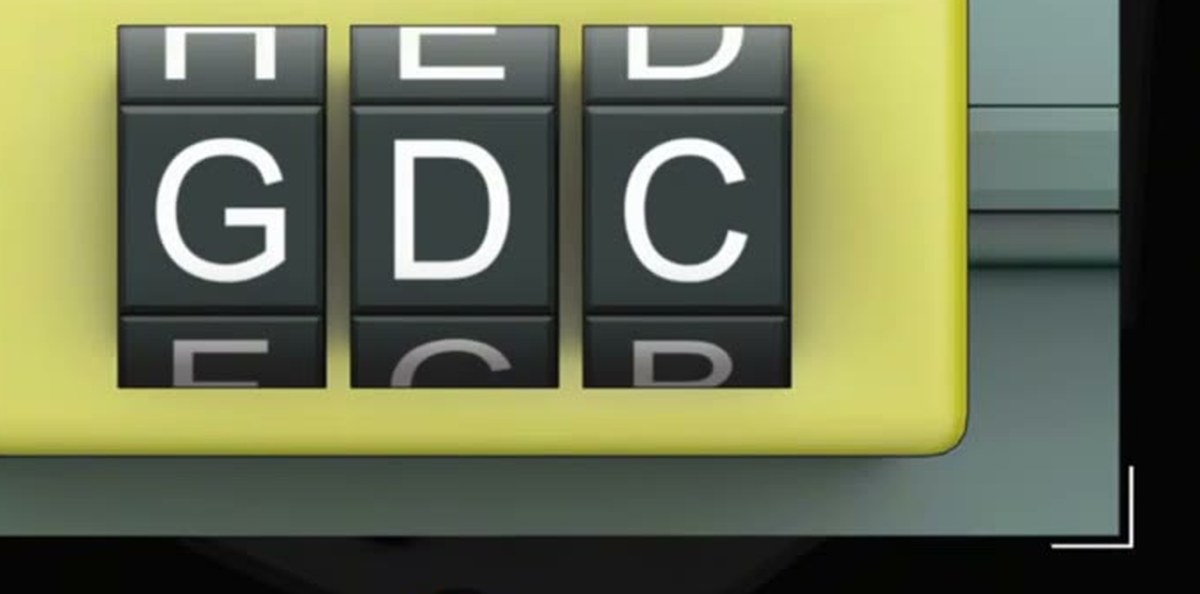
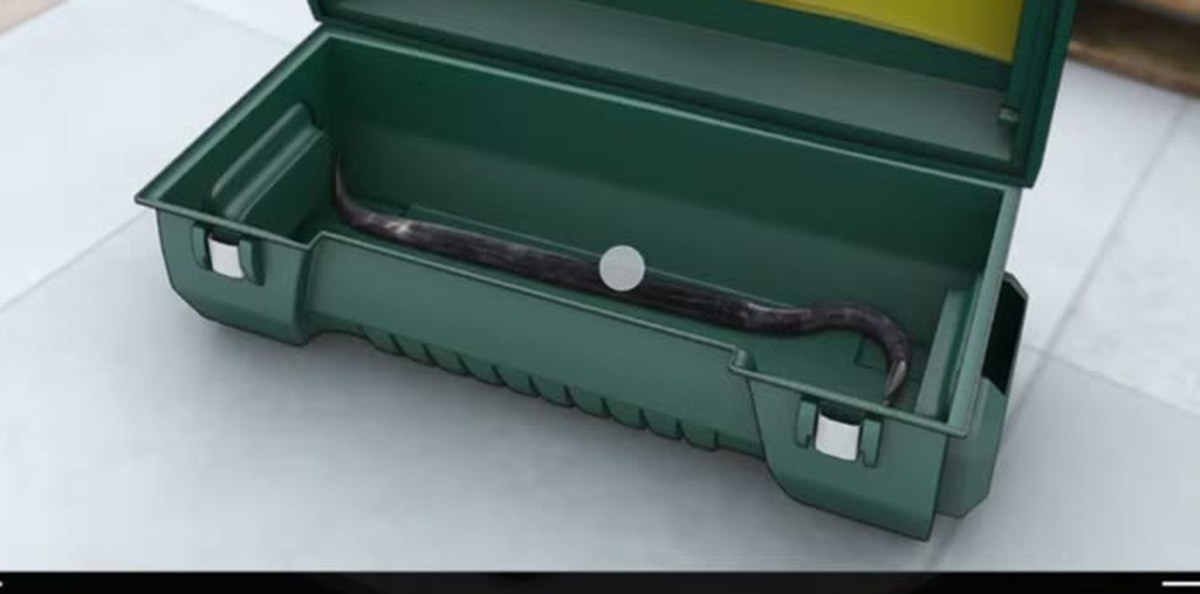
- Use the blueprint on the drawing board → its lettered rooms include G, D, C. Set the green toolbox lock to GDC → Crowbar.
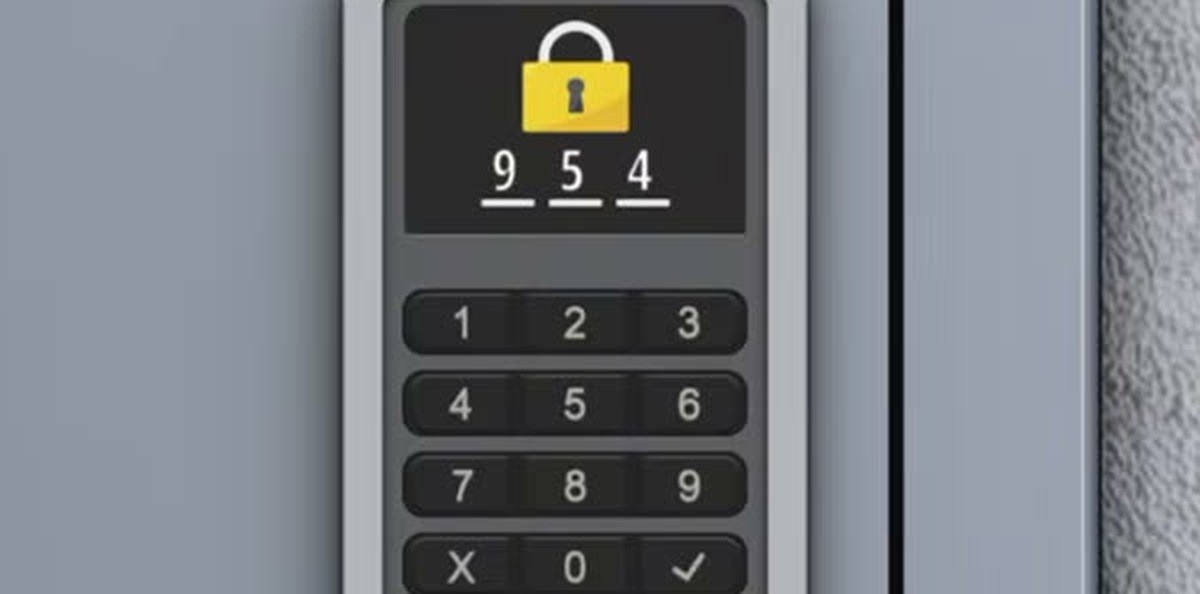
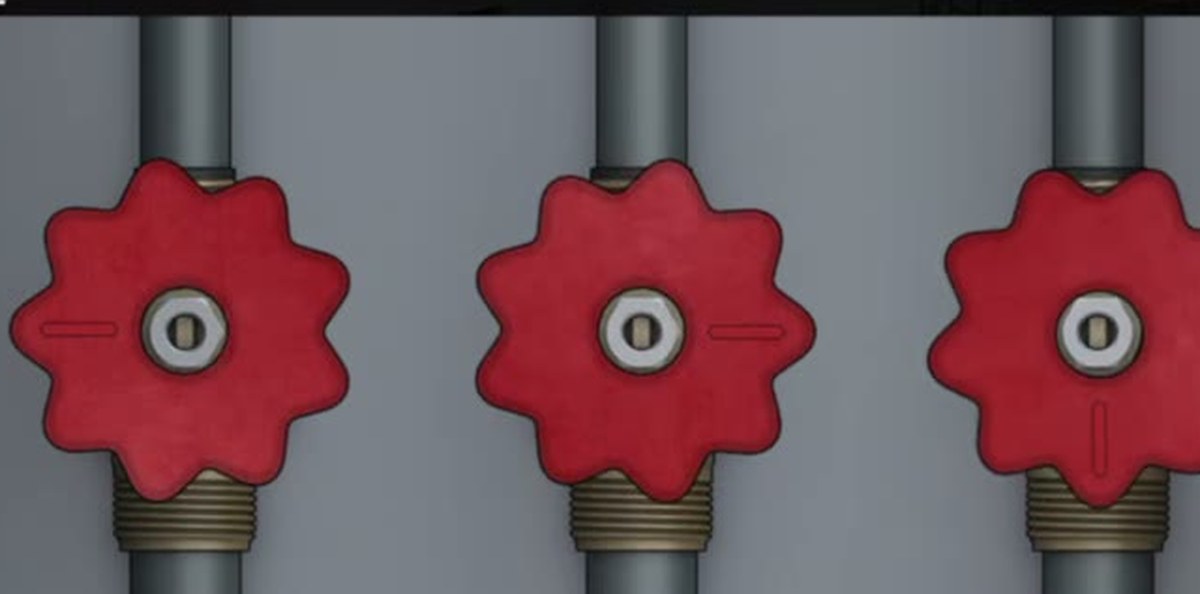
- Pry the loose floorboards → tracing paper 954. Enter it on the wall keypad → three red valves; turn all three → +50 coins.
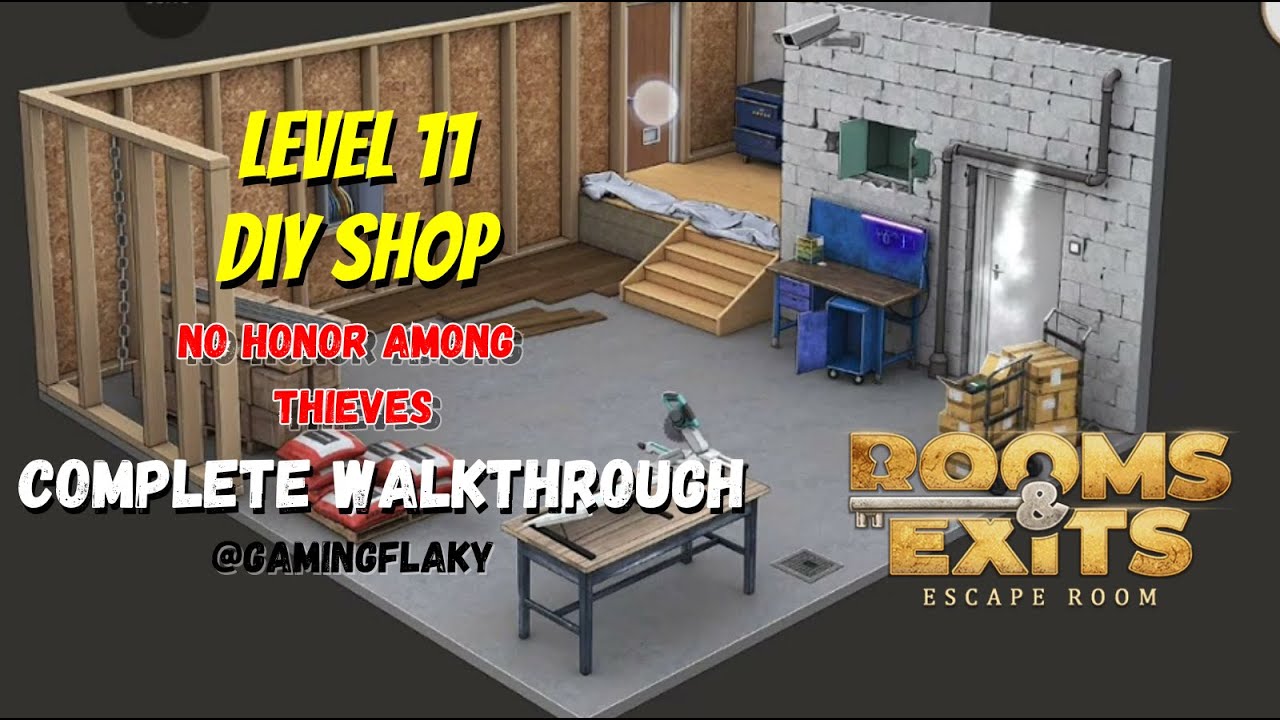
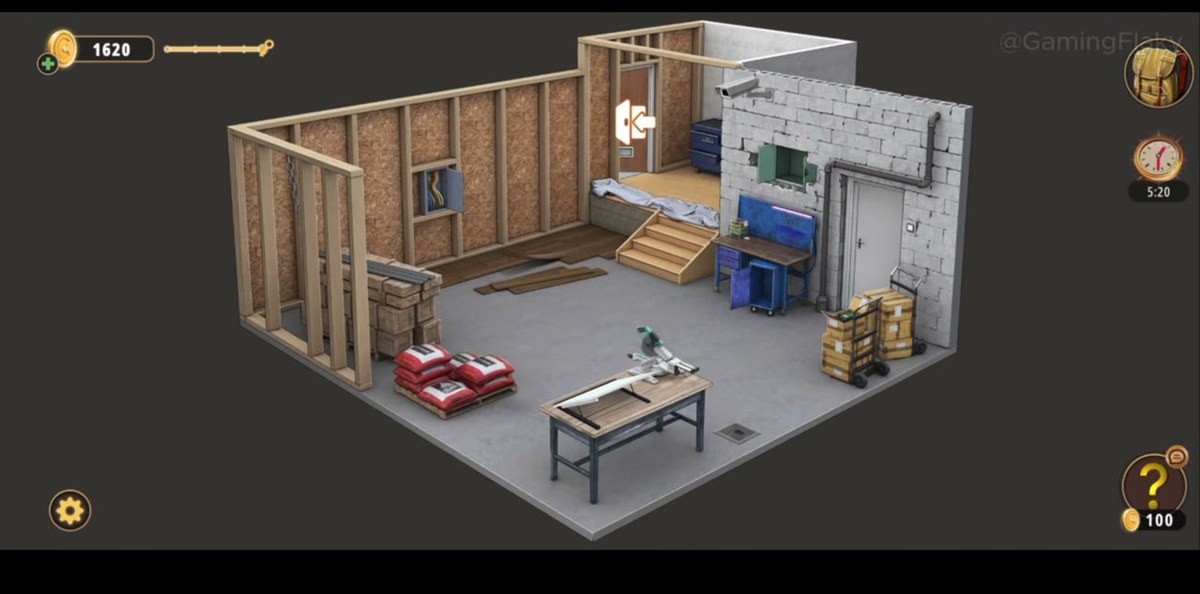
What this level actually is.
The DIY Shop is the eleventh room of Chapter 2 and it is not a shop you can shop in — it is a building site with a shop's name. One half-finished workshop, seen in a single isometric shot: a wall framed in bare studs on the left with a chain hanging off it, a stretch of oriented strand board with the electrics exposed, a back wall with wooden stairs going up to a platform, and a finished cinder-block wall on the right with a white service door, a blue workbench and a security camera above it. In the middle of the floor sits a mitre saw on a wooden bench, a pallet of red cement bags, a stack of grey blocks, and two hand trucks loaded with cardboard boxes. There is a square metal grate in the concrete near the bench and a brick wall standing on its own at the back right, which is the strangest thing in the room until you hit it with a hammer.
That is the whole level in one glance, and it is also why people stall in it. Nothing about the DIY Shop announces a sequence. There are four locks in this room and around them a dozen objects that look like they might be clues: a kettle, paint cans, a coil of cable, a hard hat, a spirit level, a toolbox with a handle and no lock on it. The game will let you tap all of them. None of them are the answer. What actually moves you forward is a sticky note clipped to a trolley, a UV lamp that only matters on one blue board, a key at the bottom of a drain, and a plan on a drawing board that spells three letters.
The other thing worth saying up front is that the DIY Shop is a two-area level pretending to be a one-area level. The workshop is where you start, and it holds the first three locks. The back room — the one with the pink insulation panels, the paint cans and the pallets — is where the last two locks live, and you do not get there until the blueprint has been read. Players who spend ten minutes circling the workshop looking for the letter lock are looking in the wrong room. The recording spends roughly three and a half minutes in the workshop and two in the back room, and the split is almost exactly at the drawing board.
Finally, the theme is not decoration. The room has a gas leak — that is the thing you are here to fix, and it is the reason the level ends where it does, at three red valves behind a keypad panel rather than at a door. Every lock in the DIY Shop is on the way to those valves, and the last one you open is literally the gas line. Once you know that, the order of the room stops feeling arbitrary: you are working from the outside of the building inwards, and the valves are the centre.
Step by step.
The four codes, and what each one opens.
There are four codes in the DIY Shop and they are not interchangeable. Every one of them belongs to exactly one lock, and the locks are not in the order you find the codes. This table is the shortest version of the level:
| Code | Where it is written | What it opens |
|---|---|---|
| 51432 | Yellow sticky note clipped to the trolley in the workshop | The blue five-button panel → tool chest drawer → Hammer |
| 42130 | Five neon figures on the blue board, read with the UV lamp | The five-dial combination lock behind the brick wall → green cabinet → Blowtorch part |
| GDC | The blueprint on the drawing board — its lettered rooms include G, D and C | The three-letter lock on the green toolbox → Crowbar |
| 954 | Tracing paper under the loose floorboards | The wall keypad → gas valve panel → end of level |
Two of these are digits and two are not, and the game does you no favours by mixing them in one room. The five-button panel and the five-dial combination lock both want five characters, which is the single most common source of confusion in this level: players assume the sticky note's 51432 must belong to the combination lock because both are five digits long, spend ten minutes trying to make 51432 fit five wheels, and never press the yellow buttons at all. The note and the buttons are ten feet apart on the same wall. The combination lock is behind a brick wall that has to be broken first. Match the clue to the object in front of you, not to the number of characters.
The letter code has the opposite problem. GDC is short, it is written on a plan rather than a lock, and the plan is a piece of paper you unroll on a board — it reads like background art. If you have a three-letter lock with no letters, the blueprint is the only place in the level where letters exist. And 954 is the only code that is not visible on a surface at eye level; it is under the floorboards, behind a crowbar, behind the letter lock, behind the blueprint. It is the deepest link in the chain and it opens the shallowest lock: three digits, straight into a keypad.
Why the order matters.
The DIY Shop is a dependency chain, not a checklist, and almost every "I'm stuck" in this room is a link that has not been made yet rather than a puzzle that has not been solved. Read it as five gates:
- Note → panel. The five-button panel cannot be brute-forced in any reasonable time and it does not respond to the play button alone. It needs 51432, and 51432 only exists on the trolley.
- Panel → hammer → wall. The hammer is not hidden. It is inside a drawer that the panel opens. Without the panel you have no hammer, and without the hammer the brick wall is a wall.
- UV lamp → board → combination lock. The blue board is inert until the lamp is used on it, and the combination lock cannot be set until the board has been read. Both the lamp and the board are in the workshop, which is why this is the one part of the level that flows cleanly.
- Key → blueprint → letter lock. The brass key from the drain opens the tool chest drawer, the drawer holds the blueprint, the blueprint is the letter code. Break that chain anywhere and the green toolbox stays shut.
- Tracing paper → keypad → valves. The crowbar from the toolbox lifts the floorboards, the floorboards hide 954, 954 opens the panel, the panel holds the valves. This is the longest chain and the one that sends people back and forth between the two rooms.
Looked at that way the level has exactly one puzzle with a real "aha" in it — the note that is not for the lock it appears to be for — and four dependency checks behind it. The rest is walking. The recording finishes the room in 5:56 of footage and 5:21 on the game clock, and most of that difference is the two trips between the workshop and the back room, not thinking time.
Where people get stuck.
- The sticky note is not for the combination lock. This is the big one. 51432 and 42130 are both five characters and the combination lock is the more interesting lock, so the note gets carried across the room and forced into five wheels. It belongs to the five yellow buttons on the blue panel, counted 1–5 from the left.
- The five yellow buttons have no labels. There is nothing on the panel to tell you which button is "1". Count from the left and commit to that convention. The panel only cares about the order, not about which button you call first.
- The brick wall looks like scenery. It stands free of the other walls, it has no highlight, and the camera never lingers on it. It is the only breakable object in the level and the hammer exists for it. If you have the hammer and no combination lock, you have not hit the wall.
- The blue board does nothing without the lamp. Tapping it in normal light gives you a row of dark tubes. Players decide it is decoration and never come back with the UV lamp, which is in the bag from the first minute.
- The hanger is not the hook. The item you need for the drain is called Hook, and the only way to get it is Dismantle on the Hanger. Use on the drain does nothing until the hanger has been dismantled.
- The drain needs two passes. First the lit blowtorch to burn the grate, then the hook to fish the key out. Doing one and walking away is the most common half-finished step in the room.
- The blueprint must go on the board. Reading it from the bag shows a rolled tube. The letters only exist once it is unrolled on the drawing board, and the board is blank until then, so it looks like an unfinished prop.
- The toolbox is in the other room. The green toolbox is not in the workshop. If you have the letter code and cannot find a letter lock, you are in the wrong half of the level.
- The floorboards are loose, not locked. They do not highlight and they do not look different from the fixed boards. The crowbar is the hint, and the tracing paper is under them.
- There is no exit door to use. The white service door and the door at the top of the stairs are both scenery. The level ends at the valves, the moment the third one is turned.
What the room is made of.
It helps to know which objects are real and which are set dressing, because the DIY Shop is unusually dense with props. Real, in the workshop: the trolley with the sticky note, the blue button panel, the blue tool chest and its two drawers, the brick wall, the blue neon board, the green cabinet behind the bricks, the floor grate, the hanger, the drawing board, and the mitre-saw bench as a landmark. Real, in the back room: the green toolbox, the loose floorboards, the grey keypad panel and the valves behind it. Everything else is texture — the cement bags, the grey blocks, the paint cans and brushes, the scaffolding, the hard hat, the kettle, the cable coil, the security camera, the stairs, the white service door, and the cardboard boxes on the hand trucks.
That distinction matters for one practical reason: the game's highlight system is inconsistent in this level. Some interactive objects glow when you get close and some do not, and the brick wall, the floorboards and the drawing board are all in the second group. If you are hunting for the next thing to tap, work from the list above rather than from what looks lit. The two objects players most often miss — the wall and the boards — are both things you have to decide to hit rather than things the game offers you.
The layout also explains the two-room confusion. The workshop and the back room share a wall and the camera makes them look like one continuous space, but they are separate scenes with separate prop sets and separate locks. The workshop owns the first three codes (note, board, combination lock). The back room owns the last two (toolbox, floorboards) plus the ending. Once you have the blueprint, there is no reason to return to the workshop at all — and every minute spent there after that point is a minute spent looking at props.
Chapter 2 levels.
Chapter 2 opens with the Cell Phone Store and runs twenty-six rooms; the list below reflects what is written up so far. The room before this one is the Restaurant.
- 1 Cell Phone Store guide
- 2 Cinemas guide
- 3 Pharmacy guide
- 4 Optical Store guide
- 5 Gym guide
- 6 Candy Shop guide
- 7 Food Court guide
- 8 Pet Shop guide
- 9 Indoor Playground guide
- 10 Restaurant guide
- 11 DIY Shop you are here
- 12 Jewelry Store guide
- 13 Grocery Store guide
- 14 Exchange Office guide
- 15 Fashion Store guide
- 16 Art Supplies Store guide
- 17 Shoe Store guide
- 18 Sports Store guide
- 19 Bookstore guide
- 20 Furniture Store guide
- 21 Household Appliances guide
- 22 Print Shop guide
- 23 Bakery guide
- 24 Toy Store guide
- 25 Restroom guide
- 26 Parking guide
FAQ.
What is the five-digit code in the DIY Shop in Rooms & Exits Chapter 2 Level 11?
42130. It opens the five-dial combination lock inside the hole you knock in the brick wall with the hammer. Read the dials left to right: 4, 2, 1, 3, 0. The lock sits on a green cabinet door behind the bricks, and inside is the Blowtorch part.
What does the sticky note 51432 open?
The blue panel with five round yellow buttons and five indicator lights. Count the buttons 1 to 5 from the left and press them in the order written on the note: 5, then 1, then 4, then 3, then 2. When all five lights turn green the drawer of the blue tool chest underneath opens and the Hammer is inside.
What is the three-letter code on the green toolbox?
GDC. It comes from the blueprint: the plan is divided into lettered rooms and its labels include G, D and C, which is the order the lock takes. Set the three wheels of the yellow letter lock to G, D and C and the toolbox opens on a Crowbar.
What is the code for the keypad behind the DIY Shop?
954. It is written on the folded tracing paper you find under the loose floorboards, and it goes into the grey keypad panel on the wall of the back room. Three digits, entered in order, then the tick. The panel releases and exposes the three red gas valves.
How do I get the key out of the floor grate?
Three steps. First build the Blowtorch in the bag: Combine the Blowtorch part from the green cabinet with the nozzle and the fuel canister you already carry. Then Combine that Blowtorch with the Lighter to make the Lit blowtorch and use it on the metal floor grate to burn it open. The key is down the hole but the grate is too narrow for fingers: Dismantle the Hanger into a Hook, use the hook on the drain, and the key comes up.
Where is the blueprint and what do I do with it?
The key from the floor grate opens a drawer of the blue tool chest and the blueprint is inside, rolled up. Take it to the blank drawing board on the wall and use it there: the plan unfolds into a floor plan of the building with lettered rooms. That picture is the clue for the three-letter lock on the green toolbox.
How do I stop the gas leak and finish the level?
Open the keypad panel with 954, then turn all three red valve wheels on the gas pipes. Our capture leaves them pointing left, up and down, in that order, and the moment the third one is turned the leak stops and the level ends on the results screen: +50 coins and a time of 5:21.
How long does the DIY Shop take?
The recorded run finishes in 5:56 of footage and the game clocks the level at 5:21. Nothing is timed and there is no fail state. The two things that stretch it are the five-button panel before you have read the sticky note, and the blueprint before you have opened the blue tool chest drawer with the key.
Previous room: ← Chapter 2, Level 10: Restaurant