 GridPaw
 Shikaku
 Akari
 Kakuro
 Nonogram
 Nurikabe
 Pictomino
 KenKen
 Binary
 Star Battle
 Hashi
 Slitherlink
 Murder Sudoku
 Meowdoku
 Crazy Cleanup
Rooms & Exits Chapter 2 Level 19 Walkthrough: Bookstore
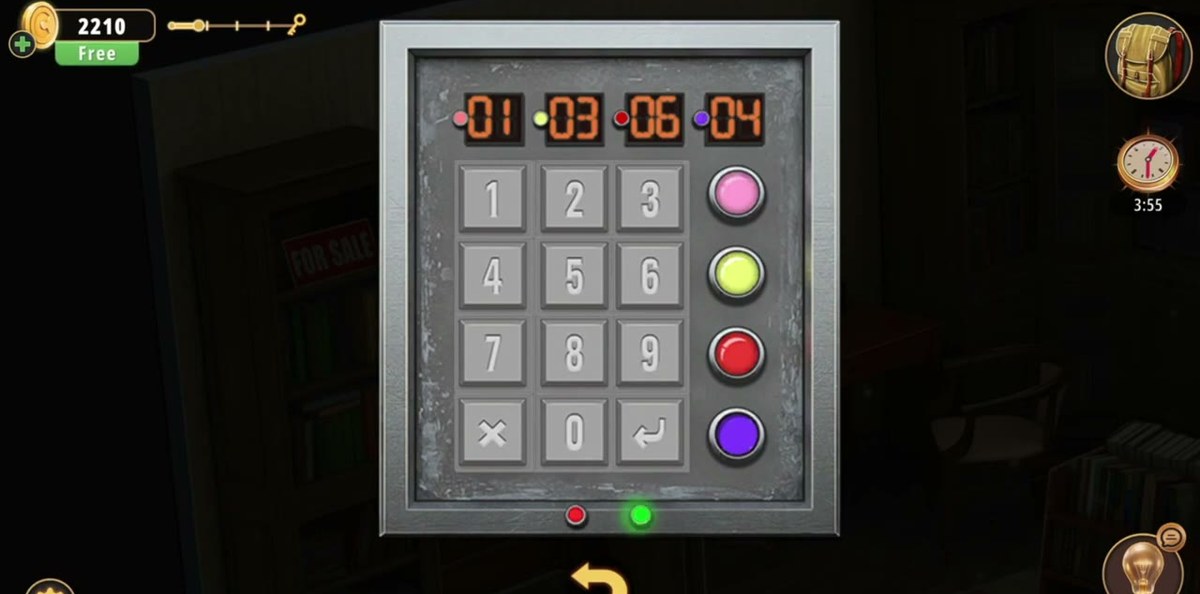
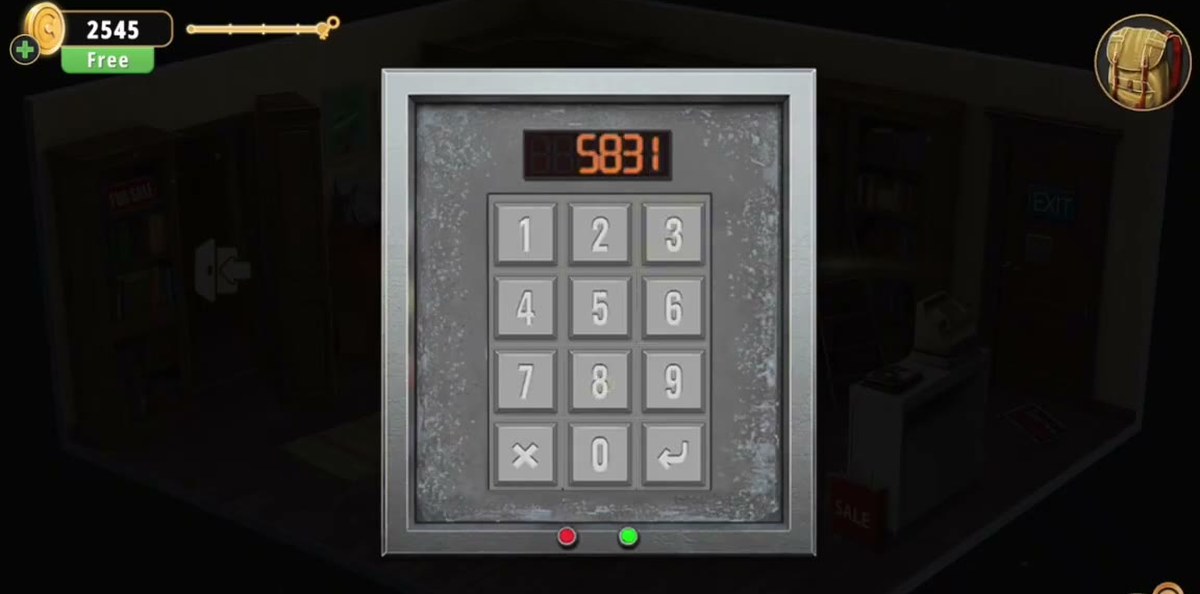
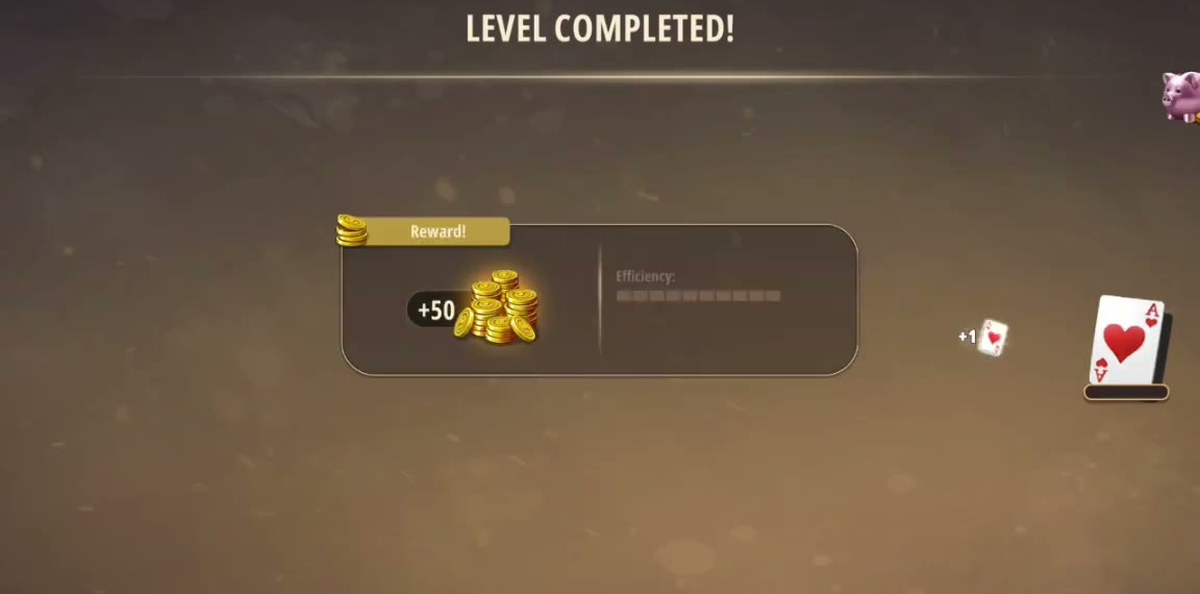
Two locks, two codes. The door to the back room takes the four poster counts as colour-plus-number pairs — pink 1, yellow 3, red 6, purple 4, display 01 · 03 · 06 · 04. The exit door takes 5831, which is the word EXIT spelled with the four plates E=5, X=8, I=3, T=1. Finish worth +50 coins.
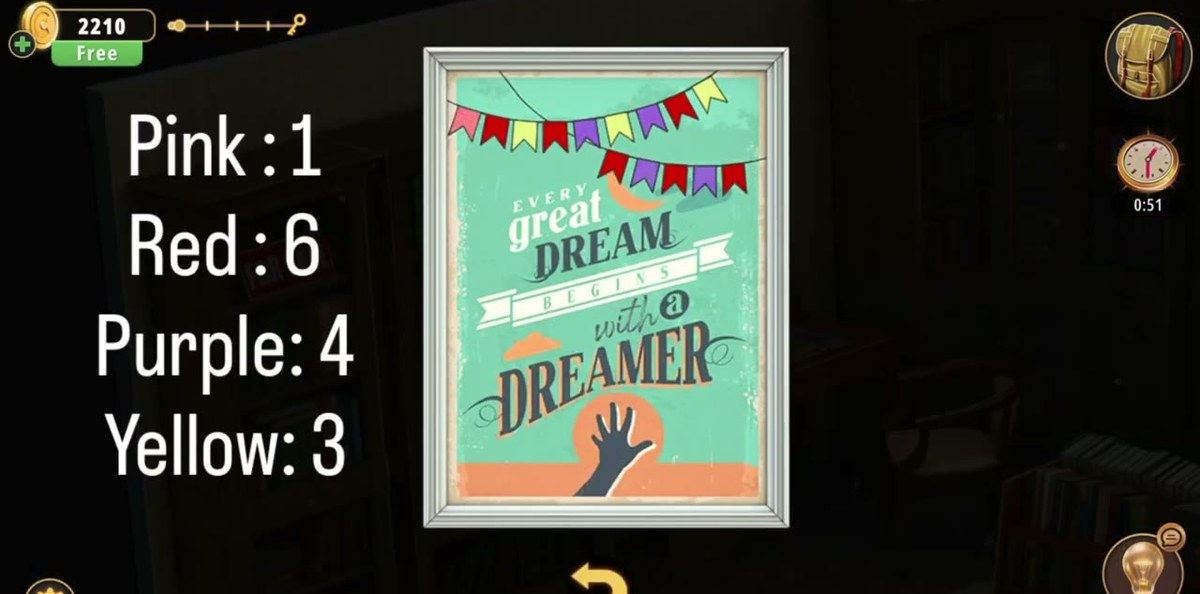
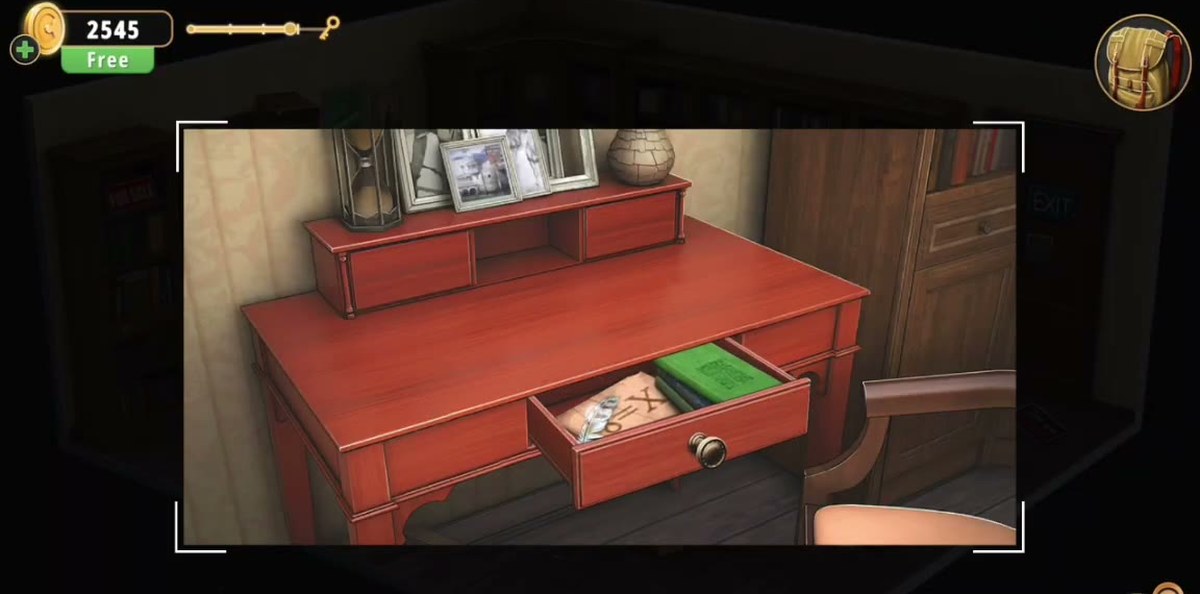
- Read the framed poster above the desk: the note beside it lists Pink: 1, Red: 6, Purple: 4, Yellow: 3.
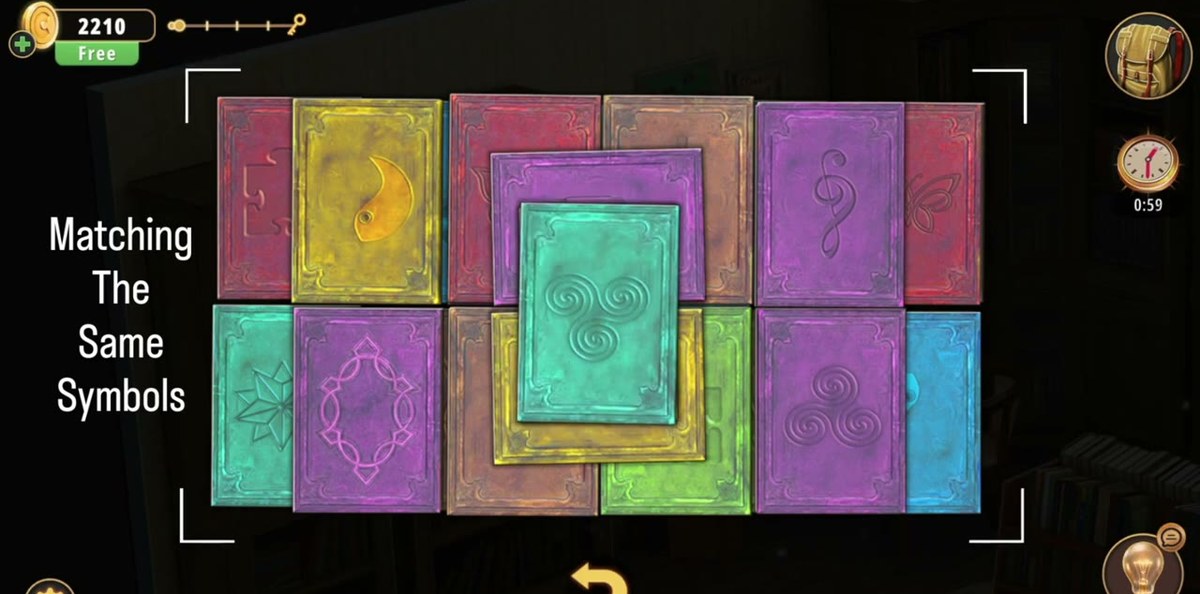
- Clear the book-cover matching board and pick up the green Book whose cover carries a key symbol.
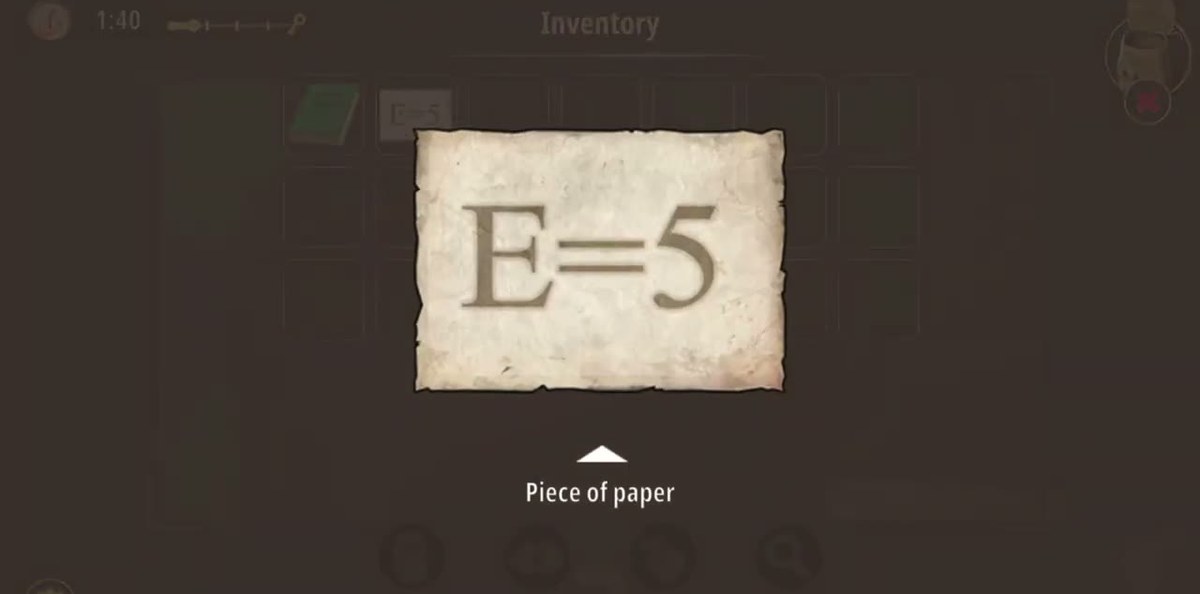
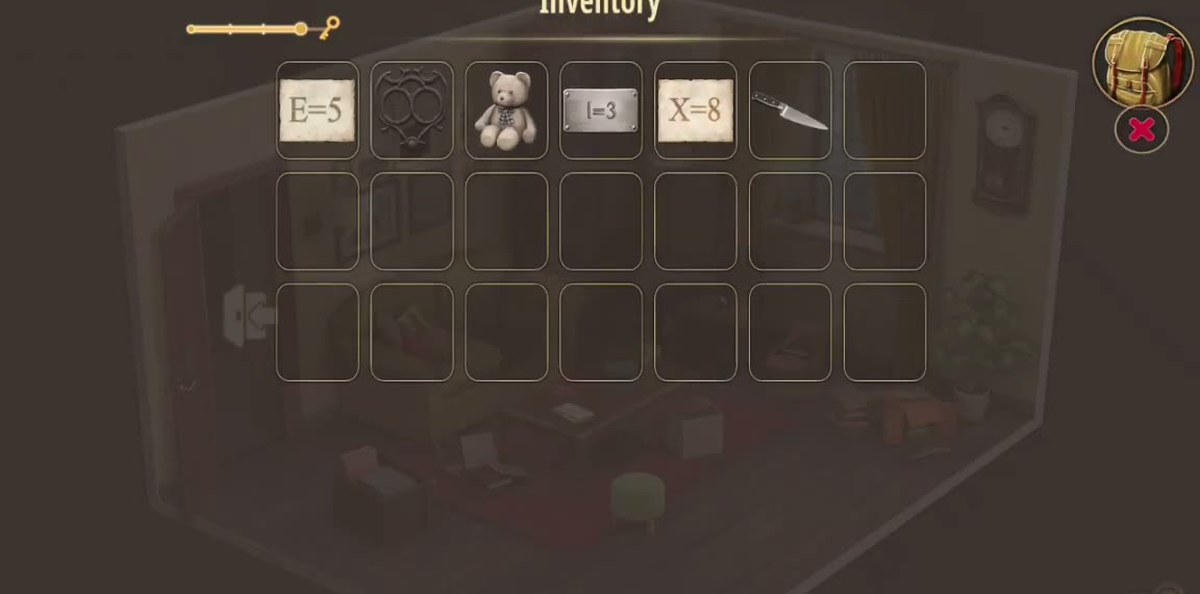
- Take the Folded paper from the bag, Examine it → E=5.
- On the wooden door's keypad press a colour, then its count: pink 01, yellow 03, red 06, purple 04 → the door opens.
- In the back room: the desk drawer gives X=8, the Metal plate gives I=3.
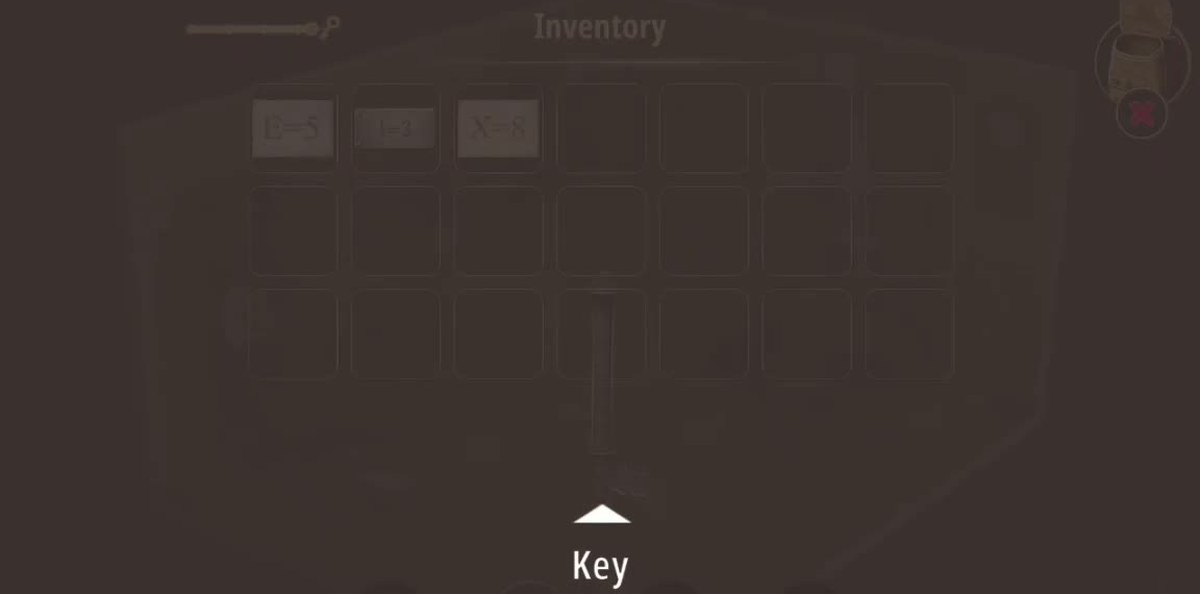
- Use the Knife on the Teddy bear → Key part → Key; the Key opens the chest on the red rug → T=1.
- Type 5831 into the keypad beside the blue EXIT sign → results panel, +50 coins.

What this level actually is.
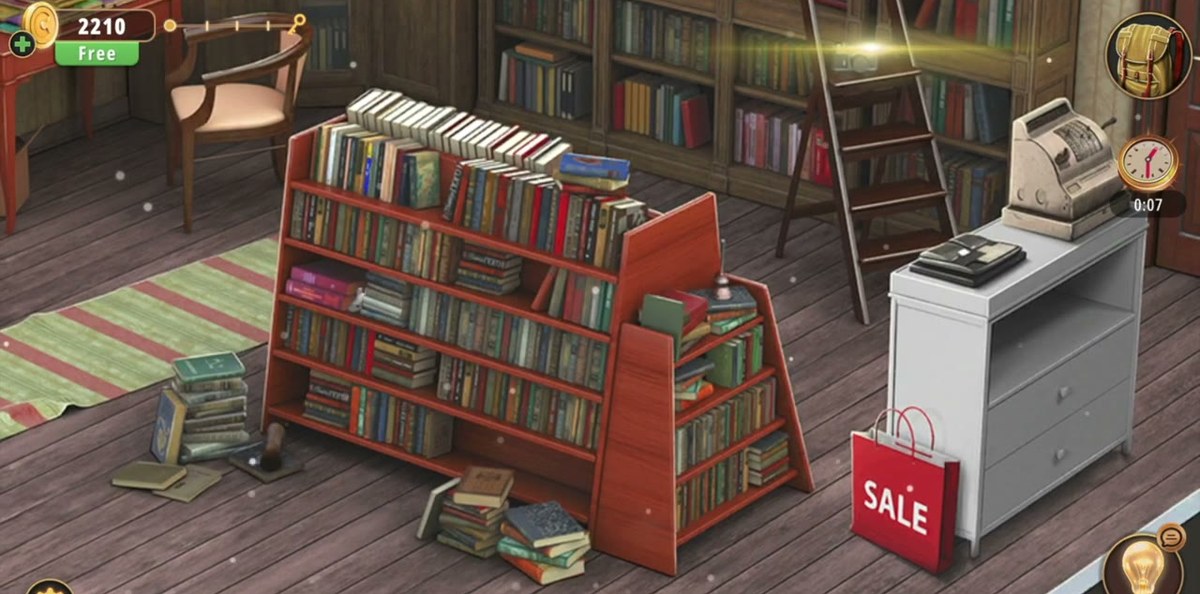
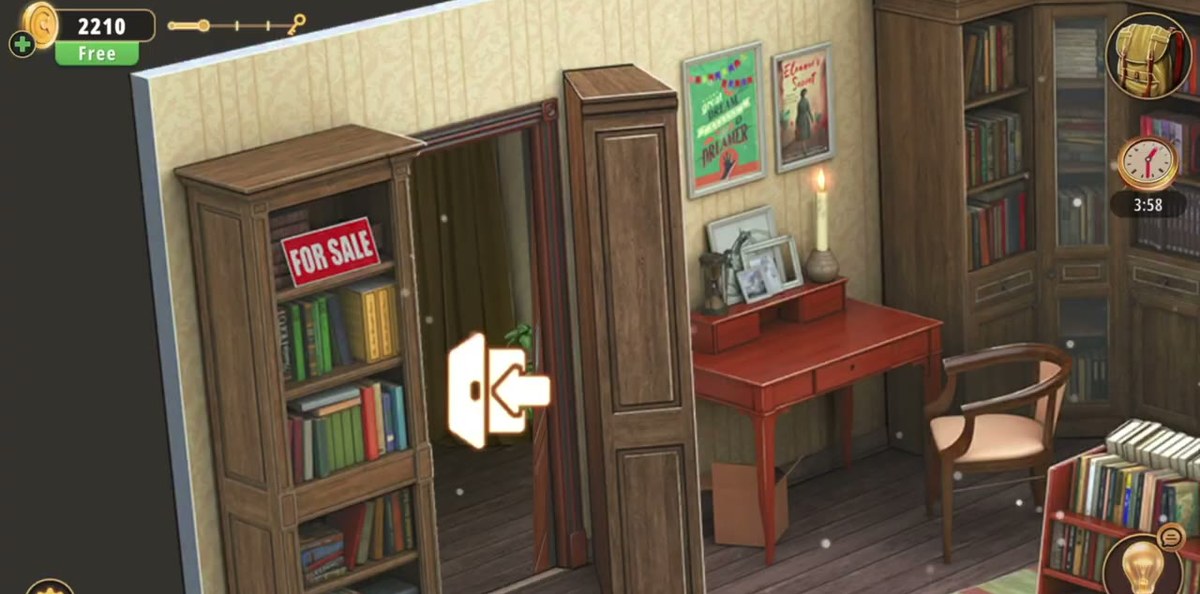
The Bookstore is the nineteenth room of Chapter 2, and it is the first level in this chapter that gives you two rooms to work in rather than one. The shop floor is a proper little bookshop: a big reddish-brown bookcase packed with hardbacks stands in the middle of the floor with more stacks piled around its base, a green-and-red striped runner lies over the dark wooden boards, a rolling ladder leans against the built-in shelves that run across the back wall, and a pale counter on the right carries an antique crank till, a stack of notebooks and a red SALE bag leaning against its front. A desk with a candle and a hutch of framed pictures sits in the back corner, a red FOR SALE placard is clipped to the shelf beside the EXIT door, and the wall above the desk carries the green motivational poster that half this level hangs on.
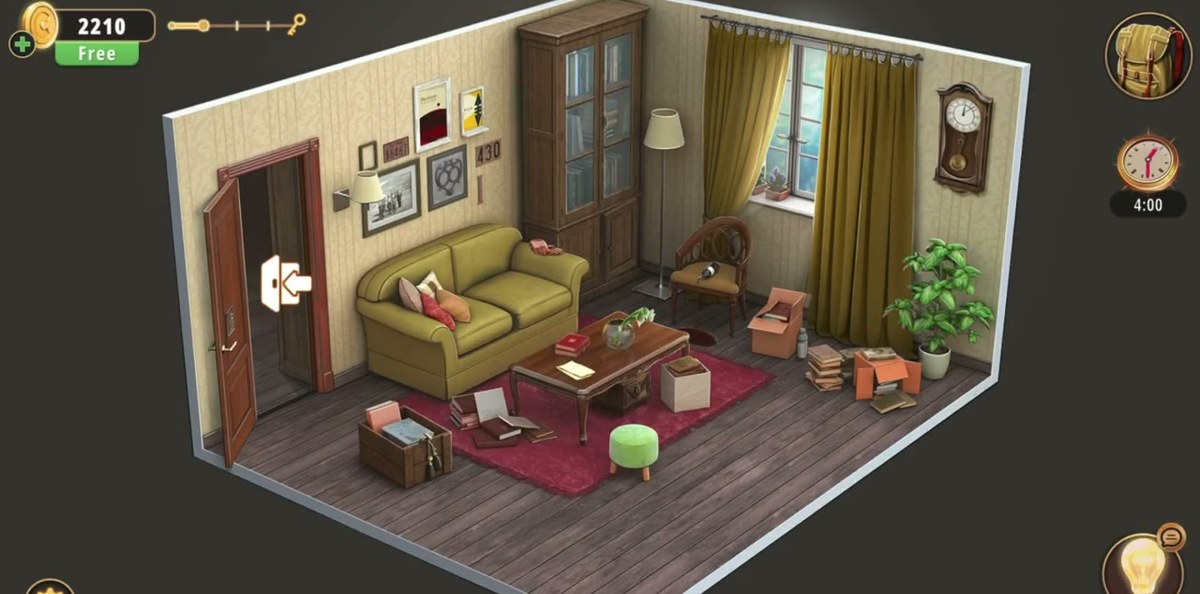
The second room is behind the wooden door next to the tall narrow cabinet, and it is a different kind of space entirely: a living room with an olive-green sofa, a red rug, a coffee table, a bookcase with glass doors, a window with mustard curtains and a wall clock. It is not an exit and it is not a bonus area — it is where three of the four letter plates live, which means the level's real answer is split across both rooms. Players who never open that door will finish the shop floor and stand at the EXIT keypad with one digit in their head.
Two structural facts explain almost every way this level goes wrong. First, the exit door is in the shop, not in the back room, and it is a keypad rather than a lock — so the chest, the key and the teddy bear are not the way out, they are the way to the last digit. Second, the door between the two rooms is a colour lock, not a key lock, and it wants a colour and a number for each of its four slots. Both of those things are unusual for this game, and both of them are why the Bookstore gets searched for a key that was never needed and typed at with digits that were never enough.
The map: what is where.
Every object in the Bookstore that takes an input or gives you something, in the order you are likely to meet it.
| Object | Where | What it does |
|---|---|---|
| Motivational poster | Wall above the desk, back corner of the shop | Mint-green print, EVERY great DREAM BEGINS with a DREAMER, with bunting flags in four colours. The note beside it gives the counts 1 / 6 / 4 / 3. |
| Book-cover board | Shop floor, centre | The level's matching puzzle, titled Matching The Same Symbols: ornate covers with embossed symbols. |
| Green Book | Bookcase, left wall | An inventory item stamped with a key symbol on the cover. A pointer, not a tool. |
| Desk drawer | Desk in the back corner | Holds a green book and a parchment marked with a large X — the X=8 note. |
| Wooden door keypad | Wooden door, left of the desk | Four colour buttons plus a 1-9 pad. Opens the back room. Display 01 · 03 · 06 · 04. |
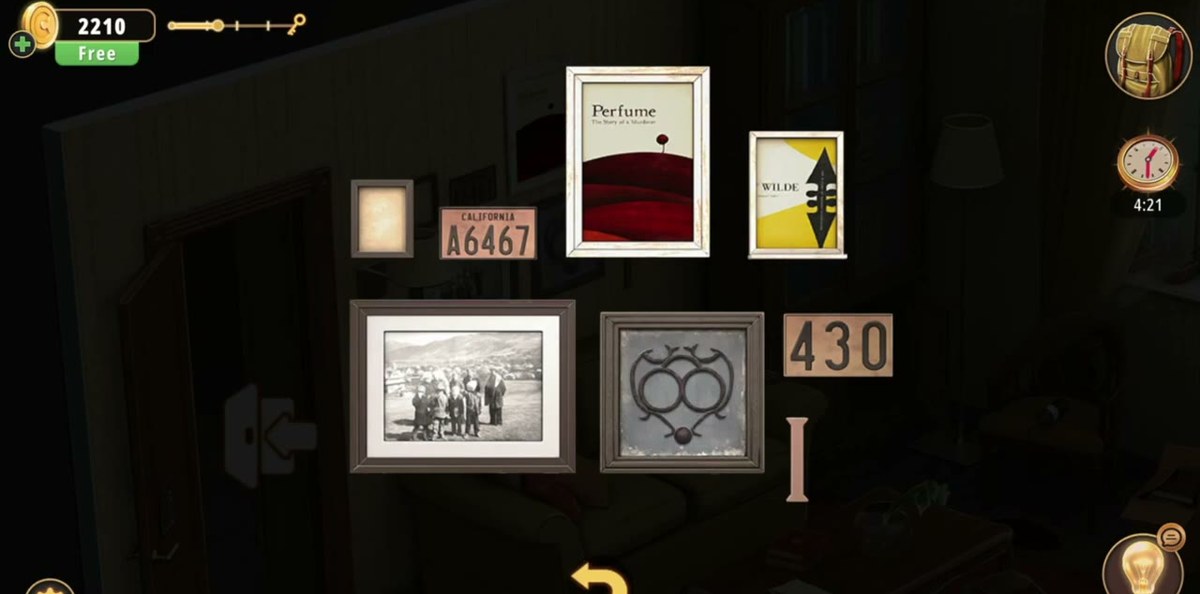
| Framed wall | Back room, above the sofa | Posters Perfume and WILDE, a California plate A6467, a plaque 430 and a single letter I. Decor, as far as either recording shows. |
| Teddy bear | Back room | Cut it with the Knife and the item relabels itself Key part. |
| Padlocked chest | Back room, on the red rug in front of the sofa | Heart-shaped padlock. The Key opens it; the T=1 note is inside. |
| EXIT door keypad | Shop, right wall, under the blue EXIT sign | Plain four-digit pad. 5831. |
Step by step.
The mechanism, taken apart.
Two locks that teach two different habits
Most rooms in Rooms & Exits hand you one code with one input. The Bookstore hands you two locks that look alike — both are dark panels with a display, both sit on doors — and then asks you to use your hands two completely different ways. The first lock is a paired entry: a colour, then a count, four times, in the order the colour buttons are stacked. The second is a straight substitution: a letter-value table that turns a word into four digits, typed in one run. If you carry the habit from the first lock into the second, you will look for something to colour-code on the EXIT door and find nothing; if you carry the habit from the second into the first, you will try to type 1-6-4-3 as a plain number and the display will sit there and do nothing.
Why the exit spells a word instead of a number
The four plates are not a set of digits with letters attached — they are a set of letters with digits attached, and the letters are the message. Look at what the level actually gives you: E=5, X=8, I=3, T=1. Four letters that only make sense in one order, and that order is printed above the door you are trying to open. The digits then fall out mechanically: 5, 8, 3, 1. This is why every plate matters and no plate is optional — three of them give you 5-8-3 and a hole where the last digit goes, and the hole is exactly where the level puts the chest, the key, the bear and the knife. The chest is not a reward, it is the fourth digit.
Notice also how the values are chosen. E=5, X=8, I=3, T=1 gives 5831, a code with no repeats and no zero, which is a small mercy: every digit is a different keypress on a pad where 0 sits at the bottom, and no two plates can be confused for each other by a player reading a photograph of their inventory at an angle. Compare that with the colour lock, where two of the four numbers repeat a colour family and the display's dots are the only thing separating a pink 1 from a red 6 at a glance.
The poster is a counting puzzle wearing a quote
The mint-green print is doing double duty. As decor it is a motivational poster — EVERY great DREAM BEGINS with a DREAMER, a crescent moon, a silhouetted hand reaching up. As a puzzle it is a tally sheet: two strings of triangular bunting run across the top of the print in pink, red, purple and yellow, and the counts of each colour are the four numbers the back-room lock wants. The note beside the poster prints the answer as four lines — Pink: 1, Red: 6, Purple: 4, Yellow: 3 — so you never have to count under pressure, but the counting is the intended solve and it explains why the numbers are so oddly distributed: one pink flag, six red, four purple, three yellow, which is what a real string of bunting looks like when someone hangs it by eye.
The sting is the ordering. The note lists the colours pink, red, purple, yellow. The keypad's buttons are stacked pink, yellow, red, purple. The display fills from left to right in button order, which is why the accepted state reads 01 · 03 · 06 · 04 and not 01 · 06 · 04 · 03. Two runs, two different players, same result — this is not a coin flip, it is a lock that maps each colour slot independently and shows you the four dots so you can see which slot is which.
Where people get stuck.
- Typing digits at the colour lock. The panel is 80% a normal keypad, and the four round buttons on the right read as decoration until you press one. The game's own caption — "Click into color Button firstly" — is the hint, and it is on screen the whole time you are failing.
- Hunting a key for the wooden door. There is a key in this level and it does not go in that door. The wooden door is the colour lock; the key goes in the chest. The green Book with a key on its cover is the reason half of this confusion exists.
- Never examining the Folded paper. A folded scrap in the bag looks like clutter. It is E — a quarter of the answer — and it only becomes E after you press Examine.
- Reading the framed wall as a code. A6467, 430, and a lone I on a wall above a sofa is exactly the shape of a puzzle, and it is not one. Nothing in either recording enters any of it anywhere.
- Treating the back room as the exit. There is no way out of it. Once the colour door is open, the back room is a treasure room: three plates, a chest, a bear, a knife.
- Missing the Metal plate because it is not paper. E, X and T are paper. I is a metal tag. If you scan the inventory for "notes", you will count three and wonder where the fourth letter went.
- Looking for a fourth digit in the wrong place. T=1 is inside the chest, and the chest needs the key, and the key needs the bear, and the bear needs the knife. That is a four-link chain for one digit, and it is the longest chain in the level.
- Assuming the codes rotate. They do not. Both of our recordings, played independently, end on the same 01 · 03 · 06 · 04 and the same 5831. The Bookstore is a fixed-code level; if a code is refused, it is a wrong entry, not a reroll.
Chapter 2, level by level.
The Bookstore is level 19 of 26 in Chapter 2, "No Honor Among Thieves" — between the Sports Store and the Furniture Store. Written guides for the other rooms in this chapter:
- 1 Cell Phone Store guide
- 2 Cinemas guide
- 3 Pharmacy guide
- 4 Optical Store guide
- 5 Gym guide
- 6 Candy Shop guide
- 7 Food Court guide
- 8 Pet Shop guide
- 9 Indoor Playground guide
- 10 Restaurant guide
- 11 DIY Shop guide
- 12 Jewelry Store guide
- 13 Grocery Store guide
- 14 Exchange Office guide
- 15 Fashion Store guide
- 16 Art Supplies Store guide
- 17 Shoe Store guide
- 18 Sports Store guide
- 19 Bookstore you are here
- 20 Furniture Store guide
- 21 Household Appliances guide
- 22 Print Shop guide
- 23 Bakery guide
- 24 Toy Store guide
- 25 Restroom guide
- 26 Parking guide
Frequently asked.
What is the exit code in Rooms & Exits Chapter 2 Level 19?
5831. The Bookstore does not hide a number anywhere: it hands you four plates that each carry a letter and its value — E=5, X=8, I=3, T=1 — and the four letters spell EXIT. Read them in that order and type 5-8-3-1 on the keypad beside the blue EXIT sign. Both of our recordings end on the same four digits.
What is the colour keypad code in the Bookstore?
The door to the back room takes a colour and a number for each of its four slots, and the four pairs settle on pink 01, yellow 03, red 06, purple 04 — the display reads 01 · 03 · 06 · 04 on the frame before the door gives way, in both of our runs. The numbers are the four counts printed on the note beside the motivational poster: Pink 1, Red 6, Purple 4, Yellow 3.
How does the colour keypad actually work?
It is a two-part entry, not a four-digit code. The panel has a normal 1-9 keypad on the left and four round colour buttons on the right — pink, yellow, red and purple, top to bottom — and the game prints the instruction "Click into color Button firstly" across the screen when you open it. Press a colour, then type the two-digit number that belongs to that colour. The display at the top has four segments, each with its own colour dot, which is how you check your work before you commit.
Where do the four colour counts come from?
From the framed poster above the desk: a mint-green print reading EVERY great DREAM BEGINS with a DREAMER, with two strings of triangular bunting flags across the top in pink, red, purple and yellow. The note beside it lists the four counts — Pink: 1, Red: 6, Purple: 4, Yellow: 3 — and those counts are what the back-room lock wants. Our independent recount of the tiny flags disagreed with the note by one on the purple string, so the figures printed here are the ones the lock accepted, not our own count.
Where is the E=5 note?
It starts life as a Folded paper in your inventory. Open the bag, select it and use Examine: the fold opens into a torn sheet with E=5 written on it in a serif hand, and the item renames itself Piece of paper. That is the first of the four letter plates and the one players most often walk past, because a folded scrap in the bag reads like junk until you examine it.
Where do X=8, I=3 and T=1 come from?
X=8 is on a parchment in the desk drawer on the shop floor — the drawer also holds a green book, and the parchment is marked with a large X and an arrow. I=3 is a Metal plate found in the back room. T=1 is a second Piece of paper, and it comes out of the padlocked chest that stands on the red rug, opened with the Key. Together with E=5 they spell EXIT in numbers.
What does the key open?
The small riveted wooden chest with the heart-shaped padlock, standing on the red rug in the back room in front of the sofa, with a round green stool just to its right. The key does not open the exit door — the exit is a keypad, not a lock — and it does not open the wooden door to the back room either, which is the colour keypad. If you are standing at the EXIT door holding a key, you are holding the wrong solution.
How do I get the key in the Bookstore?
Cut open the Teddy bear. With the Knife in the bag, use the knife on the bear: the item's label changes to Key part, the knife is consumed, and the part turns into the Key. It is the nastiest step in the level because a plush toy does not read as a container, and the game gives you no prompt that the knife is meant for it.
What do I get for finishing Chapter 2 Level 19?
The results panel reads LEVEL COMPLETED! with +50 coins, an Efficiency bar of segmented blocks, and +1 playing card — the Ace of Hearts in the run we captured. No time field appears on this panel in the build we recorded, so the only clock is the in-game timer in the top corner, which reads 7:16 as the last keypad is being typed in our first recording.
How long does the Bookstore take?
Our first recording finishes in 4:58 of footage with the in-game clock at about 7:16 when the exit keypad is filled; the second run, played by someone who already knew the level, finishes in 3:33. Nothing here is timed and there is no fail state. The two things that cost the most time are not knowing that the colour buttons come before the digits, and not realising that the four plates spell a word.
Stuck on the room before this one?
One last thing worth saying about the Bookstore: it is a level about reading the room rather than about solving anything hard. Both locks are simple once you know what they want — four colour-and-count pairs, four letter values — and everything difficult about it is a matter of misreading an object's role. The poster is a tally sheet. The book with the key on it is a lie. The wall of frames is wallpaper. The teddy bear is a container. The chest is a digit. Once those five sentences are in your head, the level is fifteen minutes of walking, and most of that is the walk between the two rooms.