 GridPaw
 Shikaku
 Akari
 Kakuro
 Nonogram
 Nurikabe
 Pictomino
 KenKen
 Binary
 Star Battle
 Hashi
 Slitherlink
 Murder Sudoku
 Meowdoku
 Crazy Cleanup
Rooms & Exits Chapter 2 Level 25 Walkthrough: Restroom
Level 25 drops you in a corridor between two restrooms and asks two real questions: can you make every side of the floor-drain lid add up to 61, and can you turn four paper grids into a click pattern on a 4x4 panel? Everything else — and there is a lot of everything else — is a tool hunt across both rooms, and the order you do it in is the difference between a nine-minute level and a very long one.
No keypad, no letter code: Level 25 is a drain lid that has to total 61 and a 4x4 panel that has to be clicked 29 times in a fixed pattern. Finish worth +50 coins.
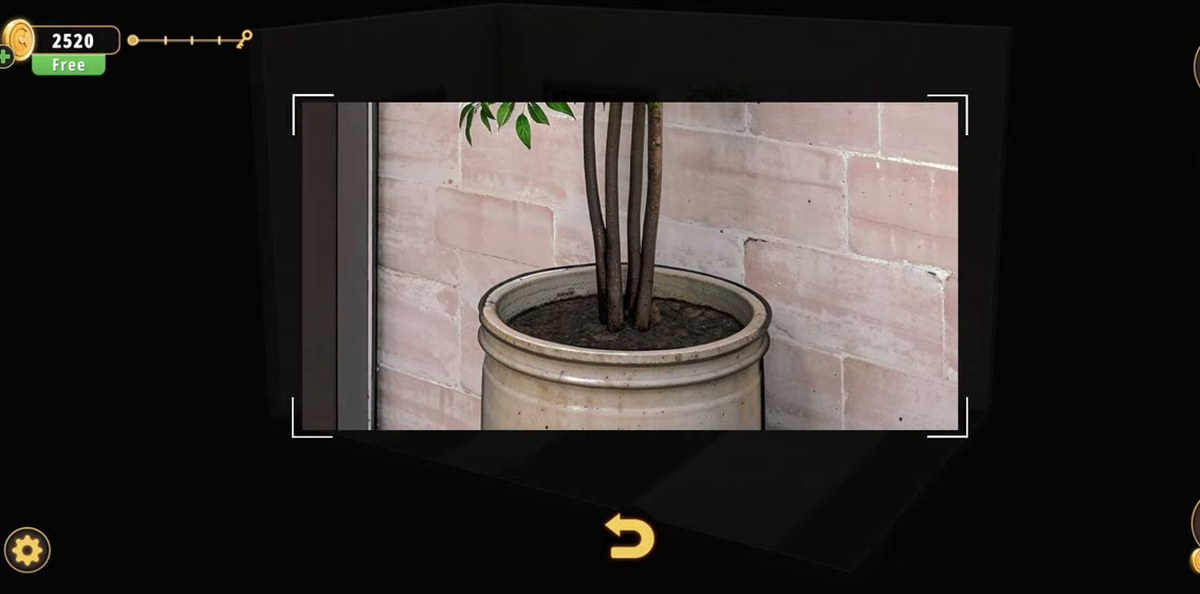
- Tap the potted plant in the corridor → Key. Use it on the door with the male symbol.
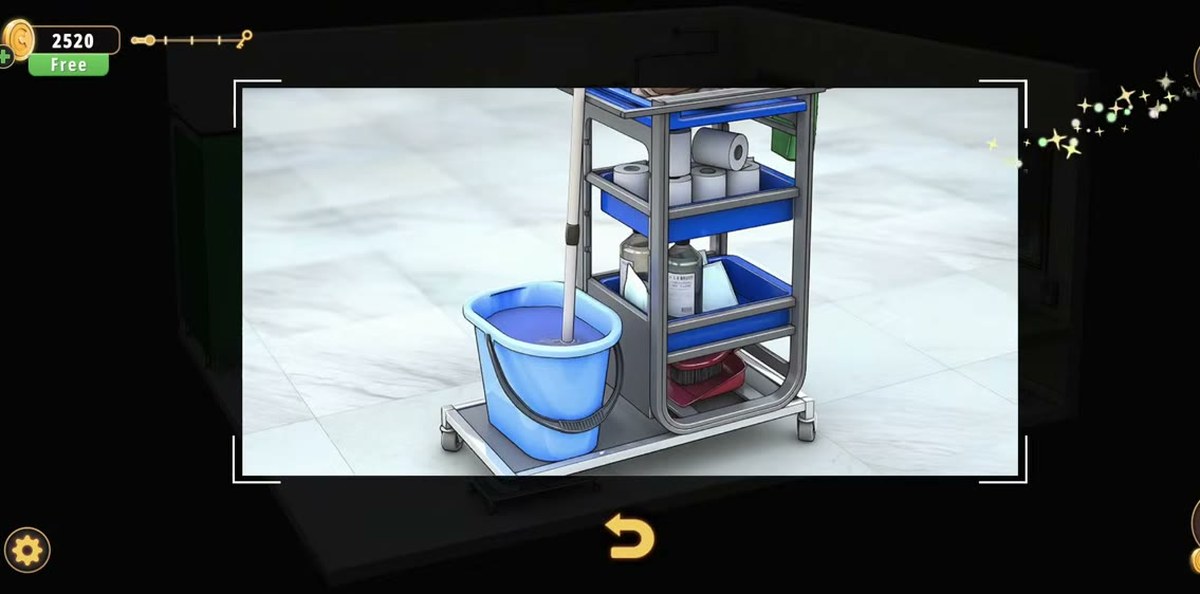
- In the men's room take the Gloves off the counter, the Plunger off the cleaning cart, and the Hook that a red wall button pays out in the end stall.
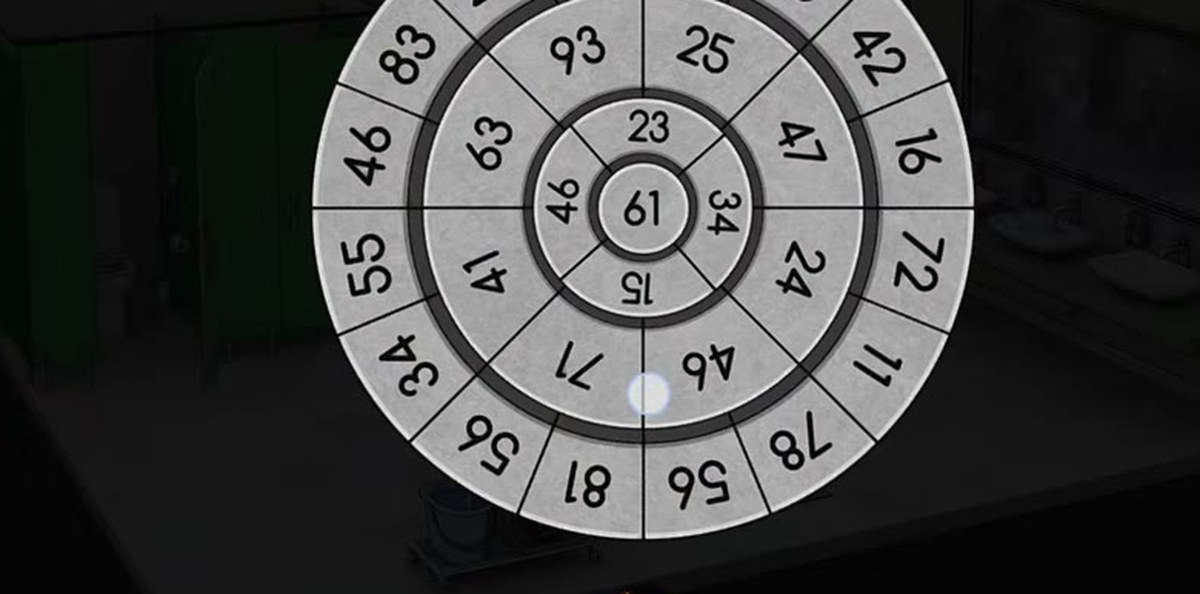
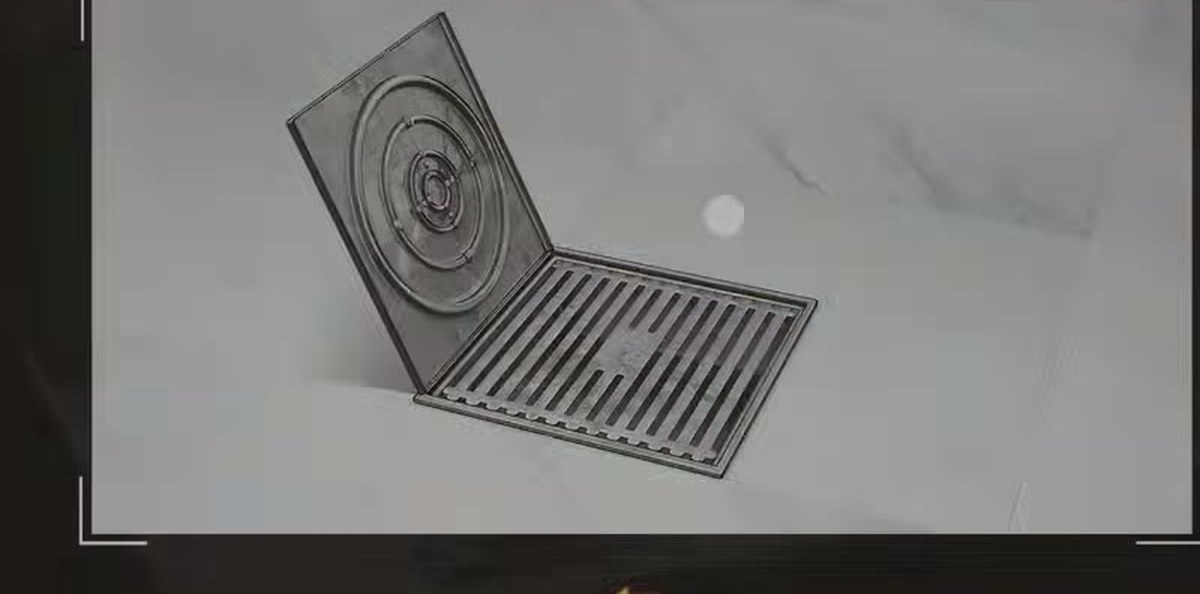
- Solve the floor drain: every side of the circular lid must add up to 61, with two-digit tiles counted as separate digits. Then Hook the key out of the open drain.
- Clear the sink for a Crumpled piece of paper → Dismantle → Piece of paper + Key. Clean the mirrors with soap and a towel; a good Light bulb over the right-hand mirror lights it and pays out another paper.
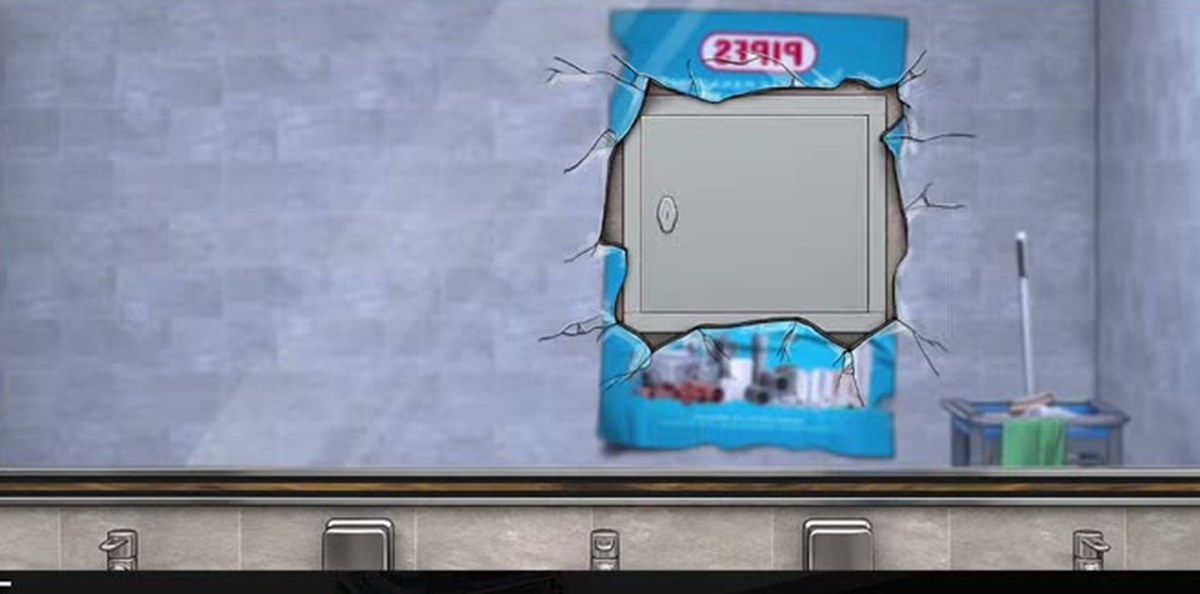
- Take the Utensil from the women's room back to the corridor plant to dig out a second key, and break the PIPES poster for a Rolled piece of paper.
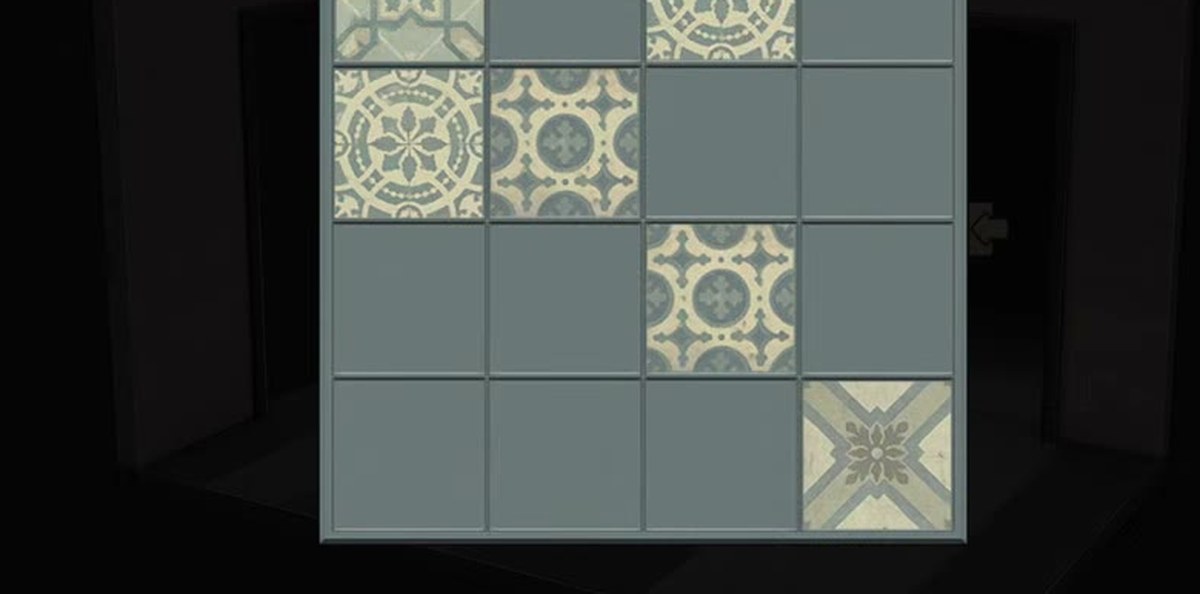
- Feed the 4x4 panel beside the exit doorway: 3 0 2 1 / 2 4 0 0 / 3 1 3 0 / 2 2 2 4 clicks per cell.
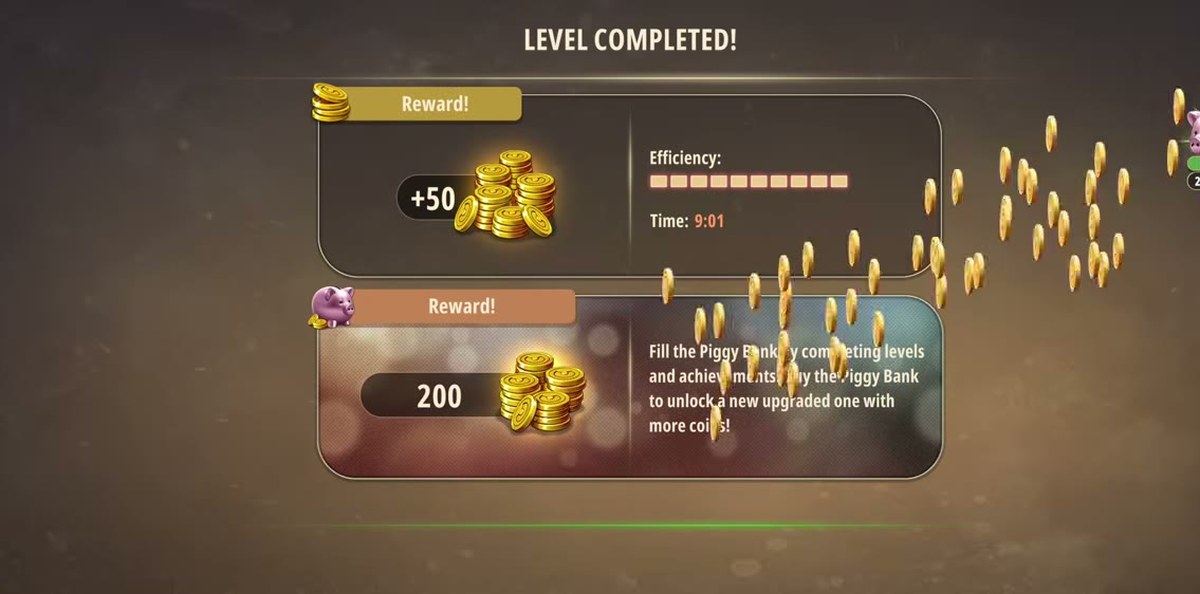
- The panel completes, the camera cuts to the corridor, and the level ends on +50 coins and Time: 9:01.

What this level actually is.
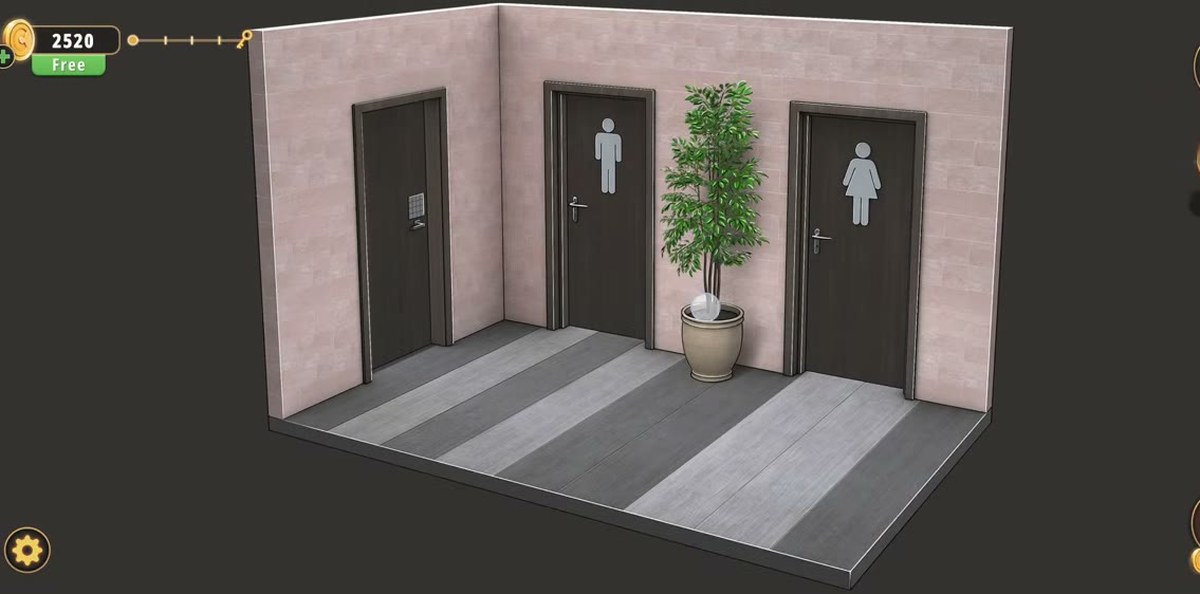
Level 25 is called Restrooms on the game's own title card — plural, and that is the whole design of the room. You start in a short corridor with a striped floor and three doors: a plain door on the left carrying a small lock panel, the men's door in the middle, and the women's door on the right, with a tall potted plant standing between the two labelled ones. Behind those two doors are two separate restrooms, and the level is spread across both of them plus the corridor that joins them.
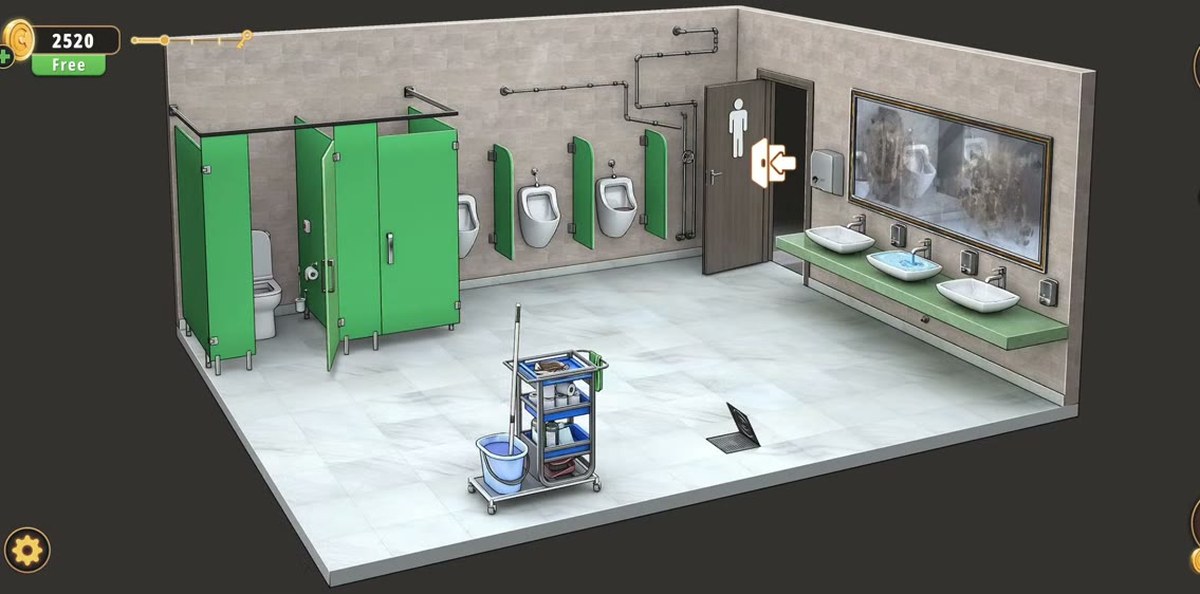
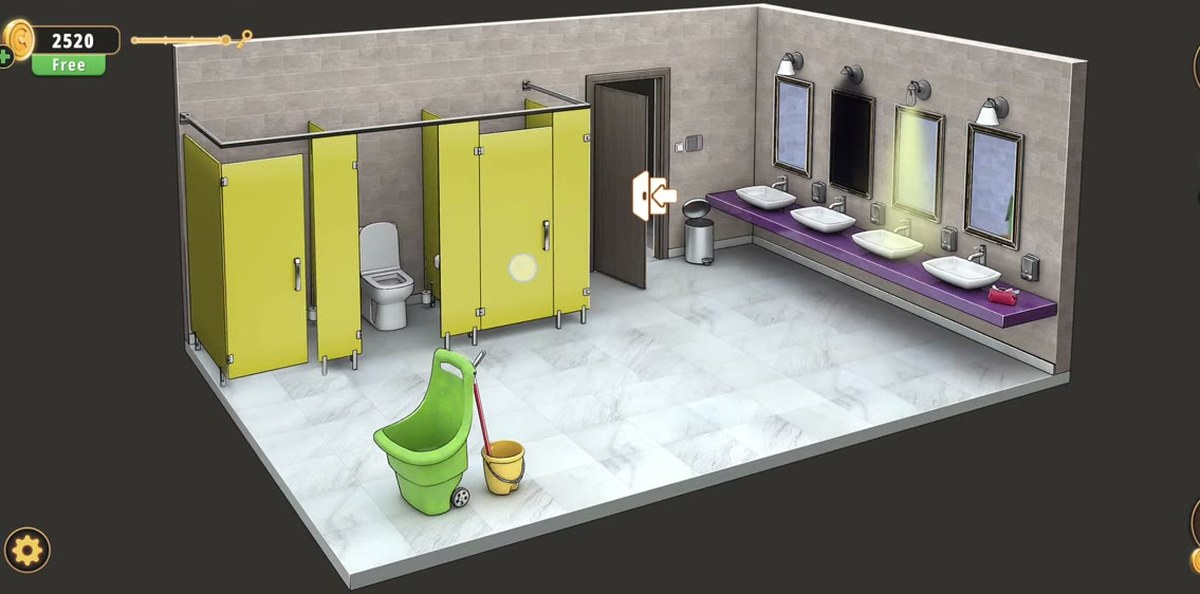
The men's room is the bigger of the two: a row of green stalls against the left wall, three urinals on the back wall under a run of exposed pipes, a long green counter with three basins and a wide mirror on the right, a cleaning cart parked in the middle of the floor, and the door back to the corridor in the far corner with a male figure on it. The women's room is a different palette — yellow stall doors, four basins on a purple counter, no urinals at all — and it is where the level hides its smaller pick-ups: a pink pouch, a pedal bin, a caged wall lamp and a hand dryer with a hole where its button should be.
What makes the room feel longer than nine minutes is that almost nothing is where the thing that opens it is. The key to the men's door is in a plant in the corridor. The key that opens the drain is inside the drain, on a string, and you cannot reach it until you have solved the lid. The paper that tells you the exit pattern is in the wall behind a poster, in a compartment that only opens once the poster is broken. The level is a chain of small tools, each one spent on a different fixture, and the two puzzles that actually stop people — the drain arithmetic and the 4x4 click panel — are at opposite ends of it.
It is also, for the record, one of the few Chapter 2 rooms with no numeric code at all. There is no keypad, no safe dial, no four-digit lock. Every number in the level is either a target sum or a count of clicks, which is why a guide that just hands you "the code" is no help here.
The room, fixture by fixture.
Before the steps, here is the map we wish we had on the first run. Everything in the level is one of these objects, and each one belongs to exactly one step.
| Object | Where | What it is for |
|---|---|---|
| Potted plant | Corridor, between the two restroom doors | Two separate pay-outs. First tap gives the Key for the men's door; a later tap with the Utensil digs out a second key. |
| Locked door | Corridor, left wall | A small panel rather than a handle. Stays shut for the whole level. |
| Mosaic panel | Corridor, beside the exit doorway | The 4x4 click grid. The last lock in the level. |
| Cleaning cart | Men's room, centre of the floor | Three tools over the run: Plunger, Spray bottle, Towel. |
| Counter and sinks | Men's room, right wall | Gloves on the counter; standing water in one basin; the Soap dispenser is on the tiled wall beside them. |
| Floor drain | Men's room, floor by the cart | The arithmetic ring. Centre reads 61; solving it lifts the square lid. |
| End stall | Men's room, left wall | A red button on the tiled wall pays out the Hook. |
| PIPES poster | Men's room, blue tiled wall over the sinks | Covers a recessed compartment. Bears the number 23919 in a red oval, which is signage, not a code. |
| Wall lamp and mirrors | Women's room, over the basins | A caged lamp holding a Light bulb, and mirrors that stay dark until one is lit. |
| Pouch and pedal bin | Women's room, counter and floor | Nail file from the pouch, Box of food from the bin, Utensil from dismantling the box. |
| Hand dryer | Women's room, wall by the door | A socket where a Machine button goes. Fitting it pays out a paper. |
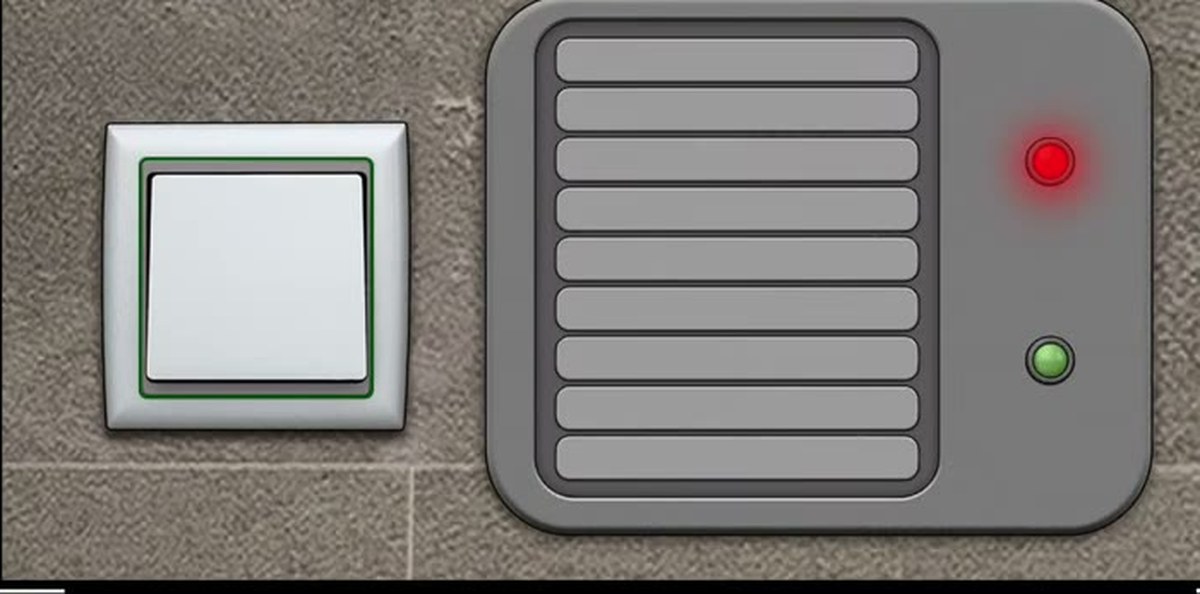
| Light switch | Corridor, beside the women's door | A white rocker with a strip panel next to it. Flips the corridor lighting. |
Step by step.
The exit panel, cell by cell.
This is the part of the level that no amount of exploring will solve on its own, so here is the whole grid. Rows run top to bottom as the panel is mounted; columns run left to right. A number is the count of clicks that cell wants; a greyed 0 is a cell no paper mentions and which you should leave alone.
| 3 | 0 | 2 | 1 |
| 2 | 4 | 0 | 0 |
| 3 | 1 | 3 | 0 |
| 2 | 2 | 2 | 4 |
Clicks per cell, top row first — twenty-nine clicks in total.
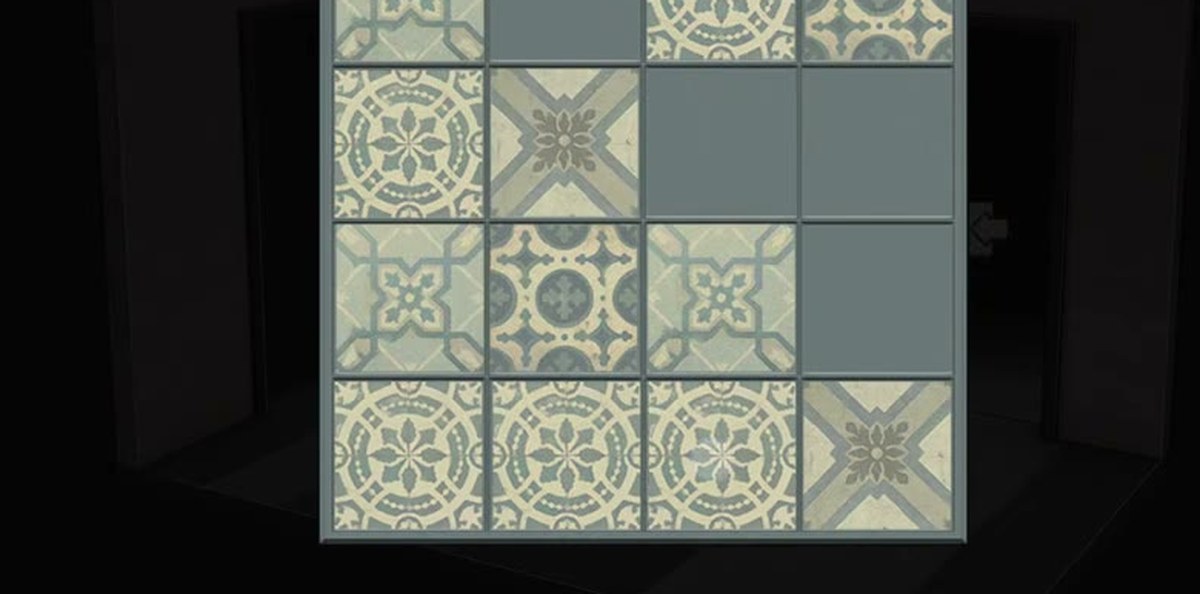
Where each number comes from matters, because if your copy of the level differs the table is only as good as the papers behind it. Four pieces of paper are needed, each of which marks three cells and leaves the rest blank. Read as a set, the twelve marked cells account for every non-zero value above, and the four cells that no paper marks are the four zeros.
| Paper | Cells it marks | Values |
|---|---|---|
| Paper A | Row 1 col 3 · Row 2 col 1 · Row 3 col 3 | 2 · 2 · 3 |
| Paper B | Row 1 col 4 · Row 3 col 1 · Row 4 col 2 | 1 · 3 · 2 |
| Paper C | Row 2 col 2 · Row 4 col 1 · Row 4 col 3 | 4 · 2 · 2 |
| Paper D | Row 1 col 1 · Row 3 col 2 · Row 4 col 4 | 3 · 1 · 4 |
The letters are ours, not the game's — the items are all just labelled Piece of paper, so the only way to tell them apart in the bag is to open each one and look at which cells are shaded. Paper B is the one we are most confident about, because it appears in both recordings and reads identically in each: a 1 in the top-right corner, a 3 in the third row on the left, and a 2 on the bottom row second from the left.
Two practical notes. First, clicking a cell more than its number does not lock the panel — it cycles, so you can carry on clicking until the right pattern comes round. Second, the four unmarked cells are meant to stay plain: a finished panel is not a full mosaic, it is twelve patterned tiles and four grey ones, which is exactly what the recording shows at 9:10.
How the level is built: five locks in a row.
Strip away the taps and Level 25 is five gates in a line, and every one of them is fed by something from a different room. Seen in order, the dependencies are:
- Plant → men's door. Two taps on the corridor plant produce the first key. Without it the whole men's side of the level is sealed.
- Drain → soap. The lid is arithmetic (four sides, 61 each, digit sums). The key inside it opens the soap dispenser, and the soap is what makes the towel able to clean a mirror.
- Lamp → mirror → paper. The nail file opens the caged lamp, the bulb from that lamp goes into the empty holder over the right-hand mirror, and the lit mirror pays out a paper. A tool and its reward sit in different rooms, which is the one genuinely confusing hop in the level.
- Button → dryer → paper. The machine button fits the hand dryer's empty socket and the dryer dispenses another paper. Nothing signposts the dryer as broken.
- Papers → panel. Four grids, twelve marked cells, twenty-nine clicks. Solving it ends the level outright — there is no sixth gate.
Everything else in the two rooms is either a tool for one of those gates or scenery. The gloves, the plunger, the spray bottle, the towel, the hook, the nail file, the utensil and the machine button all feed one of the five; the urinals, the toilet paper, the mop and the framed mirrors do not feed anything we could see.
Where people get stuck.
- The plant. It is the level's first move and it looks like decoration. If the men's door will not open and you have not tapped the pot twice, that is why.
- Adding the tiles as two-digit numbers. The drain says 61 for a reason: every side has to reach sixty-one by adding the individual digits. Add 78 as seventy-eight and every side overshoots by design.
- Looking for a code. The 23919 on the PIPES poster is the loudest number in the level and it opens nothing. So is the moment you realise there is no keypad anywhere — this room does not have one.
- The missing paper. Three papers are obvious pick-ups; the fourth is behind a poster, inside a wall compartment, rolled up. Players who have three grids and cannot make the panel work are usually short the one from the hand dryer instead.
- Trying to clean the mirror with a dry towel. The towel has to go through the soap and the spray bottle first. A dry towel on a dirty mirror does nothing and gives no feedback at all.
- Waiting for a door at the end. The panel is the last interaction. There is no exit key, no door icon and no final tap — the results screen arrives by itself.
- Walking the women's room before the lights. In the dark most of its pick-ups do not sparkle, and the pouch in particular is easy to miss when the room is grey.
Chapter 2 levels.
Chapter 2 opens with the Cell Phone Store and runs twenty-six rooms; the list below reflects what is written up so far.
- 1 Cell Phone Store guide
- 2 Cinemas guide
- 3 Pharmacy guide
- 4 Optical Store guide
- 5 Gym guide
- 6 Candy Shop guide
- 7 Food Court guide
- 8 Pet Shop guide
- 9 Indoor Playground guide
- 10 Restaurant guide
- 11 DIY Shop guide
- 12 Jewelry Store guide
- 13 Grocery Store guide
- 14 Exchange Office guide
- 15 Fashion Store guide
- 16 Art Supplies Store guide
- 17 Shoe Store guide
- 18 Sports Store guide
- 19 Bookstore guide
- 20 Furniture Store guide
- 21 Household Appliances guide
- 22 Print Shop guide
- 23 Bakery guide
- 24 Toy Store guide
- 25 Restroom you are here
- 26 Parking guide
FAQ.
How do you complete Rooms & Exits Chapter 2 Level 25, the Restroom?
Take the Key out of the potted plant in the corridor and open the men's door. Inside, the room hands you a chain of small tools, and every one of them is spent on a different fixture: the Hook fishes a key out of the floor drain, the Soap and a Towel clean the mirrors, a Light bulb relights one of them, and a Utensil digs a second key out of the plant in the corridor. The drain lid is the level's one arithmetic puzzle — each of its four sides must total 61 — and the exit is a 4x4 mosaic panel beside the doorway that wants a fixed number of clicks per cell, written on four Piece of paper items. Solve the panel and the level ends on +50 coins.
What is the rule for the drain puzzle in Level 25?
Each side of the circular drain cover must add up to 61, and the numbers are two-digit tiles whose digits are added separately — the game's own instruction text says a tile reading 78 counts as 7 + 8, not as seventy-eight. The centre of the lid is fixed at 61 and does not rotate; the concentric rings around it do. Read every tile on one side, add the digits, and rotate the rings until that side reaches 61. Work side by side rather than ring by ring: a single ring turn changes four sides at once.
What are the numbers for the 4x4 panel at the exit?
The panel wants this many clicks per cell, top row to bottom row: 3, 0, 2, 1 / 2, 4, 0, 0 / 3, 1, 3, 0 / 2, 2, 2, 4. That is twenty-nine clicks in all, and four cells that are never touched. The game's own instruction under the panel reads Click on each cell / As mentioned on papers, and the four papers in the inventory between them mark exactly twelve cells — the twelve non-zero values above.
Where do the four grid papers come from?
They are not in one place. One is dismantled out of the Crumpled piece of paper that comes out of the sink basin, another out of the Rolled piece of paper in the wall compartment behind the torn PIPES poster, and the rest are ordinary pick-ups around the two restrooms. Every one is labelled Piece of paper once it is flat, and the four we could read cleanly in both recordings are the ones that produce the click table on this page.
How much does Chapter 2 Level 25 pay out?
+50 coins, with the results screen reading Time: 9:01 underneath an efficiency meter whose segment count we could not read consistently enough to print. A second reward panel below it shows 200 with the piggy bank text — that is the bank filling up, not a second payout for this level.
Do I have to solve both restrooms?
Both rooms are part of the level and the items are split between them, but the order is yours. The men's room holds the drain, the sink, the soap dispenser and the cleaning cart; the women's room holds the pouch, the trash can, the wall lamp and the hand dryer. The light switch in the corridor is what lets you see the women's side properly, so most players flip it before they go in.
Is there a keypad code in the Restroom level?
No. There is no number pad anywhere in Level 25. The only written numbers are the 61 in the middle of the drain and the digits on the four papers, and neither is typed into anything — one is a target sum, the other is a click count. If you are hunting for a four- or six-digit code, you are thinking of a different room.
How long does the Restroom take?
The recording this guide is built from finishes in 9:01 of level time, and the drain ring alone eats about eighty seconds of it. Nothing in the level is timed and there is no fail state, so the only real cost is walking back and forth between the two restrooms because a tool was left behind.
What this page could not verify.
- The drain's ring layout. The centre 61 and the rule — each side totals 61, digits added separately, a 78 counting as 7+8 — were read twice and are solid. What we did not reconstruct is a ring-by-ring solution map: the tiles rotate faster than one frame per second resolves, so printing "put this tile here" would mean inventing the layout. The rule is enough to solve it; a position map from us would not be.
- Whether the four unnumbered cells are exactly the four that stay plain. The papers mark twelve cells and the finished panel shows twelve patterned tiles with four plain, which lines up. But at the resolution of the recordings we could not map each plain tile to a specific row and column with confidence, so the instruction to leave the unnumbered cells alone is an inference from the papers rather than a frame-by-frame read of the solved board.
- Which tool clears the sink. Both recordings show an item leaving the bag while the basin is zoomed and the water draining, but not which one — the footage is ambiguous between the plunger and the pipe at that moment. What is not ambiguous is the payout: a Crumpled piece of paper, which dismantles into a paper and a key.
- What the light switch's strip panel is for. The rocker is unambiguous and the corridor lights respond to it. The grey strips and the red and green lamps beside it are never touched in either recording, and we never see a wrong state rejected, so this page does not pretend to know what they check.
- The wall compartment behind the PIPES poster. We can see the torn poster, the recessed panel and the rolled paper coming out. We never see the panel being unlocked, so we cannot say whether it needs a key or simply opens once the poster is broken — the level's keys and locks do not map one-to-one anywhere in this room.
- Which door the 4x4 panel belongs to. It sits beside the exit doorway in the corridor, and solving it ends the level directly — no door swings, no exit icon appears, the camera simply cuts. Anything beyond "the panel is the exit" would be our reading of the set dressing rather than something the footage shows.
- The efficiency meter's value. The results screen has a segmented efficiency bar and we could not read it consistently: three separate passes over the same frame counted seven, eight and ten filled segments. The bar exists, it is not printed as a number anywhere on screen, and we would rather say that than pick the reading we liked best. The reward itself — +50, Time: 9:01, bank at 200 — was confirmed three times.
- Two item pick-ups. The wrench and the machine button both appear in the inventory between frames, with the camera on something else at the time. Their uses are visible — the wrench on the pipework, the button in the hand dryer's socket — but the exact fixture each one is taken from is not.
The honest summary is that Level 25 is a good room with two real puzzles and a lot of small errands, and the errands are what make it feel unfair. The drain and the paper grid are both fair; the plant, the lamp, the dryer and the poster are all hidden in plain sight, and none of them announces itself. If you take one thing from this page, take the order: plant, drain, soap, lamp, dryer, papers, panel.
Previous room: ← Chapter 2, Level 24 (Toy Store)