Unofficial fan-made guide. Not affiliated with Webelinx Games, the developer of Rooms & Exits: Escape Room Games.
Rebuilt from a recorded playthrough of the current build — 11 minutes 23 seconds of footage that finishes the level on an in-game time of 11:56. The capture was extracted at one frame per second, and every small display was then re-cropped and enlarged three to six times before it was read. A second recording of the same level was used to cross-check the slowest number on the page, the Costa Rica rate. Every number printed on this page was read twice from separate frames and the two reads agree; the details we could not read twice are named in the amber box further down instead of being dressed up as facts.
Chapter 2 · No Honor Among Thieves26 of 26 with full written steps · 26 with a video
Quick answer
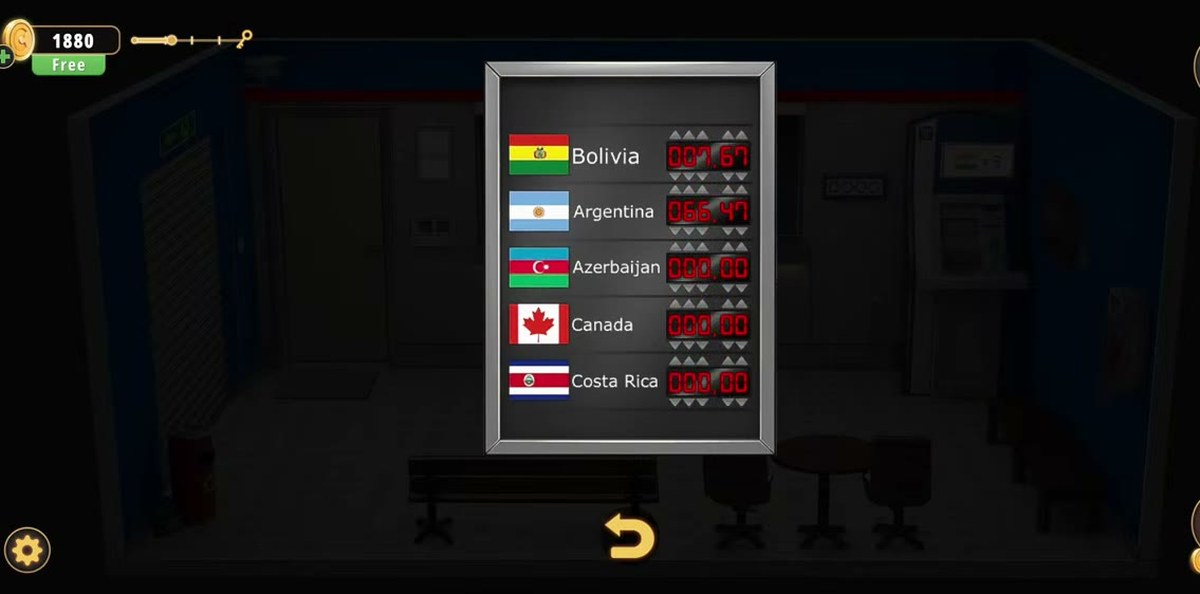
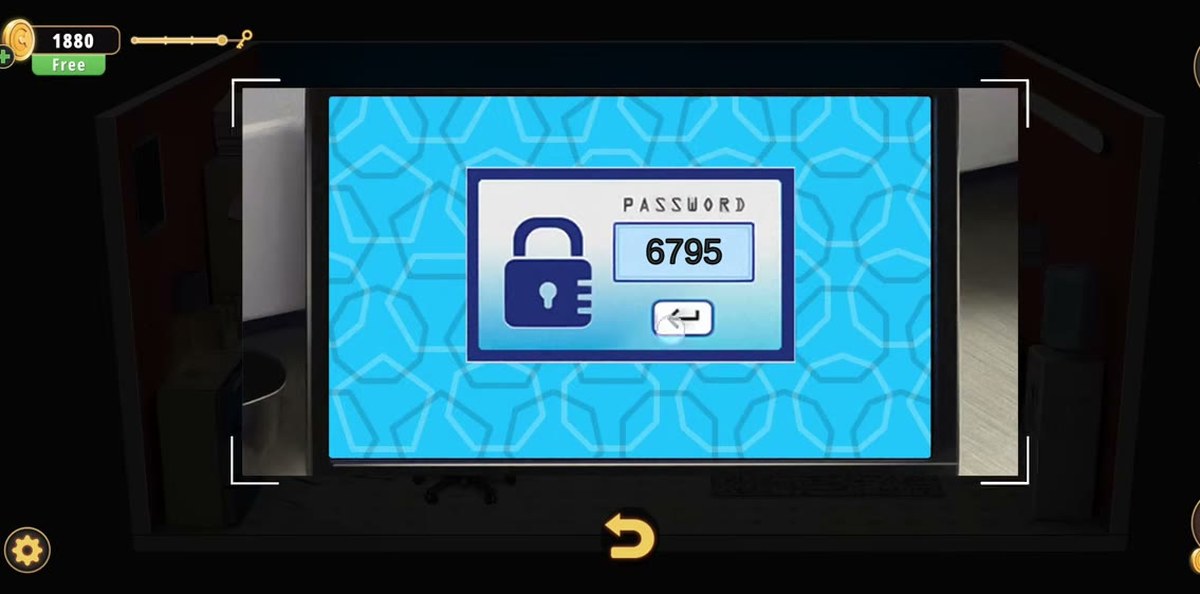
The Exchange Office is a three-area level: a lobby with a rate board, an office behind it, and the same lobby again for the exit. The five rates that open the office door are 7.67, 66.47, 1.89, 1.46 and 629.06. The laptop password is 6795. Finish worth +50 coins.
Lift the mat by the grey door → Key. Unlock the first-aid box → scissors, glove, box of gloves, bandage, medical tape, puzzle piece.
Tap the red bin → cable and puzzle piece. Combine medical tape + scissors → sticky tape.
Wall panel by the door: left button three presses, right button seven → handle (flagged below as a count we could not read off the footage).
Plug the cable into the socket by the ATM, tape it, then use the handle on the shutter → the rate board appears.
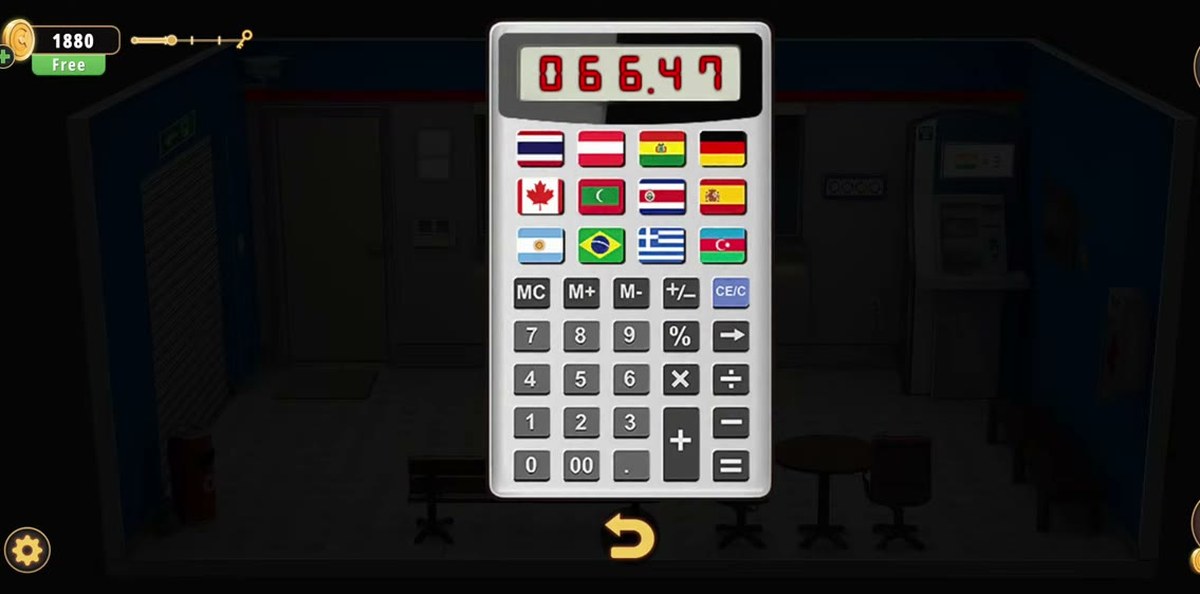
Tap the LED panel on the blue wall → hidden calculator. Tap each flag → its rate.
Set the five rows on the rate board → the door to the office opens.
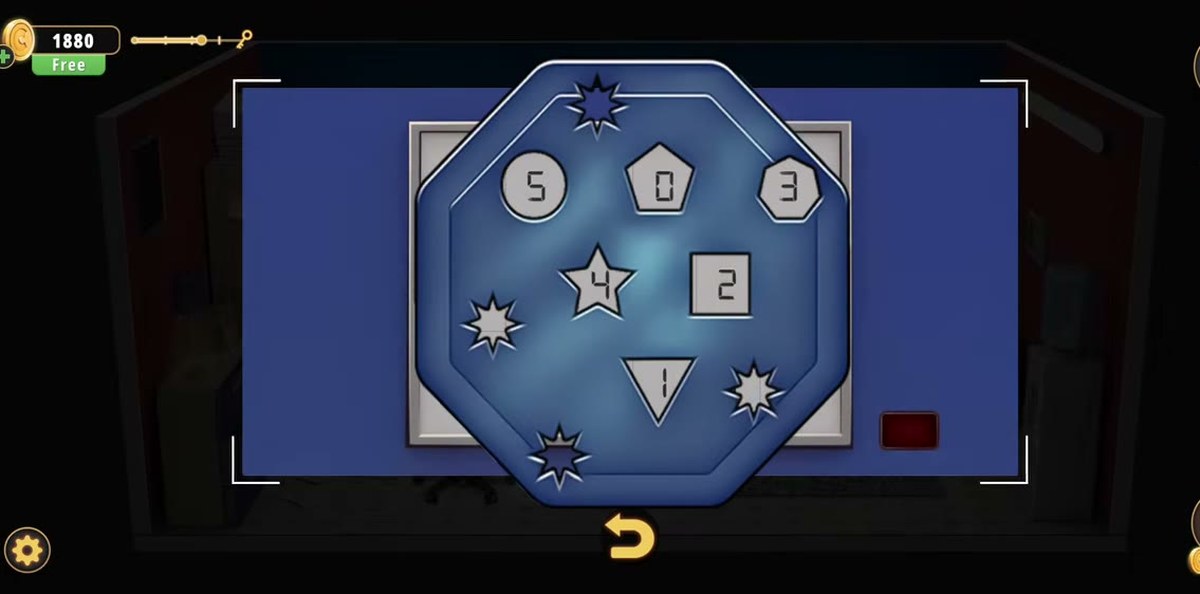
Office: collect puzzle pieces, the Pattern, the Dollar and the screwdriver; set the shape cabinet to 5-4-3-2-1-0.
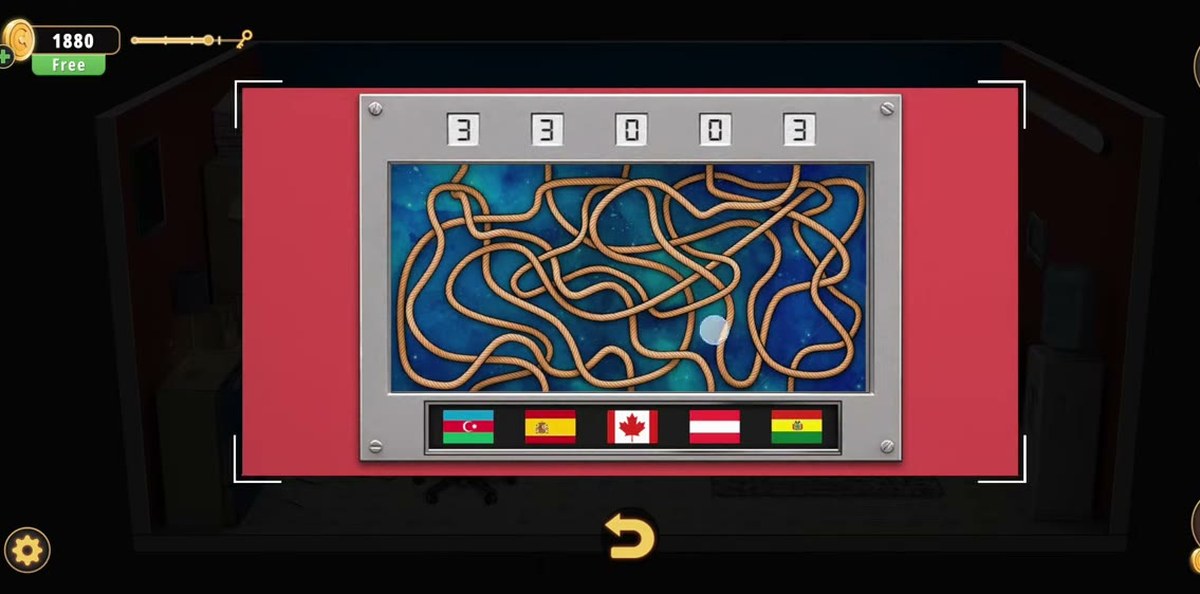
Rope panel on the red wall: count the horizontal stripes on each flag (the ATM shows India = 3 as the tutorial).
Combine scissors + glove → handle → red safe → piece of paper; print it, then unlock the laptop with 6795.
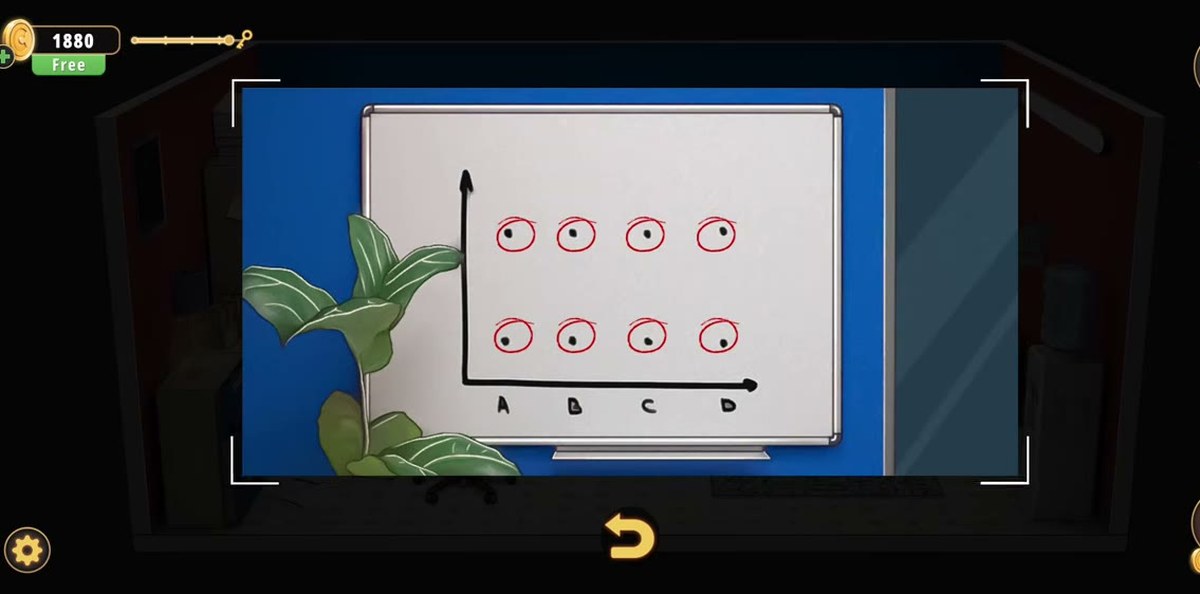
Vent → marker; boxes + whiteboard → box cutter; envelope → paper; dismantle bandage and gloves → Euro bill.
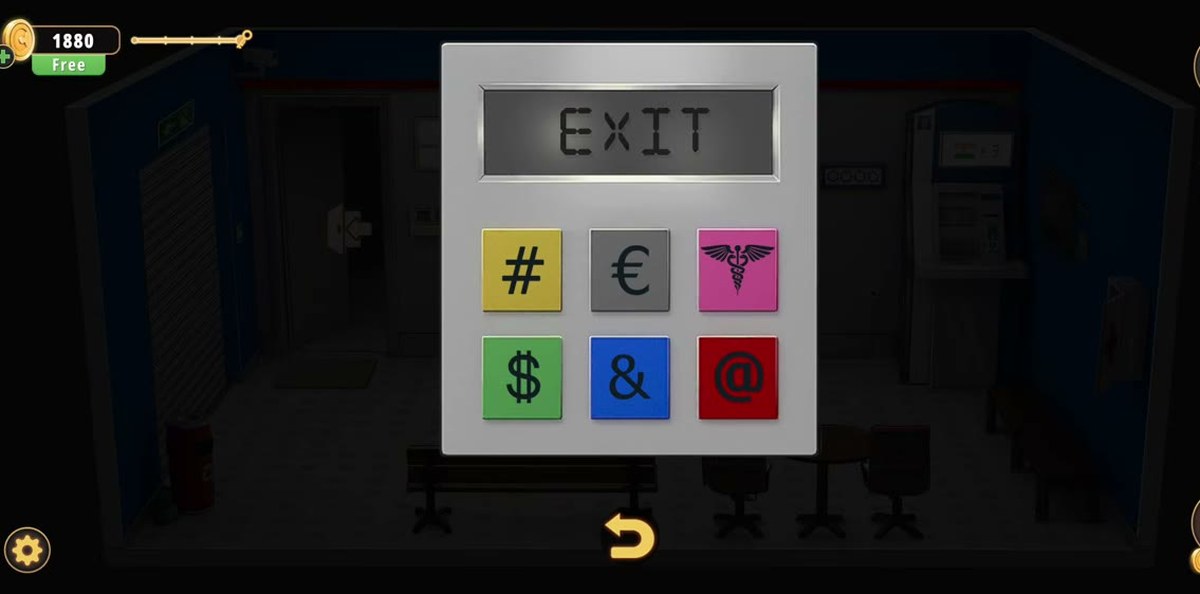
Exit keypad: yellow #, grey €, pink caduceus, green $, blue &, red @ → display reads EXIT → leave.
What this level actually is.
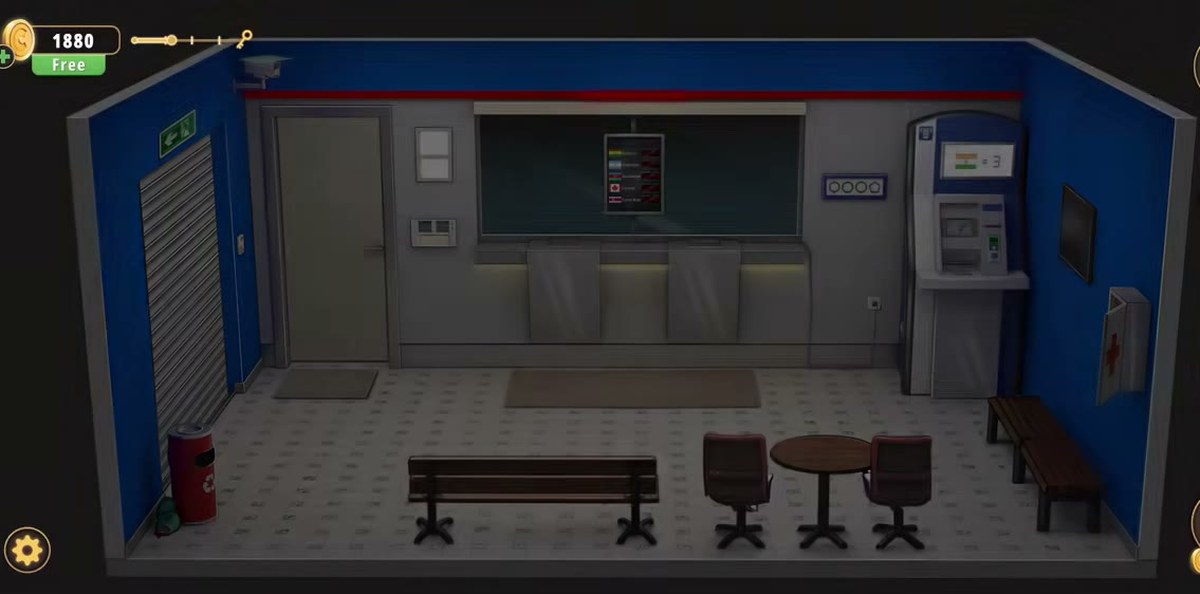
The Exchange Office is the first room in Chapter 2 that is genuinely bigger than it looks. What you see on the opening sweep is a closed currency exchange: a three-window service counter across the back wall with a corrugated metal shutter pulled down over the big rate board above it, an ATM standing against the right wall, a white first-aid box beside the ATM, a long bench, a round table with two red office chairs, and a plain grey door on the far left under a green EXIT sign. The floor is tiled, the walls are blue with a red stripe at ceiling height, and a red recycling bin sits in the left corner with wires hanging out of it.
That is the whole lobby, and it is only the first third of the level. The puzzles in this room are a chain of small mechanical jobs — lift a mat, unlock a box, repair a cable, raise a shutter — and they exist to get you to one thing: the rate board. The board wants five currency values, the values are printed nowhere in the room, and the calculator that holds them is hidden behind an ordinary-looking LED panel on the blue wall. Once the board is right, the door beside the counter opens and you walk into an office that has nothing to do with currency at all: desks, a water cooler, a laptop, a printer, a money counter, a red safe, a whiteboard and a wall panel covered in ropes and flags.
Then, after all of that, the level sends you back out into the lobby you started in, to a six-button keypad beside the grey door. That is the shape of the Exchange Office: lobby, office, lobby. Players who do not realise the last puzzle is back at the entrance will finish the office, collect everything, and then wander both rooms looking for a door that has been under their nose since the first second of the level.
The recording finishes it in 11:56 of level time, which makes it one of the longer Chapter 2 rooms. Almost all of that time is spent in the office, and almost all of the office time is spent on four item chains that all feed the same two puzzles. Nothing in the level is timed, there is no fail state, and a wrong input costs you nothing except the walk back to the panel.
Step by step.
Step 1 · 0:00Read the lobby, and note the ATM
Before you touch anything, take the wide shot seriously. Left wall: the corrugated shutter, the grey door under the green EXIT sign, the red bin with wires in it. Back wall: three service windows under a dark rate board, the shutter down over it. Right wall: the ATM, then the white first-aid box, then the bench. Centre: a round table with two red chairs. The ATM screen is already showing something, and it is not decoration: a flag with = 3 next to it. That is the level teaching you the rule for the last puzzle in the office — a flag's number is its count of horizontal bands — roughly two hours before you need it. It is the single most useful thing on screen at 0:00 and almost everyone walks past it.
Step 2 · 0:12The mat, the key, and the first-aid box
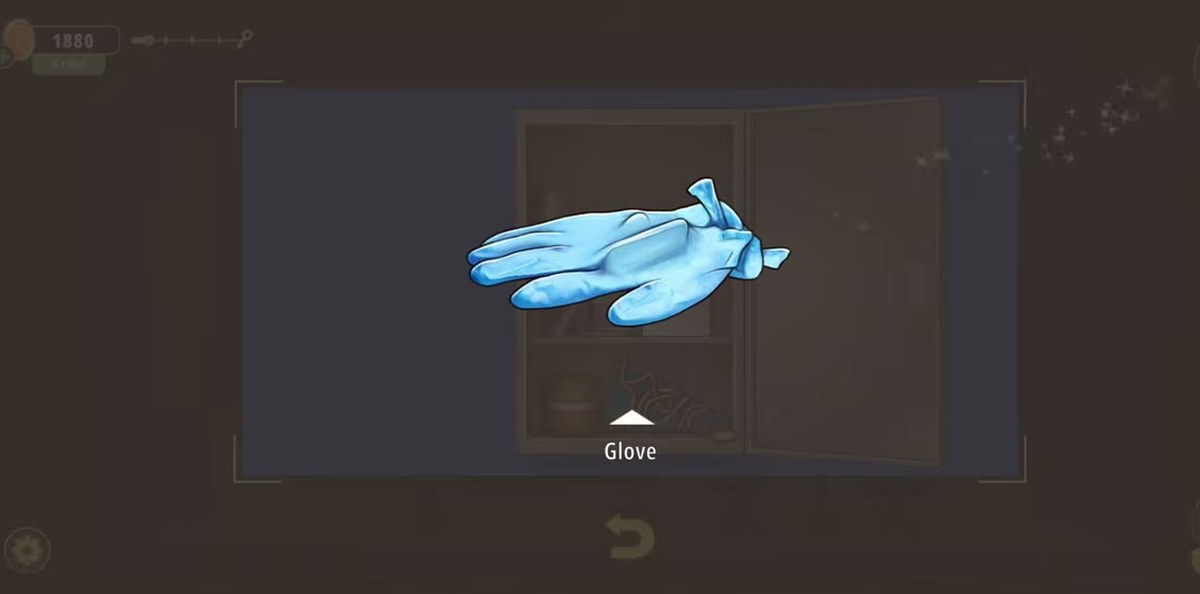
The mat in front of the grey door lifts and a silver key comes up with the label Key. There is exactly one keyhole in the lobby that wants it: the white first-aid box on the right wall. Open it and take everything, because the box is the level's whole medical supply chain — scissors, a glove, a box of gloves (the label on the carton reads Multi-Layer Dressing), a bandage, a puzzle piece and a roll of medical tape. Three of those items are ingredients rather than tools: the tape gets cut by the scissors, the scissors get combined with the glove later, and the bandage plus the box of gloves get dismantled at the end for the Euro bill. Do not leave any of them behind; the box does not restock.
Step 3 · 0:37The book with the red cross, and the thermometer that reads 37
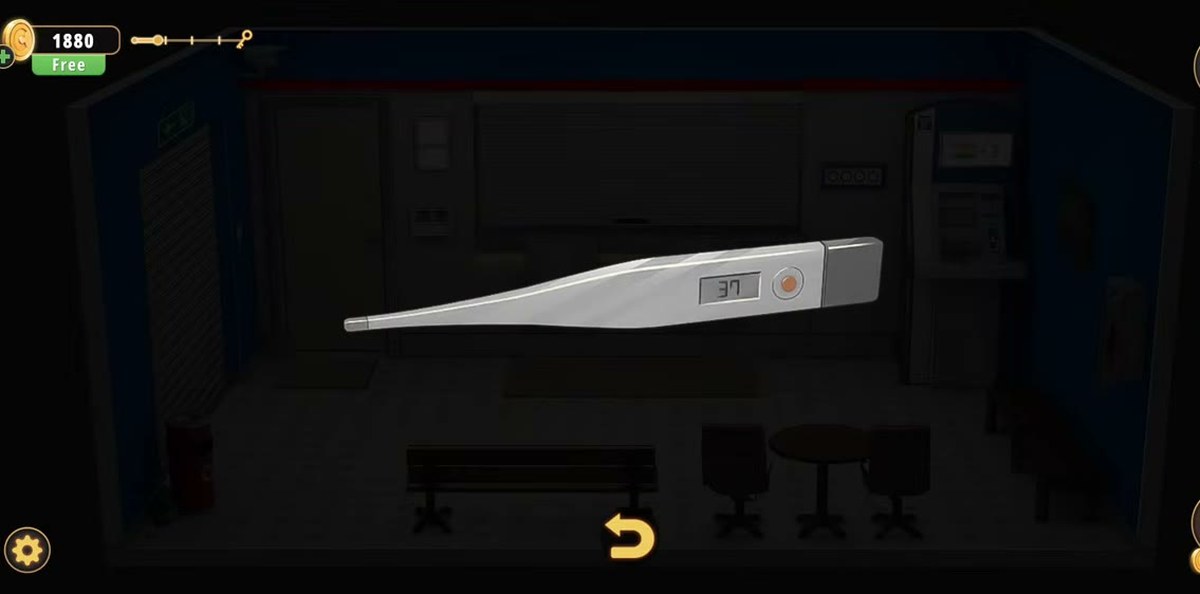
On the counter there is a thick book with a red cross on the cover. Tap it and swipe through the pages; partway in there is a loose sheet that goes into your inventory as a piece of paper. Next to the book sits a digital thermometer, and its display reads 37. We read that number twice, at 0:37 and 0:39, and both reads agree — but after finishing the level we can also tell you that nothing in the Exchange Office ever asks for a temperature. It is the one clue in the room that leads nowhere. Look at it, note it, and move on; if a future patch wires it to a lock, the number is 37.
Step 4 · 0:08The red bin: a cable and a puzzle piece
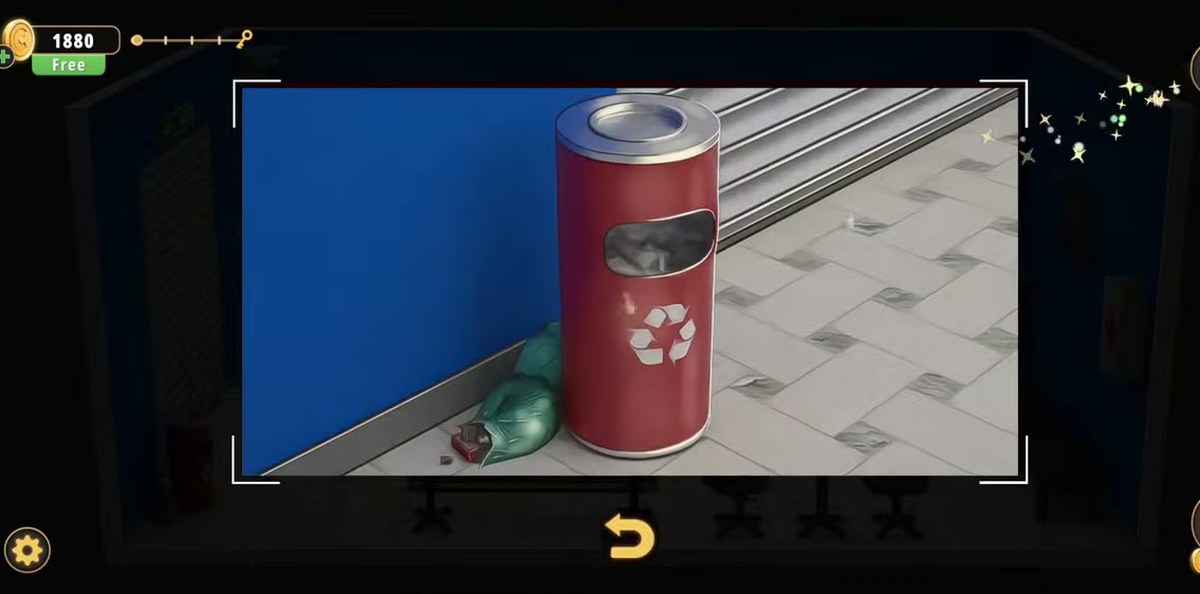
The recycling bin in the left corner is not scenery. Tap it and the wires inside resolve into a cable — it stacks as 2/6 in the inventory, so the game is counting cable segments rather than treating it as one object — plus another puzzle piece. This is the earliest puzzle piece in the level and the easiest to miss, because the bin is behind you on the opening camera and the interaction has no highlight until you tap it. Two pieces are not enough for anything yet; there are six in total across the two rooms and the panel that wants them is on the red wall in the office.
Step 5 · 0:55The two-button panel beside the door
Between the grey door and the service counter there is a pale grey wall unit with two large square buttons and two green bar counters above them. Pressing a button advances its own bar and nothing else; the panel is a pure counter, not a code wheel. When both bars sit at the values the panel wants, a metal handle drops into your inventory. The counts that cleared it in our playthrough were three presses on the left button and seven on the right — but be aware that this is the one number on the page we could not read twice off the footage, because the capture only shows the bars filling rather than the individual presses. It is flagged again in the amber box below.
Step 6 · 1:10Repair the ATM feed
Open the inventory and combine medical tape with scissors: the scissors cut the roll down to a usable strip. Then go to the socket on the wall beside the ATM, put the cable into it, and apply the cut tape to hold the plug in place. This is a two-step repair with no puzzle behind it — you are not matching wires or following a diagram — and it exists to make the point that the level expects you to combine items rather than only use them. If the socket refuses the cable, you are trying to use the uncut roll; the tape has to be cut first.
Step 7 · 1:20Raise the shutter and meet the rate board
Use the handle on the metal shutter above the service counter. It rolls up and the board behind it is the real puzzle of the lobby: five rows, each with a country name, a flag and six digit wheels with a pair of up and down triangles per digit. Top to bottom the rows read Bolivia, Argentina, Azerbaijan, Canada and Costa Rica. All five start at zero. The board is not a keypad and there is no submit button — it accepts the values as soon as they are right, which is why players who expect a green tick sit in front of a finished board wondering what to press.
Step 8 · 1:28The hidden calculator on the blue wall
The LED screen on the blue wall to the right of the counter is a cover, not a screen. Tap it and it slides aside to reveal a calculator: a red seven-segment display, three rows of flag buttons, and a normal number pad underneath. Tap a flag and the display prints that currency's rate. This is the only place the five values exist, and there is no list, no printout and no note anywhere in the lobby that repeats them — so read all five before you go back to the board, or you will be walking between the two panels five times.
Step 9 · 1:45The five rates
These are the numbers the level is built around, and each was read twice from separate frames:
Bolivia — 7.67 (read at 1:30 and again on the board at 2:25 as 007.67).
Argentina — 66.47 (read at 1:37 and again on the board at 2:25 as 066.47).
Azerbaijan — 1.89 (read at 2:18 and 2:19 as 001.89).
Canada — 1.46 (read at 2:21 and 2:22 as 001.46).
Costa Rica — 629.06 (read at 2:48 and 2:49, and independently in a second recording of the same level at 2:40).
Set each row with the triangles. The decimal point is fixed, so you are only changing digits — and the last three digits of a row are the ones that actually move the value, which makes it tempting to rush the leading zeros. Take the time to check the display against this list before you walk away.
Step 10 · 3:05The door to the office opens
When the fifth row is correct the door beside the service counter swings open on a dark office. The camera pulls back to the lobby, the door stays open, and from this point the level has two rooms rather than one. You can walk back and forth freely; nothing in the lobby resets and nothing in the office is time-gated. Before you go through, make sure the inventory still holds the puzzle pieces from the bin and the first-aid box — the office gives you four more and the panel on the far wall wants the full set.
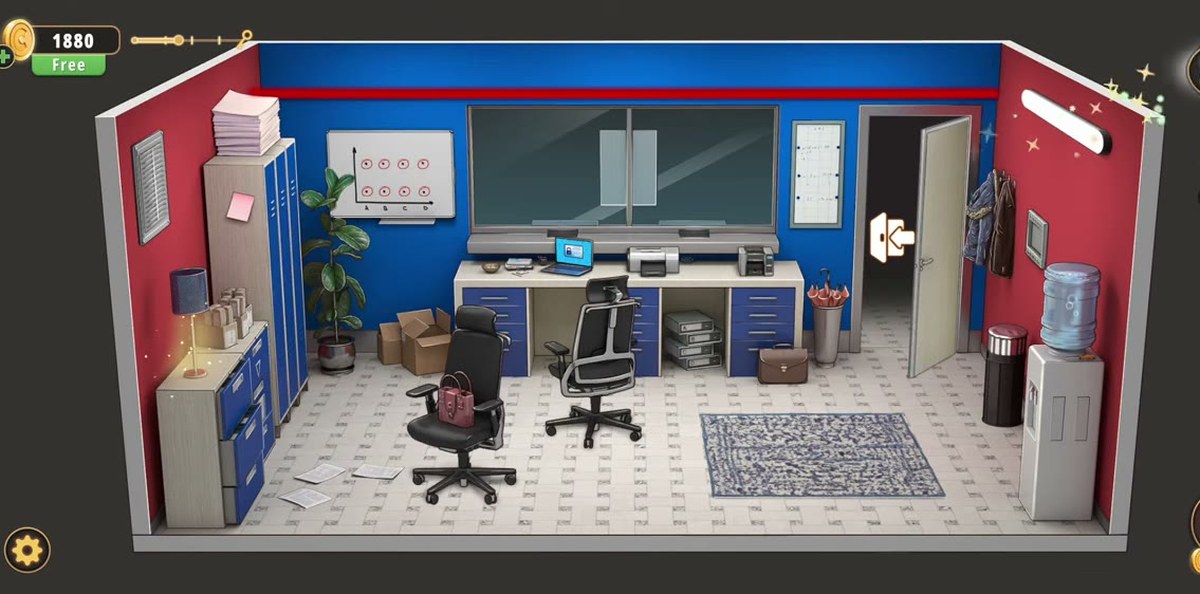
Step 11 · 3:12The office: what is in it
The second room is a working office: two desks with monitors, wheeled chairs, a water cooler by the door, filing cabinets on the left, a red accent wall with a large panel on it, a whiteboard, a printer, a laptop, a money counter and a framed poster of geometric shapes. Everything that matters is on the perimeter — the desks themselves are almost entirely scenery. The four item chains in this room are: puzzle pieces (scattered in four places), the Pattern card, the paper-and-printer chain, and the whiteboard chain. Do them in that order and the room resolves in about eight minutes; do them in a random order and you will spend twenty.
Step 12 · 3:20Papers, the money counter and the screwdriver
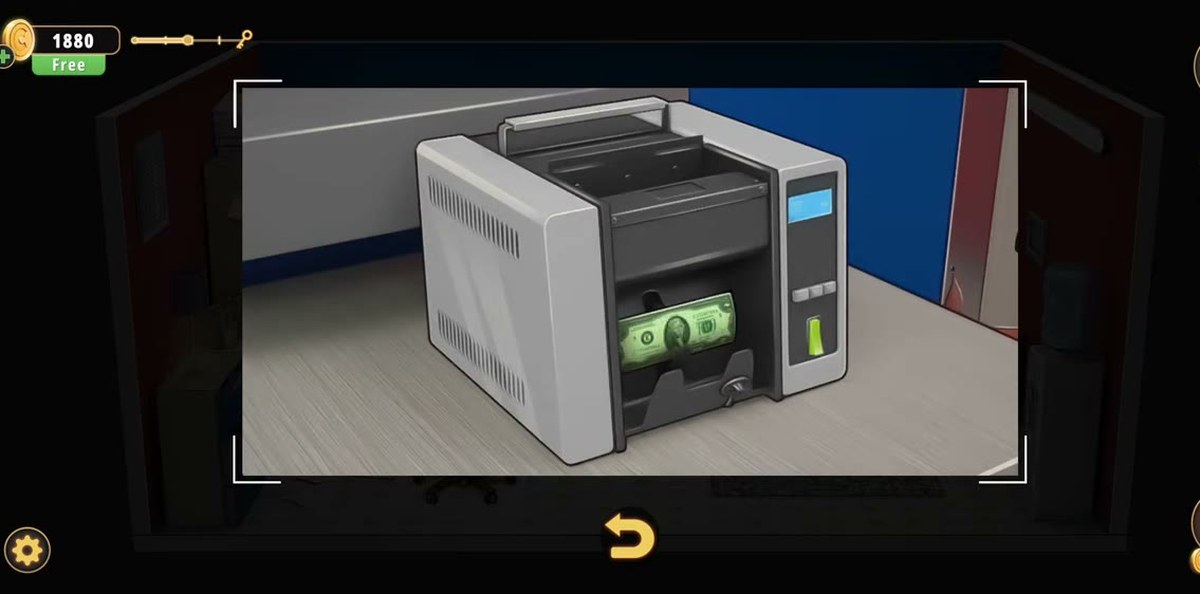
Three pickups before any puzzle. The sheets of paper on the floor in the lower-left corner hide a puzzle piece under the middle one. The money counter on the right of the desk has a red button: press it and it runs a single bill through and drops a Dollar into the tray. The screwdriver is tucked behind the water-cooler jug — walk the camera to the cooler and tap the gap behind it rather than the bottle itself. None of the three is signposted, and the money counter in particular looks like furniture until you notice the red button.
Step 13 · 3:40The last two puzzle pieces and the Pattern card
The blue coat on the hanger by the door holds a puzzle piece, and a second one is under the book to the left of the laptop. The card clipped to the top right of the printer is the Pattern item — the same kind of inventory card the Cell Phone Store used for its lock trace, and just as easy to ignore. Examine it once you have it: the picture on it is the key to the shape cabinet on the left-hand wall, not to anything in this room's puzzles.
Step 14 · 4:01The shape cabinet: 5-4-3-2-1-0
The blue octagonal panel on the left cabinets holds the digits 0 to 5, each one sitting inside a different shape — a circle, a pentagon, a hexagon, a star, a square and a triangle — with a red button beside the panel. Examine the Pattern, then tap the digits from the highest to the lowest: 5, 4, 3, 2, 1, 0. The panel does not care about the shapes; it is checking the order of the values. Clearing it releases the last puzzle piece and, with it, everything you need for the red wall.
Step 15 · 4:15The rope and flag panel on the red wall
Place every puzzle piece on the panel on the red accent wall. It resolves into a picture: tangled ropes on a blue background, five small digit displays along the top and five flags along the bottom. Each rope runs from one flag to one display. Your job is to write, in each display, the number of horizontal stripes on the flag at the other end of its rope. The ATM in the lobby is the worked example — a flag and = 3 — and it is the only instruction the game ever gives you for this puzzle.
Step 16 · 5:20Why the flag panel defeats people
Three things go wrong here. First, the flags are randomised per player: the set in our run was not the set in the written walkthrough we cross-checked, and the digits differ between the two recordings we watched. Do not copy a number string off a video — read your own flags. Second, the answer goes in the display at the end of the rope, not in the display above the flag, so left-to-right reading gives you the wrong row. Third, a flag with vertical bands (Canada) counts as 0, not as three, because the question is horizontal stripes. That single rule is what most players get wrong, and it is exactly what the ATM is teaching.
Step 17 · 6:20Scissors plus glove, and the red safe
Open the inventory and combine the scissors with the glove. You get a second handle — a different one from the lobby's, and the game does not distinguish them in the label, which is why players who still have the first handle in the bag assume the combination failed. Use it on the red safe in the office and take the piece of paper inside. That sheet is blank, and it is supposed to be: it is the printer's input, not a clue.
Step 18 · 6:56The laptop: 6795
Put the blank sheet into the printer, then open the laptop. It asks for a PASSWORD. The answer is on the framed poster of geometric shapes hanging in the room: count the sides of each shape, left to right, and enter the four counts. In our run the shapes gave 6, 7, 9, 5, so the password is 6795 — read twice, at 7:04 and 7:06, with the same four digits in the field both times. The keypad shows each digit as you press it, so check the field before you confirm; there is no penalty for a wrong entry, only a re-type.
Step 19 · 7:12Print the sheet
The laptop boots to a camera view of the lobby. Two controls matter: the camera icon with a down arrow, which tilts the view, and the folder icon that opens the print menu. Use both, then send the job. Go back to the printer and take the sheet that comes out. It carries a symbol, and that symbol is one of the six the exit keypad will ask you to reproduce. If the printer says something is missing, the blank sheet is still in your inventory and has not been loaded.
Step 20 · 7:50The vent, the marker and the whiteboard
Use the screwdriver on the air vent in the red wall and take the marker inside. Now look at the boxes under the desk: each one has black dots printed on it, and their positions are the data for the whiteboard. Go to the whiteboard — it shows four columns labelled A, B, C and D with a row of dots above and below the axis — and use the marker to connect bottom A to top B, then bottom C to top D. The board accepts the drawing and hands you a box cutter. The dots are not a code and there is nothing to count; it is a join-the-dots instruction that you read off the boxes rather than the board.
Step 21 · 9:00The envelope and the Euro bill
Back in the lobby there is an envelope on the floor by the door. Use the box cutter on it to get another piece of paper. Then open the inventory and dismantle the bandage and the box of gloves: between them they yield a 5 Euro bill. Both of these are inventory verbs, not world interactions — Dismantle is the third button under the grid and it is the one nobody presses. The Euro bill is the level's thematic item rather than a key: it is what the exchange office was for, and the game gives it to you on the way out.
Step 22 · 10:52The six-button keypad by the exit
This is the puzzle that sends people back and forth between rooms, because it is in the lobby, on the wall beside the grey door you have been walking past since 0:00. Six square buttons in two rows of three, each a different colour, each cycling through symbols when tapped: yellow #, grey €, pink caduceus (the winged staff), green $, blue & and red @. Set them to match the symbols your dismantled items and printed sheet carry. When the last one is right the display reads EXIT and the door unlocks. In our capture the final correction was the green button, which was sitting on @ and had to go to $.
Step 23 · 11:20Leave: +50 coins
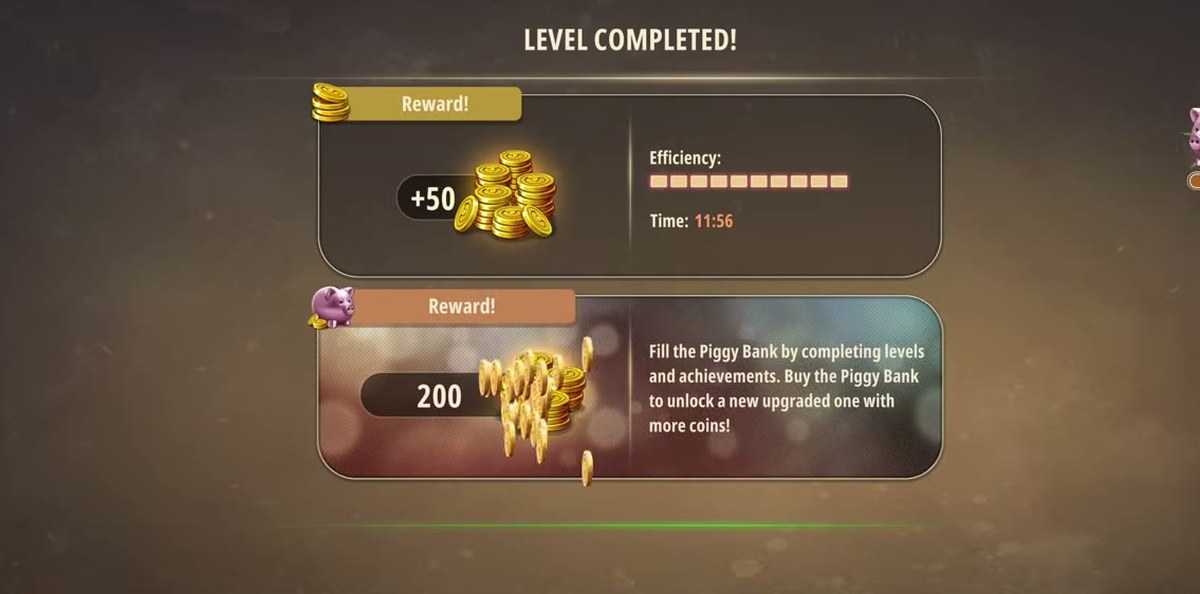
Open the grey door under the green EXIT sign. The camera pulls back, the level ends and the results screen reads LEVEL COMPLETED! with a reward of +50 coins, a green efficiency bar and a time of 11:56. Nothing carries over except the coins; there is no collectible tied to the puzzle pieces and no bonus for finishing under a set time.
Once you have finished the level it stops looking like twenty small puzzles and starts looking like one machine with four chains feeding two locks. The first chain is the rate chain: mat, key, first-aid box, wall panel, shutter, calculator, board. Every item in it exists only to get the five values onto the board, and none of them is used again afterwards. The second is the paper chain: scissors plus glove gives a handle, the handle opens the safe, the safe gives a blank sheet, the printer prints it. The third is the drawing chain: screwdriver, vent, marker, boxes, whiteboard, box cutter. The fourth is the symbol chain, which is the only one that is not linear — every item you dismantled during the other three contributes one symbol to the exit keypad.
Two details make the layout harder than it needs to be. The first is that there are two handles with the same name, made in different ways, used on different fixtures, and the inventory does not distinguish them: both cards are labelled simply Handle, and the only way to tell them apart is where you are standing when you try to use one. The second is that the exit is behind you. The keypad is not in the office, not on the red wall, and not next to the safe: it is beside the grey door in the lobby, at the exact spot where you picked up the key at 0:12. Players who finish the office and go looking for the last puzzle in the office lose more time to that than to any code.
The piece count is worth knowing in advance. Six puzzle pieces go on the red wall panel: one from the red bin, one from the first-aid box, one under the office papers, one in the blue coat, one under the book beside the laptop, and one from the shape cabinet. The panel will not resolve until all six are placed, and there is no counter telling you how many you are missing — if the panel stays a jumble of loose pieces, you are short one and the shape cabinet is the likeliest place you have not looked.
What we could not read twice. Three things on this page are not double-read facts, and we would rather label them than bury them.
The press counts on the two-button panel (three left, seven right). Our capture shows the two green bars filling but never shows the individual presses clearly enough to count twice. The counts come from a written walkthrough we cross-checked against the footage, and the footage is consistent with them — the bars do fill, and the handle does drop — but treat them as a strong lead, not a reading.
The digit string on the rope panel. We read our own panel twice and the two reads did not agree on one slot, and the flags are randomised per player anyway, so we publish the rule and not the string. Do not copy five digits from any video, including ours.
The keypad's symbol mapping. Read once from the frame where the display flips to EXIT, and it matches the written walkthrough exactly, which is why we print it — but it is one reading plus one cross-check rather than two clean reads.
Everything else that is numeric on this page — 7.67, 66.47, 1.89, 1.46, 629.06, 37, 6795, 5-4-3-2-1-0, +50 and 11:56 — was read twice from separate frames and the reads agree.
Where people get stuck.
They never find the calculator. The LED screen on the blue wall looks like part of the room, not like a cover, and there is no prompt on it until you tap it. If you have the board open and no numbers, the calculator is the answer, and it is three metres to the right of the board.
They enter the rates as whole numbers. The board has six wheels and a fixed decimal point, so 7.67 is 007.67 and not 000.77 or 00767. The leading zeros are free; the digits after the point are the ones that must be exact.
They count the wrong stripes. On the rope panel the question is horizontal bands. Canada's vertical bands count as zero, and a cross or a crest in the middle of a flag does not change the count. The ATM in the lobby shows the rule working on one flag before you ever reach the panel.
They read the ropes as columns. Each rope ends at a different display than the flag below it. Trace the rope with your eye rather than filling the row left to right — in our panel no rope was vertical, which is exactly why the left-to-right guess fails.
They miss the Dismantle button. The bandage and the box of gloves do nothing until you dismantle them, and Dismantle is the third verb under the inventory grid. Players who only ever tap Examine and Use finish the level convinced there is an item they never found.
They hunt for the exit in the office. The last keypad is in the lobby, beside the grey door. After the printed sheet and the box cutter, walk back out — the office is done.
Chapter 2 around this room.
Level 14 sits between the Grocery Store and the Fashion Store. Written steps are live for Levels 1 to 10 and for this one; the rest carry video only for now.
Chapter 2 · No Honor Among Thieves26 of 26 with full written steps · 26 with a video
What are the exchange rates in Chapter 2 Level 14?
Bolivia 7.67, Argentina 66.47, Azerbaijan 1.89, Canada 1.46, Costa Rica 629.06. They are not written anywhere in the lobby. Tap the LED screen on the blue wall beside the counter, the cover slides aside, and a calculator appears with a row of flag buttons; tap a flag and the red display shows that country's rate.
How do I open the rate board?
The board is behind the metal roll-down shutter above the service counter. The handle that raises it comes from the two-button panel on the wall beside the grey exit door. Once the shutter is up you get five rows, one per country, each with six digit wheels and up and down triangles.
What is the laptop password?
6795. The framed poster in the office shows four geometric shapes in a row; count the sides of each and enter the counts in the same order. Our four shapes gave 6, 7, 9 and 5. The keypad echoes each digit as you type, so you can check the field before you confirm.
How do I open the shape cabinet in the office?
The blue octagonal panel on the left-hand cabinets holds the digits 0 to 5, each inside a different shape. Examine the Pattern item, then tap the digits from highest to lowest: 5, 4, 3, 2, 1, 0. The cabinet releases the last puzzle piece.
How do I solve the rope and flag panel?
With all six puzzle pieces placed, the red wall panel becomes ropes on a blue background: five digit displays along the top, five flags along the bottom. Follow each rope from a flag to the display it ends at and enter the number of horizontal stripes on that flag. The ATM in the lobby is the tutorial and shows one flag with = 3. The flags are randomised per player, so read your own panel.
Where do I get the handles?
There are two. The first comes from the two-button panel beside the grey door and raises the shutter over the rate board. The second is made in the inventory by combining the scissors with the glove, both from the first-aid box, and it opens the red safe in the office.
What is the thermometer reading 37 for?
As far as we can tell, nothing. The digital thermometer in the first-aid box clearly reads 37 and we read it twice, but in a full playthrough no lock in either room asked for a temperature. Treat it as scene dressing unless a later patch gives it a job.
How long does the level take and what does it pay?
The recording finishes the Exchange Office in 11:56 of level time for +50 coins. It is one of the longer Chapter 2 rooms because it has three areas — the lobby, the office behind it, and the lobby again for the exit — and the office hides four separate item chains.
 GridPaw
 Shikaku
 Akari
 Kakuro
 Nonogram
 Nurikabe
 Pictomino
 KenKen
 Binary
 Star Battle
 Hashi
 Slitherlink
 Murder Sudoku
 Meowdoku
 Crazy Cleanup