Unofficial fan-made guide. Not affiliated with Webelinx Games, the developer of Rooms & Exits: Escape Room Games.
Rebuilt frame by frame from a recorded playthrough of the current build — 9 minutes 10 seconds of footage, extracted at one frame per second and read at full resolution. Two codes are published on this page, 6841 and G6H8, and each was read twice on separate frames immediately before the game acted on it. The order of the candy layers inside the jar is not published here: our footage shows the levers being pulled but never shows a legible clue for the sequence, so the page tells you where the clue lives instead of inventing an order.
Chapter 2 · No Honor Among Thieves26 of 26 with full written steps · 26 with a video
Quick answer
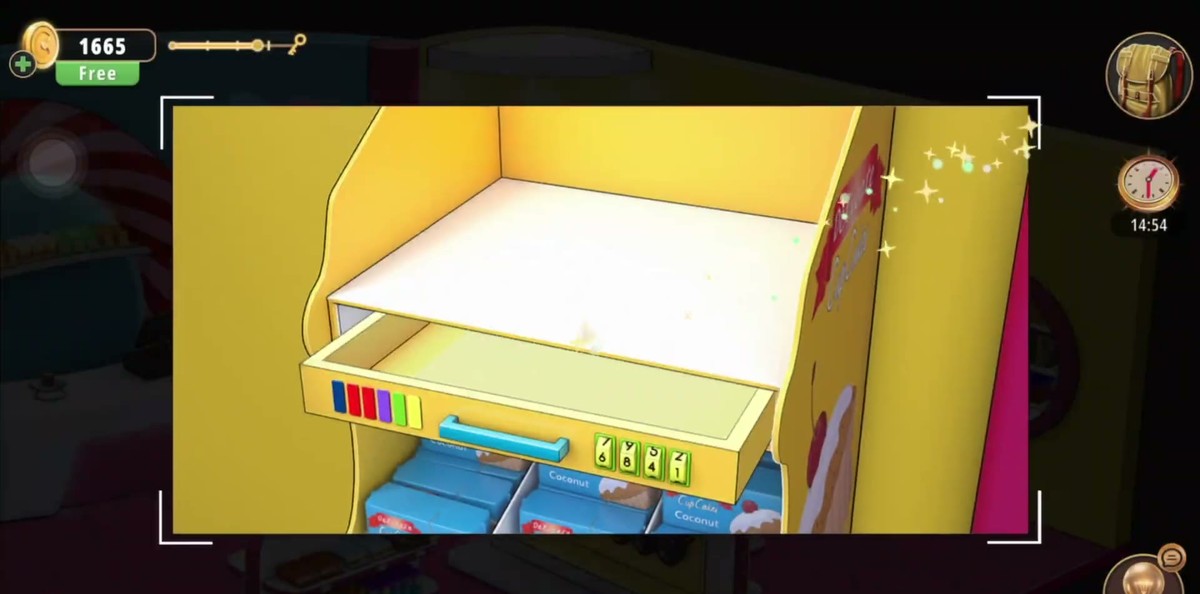
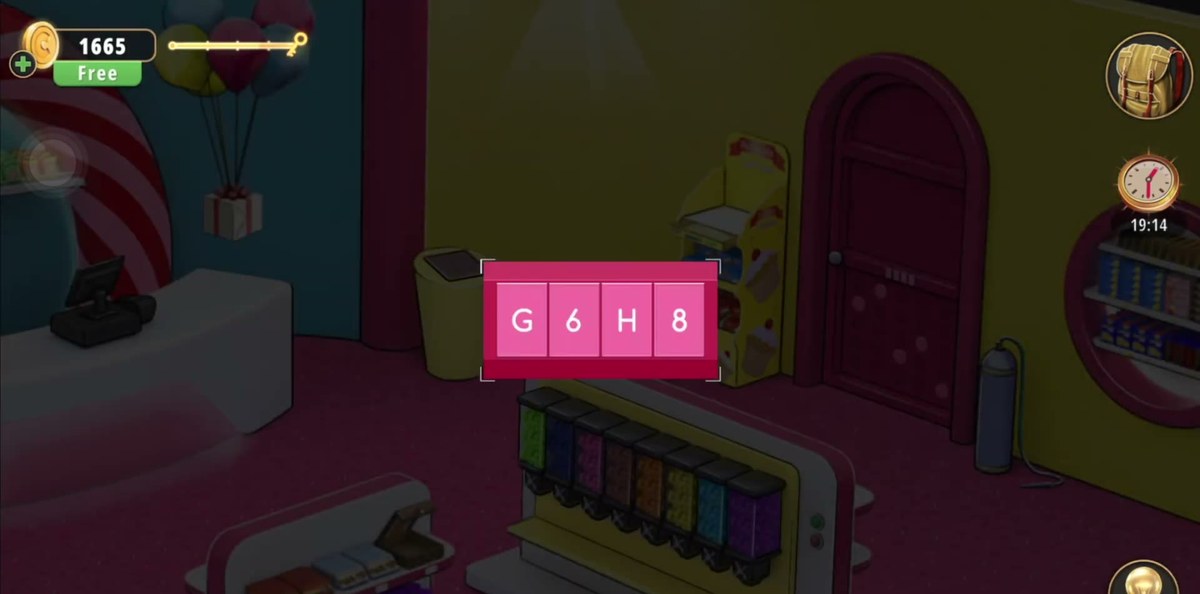
The Candy Shop ends with an alphanumeric code, not a number: G6H8 goes into the four-slot panel beside the pink arched door. The only four-digit number in the room is 6841, and it opens the yellow display drawer.
Clear the ice-cream memory game on the red board — watch the reveal before you start flipping.
Crack the pinata with the candy cane and clear the chocolate-box symbol puzzle for the ring and the wrapped bar.
Beat the 4×4 sweet sudoku on the cash register tray.
Lift the present to get the empty jar, then stack candy layers in it from the eight dispensers, following the paper clue.
Weigh the jar, set the four wheels in the yellow drawer to 6841, and take what the drawer holds.
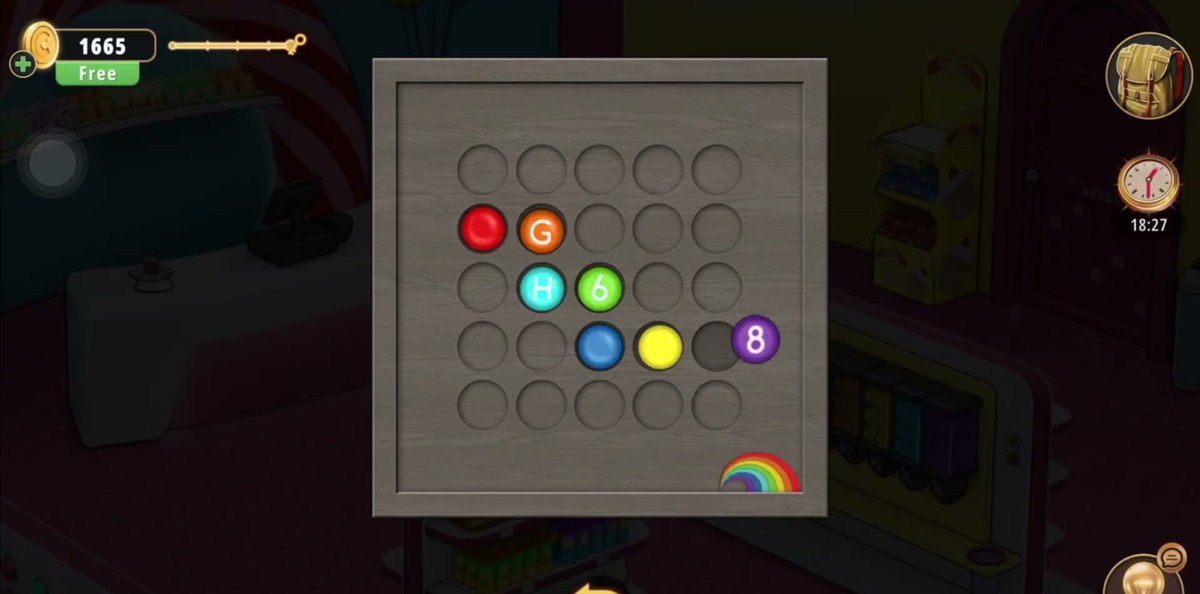
Place the labelled discs on the wooden 5×5 board to assemble G, 6, H, 8.
Enter G6H8 in the panel by the pink door and walk out through the glowing exit.
What this level actually is.
The Candy Shop is the longest room in the first half of Chapter 2, and it is long for a structural reason rather than a difficulty one. There is no corridor and no second area: everything happens in one open shop with a pink sprinkle floor, yellow walls and a curved blue corner on the left. But the shop contains roughly a dozen separate locks, and they are chained. The present will not lift until the ring is in your bag, the jar will not fill until the present has been lifted, the scale will not give you a number until the jar is full, and the drawer will not open until the scale has given you that number. Break the chain anywhere and the room simply stops responding, with no message explaining why.
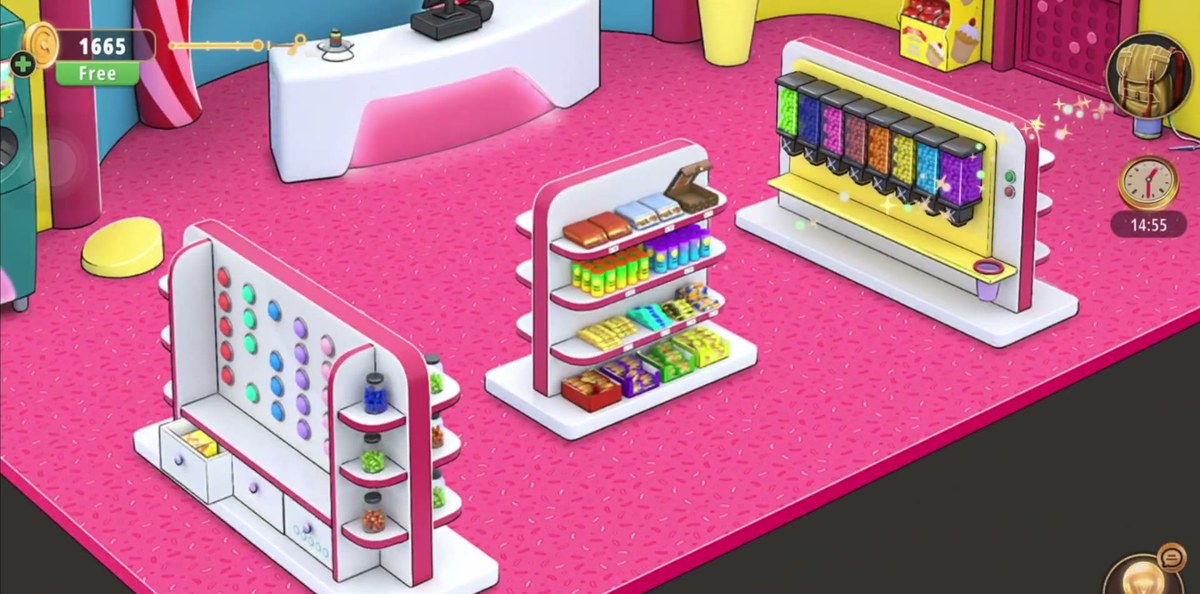
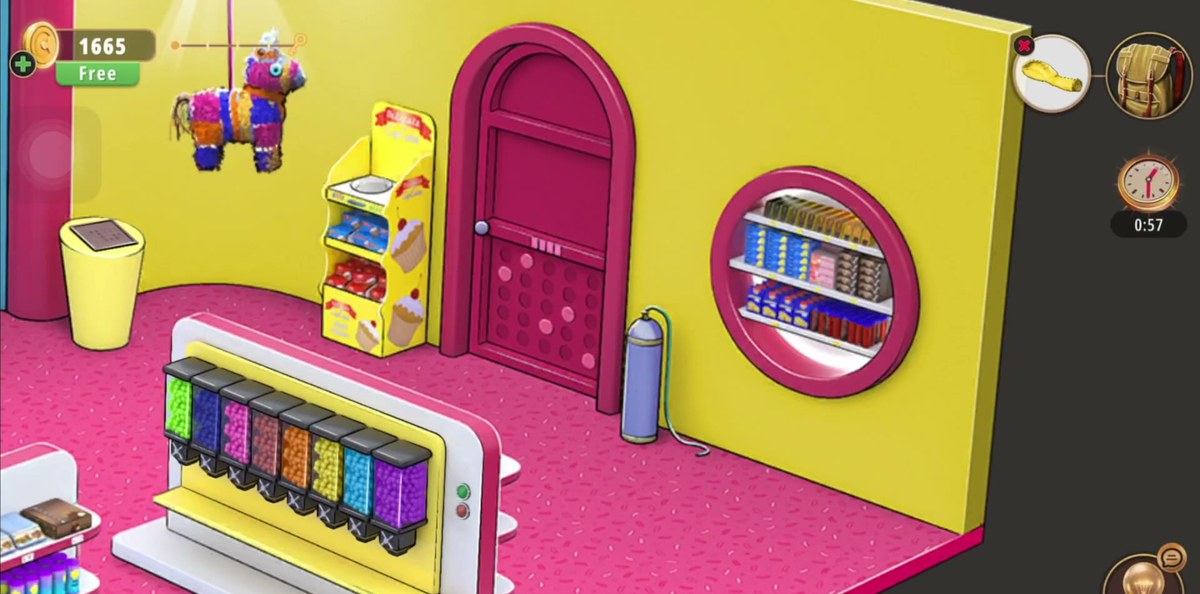
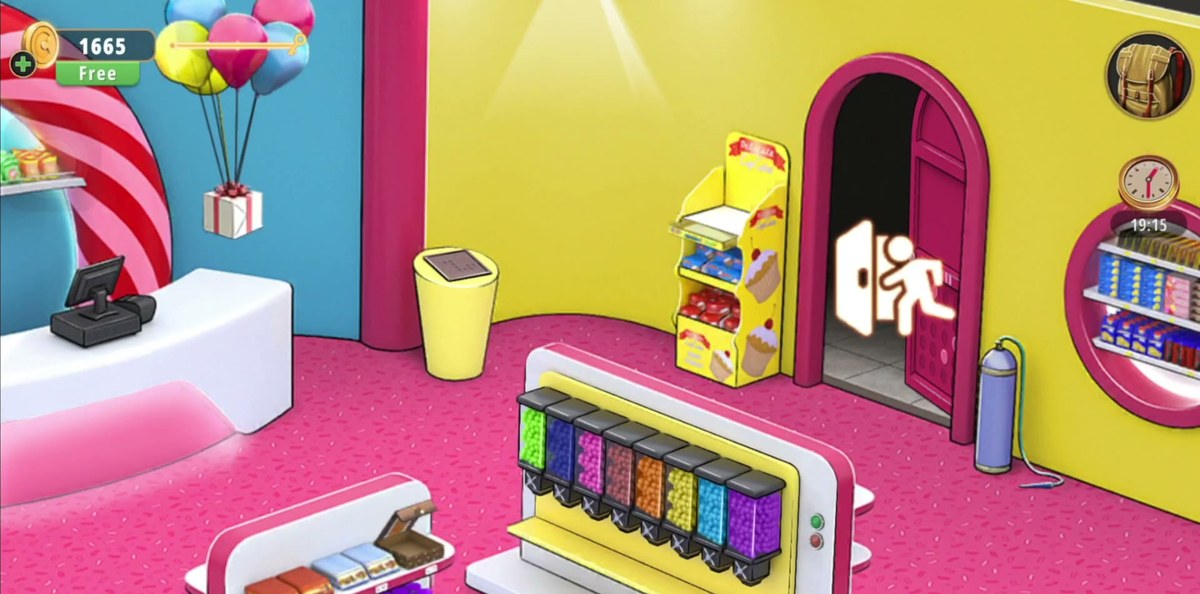
The layout is worth learning in the first ten seconds, because you will walk it twenty times. On the left: a white counter with a black cash register, a shelf of wrapped goods behind it, a cluster of balloons tied to a small gift box, and the red-and-white striped column that looks like a giant candy cane. In the middle: a yellow rubbish bin, a donkey pinata hanging from the ceiling, a tall yellow display stand decorated with cupcakes, the pink arched door you are leaving through, and a light blue helium tank on the floor beside it. Along the front: the wall of eight candy dispensers under a yellow canopy. On the right: a circular opening in the wall with three shelves of packaged candy inside it.
Two things about this room are unusual for the game. The first is that the exit code is not numeric. Chapter 2's earlier rooms hand you passcodes made of digits; the Candy Shop hands you G6H8, four characters that only exist as labelled discs on a wooden board. Players who have trained themselves to look for a four-digit number spend a very long time hunting for one that is not there. The second is that the jar is one-way: our footage never shows it being emptied, so every lever you pull at the dispenser wall is permanent. That is the only place in the level where a mistake actually costs you something.
Step by step.
Step 1 · 0:00The level card, and the sweep that saves you twenty minutes
The room opens on the title card — "Level 6, Candy Shop" over a paused wide shot — and the shot is the cleanest view you will get of the whole floor. Use it. Count the dispensers along the front (eight), find the pink arched door on the far wall, and note that the pinata hangs over the left third of the room while the cash register sits on the counter at the back left. Those four landmarks are the entire map of the level; everything else is either a lock or a pickup.
Step 2 · 0:18The ice-cream memory board
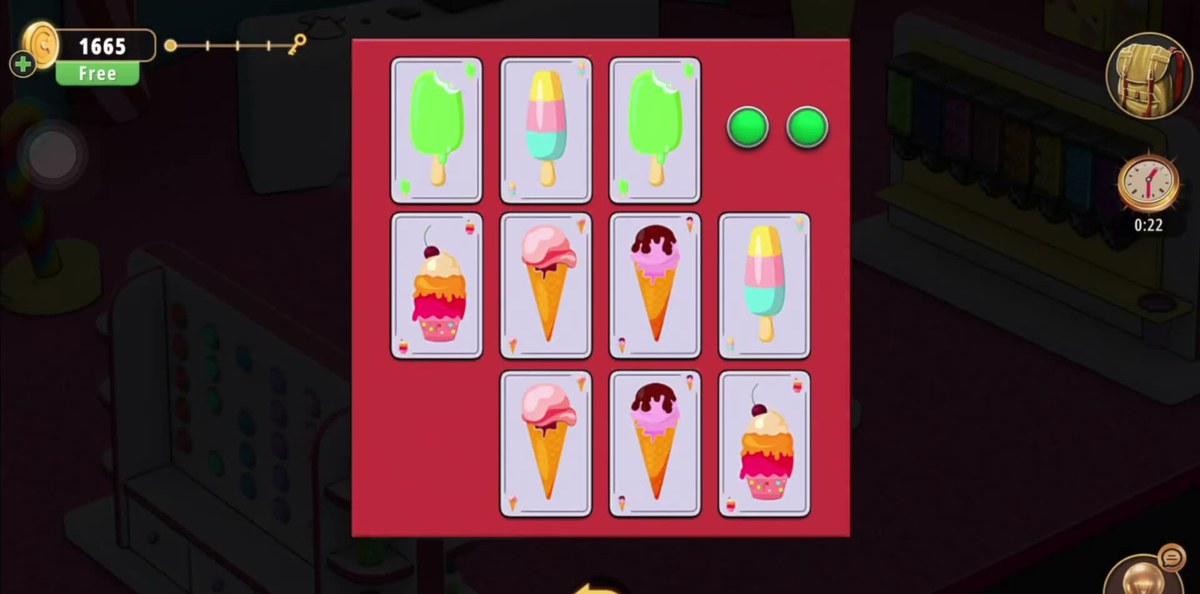
The first puzzle the recording touches is a mini-game on a red board: a grid of tiles showing ice creams, cupcakes and popsicles, all face up for a moment, then face down. You flip them in pairs and the board clears when every pair has been matched. Our footage only catches the opening pass — the tiles reveal, then turn over — so treat it as a straight memory round: watch the reveal, then work the pairs from the corners inward. There is no clue anywhere in the shop that tells you where a card is, so this is memory and nothing else.
Step 3 · 0:48The pinata, the candy cane and the helium tank
The pinata is not decoration. It hangs from a line above the left side of the shop, it is a container, and it is part of a three-object chain: the candy cane is the tool the level gives you for it, and what comes out of it feeds the chocolate-box lid later. The helium tank standing beside the pink door belongs to the balloon chain — the balloons on the counter are tied to a gift box, and that box is the one the recording ends up lifting. Treat the whole left-back corner as one connected prop: cane, pinata, tank, balloons, present. We never got a clean frame of the pinata breaking, so if your cane will not connect, step back to the wide view and tap the pinata itself rather than the line above it.
Step 4 · 1:06The present on the counter
The small white gift box with the red ribbon sits on the counter beside the balloons. Early in the level it is a prop: tapping it gives you nothing but a look. Much later, once the ring and the wrapped bar are in your bag, the same box lifts and the sweet jar is underneath it. If you are stuck at the jar stage, this is the object you have forgotten — the jar does not come from a shelf, it comes from under the present.
Step 5 · 1:12The kitchen scale, sitting at zero
There is a white kitchen scale on the counter with a clear bowl and a small display. At 1:12 it reads 0, which is the level telling you it is waiting for something that has weight. This is the device that eventually produces the four-digit code, but nothing you own at this point is heavy enough to matter. Leave it at zero and come back when the jar is full.
Step 6 · 1:36The piece of paper: your only written clue
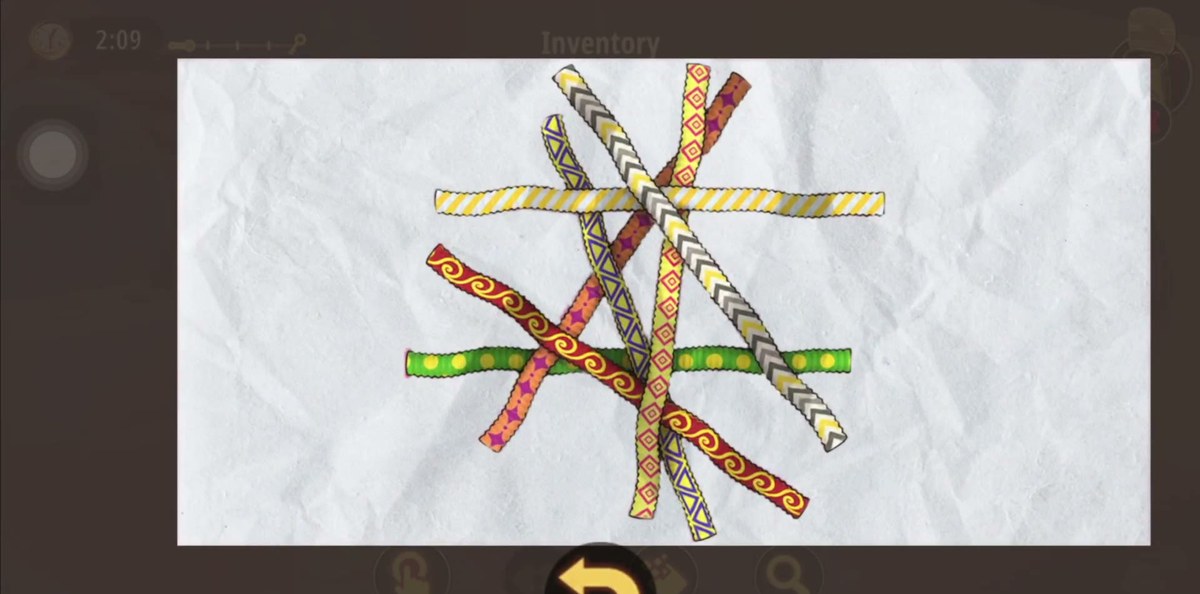
Open the inventory and press Examine on the item labelled Piece of paper. It is a crumpled sheet covered in overlapping strips of patterned candy — some striped, some chevroned, some dotted, some with diamonds — crossing each other at angles. This sheet is the closest thing the Candy Shop has to a written answer key, and it is the clue for the candy layering. It is also easy to dismiss as texture, because it is drawn as a tangle rather than as a list. Look at the strips as a sequence, not as a picture.
Step 7 · 2:42The chocolate box lid: seven symbol slots
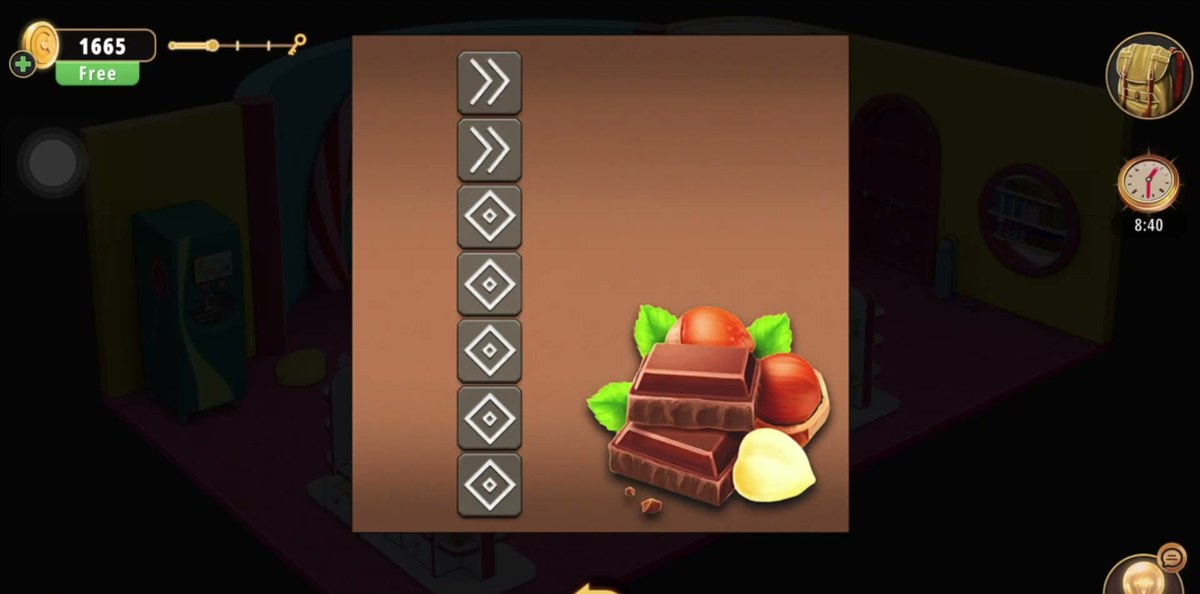
Zooming the chocolate box gives you a brown panel with a column of seven symbol slots down the left and a picture of dark chocolate and hazelnuts on the right. Each slot holds a shape rather than a letter — doubled chevrons, a diamond inside a square — so the puzzle is about matching shapes, not reading text. The recording works the slots until the panel accepts the arrangement, and the box then opens on a wrapped bar and a ring. Both of those go into the inventory and both are needed before the present will lift.
Step 8 · 3:36The sweet sudoku on the cash register
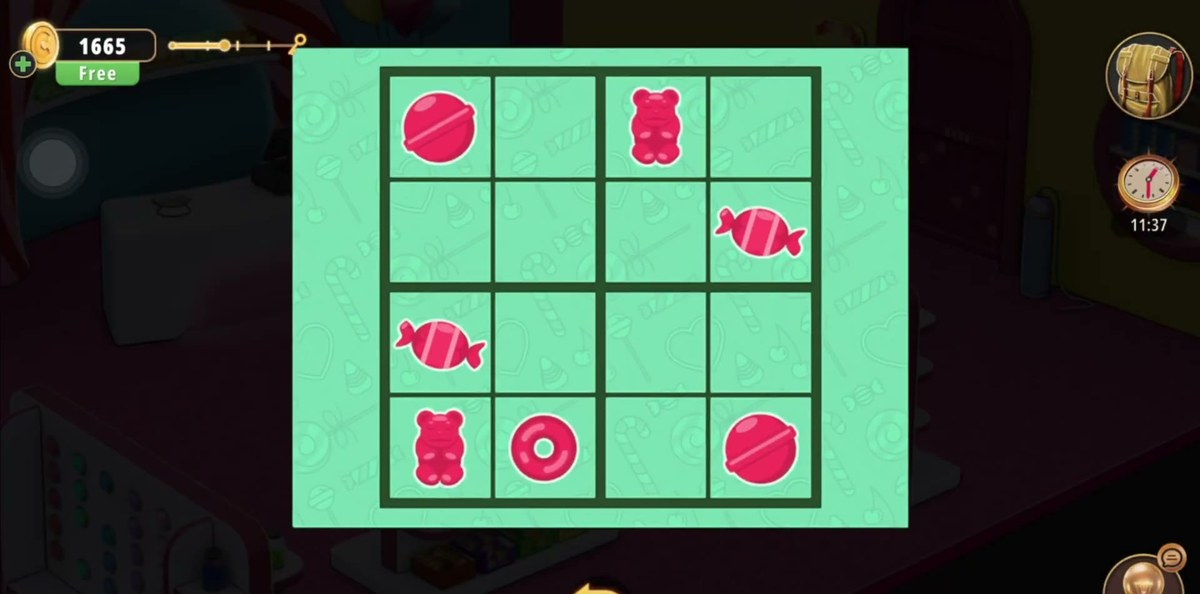
The tray that opens at the cash register is a 4×4 grid on a mint-green candy-patterned board. The cells hold four different sweets — a lollipop, a gummy bear, a wrapped candy and a donut — and only part of the grid starts filled, leaving the empty cells for you to solve. It is a sudoku rather than a matching game: each row and each column has to hold all four sweets exactly once, so the way in is a row or column that already has three of them. Work that line first and the rest falls out; guessing a cell in an empty row is what burns the time here.
Step 9 · 4:30Duct tape, and the jar in your bag
Two pickups sit next to each other in the mid-game: a roll of duct tape with a label that reads "Piece of duct tape", and an empty glass container labelled simply Jar. The tape belongs to the repair side of the room rather than the code chain — nothing about it is numeric — while the jar is the object the second half of the level is built around. When the jar appears in the inventory you are past the halfway point whether it feels like it or not.
Step 10 · 5:18Filling the jar at the dispenser wall
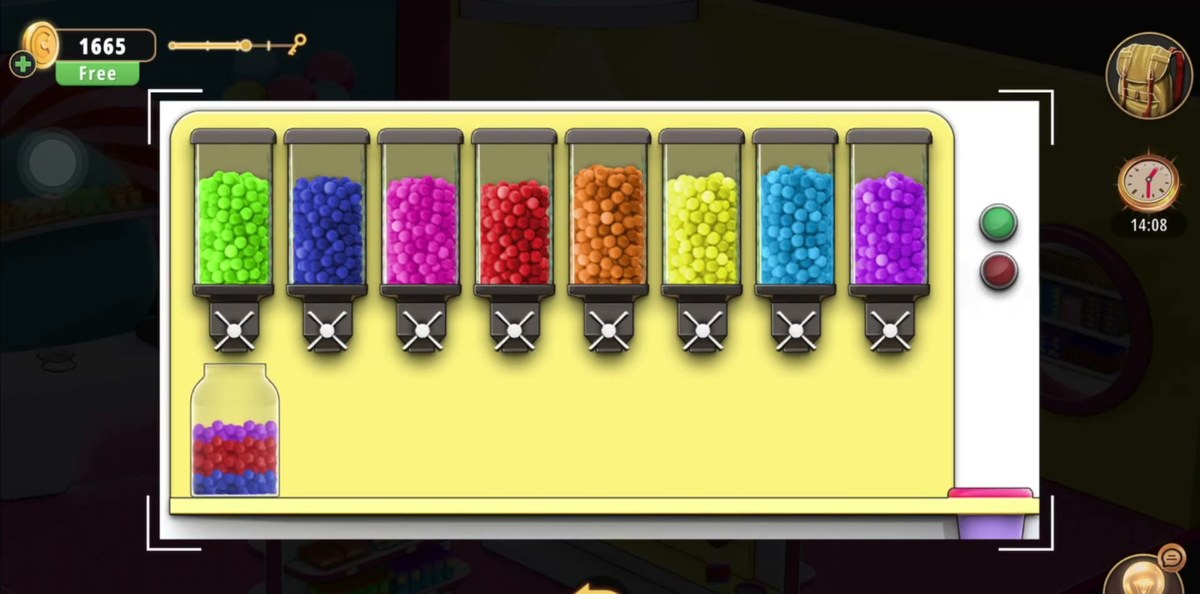
Stand the jar under the dispenser wall and pull levers. Each canister drops one colour into the jar and the colours stack in layers, bottom to top, exactly in the order you pull them. Our recording fills the jar while the camera stays on the canisters, and the layers build up one at a time as the levers are pulled. This is the step where you want the Piece of paper open beside you: the order you pull is the whole puzzle, and the jar in our footage never came back down once a colour had gone in.
Step 11 · 5:21The eight dispensers, and why they are the bottleneck
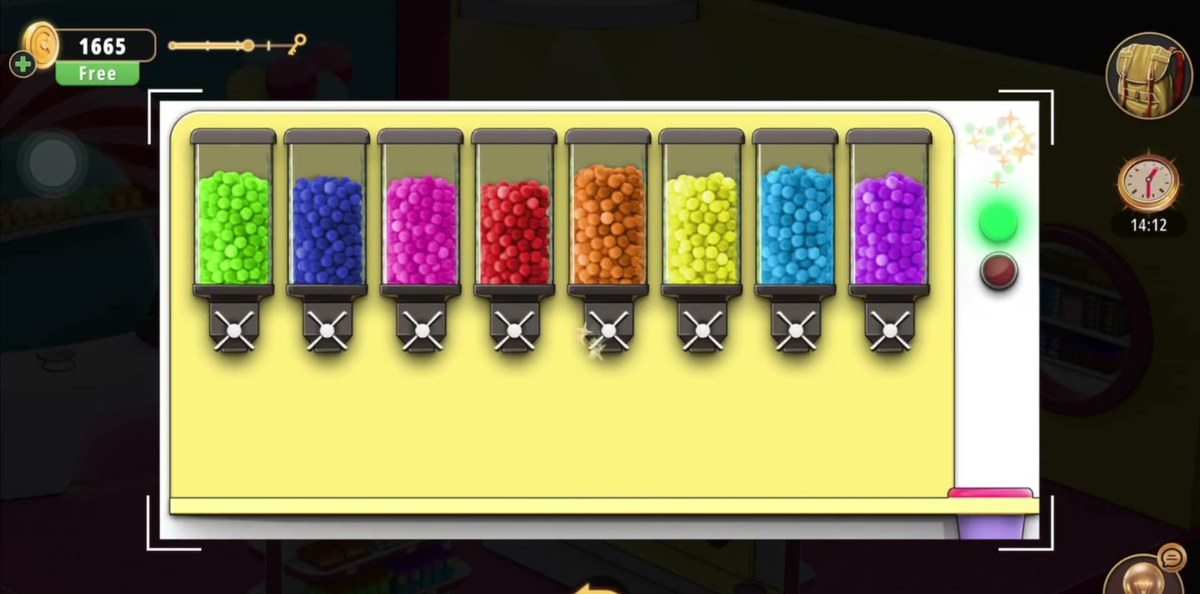
The dispenser wall is one row of eight clear canisters under a yellow canopy, each filled with a different colour and each with a black-topped lever underneath. Our footage never shows the jar being emptied — every colour that went in stayed in — so a wrong pull reads as permanent rather than as a retry, and it changes the weight you are about to read. That is the single most expensive mistake in the Candy Shop, and it is why this page tells you to read the paper before you touch a lever. If you are already carrying a wrong layer, restarting the level is the clean fix.
Step 12 · 5:40Weigh the jar, then set 6841
Put the filled jar on the kitchen scale. The weight is what the level turns into a code, and the code goes into the four digit wheels set into the yellow display drawer — the drawer with the "Cup Cakes Coconut" boxes underneath it. Our footage shows those wheels reading 6, 8, 4, 1 on two consecutive frames just before the drawer is pulled open, so that is the combination to set. The wheels are scroll wheels, not a keypad: each column shows the digit above and below the selected one, which makes it easy to slip one value past the number you wanted.
Step 13 · 6:24The purple ball and the five-button panel
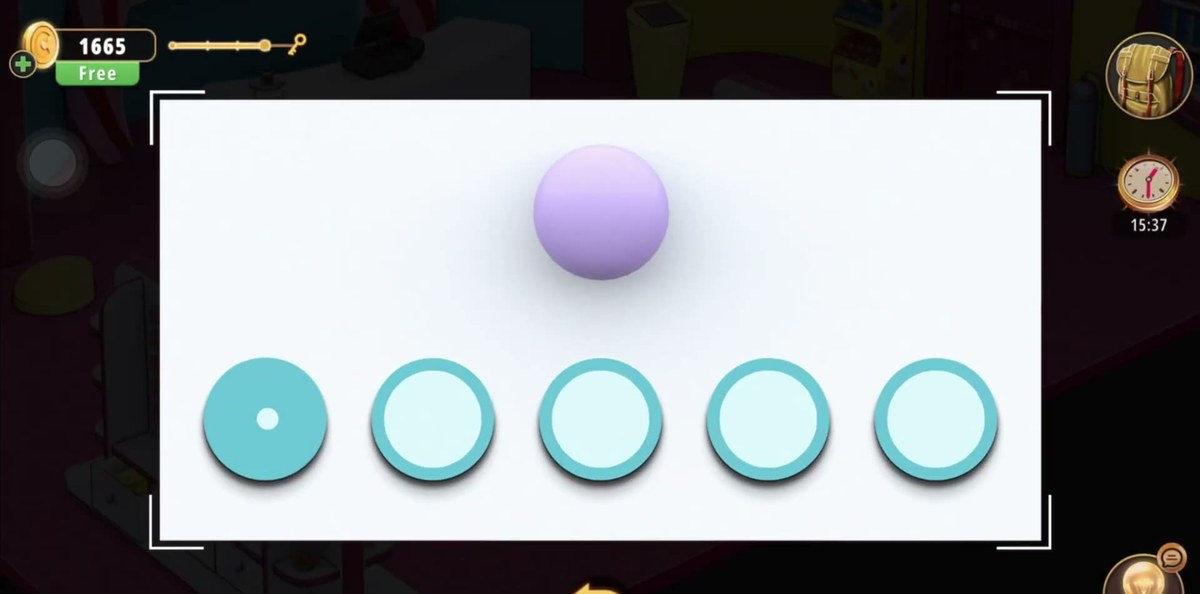
One screen near the counter shows a single pale purple sphere floating above a row of five round light-blue buttons, and the buttons take turns being the selected one. The recording uses it to produce the purple ball that other parts of the shop ask for. We could not read a rule off the footage — there is no visible clue for what each button does — so the honest advice is to press them and watch which one stays selected, exactly as the recording does.
Step 14 · 7:30The colour grid: a wall of coloured buttons
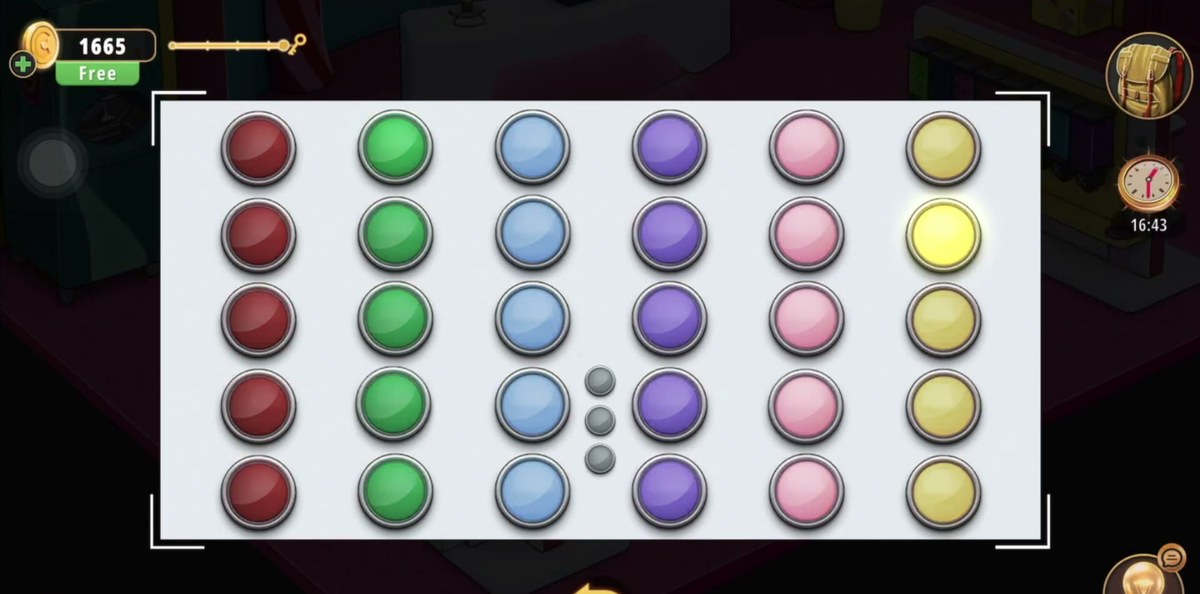
One wall panel is a grid of coloured round buttons — red, green, light blue, purple, pink and yellow — and the game lights them in a sequence that you have to repeat. The recording goes through it three times, and each pass is longer than the one before. Two practical notes from the footage: the buttons flash in order rather than all at once, so watch the whole pass before you touch anything, and the lit buttons stay inside the grid, so you can rehearse the sequence by tracing it with your eyes before you start pressing.
Step 15 · 8:21The wooden 5×5 board: where G6H8 comes from
The wooden board with twenty-five round slots is the answer key to the exit. When the recording opens it, some slots already hold coloured discs and some of those discs carry a character: an orange disc with G, a cyan disc with H, a green disc with 6 and a purple disc with 8. A small rainbow icon sits at the bottom of the board. Those four characters are the door code, in that order — and this is the single most useful thing to know about the level, because it means you are looking for letters, not digits.
Step 16 · 9:08Enter G6H8 at the pink door
The panel beside the pink arched door is four character slots rather than a keypad. Set them to G, 6, H, 8 and confirm. Our footage reads the finished panel as G6H8 on the frame before the door releases, and the last slot is the one that gets fumbled — at 9:07 it is still showing a 6 where the 8 belongs, one frame before it lands. If the door does nothing, check the fourth slot first.
Step 17 · 9:09The exit icon, and out
With the code accepted the pink arched door stops being scenery: a white exit sign lights up over it — a figure running through a doorway — and the camera pulls back to the full shop. Tap the door and the level is done. Nothing else in the room needs to be finished first; the Candy Shop does not check whether you cleared the optional corners, only whether the code was right.
Every complaint about the Candy Shop comes down to the same thing: the room has one true sequence and it never tells you where you are in it. The memory board, the pinata and the sudoku sit in front of that sequence and hand you items; the sequence itself, from the chocolate box onward, is this.
Chocolate box → ring and wrapped bar. Those two items are the key to the present.
Present → jar. The jar is under the box, not on a shelf.
Dispensers → full jar. Colour layers, in the paper's order, one-way.
Scale → four digits → 6841. The weight becomes the drawer combination.
Yellow drawer → the discs. What the drawer holds is what the wooden board is missing.
5×5 board → G6H8 → door. The board supplies the four characters; the panel takes them.
Look at that list and the shape of the level is obvious: it is two halves. Everything up to the jar is about opening containers to get objects; everything after the jar is about converting objects into information. Players who stall in the second half are almost always still hunting for an object, and players who stall in the first half are almost always trying to solve a lock before they own the item that feeds it.
What we could not verify: the exact colour order for the jar. Our recording shows the levers being pulled and the layers stacking, but no frame shows a legible clue that ties each colour to a position, and we will not publish a sequence we could not read twice — nothing in the footage empties the jar again. The Piece of paper in your inventory is the clue the level gives you; open it with Examine and treat the strips as a top-to-bottom list. The same caution applies to the five-button panel: the buttons light individually and the footage never shows a rejected press, so we cannot state its rule.
Where people get stuck.
Looking for a number at the door. The exit code is G6H8. Chapter 2 trains you to expect digits, and this room breaks the pattern on purpose. If you are stuck at the pink door, you are not missing a number — you are missing a board.
Pulling dispenser levers early. The jar never empties in our footage. Read the paper first; a wrong layer changes the weight you need for 6841, which means the drawer combination may stop being 6841 at all.
Tapping the present too soon. The box only lifts once the ring and the wrapped bar are in the bag. Before that it reads as decoration, and players conclude the jar is in a cupboard somewhere.
Treating the pinata as scenery. It is a container. The candy cane is the tool. Nothing in the interface points at either of them.
Guessing cells in the 4×4 sudoku. Most of the grid starts empty and there is no undo worth using. Find the row or column that already holds three sweets and fill the fourth.
Sliding one wheel past the target. The 6841 wheels show the digit above and below the selection, so it is genuinely easy to land on 6851 or 6831 and conclude the code is wrong. Check all four columns before you pull the drawer.
Chapter 2 levels.
The Candy Shop is the sixth room of Chapter 2; the list below reflects what is written up so far.
Chapter 2 · No Honor Among Thieves26 of 26 with full written steps · 26 with a video
What is the exit code in Rooms & Exits Chapter 2 Level 6 Candy Shop?
G6H8. The exit is not a number pad: the panel beside the pink arched door shows four character slots, and the four characters you need are the four labelled discs on the wooden 5×5 board — G, 6, H and 8. Set them in that order and the exit icon lights up on the door.
What is the four-digit code on the yellow drawer lock?
6841. The lock is the row of four digit wheels inside the yellow display drawer, and the number comes from weighing the jar of candy you fill at the dispenser wall. Our recording shows the wheels reading 6, 8, 4 and 1 on two separate frames before the drawer is opened.
How do I fill the candy jar?
Take the empty jar from under the present, stand it below the eight-canister dispenser wall and pull the levers in the order the game's paper clue shows. Each lever drops a layer of one colour and the layers stack bottom to top. In our recording the jar could not be emptied once a colour went in, so read the Piece of paper before you start pulling levers.
How many candy dispensers are there?
Eight, in one row under a single yellow canopy. Each canister holds one colour and has its own black-topped lever underneath. They are the only place in the shop where you can add colour to the jar, and the order you pull them is the whole puzzle.
What is the memory game in the Candy Shop?
A card-matching mini-game on a red board: a grid of ice-cream and cupcake tiles that you flip over in pairs. Our footage catches the reveal at 0:18 and the grid face down again at 0:30, so the round is played on the tiles rather than being a hidden-object search. There is no clue anywhere in the room that tells you which card is which, so it is pure memory.
Why can't I open the pink door?
Because the door is the last thing in the level, not the first. It opens only after the four-slot panel beside it has been filled with G6H8, and that code only exists once the labelled discs on the wooden 5×5 board have been placed. Tapping the door before then does nothing at all, and there is no message telling you why.
 GridPaw
 Shikaku
 Akari
 Kakuro
 Nonogram
 Nurikabe
 Pictomino
 KenKen
 Binary
 Star Battle
 Hashi
 Slitherlink
 Murder Sudoku
 Meowdoku
 Crazy Cleanup