 GridPaw
 Shikaku
 Akari
 Kakuro
 Nonogram
 Nurikabe
 Pictomino
 KenKen
 Binary
 Star Battle
 Hashi
 Slitherlink
 Murder Sudoku
 Meowdoku
 Crazy Cleanup
Rooms & Exits Chapter 2 Level 15 Walkthrough: Fashion Store
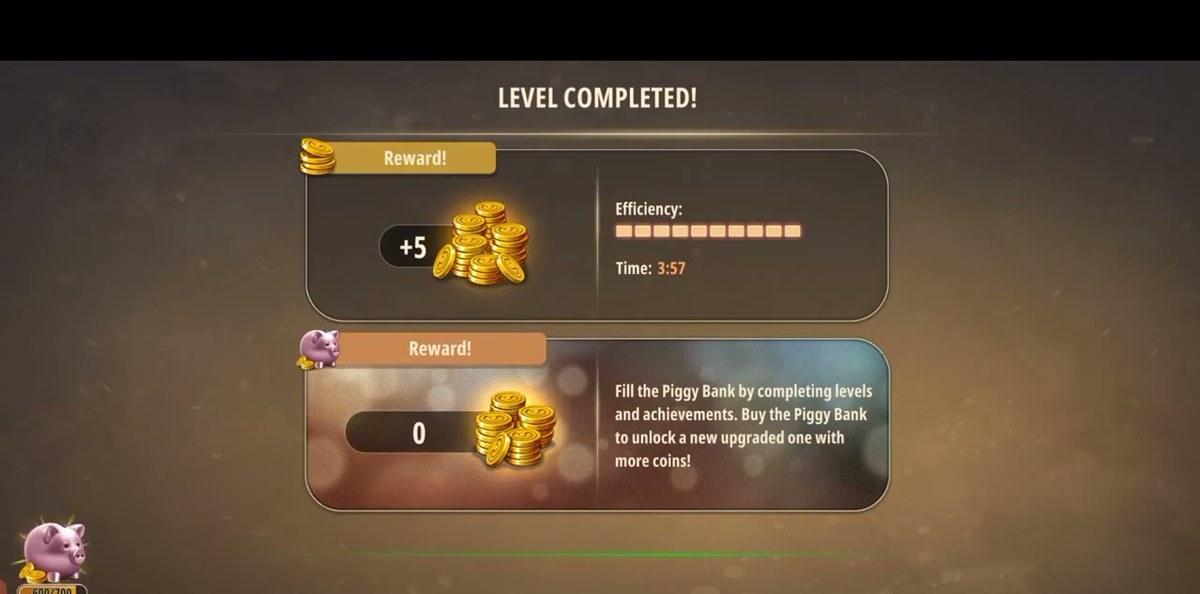
The Fashion Store ends at the front door, and the door code is 30015. It comes from the register, not from a wall: pay the bill, scan the printed receipt, and read the code off the item the game hands you. Finish worth +5 coins in 3:57.
- Tap the register counter → Handwritten bill (3:15).
- Open the bag and Examine the bill: 25,50 / 299,00 / 32,99 / 6,50, boxed total 363,99.
- Go back to the register and tap the monitor → numeric keypad.
- Type 363,99 — with the comma — and press the green ENTER.
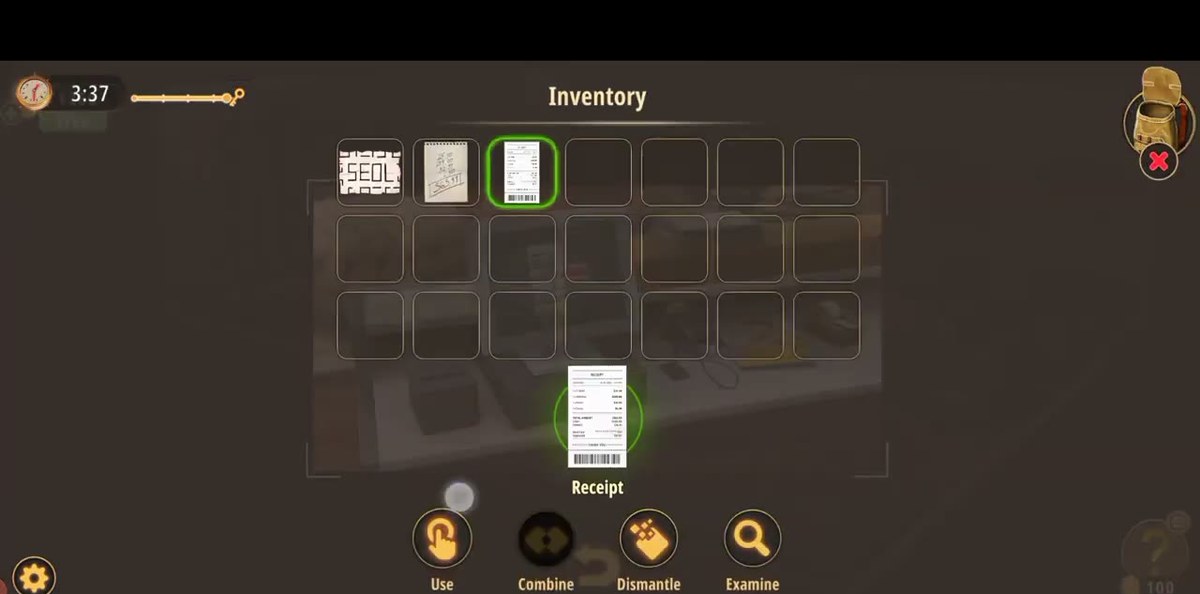
- Take the Receipt the printer spits out, select Barcode reader with cable in the bag, press Use, and tap the receipt.
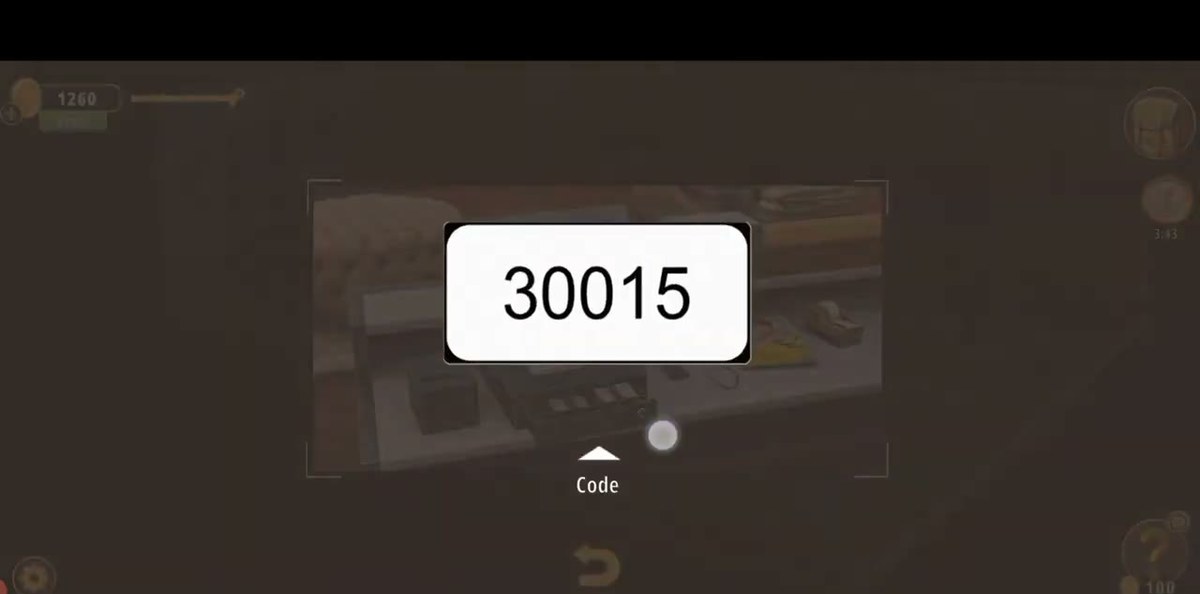
- The scan returns a Code item reading 30015.
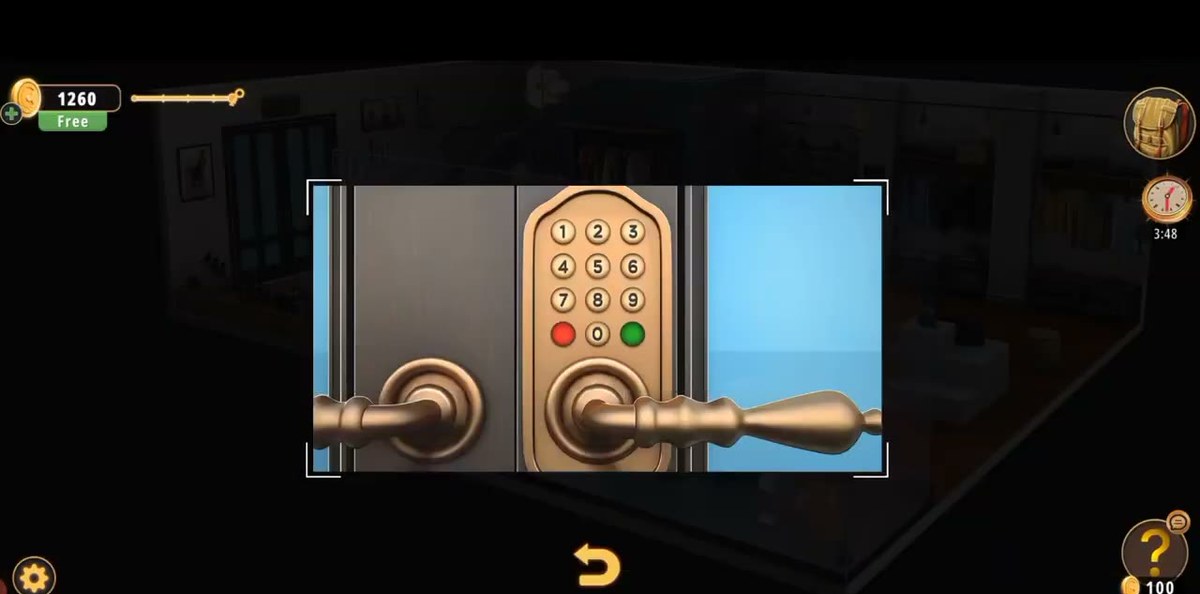
- Tap the keypad beside the shop's double doors and enter 30015 → results screen, +5 coins, 3:57.

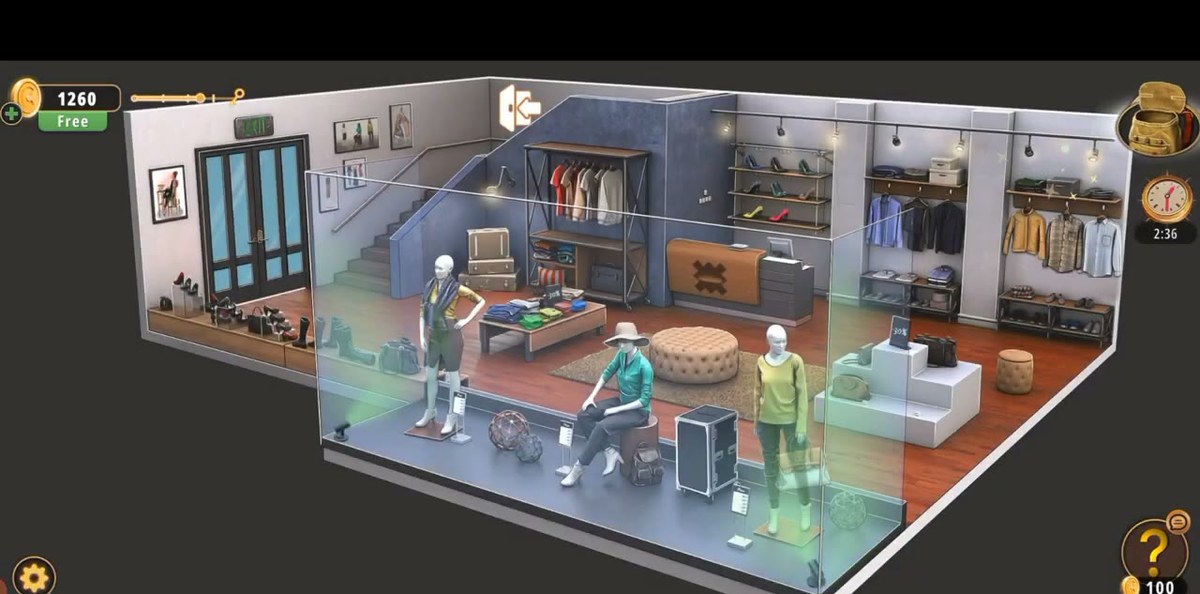
What this level actually is.
The Fashion Store is a boutique with two floors and no corridor, no lift and no second building. You start outside the glass, you walk in through a pair of double doors under a green EXIT sign, and every object you will ever need is inside the same box of walls. That is the whole map. It is also why the room has a reputation for being longer than it is: there is no door you cannot see from the entrance, so there is nothing to narrow your search, and the shop is dense with things that look like puzzles.
They mostly are puzzles, which is the trap. The boutique is stuffed with mini-games — a chest with four coloured pads on its lid, a row of framed outfit photographs, a four-wheel dial that starts on 0-0-0-0, a wall of high heels with green arrows beside it, a panel with four round buttons, a sixteen-tile wooden slider, a cabinet with a padlock. Each one is a real interaction, each one answers back, and none of them is the finish line. The level ends at the front door with a keypad code, and that code is downstream of the cash register: a bill on the counter, a total you have to type, a receipt the register prints, and a barcode on that receipt that a reader in your bag turns into five digits.
So the Fashion Store has two spines. The first is the register chain, and it is compulsory: bill → total → receipt → scan → code → door. The second is the shop floor itself, a set of display puzzles that hand you items and keep the room busy. Most players spend their first ten minutes on the second spine, because the shoe wall is enormous, lit like a shop window and clearly interactive, while the bill is a small pale rectangle sitting flat on a counter you have already walked past twice.
The recording finishes in 3:57 of level time and 4:09 of footage, with an efficiency bar of nine out of ten. Nothing in the room is timed, there is no fail state, and no puzzle can be made unsolvable — you can spill every item out of the bag and the game will still let you pick it back up. The only thing that stretches this level is the order you do it in.
The shop, floor by floor.
Ground floor. The entrance is on the far left of the box: two glazed doors with dark frames, an EXIT sign above them, and a low console of shoes and handbags against the wall beside them. The front of the shop is a full-height glass window with two dressed mannequins in it — a standing figure in a yellow top, brown shorts and white heels, and a seated figure in a teal top, dark trousers, a wide-brim hat and white boots — arranged around a round tufted ottoman. Behind the window the floor opens up: a men's rail of hanging shirts and jackets on the left, a staircase with blue risers climbing to the upper level beside the entrance, a folded-clothes table in the middle, and the register counter at the back with a monitor, a receipt printer, a barcode scanner on a stand, a cash drawer, magazines and a tape dispenser.
To the right of the register, a wall display holds several pairs of high-heeled shoes in bright colours — blue, green, yellow, pink — on individual shelves, with small green arrows beside them. Further right, hanging rails of blue, black, yellow and plaid shirts run along the wall with folded stock underneath, and a white tiered pedestal in the foreground carries handbags and a card reading 30%. A stack of vintage suitcases fills the corner behind the men's rail.
Upper floor. The staircase lands you in a smaller, softer room: a red dress on a mannequin against a window, a tall mirror, a counter with a glowing pink-violet top, a rack of garments on the back wall and a fitting area with blue curtains. The chest with the four coloured pads sits up here on a shelf, and so does a good deal of the shop's loose stock. The two floors share one camera and one bag, so anything you pick up upstairs is available downstairs immediately — there is no need to carry items between floors by hand.
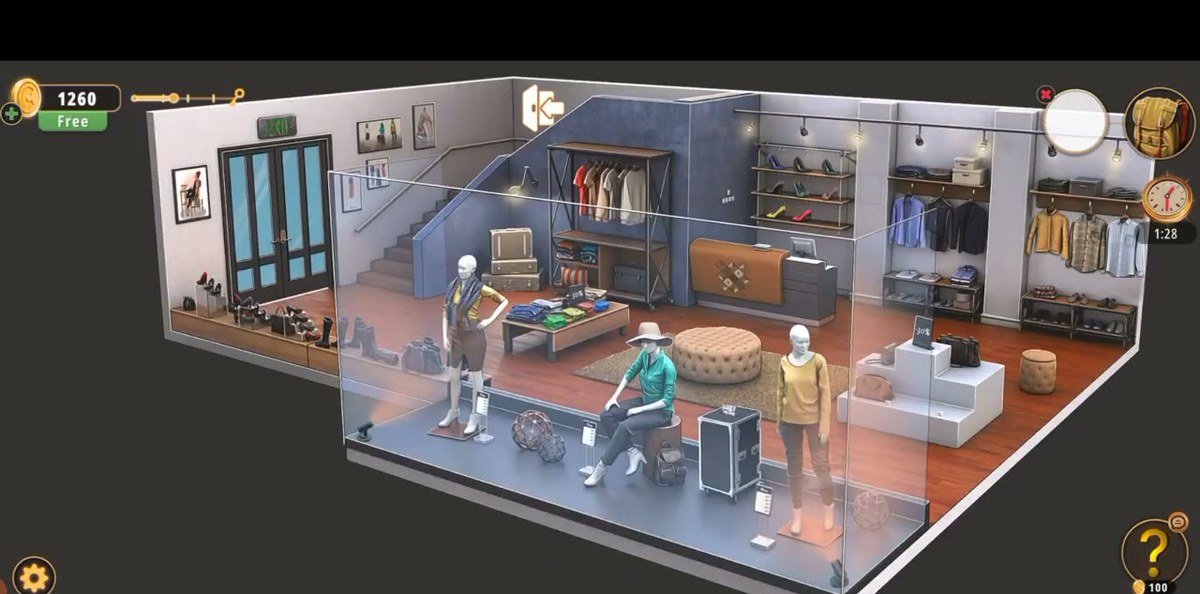
Step by step.
The first frame after the title card gives you the entire level in one isometric shot. Find three things and you have the map: the double doors on the left with the green EXIT sign, the staircase immediately to their right, and the register counter at the back with a monitor and a small printer on it. Everything else in the room is either stock or a side puzzle. The doors are the finish, the stairs are the second floor, and the counter is the only place that generates a number.
Video: 0:02
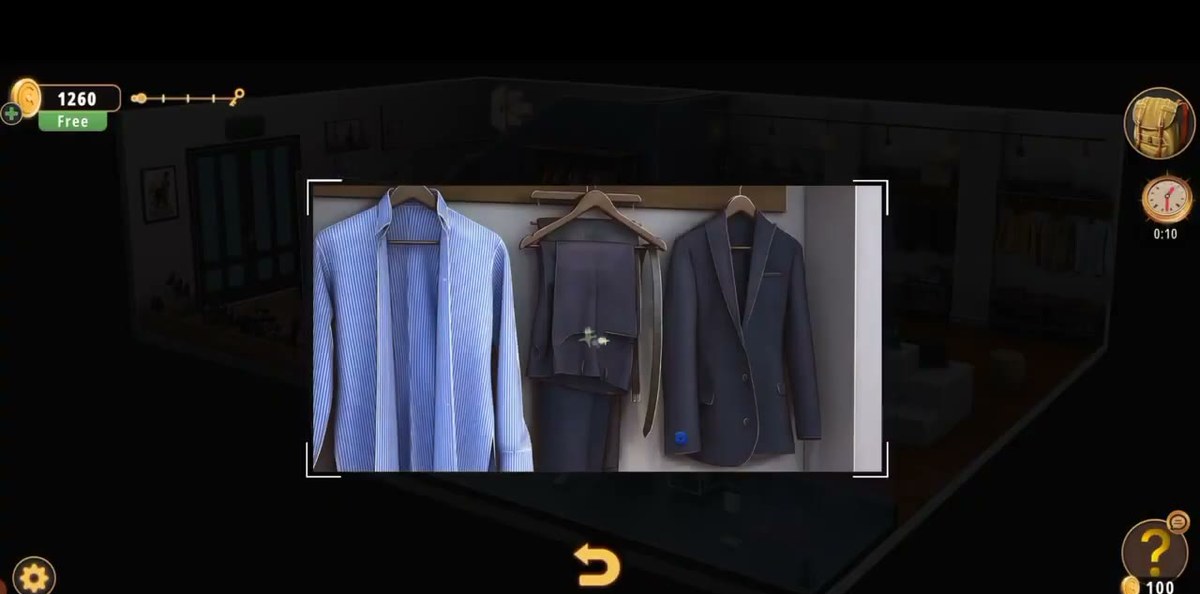
The camera drops onto the hanging rail on the left wall: blue striped shirts, a pale suit, a dark blazer, all on a wooden rail with folded stock on the shelf above. It looks like it should hide something, and in other Rooms & Exits rooms a rail like this often does. Here it does not. Our recording taps along it, gets nothing, and moves on — the rail exists to make the shop read as a shop. Spend ten seconds on it and leave.
Video: 0:13
This is the most important visit in the level and it looks like the least important. The counter holds a flat monitor on a white stand, a black cash drawer with a keyhole in its face, a small black receipt printer to the left of the drawer, a barcode scanner on a stand to the right with a coiled cable, an open magazine, a tape dispenser and a stack of notebooks behind. The monitor screen is showing a bare numeric keypad. You will come back here three times — once to collect the bill, once to pay it, once to deal with the receipt — so fix its position in your head now rather than hunting for it later.
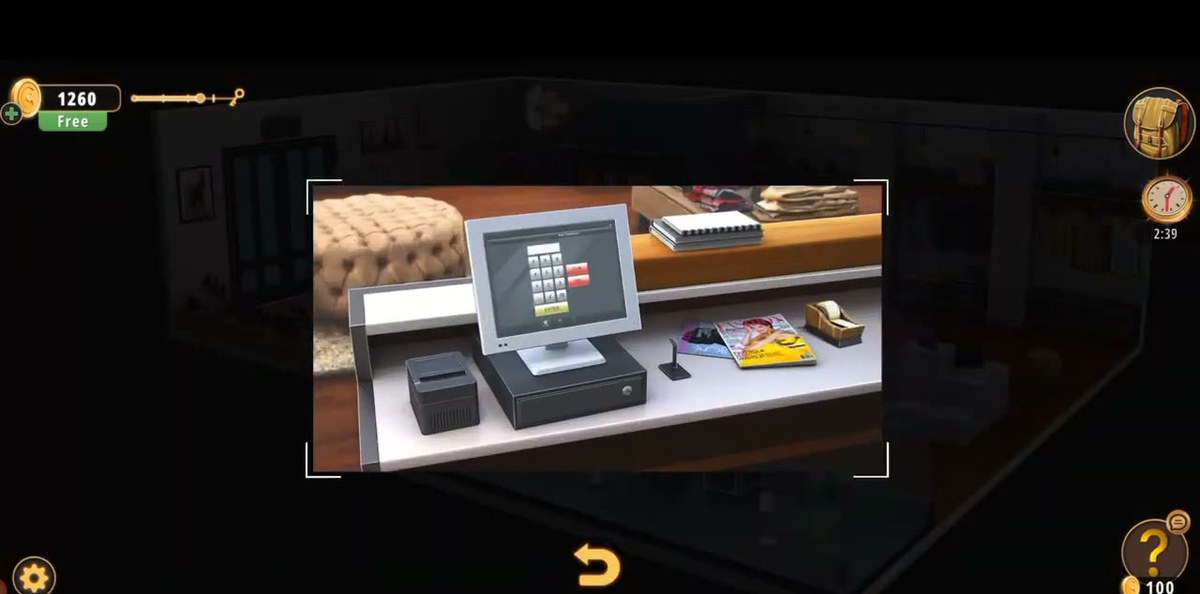
Video: 0:25
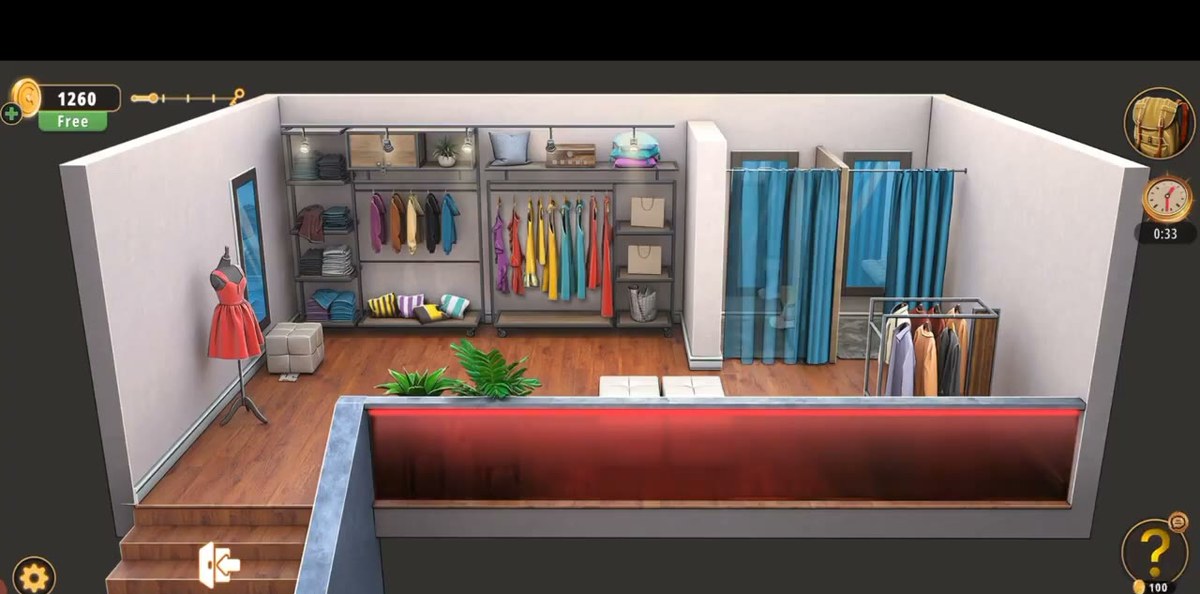
The stairs take you to the boutique's second level: a red dress on a mannequin by the window, a tall mirror, a counter with a pink-violet glowing top, a rack of garments along the back wall and blue-curtained fitting rooms. Do a full lap before you touch anything, because the bag is shared between floors and there is no reason to walk back up. Two things up here are worth your time: the chest on the shelf with the four coloured pads on its lid, and the framed photographs on the wall. Everything else is stock.
Video: 0:37
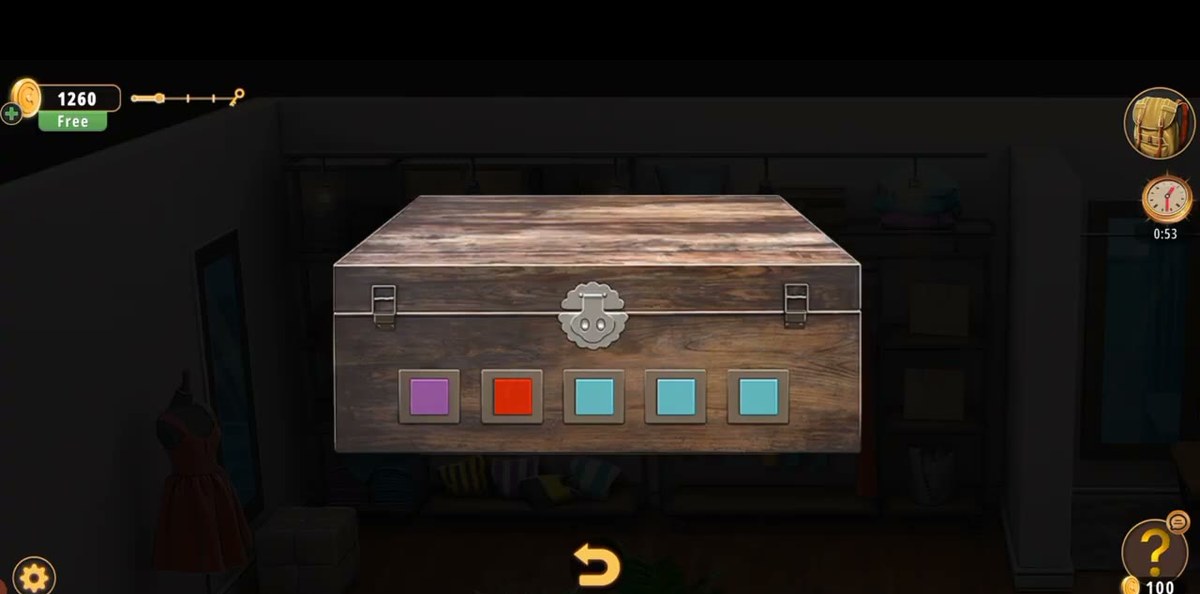
A wooden chest sits on a shelf upstairs with four square pads set into its lid. Tapping a pad lights it a different colour — purple, then red, then a pale blue in our frames — and once all four have been pressed the lid swings open and the game hands you whatever was inside. This is a sequence toy, not a code: there is no wrong order and nothing to read, so press all four and take the item. Our frames never give a legible label for the contents, so this page does not name it.
Video: 0:57
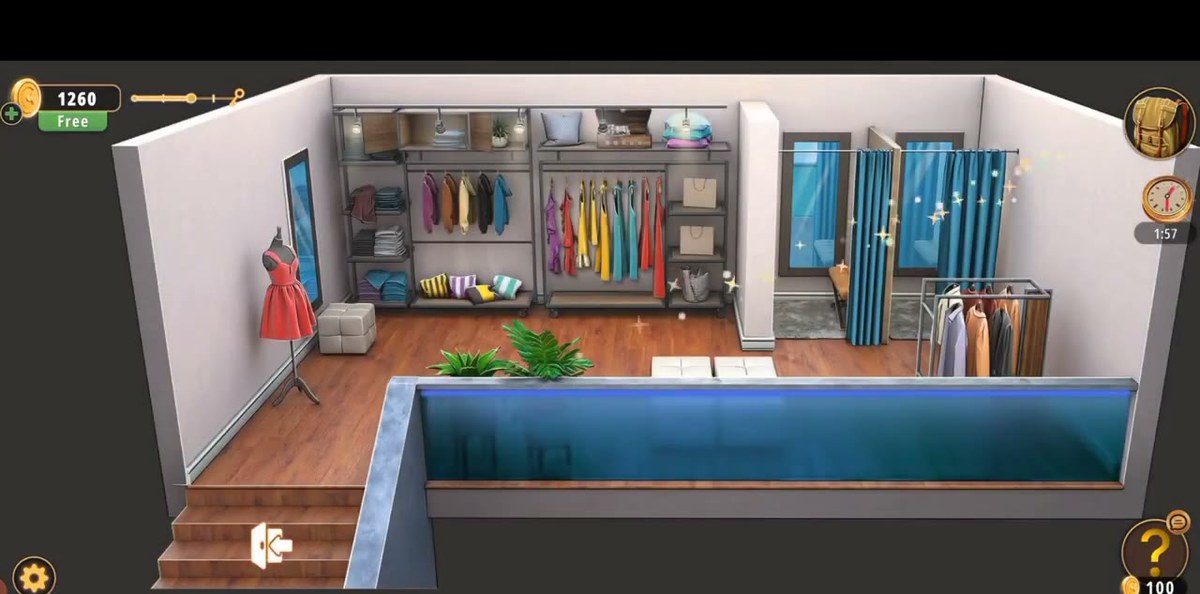
The blue-curtained fitting area and the mirror behind it are the most "escape room" looking objects on the upper floor, and they are empty. There is no hidden catch, no gap behind the curtain, no code written in the mirror frame. In our recording the camera sweeps them twice and the player never interacts. If you are the kind of player who needs to be told, this is the telling: the Fashion Store's secrets are all on the ground floor and in the bag interface, not up here.
Video: 1:05
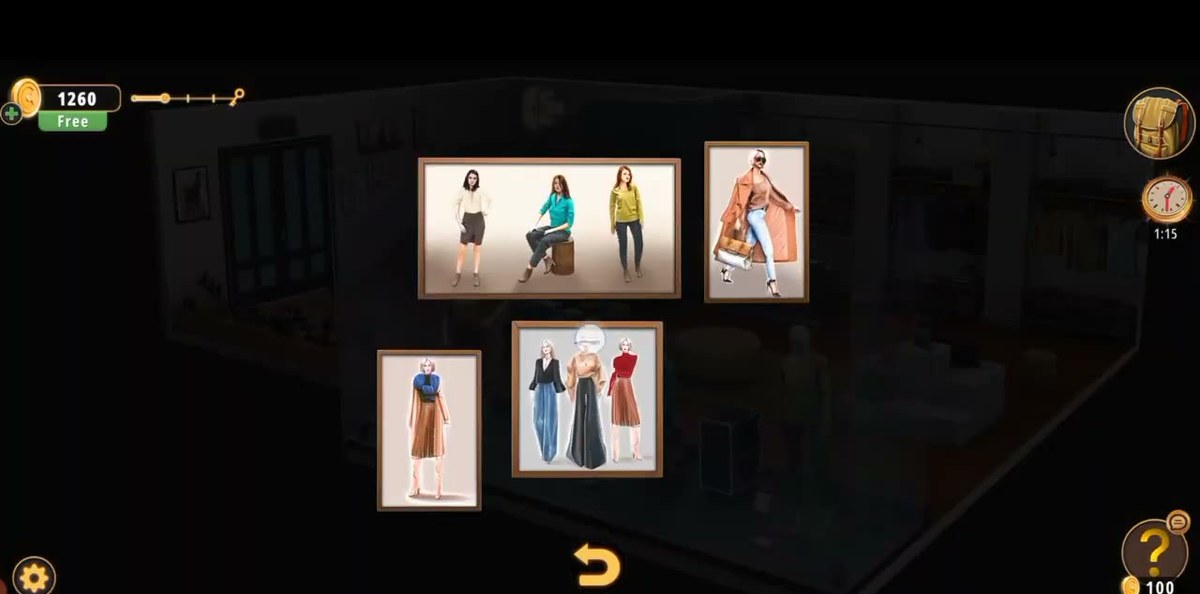
A row of framed photographs of dressed figures hangs on the wall above a console of shoes and handbags, near the men's rail. These are the shop's styling reference — each frame shows a complete outfit. Our recording looks at them immediately before working the shoe wall, which is the natural reading: the photographs tell you which shoes belong with which look. That link is an inference, not something the game states, so treat the photographs as the reference for the shoe display rather than as a code. Nothing in the frames carries a number.
Video: 1:19
On a shelf unit on the ground floor there is a four-wheel combination dial that reads 0-0-0-0 when you first find it, and separately a small slip of paper that goes into the bag as "Piece of paper" with four letters on it. They are the room's most obviously-coded objects and the pair most likely to be connected — but this is exactly where the footage fails us. We could not read the dial's accepted combination twice from independent frames, so this page prints no number for it. If your copy of the puzzle needs it, the slip in your own bag is the authoritative version; do not trust a number from a video's on-screen annotation.
Video: 1:34
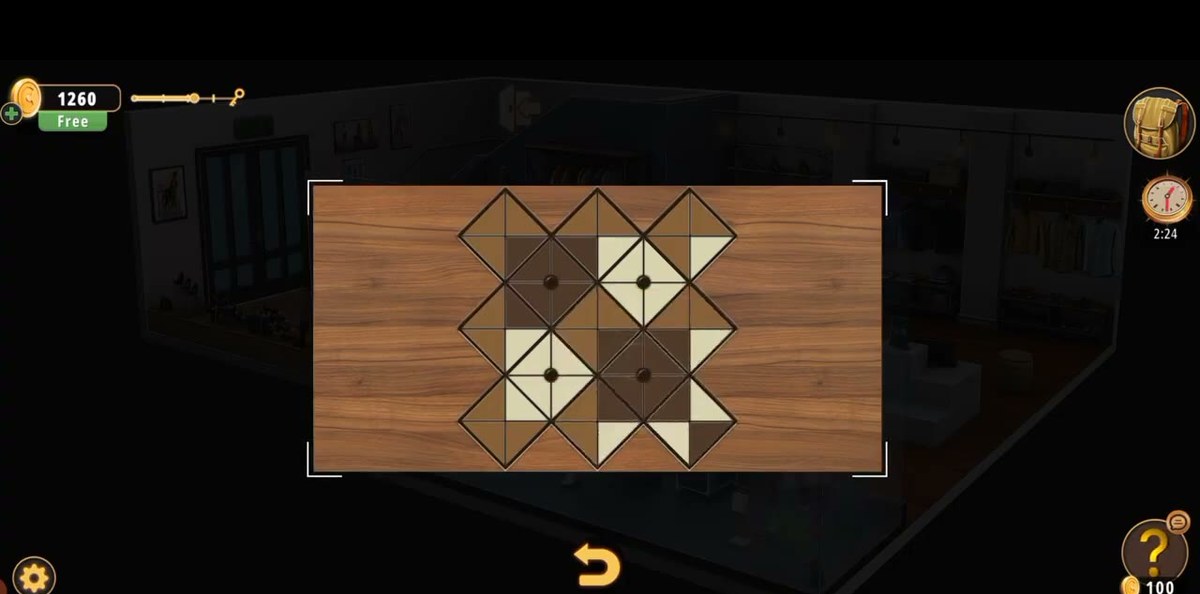
A rectangular panel framed with white corner brackets holds a four-by-four grid of square tiles, each split diagonally into two triangles in three shades of brown and beige, with a small dark dot in the centre of some tiles. Turning a tile rotates its two triangles. The target is a continuous pattern across the grid rather than a picture, and the dots mark the tiles that have to end up in a specific orientation. Clearing it opens a shallow compartment behind the panel; our frames show a hairdryer sitting in it, and it goes straight into the bag.
Video: 2:03
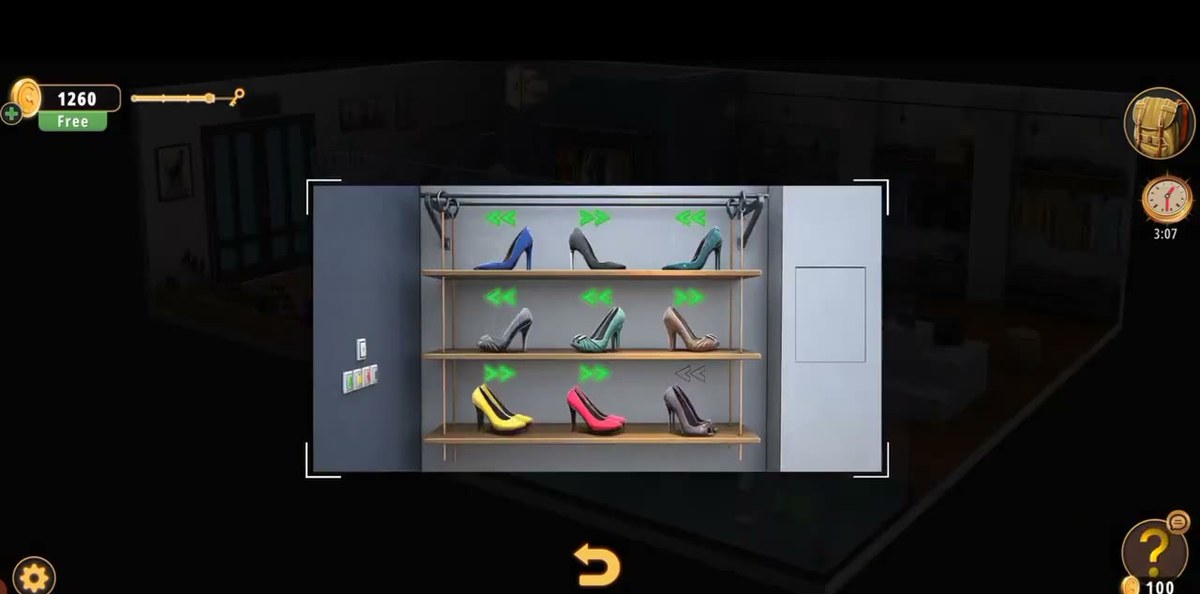
To the right of the register, a wall of individual shelves holds high-heeled shoes in blue, green, yellow and pink, and small green arrows sit between the shelves. Tapping an arrow moves a pair, so the display is a sorting toy: the shop wants its stock arranged, and the photographs on the other wall are the reference for how. Our recording works along the shelves from the top, moving pairs and picking up the loose shoes that are lying around the shop floor — they arrive in the bag simply as "Shoes". We could not confirm the exact winning arrangement twice, so this page describes the mechanism rather than printing a layout.
Video: 2:39
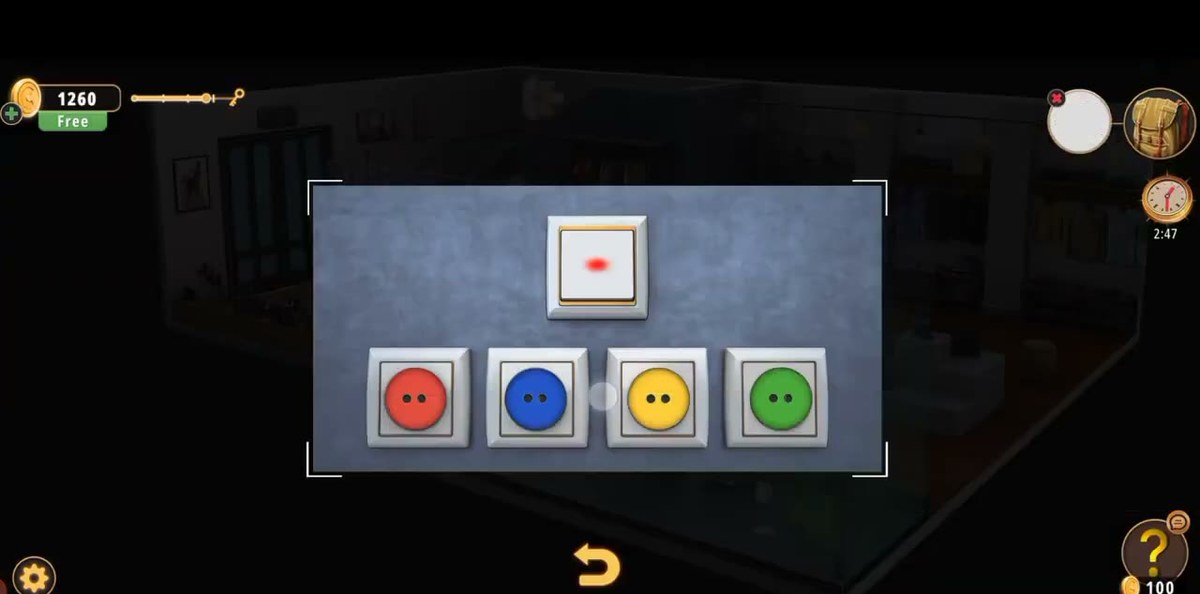
A wall panel holds one square button with a red dot above four square modules, each carrying a round coloured button — red, blue, yellow and green — with two small black dots beside it. The bag shows a matching "Button" item whose icon is four coloured segments with a 3/4 counter, which is the game telling you it is a collect-and-fit object rather than a code. Press the pads you have, watch which modules light, and keep the panel open while you sweep the floor: the pieces you are missing are lying in the shop.
Video: 2:52
Back at the counter, tap the surface next to the printer and the game hands you the item labelled Handwritten bill. It is a small pale rectangle lying flat, easy to mistake for part of the counter's decoration, and it is the single most important pickup in the room. Everything that follows — the keypad, the receipt, the scan, the code, the door — is downstream of this one tap. If you have been stuck in the Fashion Store for twenty minutes, this is almost certainly the thing you have not done.
Video: 3:15
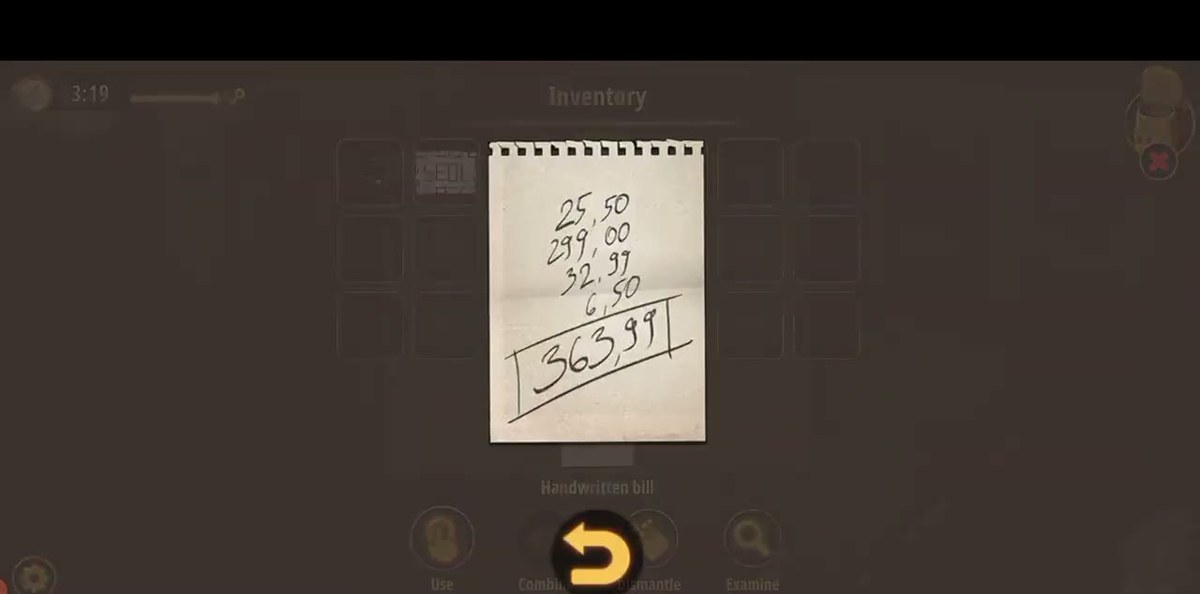
Open the bag and press Examine. The bill is a handwritten column of four prices with the sum boxed underneath: 25,50, 299,00, 32,99, 6,50, and a boxed 363,99. Add them and the four figures land on 363,99 exactly, which is the check that matters — this is a handwriting puzzle, the nines have a long tail that reads as a seven at thumbnail size, and the sum is what tells you which one you are looking at. Write the total down before you close the bag; the register wants it character for character.
Video: 3:19
Tap the register monitor and the screen becomes a plain numeric keypad: digits 0 to 9, a red CLEAR, a red DEL, a green ENTER, and an amount field along the top. Type 363,99 — the bill is written in the comma decimal style and the amount has to match it. Use CLEAR rather than DEL if a digit goes in wrong: DEL removes one character at a time, and a stray figure left in front of the amount turns 363,99 into something the register will not take. Check the field, then press ENTER.
Video: 3:25
The printer produces a receipt and it lands in your bag as Receipt. Read it once and you will see the same four lines the bill gave you — a T-shirt at 25.50, a watch at 299.00, a pair of trousers at 32.99 and socks at 6.50, a total of 363.99, cash 400.00, change 36.01, a card ending 7211 and an approval number 192107. Under the THANK YOU line there is a barcode. That barcode is the point. Select Barcode reader with cable in the bag, press Use, and tap the receipt: the view switches to a close-up of the paper inside white corner brackets, a red scan line sweeps across it, and the reader does its job.
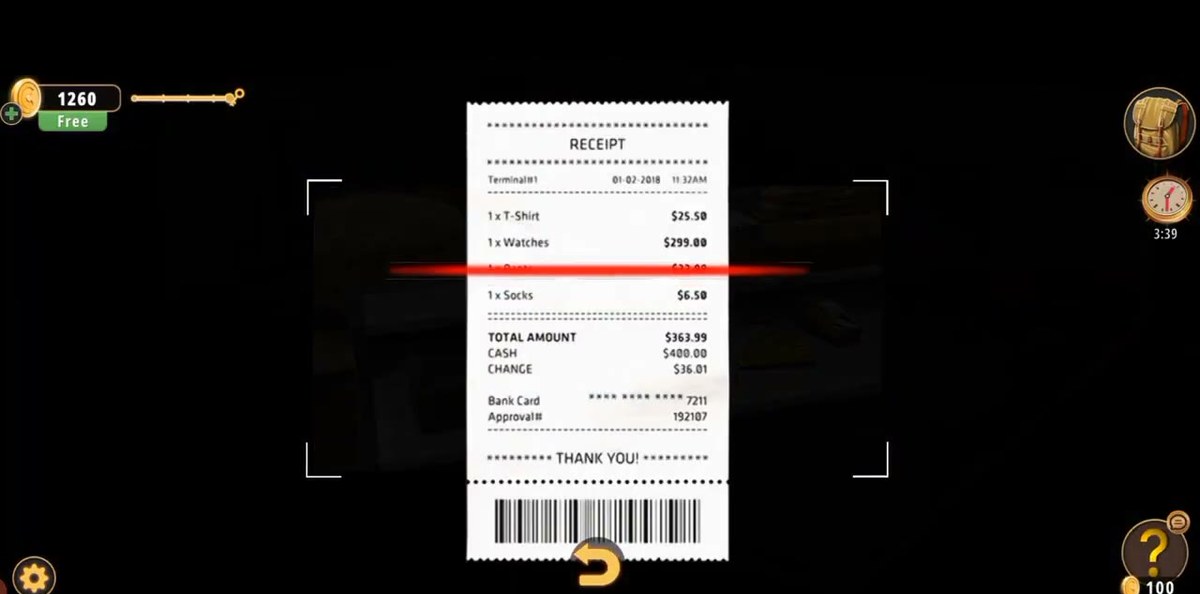
Video: 3:39
A white pop-up prints 30015 and the game drops a Code item into the bag with those five digits on it. That is the whole reveal — no wall writing, no arithmetic, no letter-to-number conversion. It is also why the Fashion Store is hard to spoil by searching the room: the code does not exist in the world until the register has produced a receipt and the reader has been run over it. If a video shows you a five-digit door code for this level, this is where it came from.
Video: 3:48
Walk back to the double doors under the EXIT sign. The keypad is mounted on the door beside the handle: a gold twelve-key pad with 1 to 9 in three rows and the 0 beneath the 8, and two small indicator lamps below the zero — red on the left, green on the right. Tap it, type 30015, and the green lamp answers. The doors release, the camera pulls back to the isometric view of the whole shop, and the results screen comes up. There is no key item and no final Combine — the code alone is the exit.
Video: 3:53
The Fashion Store pays +5 coins with an efficiency bar of nine segments out of ten, and the recorded run finishes at Time 3:57. The Piggy Bank panel underneath is the game's own upsell — it fills as you complete levels and asks to be bought — and nothing on it affects the room. Five coins is a small payout for a two-floor level, which is worth knowing if you are farming currency: this is not the room to replay for coins.
Video: 4:05
Why the register chain is the whole level.
Strip out every display puzzle and the Fashion Store is a five-link chain. A bill on the counter carries a total. The register's keypad accepts that total. When it does, the receipt printer fires and the receipt goes into your bag. The receipt carries a barcode, and the barcode reader in your bag converts it into a five-digit code. The keypad beside the front doors accepts that code. Nothing else in the room produces a number that a lock will take, and no lock in the room can be opened without something the chain has already produced.
The chain's weak link is the first one, and it fails for a very ordinary reason: the bill does not look like a puzzle object. Rooms & Exits usually marks its pickups by making them odd — a note pinned at an angle, a sheet sticking out of a drawer, a card face-up on a table. This one is a plain pale rectangle lying flat on a counter, roughly the same tone as the counter's surface, and the camera only shows it clearly when you are already zoomed in on the register. Our recording only notices it at 3:15, after nearly three minutes of working the shop floor, and that is a player who knew it was there.
The second link is the formatting trap. The bill is written the European way: 25,50 / 299,00 / 32,99 / 6,50 / 363,99. If you read the four figures and then type them into the register the way you would write them in a spreadsheet — 363.99 with a full stop — you are entering a string the keypad is not laid out for. The register screen is a plain numeric pad with a red CLEAR, a red DEL and a green ENTER; type the amount the way the paper writes it, with the comma. If you fumble a digit, use CLEAR and start the amount again rather than DEL, which only walks back one character.
The third link is the one people miss even after they have paid. The receipt is not a receipt in the ordinary sense — it is the level's code carrier, and the code is printed as a barcode under the THANK YOU line rather than written out. You cannot read the code off the paper by eye. You have to open the bag, select Barcode reader with cable, press Use, and then tap the receipt. Only then does the game run the scan animation — the paper inside white corner brackets, a red line sweeping across it — and only then does the five-digit pop-up appear. Players who take the receipt, examine it, see a normal shop receipt, and conclude the level has glitched are one Use press away from the answer.
The final link is anticlimactic on purpose. The door keypad takes the five digits, the green lamp lights, the camera pulls back and the results screen appears. There is no key to combine, no final item to fit, no second door. The Fashion Store is one of the Chapter 2 rooms where the last action is the smallest one, which is why a run that knows the chain can finish in under four minutes while a run that does not can circle the shoe wall for twenty.
What this page does not claim. Two things in the Fashion Store could not be pinned down twice from independent frames, and they are listed here rather than buried in the text above.
1. The four-wheel dial's combination. The dial reads 0-0-0-0 on first sight, and a paper slip with four letters goes into the bag. We saw the dial, we saw the slip, but we never got two agreeing reads of the number the dial accepts. One widely-shared upload of this level carries a four-digit number burned onto the frame as an annotation; we could not confirm that number is in the game rather than in the video's edit, so this page prints none. Use the slip in your own bag.
2. The shoe wall's winning arrangement. The green arrows move pairs and the framed photographs are the obvious reference, but no frame in either upload shows the completed display long enough to read the layout twice. The mechanism is described above; the arrangement is not.
Everything else on this page — the bill total, the four receipt lines, the five-digit code, the reward, the time — was read twice and agrees.
Where people get stuck.
- They never find the bill. It is on the register counter, flat and pale, and it is the single pickup that unlocks the entire chain. If the register keypad is inert for you, you are missing this and nothing else. Tap the counter surface next to the receipt printer.
- They type 363.99 instead of 363,99. The bill is written with commas and the register wants the same style. The amount field is at the top of the screen and it is easy to type a full stop out of habit from every other game you have played.
- They never scan the receipt. The receipt goes into the bag and looks finished. The code only exists after the Barcode reader has been used on it, and the reader has to be selected in the bag first — tapping the receipt with nothing selected does nothing.
- They treat the shoe wall as the main puzzle. It is the biggest, brightest, most obviously interactive object in the room, and it is a side puzzle. Our recording spends over a minute on it and the finish does not depend on it.
- They hunt for the code on the walls. There is no five-digit number painted anywhere in this shop. The code is generated by the register and handed to you as an item, which is why searching the room for it is hopeless.
- They read the bill's 9s as 7s. At thumbnail size, the handwritten 32,99 and 363,99 both look like 32,97 and 363,97. The four line items are the check: 25,50 + 299,00 + 32,99 + 6,50 = 363,99, and the printed receipt confirms the same figures once the transaction goes through.
- They try to carry items between floors. There is no carrying. The bag is shared across the whole level, so anything picked up upstairs is available at the register downstairs without a trip back.
Chapter 2 levels.
Chapter 2 runs twenty-six rooms, from the Cell Phone Store to the final escape. The list below shows what is written up so far; the last full walkthrough before this room is the Restaurant.
- 1 Cell Phone Store guide
- 2 Cinemas guide
- 3 Pharmacy guide
- 4 Optical Store guide
- 5 Gym guide
- 6 Candy Shop guide
- 7 Food Court guide
- 8 Pet Shop guide
- 9 Indoor Playground guide
- 10 Restaurant guide
- 11 DIY Shop guide
- 12 Jewelry Store guide
- 13 Grocery Store guide
- 14 Exchange Office guide
- 15 Fashion Store you are here
- 16 Art Supplies Store guide
- 17 Shoe Store guide
- 18 Sports Store guide
- 19 Bookstore guide
- 20 Furniture Store guide
- 21 Household Appliances guide
- 22 Print Shop guide
- 23 Bakery guide
- 24 Toy Store guide
- 25 Restroom guide
- 26 Parking guide
FAQ.
What is the door code in the Fashion Store in Rooms & Exits Chapter 2?
30015. It is not written anywhere in the shop. Pay the handwritten bill at the register, take the receipt the printer produces, then use the Barcode reader with cable on it — the scan returns a Code item reading 30015. The keypad beside the double entrance doors takes those five digits and the level ends.
What is the total on the handwritten bill?
363,99, with a comma. The four lines are 25,50, 299,00, 32,99 and 6,50, and the boxed total underneath reads 363,99. The arithmetic checks — those four figures sum to exactly 363,99 — and the receipt the register prints after a correct entry repeats the same items and the same total, which is the cross-check that the handwriting has been read right.
Where do I find the handwritten bill?
On the register counter at the back of the ground floor. At 3:15 in the recorded run the player taps the counter surface beside the receipt printer and the item pops up as Handwritten bill. It is the only pickup on that counter that matters, and until you have it the register has no amount to accept.
How do I get the code out of the receipt?
Open the bag, select Barcode reader with cable, press Use, then tap the receipt. The view switches to a close-up of the receipt inside white corner brackets with a red scan line running across it, and a moment later a white pop-up prints 30015 over the label Code. The barcode sits under the THANK YOU line at the bottom of the paper, which is why you cannot simply read the code off the receipt.
Why will the register not accept my total?
The bill is written in the comma decimal style, so the amount is 363,99 and not 363.99. The register screen is a bare numeric keypad with a red CLEAR, a red DEL and a green ENTER, plus an amount field along the top. Type the figure the way the paper writes it, check the field before you commit, and use CLEAR rather than DEL if a digit goes in wrong — DEL removes one character at a time and it is easy to leave a stray figure at the front of the amount.
Do I have to solve the shoe wall and the tile panel to finish?
We could not prove either is optional. Our recording solves both on the way through, and the finish is triggered at the door rather than at any display puzzle, so the register chain is certainly the required part. Treat the shoe wall, the sixteen-tile panel, the chest and the four-wheel dial as the room's side puzzles: they hand over items and keep the shop busy, but this page will not call them skippable, because we never saw a run that skipped them.
How long does the Fashion Store take?
The results screen reads Time 3:57 with an efficiency bar of nine segments out of ten, and the clip runs 4:09 because it opens on a title card. That is a fast run by a player who already knew the bill was sitting on the counter. Nothing in the room is timed and there is no fail state, so a slower first pass costs you nothing but the walk back to the door.
What do you get for finishing Chapter 2 Level 15?
+5 coins and an efficiency rating of nine out of ten. The results screen shows the +5 badge, a ten-segment bar with nine filled, and Time 3:57. The Piggy Bank panel underneath is the game's own optional upsell and nothing on it is needed to finish the room — five coins is also a small payout for a two-floor level, so this is not a good room to replay for currency.
Previous walkthrough: ← Chapter 2, Level 10: Restaurant