Rooms & Exits Chapter 2 Level 4 Walkthrough: Optical Store
Unofficial fan-made guide. Not affiliated with Webelinx Games, the developer of Rooms & Exits: Escape Room Games.
Rebuilt frame by frame from a recorded playthrough of the current build — 3 minutes 52 seconds of footage, extracted at one frame per second (and at four frames per second around the keypad and the safe), read at full resolution and cross-checked with text recognition. The five-digit keypad code, the prescription values, the phoropter reading and the three safe letters were each read twice from separate frames and agree. Three details could not be settled from the footage and are called out as unconfirmed further down: what the cat-eye pair in your bag is actually for, the capitals at the far ends of the eye-chart row outside the red rule, and which eyepiece carries the L and which the R marking — the four phoropter values themselves were read twice and agree, but our frames do not tie each pair to a side, so the step below gives the pairing the prescription forces instead of trusting the lettering. Everything below is what the recording does, not what a guide says it does.
Chapter 2 · No Honor Among Thieves26 of 26 with full written steps · 26 with a video
Quick answer
The Optical Store runs on one five-digit code, four lens values and three letters: keypad 68459, phoropter 0.75 / −2.50 left and 1.75 / −1.25 right, safe T-O-D. Finish worth +50 coins.
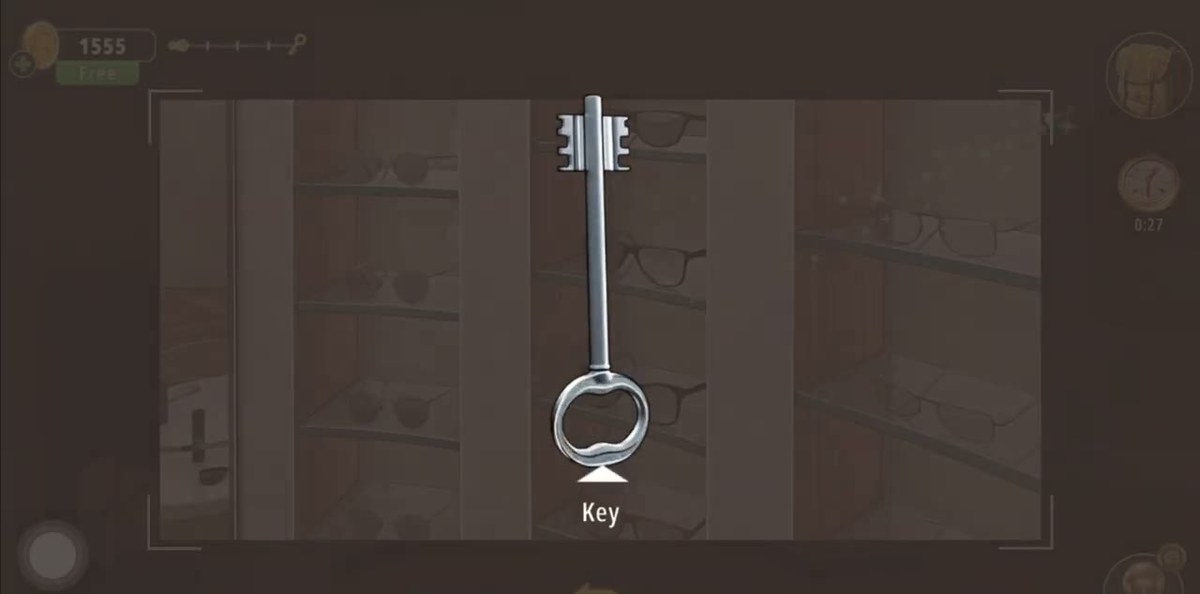
Take the Key from the glass shelf on the eyewear display wall → it unlocks the tall frosted cabinet on the left.
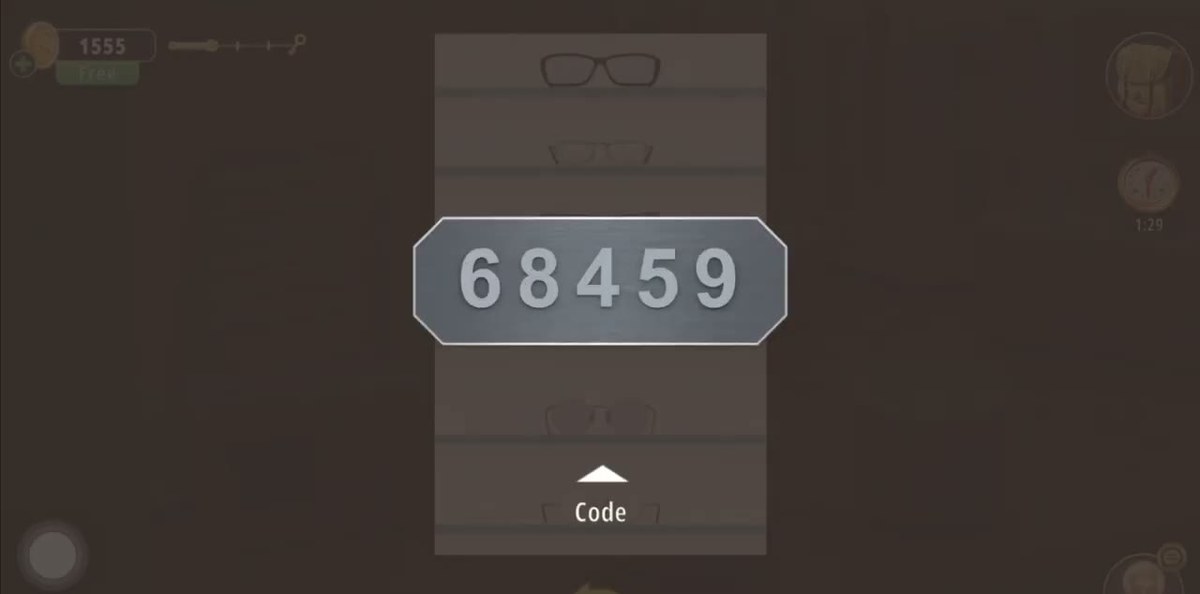
Inside that cabinet, take the small Code tag: 68459.
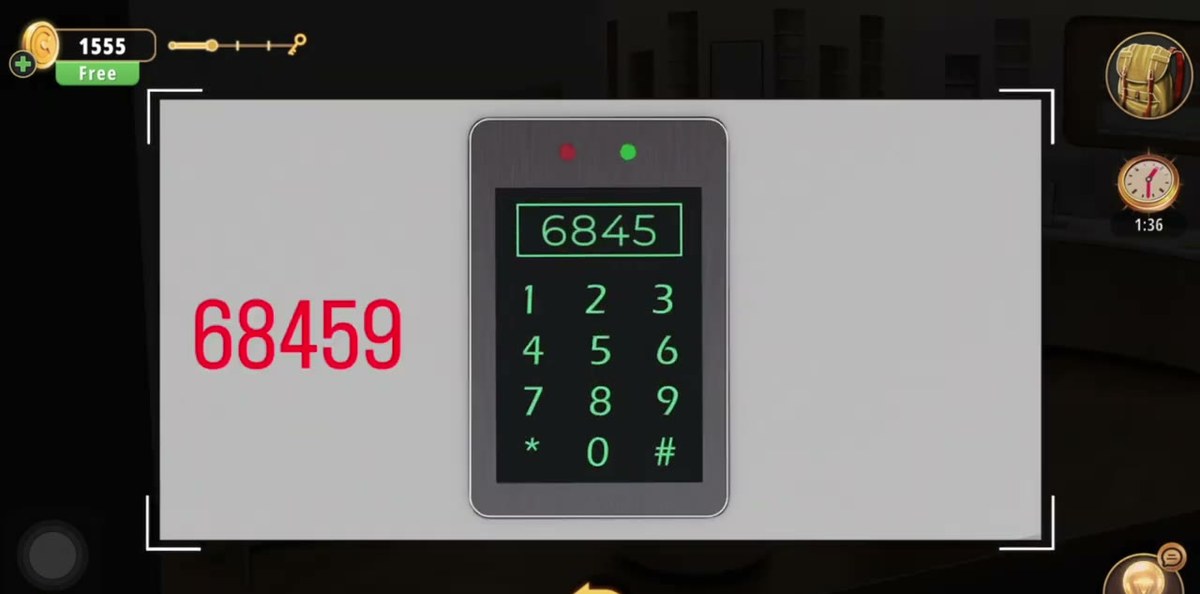
Type 68459 into the wall keypad → a drawer in the shop opens → Refractor lens (−1.25).
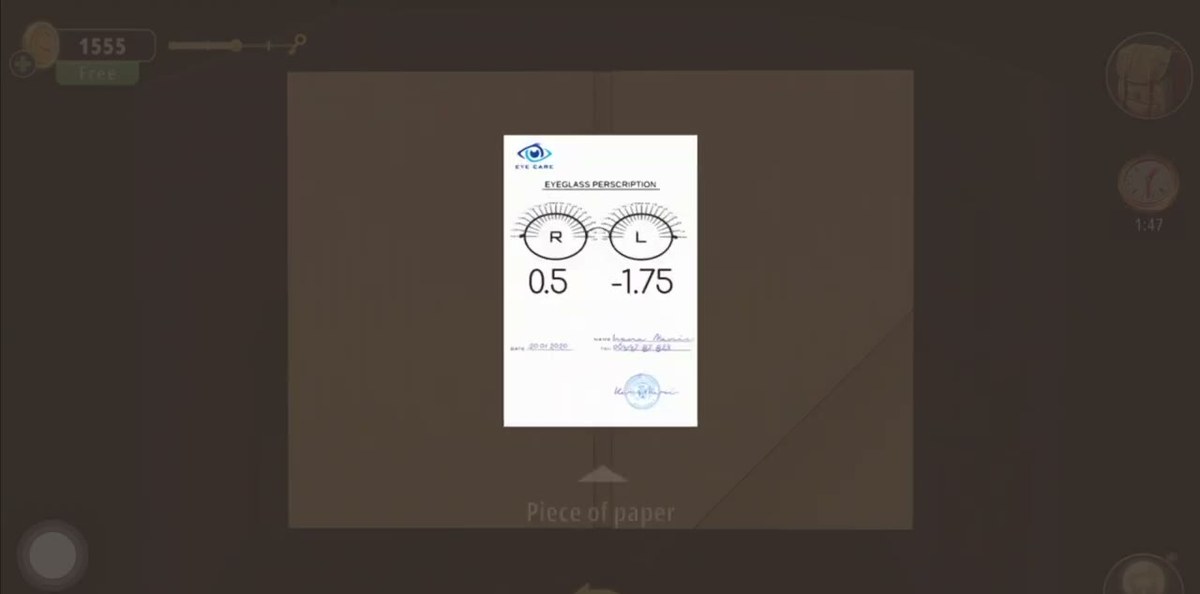
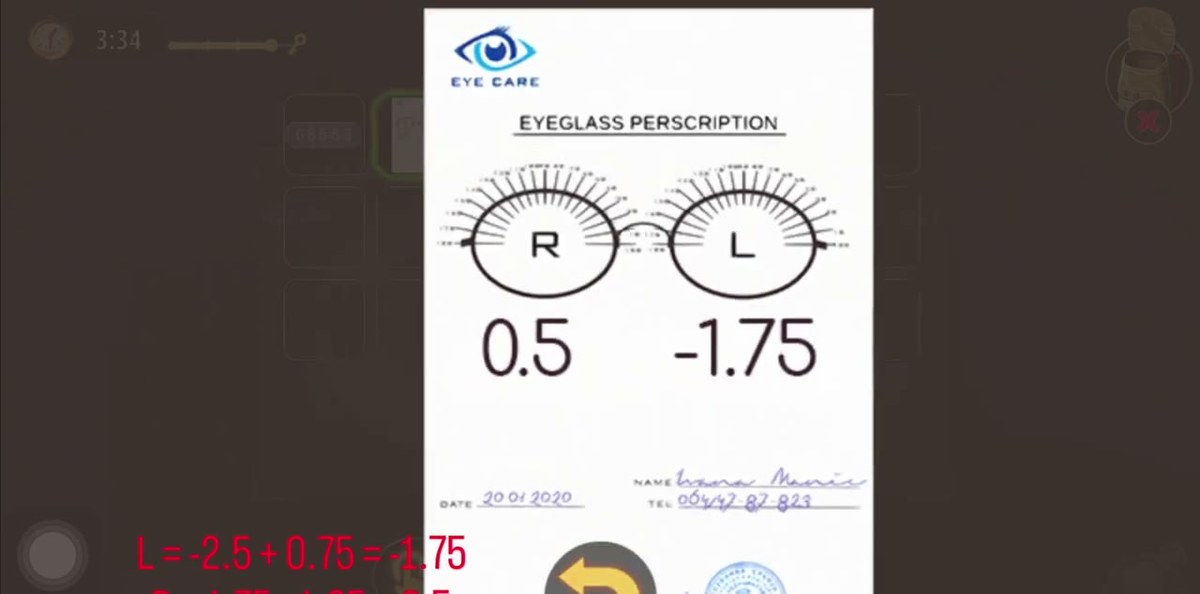
Go through the doorway into the examination room; the EYEGLASS PRESCRIPTION on the desk reads R 0.5 and L −1.75.
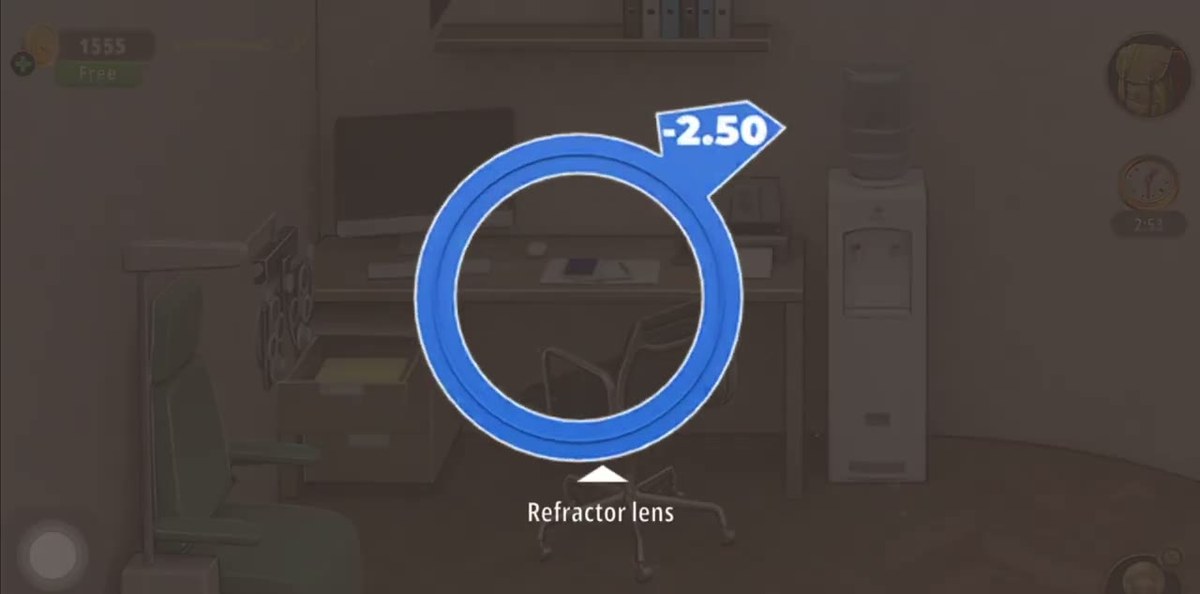
Open the examiner's desk drawer → Refractor lens (−2.50).
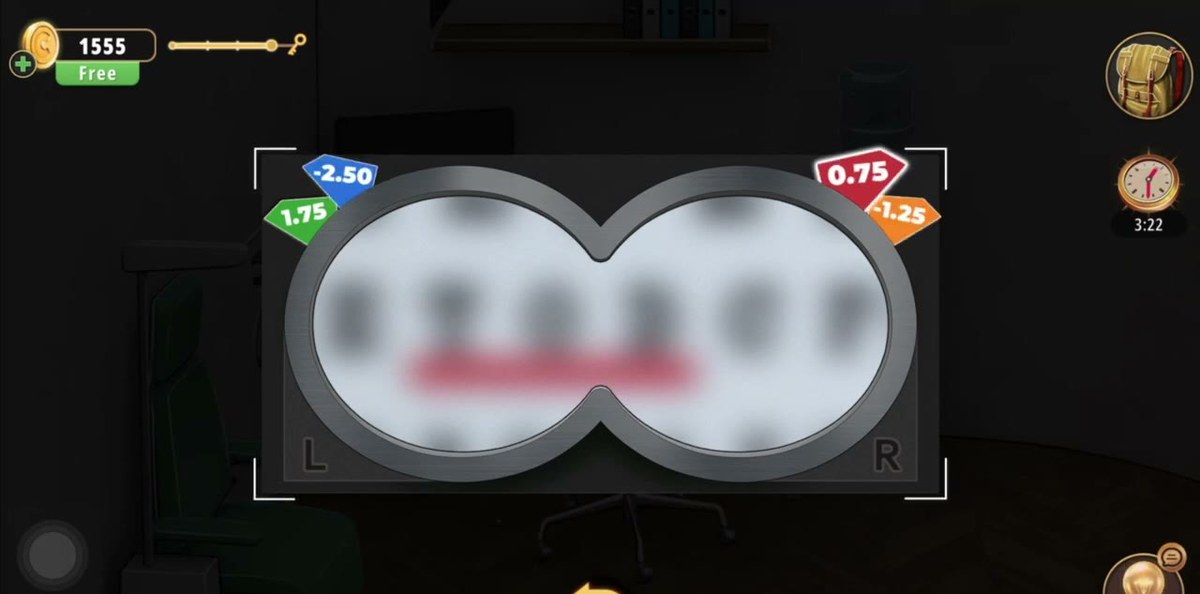
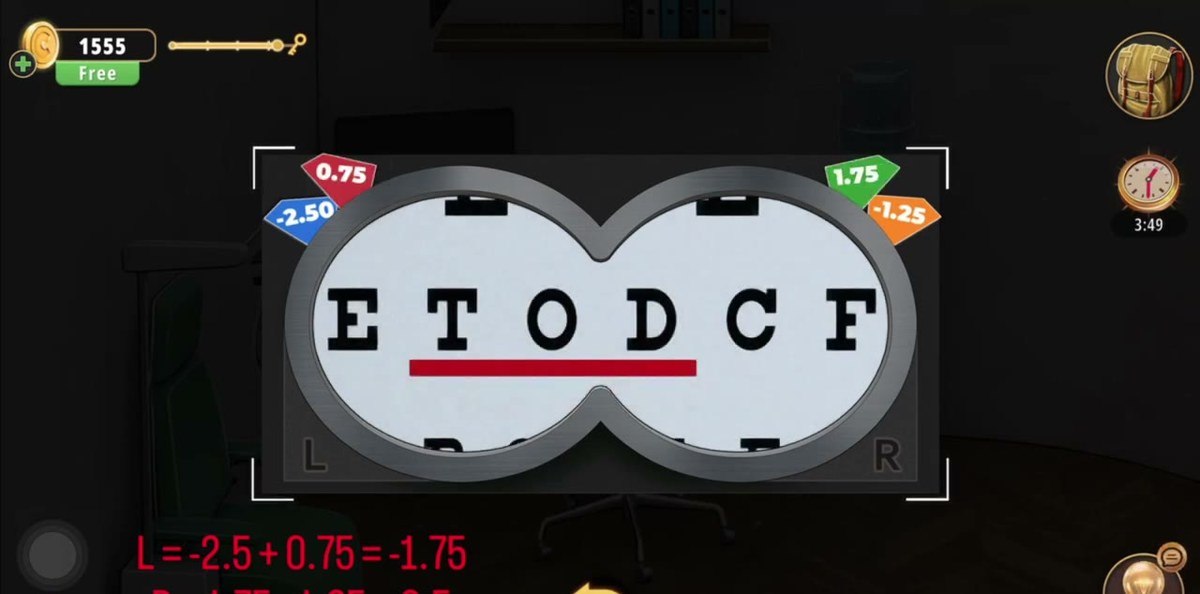
Set the phoropter so the two tags on one eyepiece read 0.75 and −2.50 and the two on the other read 1.75 and −1.25; the pairing is fixed by the prescription — the eye that has to end up at −1.75 takes 0.75 and −2.50, the eye that has to end up at 0.5 takes 1.75 and −1.25 — so if the L and R markings on your panel sit the other way round, put the pairs on the opposite sides. The chart then sharpens and a red rule marks T, O, D.
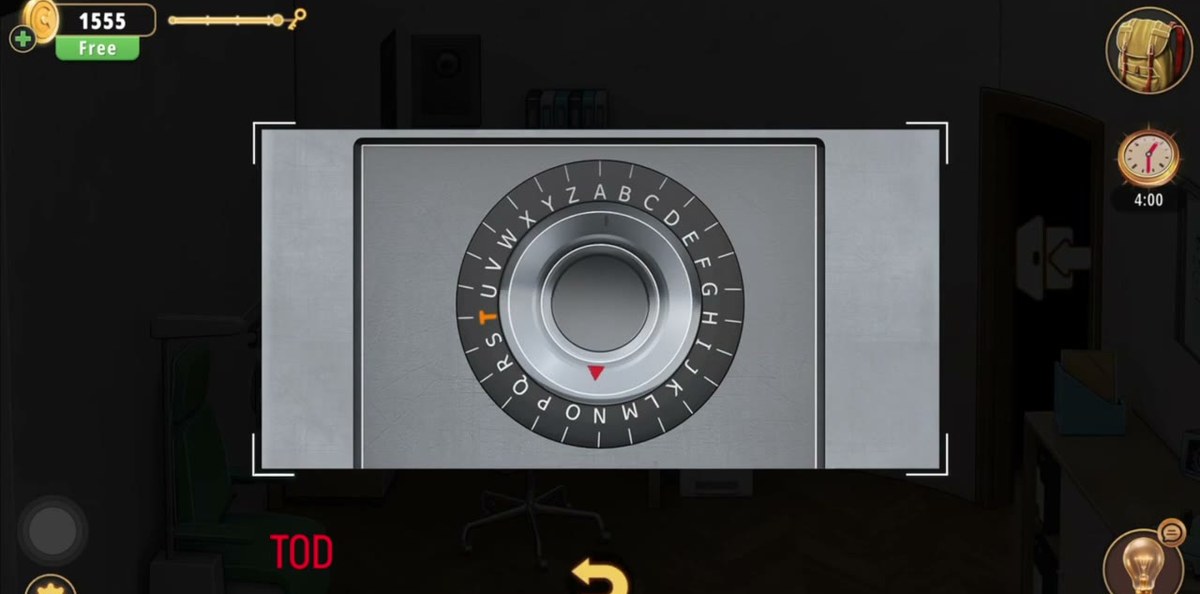
Dial T, then O, then D on the safe → a Key is hanging inside.
Use the key on the shop doorway → exit icon → +50 coins, 4:14.
What this level actually is.
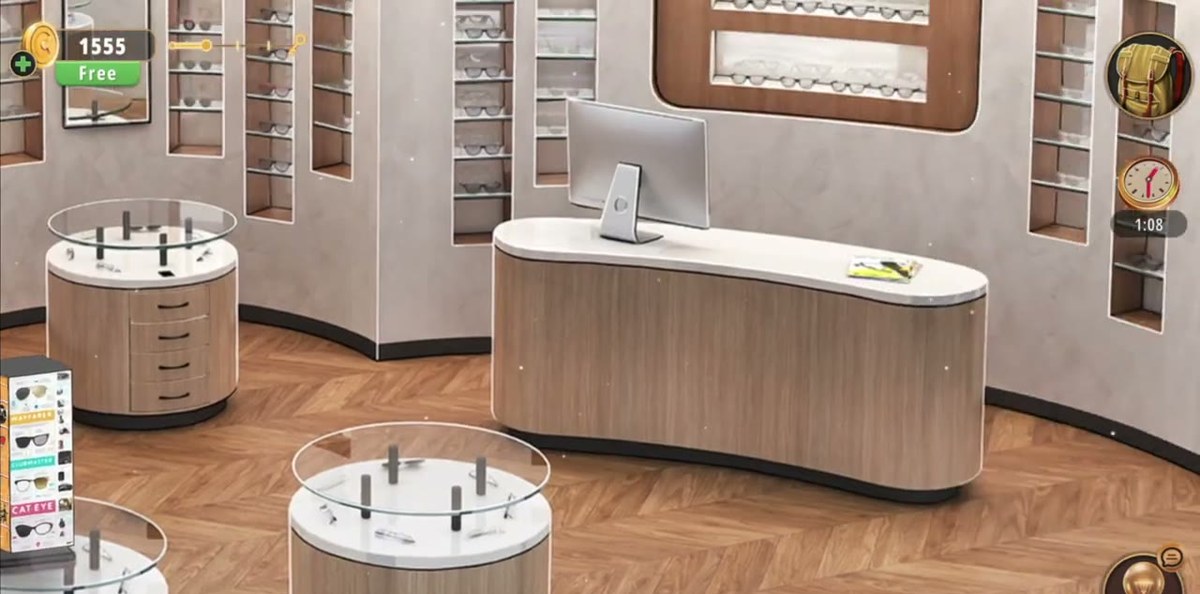
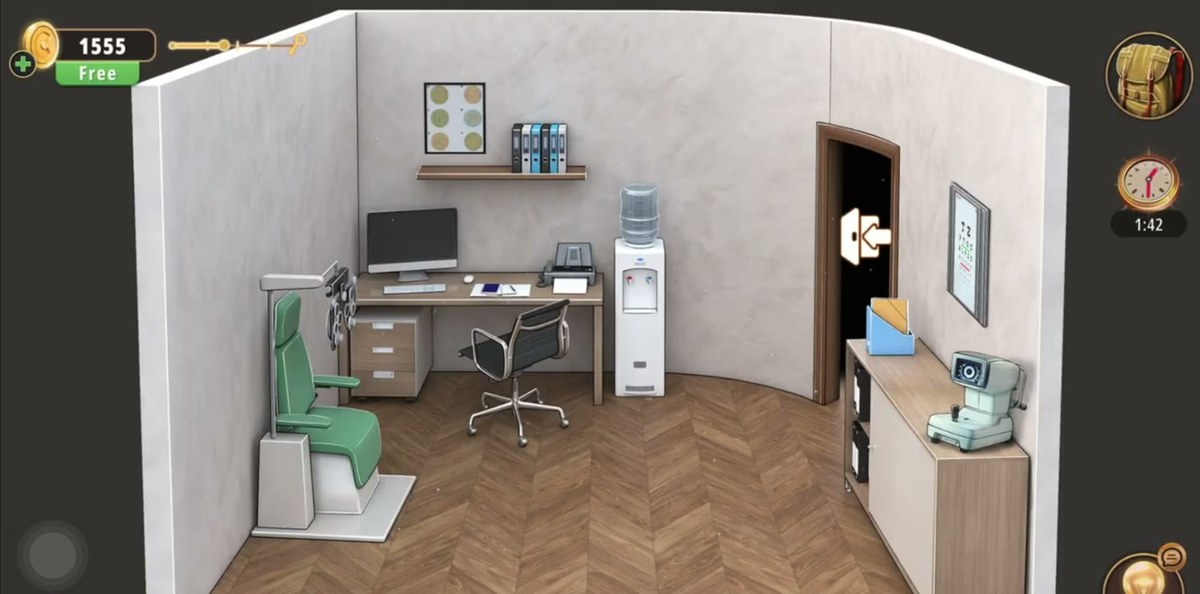
The Optical Store is one shop and one back room, and almost everything in it is eyewear. The shop floor has three round display tables with glass tops and a single pair of glasses pegged on each, a curved back wall cut into recessed niches of eyewear shelving, a mirror between two of those niches, a curved reception desk with a monitor on the right, and a tall glass display cabinet with a white countertop on the left. A doorway beside that cabinet leads into an examination room: an exam chair with a phoropter on an arm, a desk with a monitor, keyboard and printer, a water cooler, a filing shelf of binders, and a framed eye chart on the side wall.
The structure is a three-lock chain, and the three locks use three different alphabets — digits, dioptres, letters. That is the whole reason this level feels harder than its size. The keypad wants five digits, the phoropter wants four signed lens values, and the safe wants three letters. Players who find the 68459 tag early try to feed it to the safe. Players who find the safe first assume the answer is a number. Neither works: the five digits open a drawer, the four values produce a letter line, and only the three letters the red rule brackets go into the safe.
Nothing here is hidden behind pixel hunting, either. Every interactive object either carries an item label (Key, Code, Glasses, Refractor lens, Piece of paper) or sparkles when your finger is near it. If you are stuck in the Optical Store, you have almost certainly walked past a piece of eyewear that was glowing, or you are standing at a lock trying to use the wrong kind of answer.
Step by step.
Step 1 · 0:04Read the shop before you touch anything
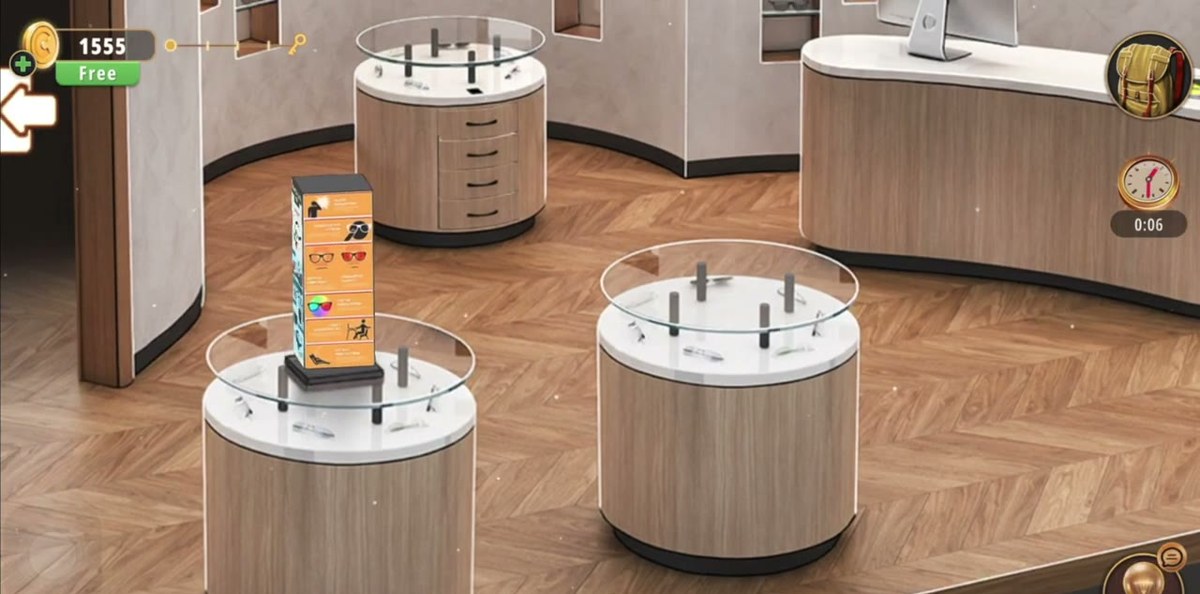
The opening sweep is the cleanest wide shot you get. Left: the tall glass cabinet with the white counter, and under it a cupboard and a drawer that are already hanging open. Centre: three round display tables, one with a small upright card stand on top. Right: the curved reception desk with a monitor on it. Back wall: shelf niches of glasses and a mirror. The doorway you will use twice — once to reach the back room, once to leave the level — is the dark opening between the glass cabinet and the curved wall.
Step 2 · 0:11The reading material is set dressing, not a clue
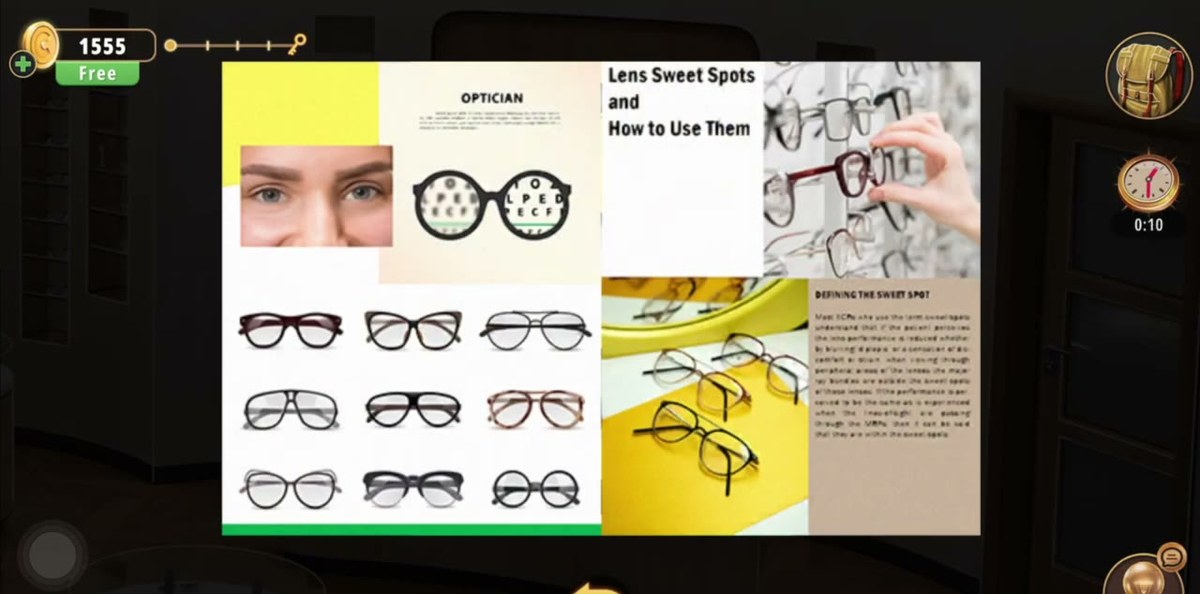
Three things on the walls are readable and none of them are needed. The OPTICIAN poster carries the column “Lens Sweet Spots and How to Use Them” with a DEFINING THE SWEET SPOT paragraph underneath. A second spread is headlined “Living in Color — Eyewear and Trends”. A third is a trade page, “L&T New Products” and “Jewelry for Your Eyes: Reframing Frame Sales”. The magazine on the table is optical MAGAZINE, January 2021, with two pairs of sunglasses on the cover.
Read them once if you like the flavour, but the recording opens all four, reads them and moves on. There is no number, letter or colour order written on any of them. The eyewear vocabulary is the only thing they contribute.
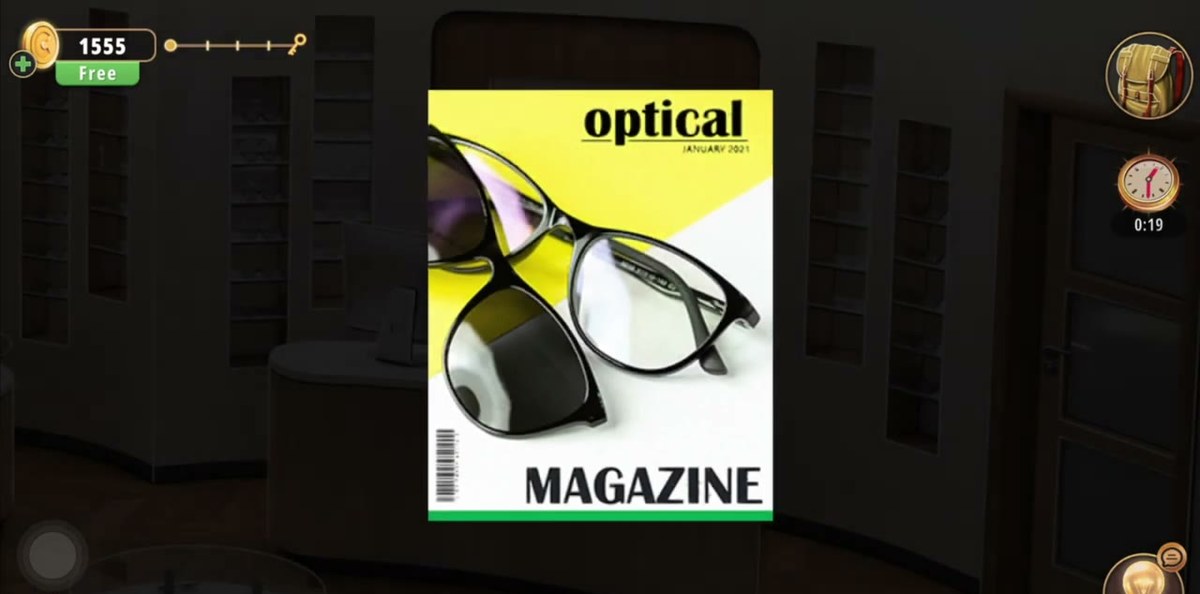
Step 3 · 0:20The optical MAGAZINE is a prop with a barcode
The magazine on the round table opens to a full-screen cover: optical across the top, JANUARY 2021 under it, MAGAZINE across the bottom, a barcode down the left edge and dark-framed sunglasses as the cover shot. It is the first thing most players tap, because it is the only object in the shop with print on it at eye level, and it is a dead end. Close it and keep walking.
Step 4 · 0:27The key is on a shelf of glasses
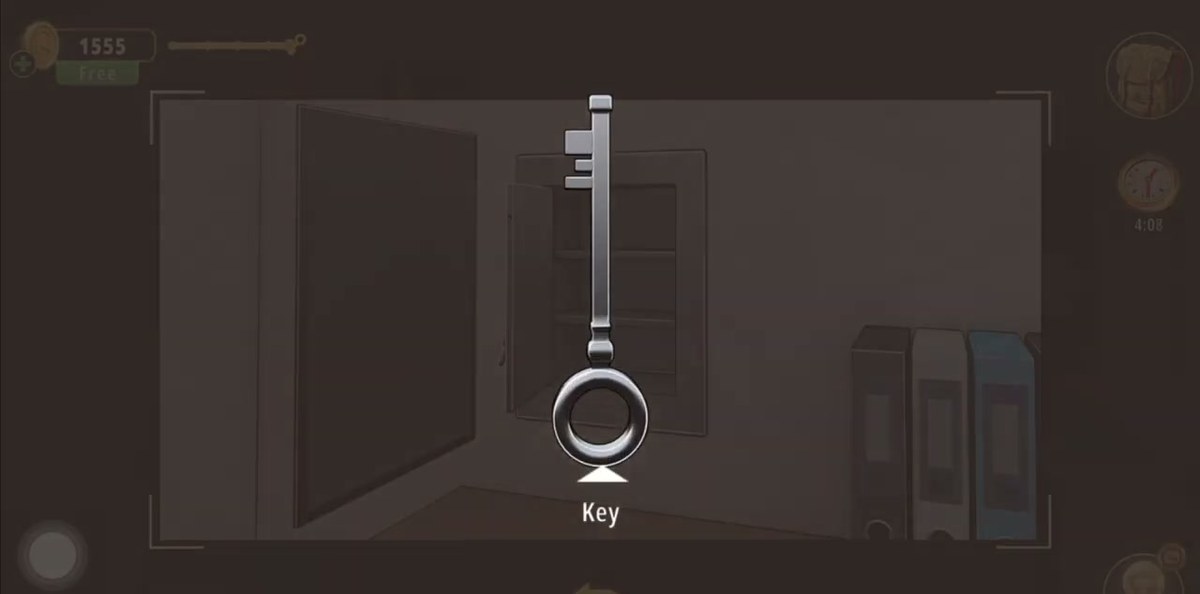
Walk to the eyewear display wall and look along the glass shelves. One pair of frames on the middle shelf sparkles; the camera moves in and a silver key rises out of the shelf with the label Key under it. That is pickup number one, and it is the single most-missed object in the room because it is the same colour as the frame hardware next to it.
If you have already tried the tall cabinet and found it locked, this is the answer: the key is not in a drawer and not in the back room, it is sitting in plain sight among the eyewear.
Step 5 · 0:43The cat-eye pair: a labelled pickup we could not place
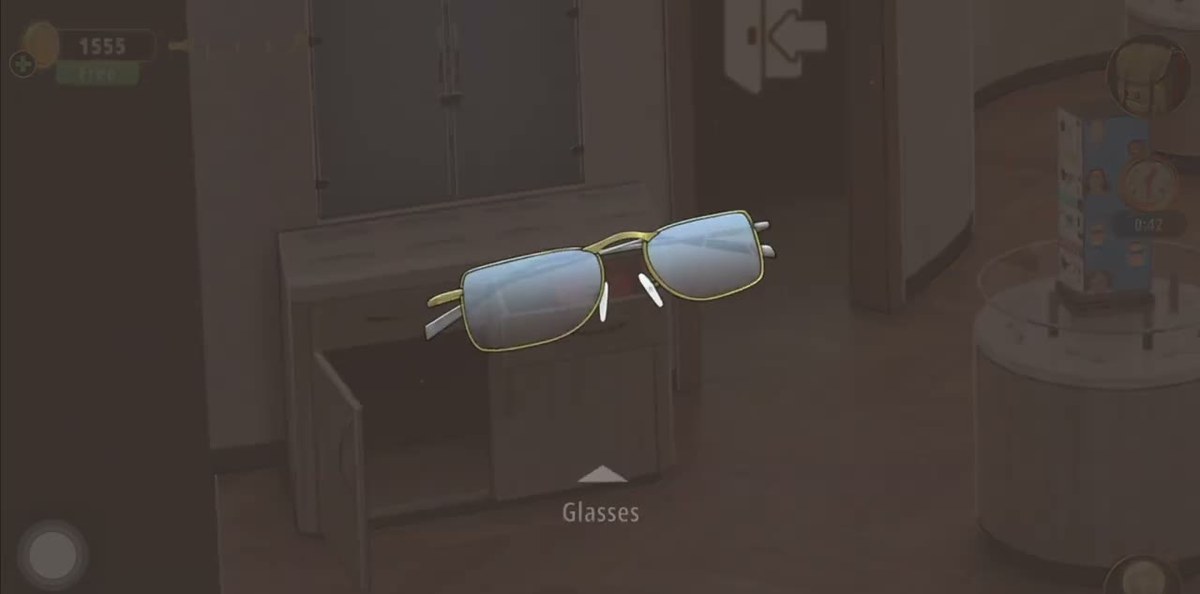
On the round table with the card stand there is a display labelled CAT-EYE. Tapping it gives you a pair of pale gold rectangular frames with the label Glasses, and they go into the bag as their own item. Then the recording never uses them again on camera.
So take them — they cost nothing and every item in this game tends to come back — but do not build a plan around them. The phoropter in the back room runs on Refractor lens items, not on a pair of finished glasses, and none of the three locks asks for a frame. Treat this as the one loose thread in the level and read the warning box further down before you spend time on it.
Step 6 · 0:48Use the key on the frosted cabinet
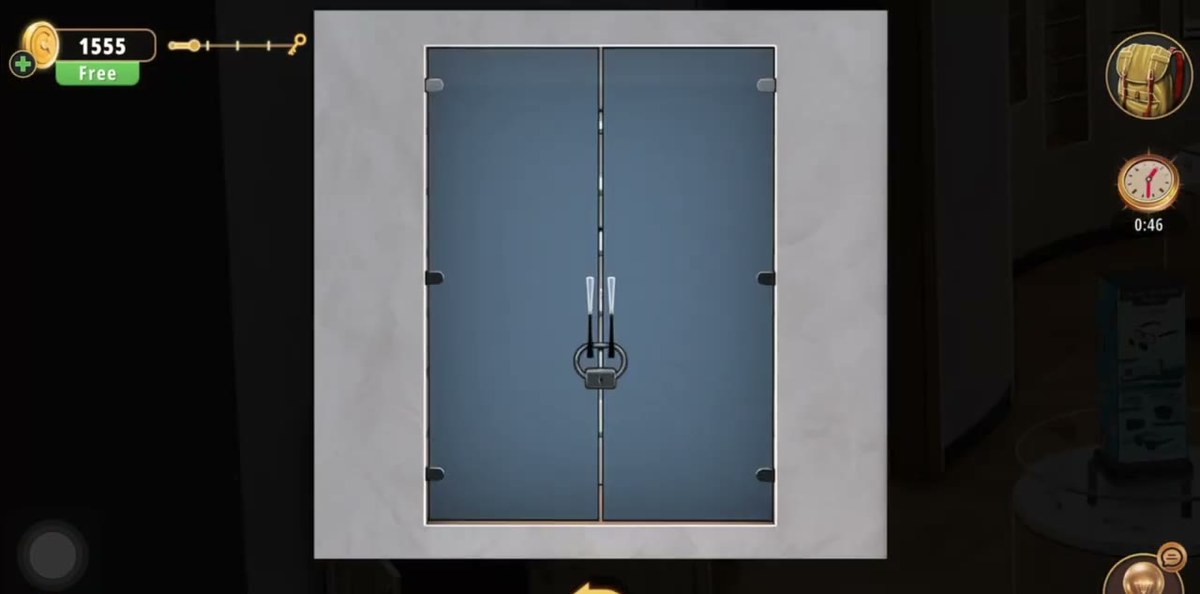
Stand in front of the tall cabinet on the left wall: two frosted glass doors, a slim handle on each, pale grey frame, a white counter beneath. Without the key it is inert. Open the inventory, tap the Key, press Use, close the bag and tap the doors. The little key icon appears at the top left of the screen to tell you an item is armed, and the doors swing outward.
This is the only thing the shelf key opens. The drawers under the counter, the drawer with the red box in it, and the cupboard door that is already ajar are all empty or prop-only; the recording opens them first, finds nothing, and only then uses the key.
Step 7 · 1:06The cabinet is a display case, not a puzzle
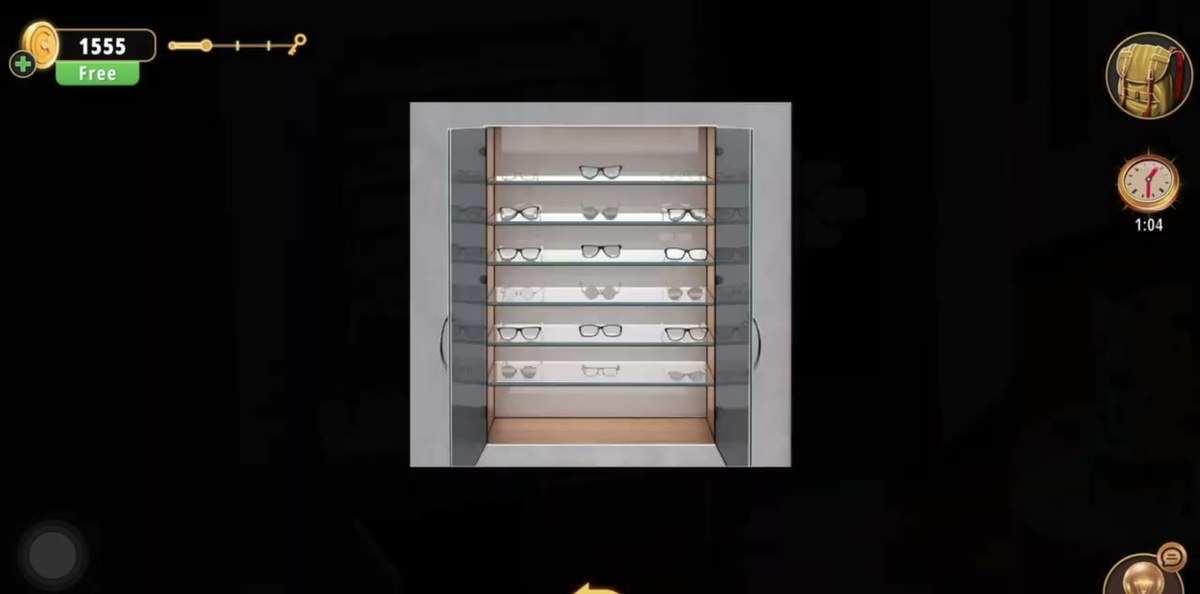
Open, the cabinet shows six glass shelves of eyewear, two or three pairs per shelf, lit from above. Nothing inside is a mechanism: you cannot rotate the frames, swap them, or read an order off them, and the recording taps along the shelves once and stops. The only thing worth taking is the card.
It is worth saying plainly because the open cabinet with seventeen pairs of eyeglasses looks exactly like a “match the frames” puzzle, and players lose minutes trying to compare shapes with the wall niches or the mirror. There is no comparison puzzle in this room.
Step 8 · 1:31The Code tag: 68459
Inside the cabinet, on one of the middle shelves, is a small grey metal tag stamped with five pale digits: 68459. Tap it and the label Code appears with the pickup arrow, and the card goes into the inventory where it shows as 68459 for the rest of the level.
Two independent reads of separate frames give the same five digits, and the typing animation later confirms them one key at a time. This is the only number in the Optical Store. Write it down: the card stays in the bag, but the keypad is on the other side of the shop and the display is small.
Step 9 · 1:3668459 into the wall keypad
The keypad is a dark brushed panel with a red light and a green light above a small screen, and a green 1–9 / ✱ 0 # grid under it. It sits on a pale plate with the red digits printed beside it, so you can check your reading against the wall while you type. The display fills left to right: 6, 68, 684, 6845, 68459. The green light comes on when the fifth digit lands and the panel drops away.
If you mistype, clear the field and start again — the display only holds five characters, so a wrong first digit means the whole entry is wrong.
Step 10 · 1:40The keypad opens a drawer, not a door: Refractor lens (−1.25)
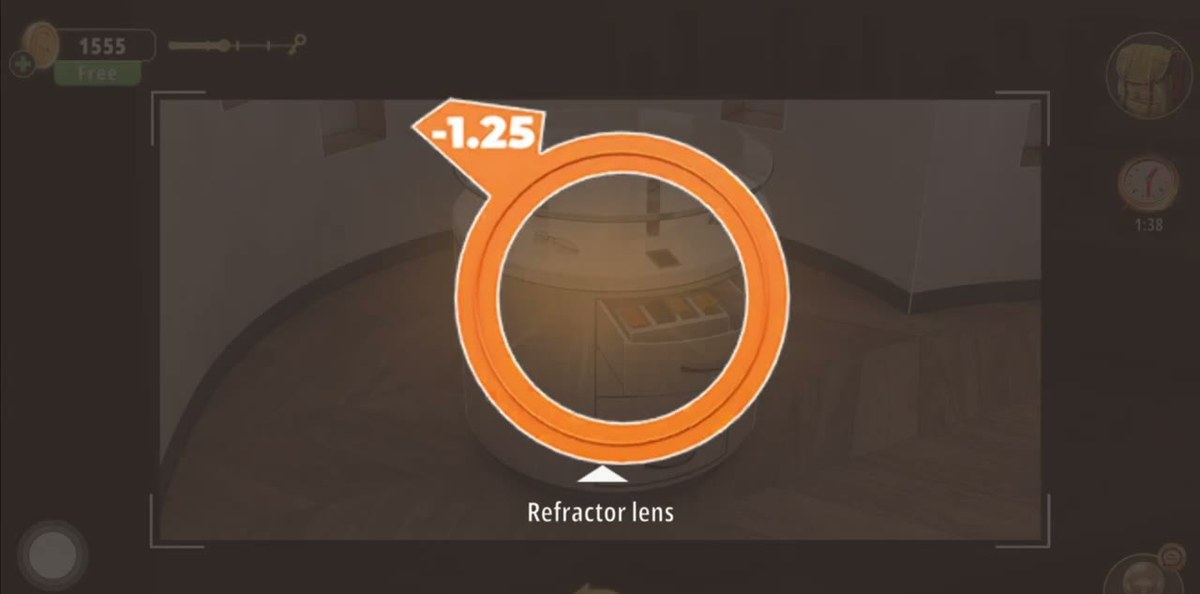
The panel releases a drawer and the camera turns to a round display table whose drawer has slid out. Inside, marked with the usual sparkle, is a Refractor lens reading −1.25. Take it.
This is where the level changes gear. Up to now everything has been eyewear as scenery; from here the game starts handing you lens powers with signed values, and those values are the raw material for the back room. The recording banks this one before it ever looks through the phoropter, and −1.25 is already on the dials by the time it sits down.
Step 11 · 1:44Into the examination room
The doorway beside the tall cabinet now carries an entry icon. Walk through it: exam chair on the left with the phoropter on an arm, desk against the back wall with a monitor, keyboard, printer and an office chair, a water cooler beside the door, a shelf of binders, and a framed eye chart on the right-hand wall above a low cabinet holding a blue file tray. The lighting is dim and the room reads as a second, smaller level.
Everything you still need is in here: the prescription on the desk, the second lens in a desk drawer, the phoropter, and the safe.
Step 12 · 1:47The EYEGLASS PRESCRIPTION: R 0.5 and L −1.75
On the desk, in front of the monitor, is a white sheet in a folder. Take it: the item is labelled Piece of paper and examining it opens a full-page EYEGLASS PRESCRIPTION on EYE CARE letterhead, dated 20 01 2020. Two lens circles carry the values: R 0.5 and L −1.75.
Those two numbers are the target. Everything the phoropter does afterwards is an attempt to reach them, and the paper ends up carrying the working down its lower half: L = −2.5 + 0.75 = −1.75 and R = 1.75 − 1.25 = 0.5. If you only remember two numbers from this room, remember 0.5 and −1.75.
Step 13 · 2:29The desk drawer gives you the second lens (−2.50)
Pull the drawer in the examiner's desk. It slides open on a yellow box, and the second Refractor lens lifts out in front of it, this one tagged −2.50. Take it.
Now you are holding all four powers the machine can display: 0.75, 1.75, −1.25 and −2.50. That is a complete set for a two-lenses-per-eye answer, and the prescription's arithmetic is literally a pairing of them.
Step 14 · 2:45The phoropter: 0.75 and −2.50 on the left, 1.75 and −1.25 on the right
Sit at the exam chair and look into the phoropter. You get a binocular view with a blurred eye chart behind the lenses, a big L and R under the two eyepieces, and four value tags pinned around them: 0.75, −2.50, 1.75 and −1.25. The chart is a red-smeared blur until the tags are on the right eyes.
The tags are not fixed to one side. Tap a tag and it crosses to the other eyepiece — the recording shuffles the same four values between left and right several times, so if you watch frame by frame you can see 0.75 sitting on the left pair early on and on the right pair a moment later. What you are solving is which two powers belong to which eye: 0.75 and −2.50 to the left, 1.75 and −1.25 to the right. Those pairs are the prescription's arithmetic — 0.75 − 2.50 = −1.75 on the left, 1.75 − 1.25 = 0.5 on the right — and the chart snaps into focus the moment both pairs are correct.
Step 15 · 3:24The chart clears, and a red rule marks T, O and D
With the lenses set, black capitals resolve on the white chart and a thick red rule runs underneath them. The rule starts under the T and stops under the D, so the letters it brackets are T, O and D — three letters, which is exactly what the safe takes.
The row carries more capitals beyond the rule at both ends. Read them if you like; they are not part of the answer, and the underline is the game telling you where the answer stops. This is the step where most players go wrong in the other direction as well: they read the whole line and try to dial five or six letters.
Step 16 · 3:30The safe: dial T, O, D
The safe is recessed into the wall of the back room, with a dark framed panel on its left and a shelf of binders on its right. Its dial is a full alphabet, A to Z clockwise, with a red pointer at the bottom and the entered letters shown in red as you go. Turn to T, then O, then D. The handle releases and the door swings out.
Notice what the safe is not: there is no number pad on it and no place to type 68459. The five digits you found in the shop belong to the keypad, and mixing them up is the most common way to stall in this level.
Step 17 · 3:44Take the key out of the safe
The safe interior is two empty shelves and one small object on the bottom shelf, sparkling. Tap it and the label Key appears. That is the second key of the level and the last item you need: the shop key opened a cabinet, this one opens the way out.
Step 18 · 3:48Use the key, take the exit, +50 coins
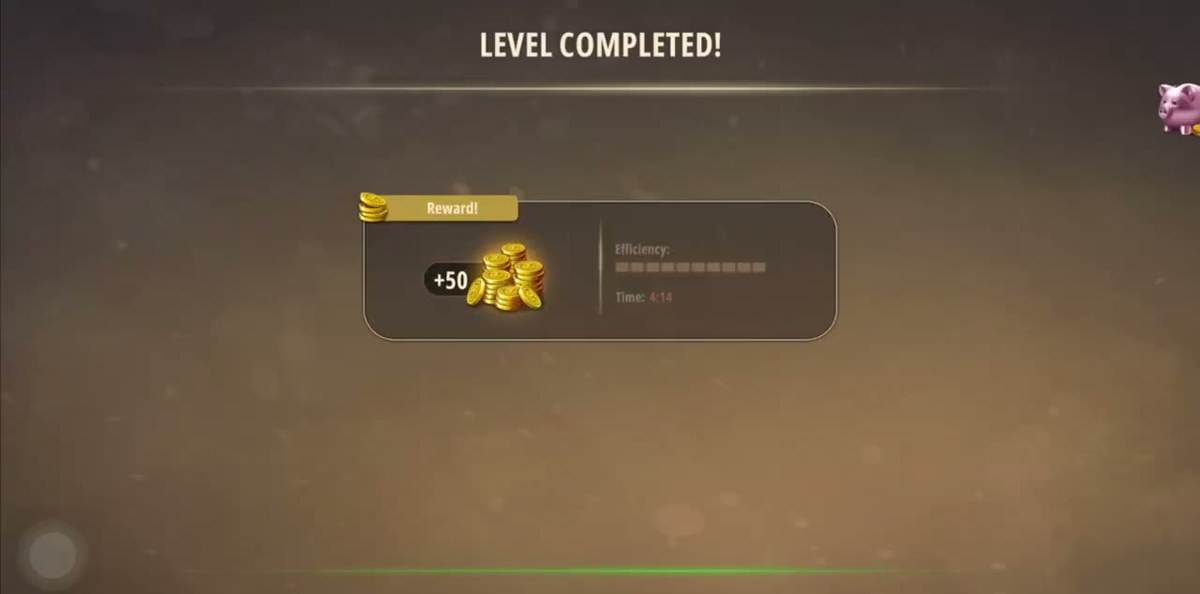
Walk back into the shop. Open the inventory, select Key, press Use, then tap the doorway on the left wall beside the tall display cabinet — the one you came through to reach the back room. A glowing exit icon appears in the opening. Tap it and the camera pulls back to the wide shop, the screen fades and LEVEL COMPLETED! comes up with Reward! +50 coins, an efficiency bar and Time: 4:14.
The Optical Store is easier to hold in your head once you stop thinking of it as five puzzles and start thinking of it as three answers in three different scripts. Almost every dead end in this level is a player carrying an answer to the wrong lock.
Digits — 68459. Found on the Code tag inside the cabinet the first key opens. Spent on the wall keypad. Pays out a drawer with the −1.25 refractor lens.
Dioptres — 0.75 / −2.50 and 1.75 / −1.25. Sourced from the four refractor lenses and confirmed by the EYEGLASS PRESCRIPTION (R 0.5, L −1.75). Spent on the phoropter, which turns them into a readable eye chart.
Letters — T O D. Read off the chart under the red rule: three letters, no more. Spent on the safe dial. Pays out the second key, which is the end of the level.
Read that way, the room has exactly one real puzzle — the phoropter, because it asks you to understand that two lenses stack — and two lock-and-key chains around it. The rest of the shop, including six shelves of eyeglasses in a lit cabinet, is there to make the eyewear theme feel real.
What we could not confirm: two things. First, the cat-eye pair labelled Glasses that you can pick up from the round table — our recording never uses it again, and none of the three locks asks for it, so we will not invent a purpose for it; if your build wants it somewhere, it is not visible in this footage. Second, the eye chart: the red rule clearly runs from the T to the D, and T-O-D is confirmed twice over because that is what the recording dials and the safe opens, but the capitals at the far ends of the row sit half out of frame at this resolution and we could not read them with two agreeing passes. We have left them out rather than print a guess. They are not part of the answer.
Where people get stuck.
The key on the shelf. It is silver, it sits among silver frame hardware, and it does not look like a pickup until the sparkle catches. If the tall cabinet will not open, you have not got it.
The Code tag. It is inside the cabinet, not on a wall and not in a drawer. Players who unlock the cabinet, glance at the glasses and close it again miss the only number in the level.
Reading the cabinet as a puzzle. Six shelves of frames, two or three pairs per shelf, all lit. There is no order to copy and no frame to match. The cabinet exists to hold the card.
Trying 68459 on the safe. The safe has an alphabet wheel and no digits. Five digits cannot open a three-letter lock.
Feeding the whole line into the safe. Only the letters the red rule brackets count — T, O and D. The capitals either side of the rule are decoration and the dial will not take them.
Not collecting the lenses. The phoropter will not give you a value you have not banked. If a corner tag refuses to show −2.50, the desk drawer is still shut.
Doing the maths the wrong way round. Left is 0.75 plus −2.50. Right is 1.75 plus −1.25. Swap the pairs and the chart stays blurred.
The exit. The way out is the doorway beside the tall cabinet, and it only glows after the safe key has been used from the inventory. Tapping the door with the key still in the bag does nothing.
How long it takes, and what carries over.
The results screen in our recording reads 4:14 with a +50 coin reward and a partial efficiency bar. That time is the level clock, not the length of the video: the footage is 3:52 because the recording skips a stretch of re-reading the same two posters. Nothing in the Optical Store is timed and there is no fail state, so the clock is a score rather than a threat.
Nothing carries over except the coins. The Code tag, the refractor lenses and the prescription stay behind in the level; the safe key is consumed on the door. If you replay the room, the key is back on the shelf and the cabinet is locked again.
Chapter 2 levels.
The Optical Store is the fourth room of Chapter 2. If you came here from the Pharmacy, the pattern is the same: one code on a card, one device that converts values, one letter lock at the end.
Chapter 2 · No Honor Among Thieves26 of 26 with full written steps · 26 with a video
What is the code in Rooms & Exits Chapter 2 Level 4 Optical Store?
68459. The five digits are stamped on a small metal tag labelled Code, and that tag is sitting inside the locked eyewear cabinet that opens with the key from the display shelf. Type 68459 into the keypad on the wall plate and its drawer releases a refractor lens.
Where do I find the key for the glasses cabinet?
The key is lying on a glass shelf of the eyewear display wall in the main shop, next to the frames and marked with the usual sparkle. Tap it, open the inventory, select Key and press Use, then tap the frosted double doors of the tall cabinet on the left wall. The doors swing open onto six shelves of eyeglasses.
What is the safe code in the Optical Store?
T-O-D, three letters, dialled on the letter wheel. You get them from the phoropter: once the four lens values sit on the right eyes the eye chart clears and a red rule underlines T, O and D. Turn the dial to T, then O, then D; the door swings open and a key is hanging inside.
What lens values does the phoropter need?
The left eye wants 0.75 and −2.50 (they add to −1.75) and the right eye wants 1.75 and −1.25 (they add to 0.5). That is exactly what the prescription on the examiner's desk says: R 0.5 and L −1.75, with the working written on the paper as L = −2.5 + 0.75 = −1.75 and R = 1.75 − 1.25 = 0.5.
Where are the refractor lenses?
Two of them are pickups you cannot miss once the locks are open. The −1.25 lens is in the drawer that the 68459 keypad releases in the shop, and the −2.50 lens is in the drawer of the examiner's desk in the back room. Each one you bank adds its value to the phoropter's dials.
How do I finish the Optical Store level?
Take the key out of the open safe, go back into the shop, open the inventory, select Key and press Use, then tap the doorway on the left wall beside the tall display cabinet. The glowing exit icon appears, you tap it, and the level ends on LEVEL COMPLETED with +50 coins and a time of 4:14.
How long is Chapter 2 Level 4?
The results screen in our recording reads 4:14. Nothing is timed and there is no fail state, so the only thing that stretches the room is walking past the key on the shelf or trying to open the safe with five digits instead of three letters.
 GridPaw
 Shikaku
 Akari
 Kakuro
 Nonogram
 Nurikabe
 Pictomino
 KenKen
 Binary
 Star Battle
 Hashi
 Slitherlink
 Murder Sudoku
 Meowdoku
 Crazy Cleanup