 GridPaw
 Shikaku
 Akari
 Kakuro
 Nonogram
 Nurikabe
 Pictomino
 KenKen
 Binary
 Star Battle
 Hashi
 Slitherlink
 Murder Sudoku
 Meowdoku
 Crazy Cleanup
Rooms & Exits Chapter 3 Level 7 Walkthrough: Master Bathroom
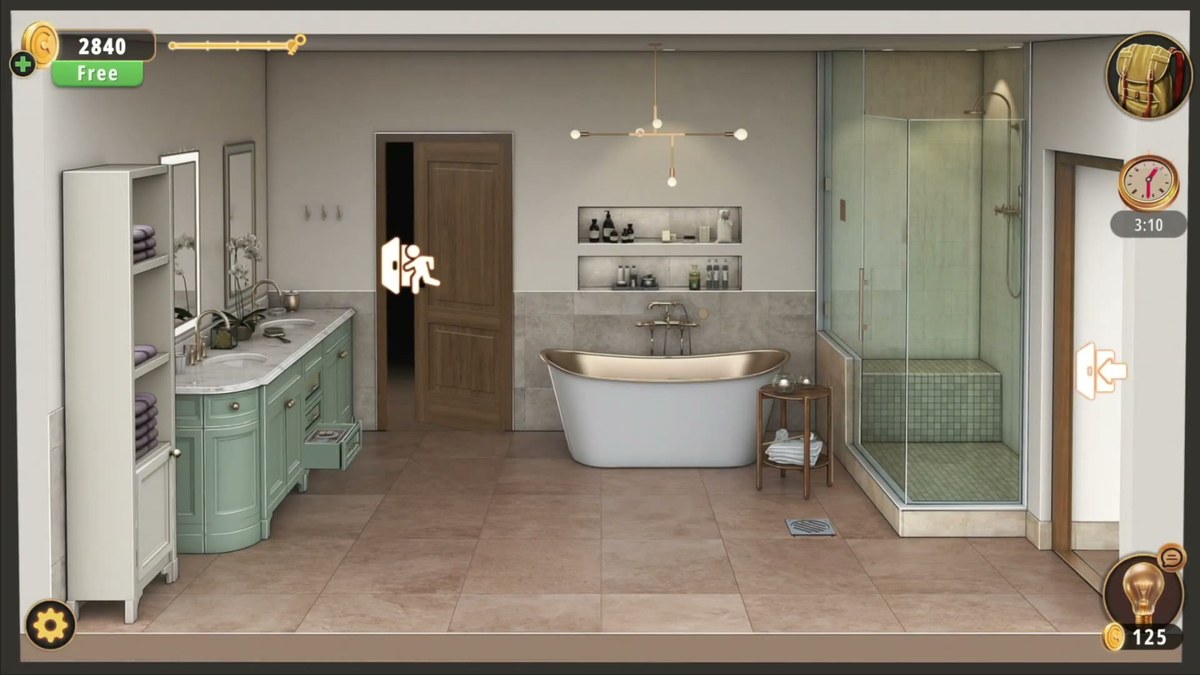
Master Bathroom is the seventh room of Chapter 3, Murder Dressed in White, and it is the first room in the chapter that gives you somewhere to walk. The camera pans across a double vanity, a freestanding tub and a glass shower, and there is a separate toilet alcove behind a partition with its own towel rack. Two keypads carry the level: a six-dial panel on the toilet cistern and a four-digit lock on the door. This page gives you both codes, the objects they come from, and a plain account of the two puzzles in this room whose answers we could not read off the footage.
Master Bathroom is room 7 of 15 in Chapter 3. Two keypads, two codes: 279151 on the six-dial panel built into the toilet cistern, and 6389 on the door keypad.
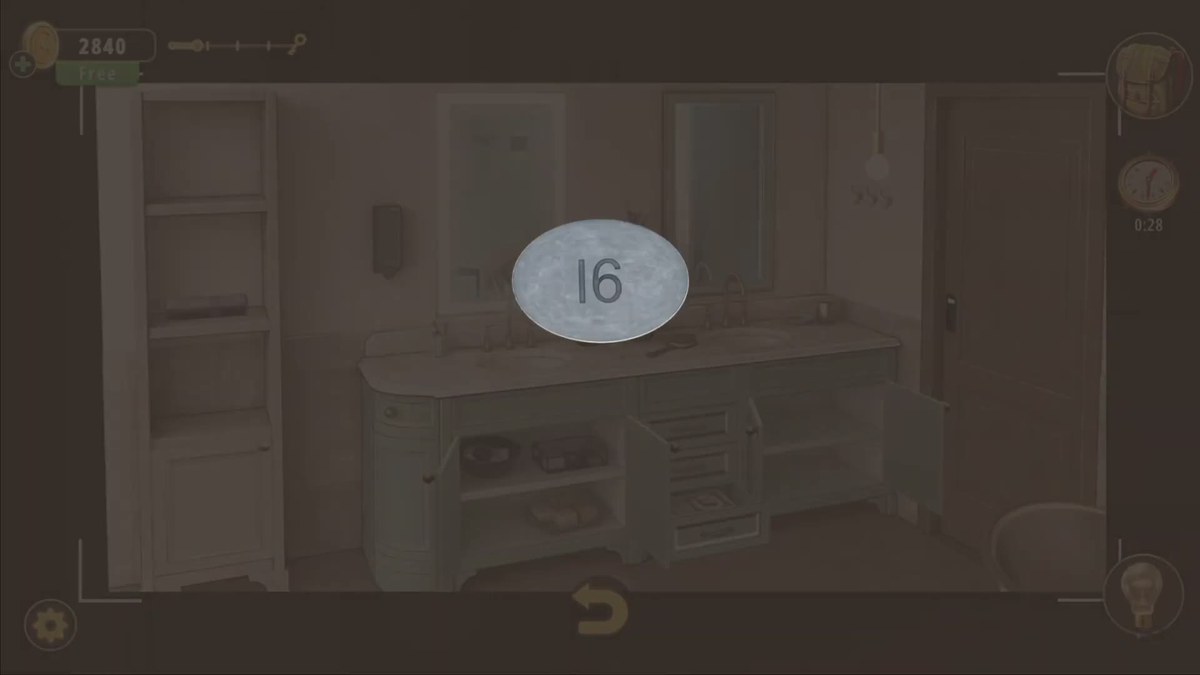
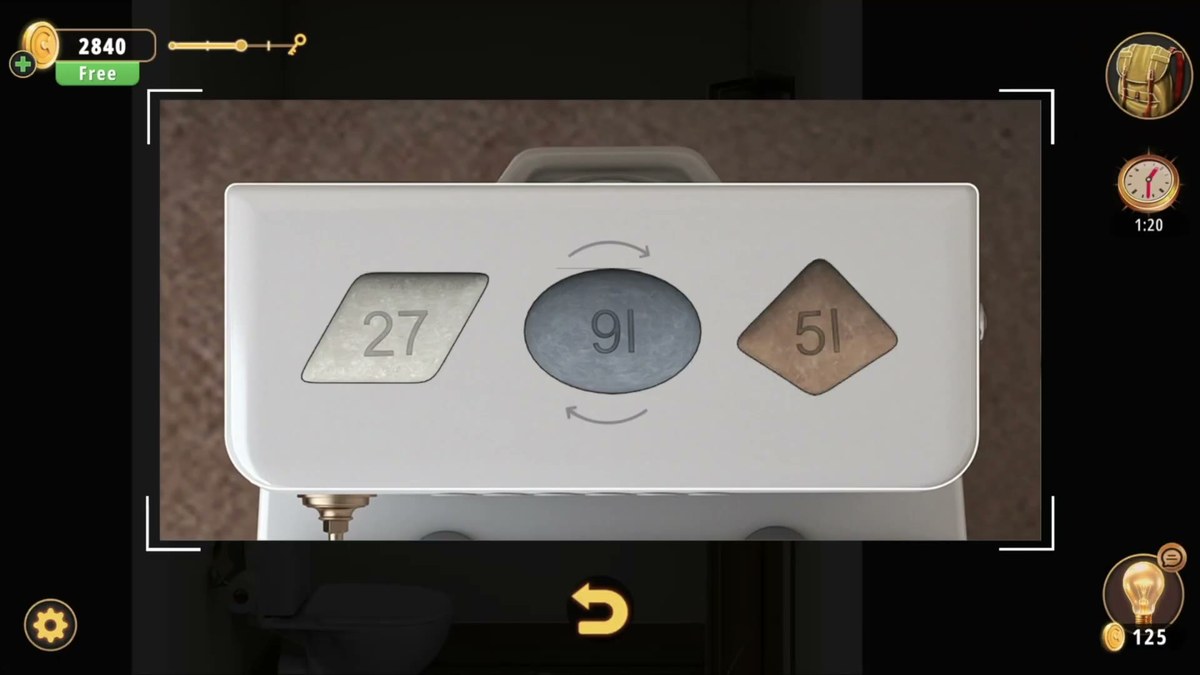
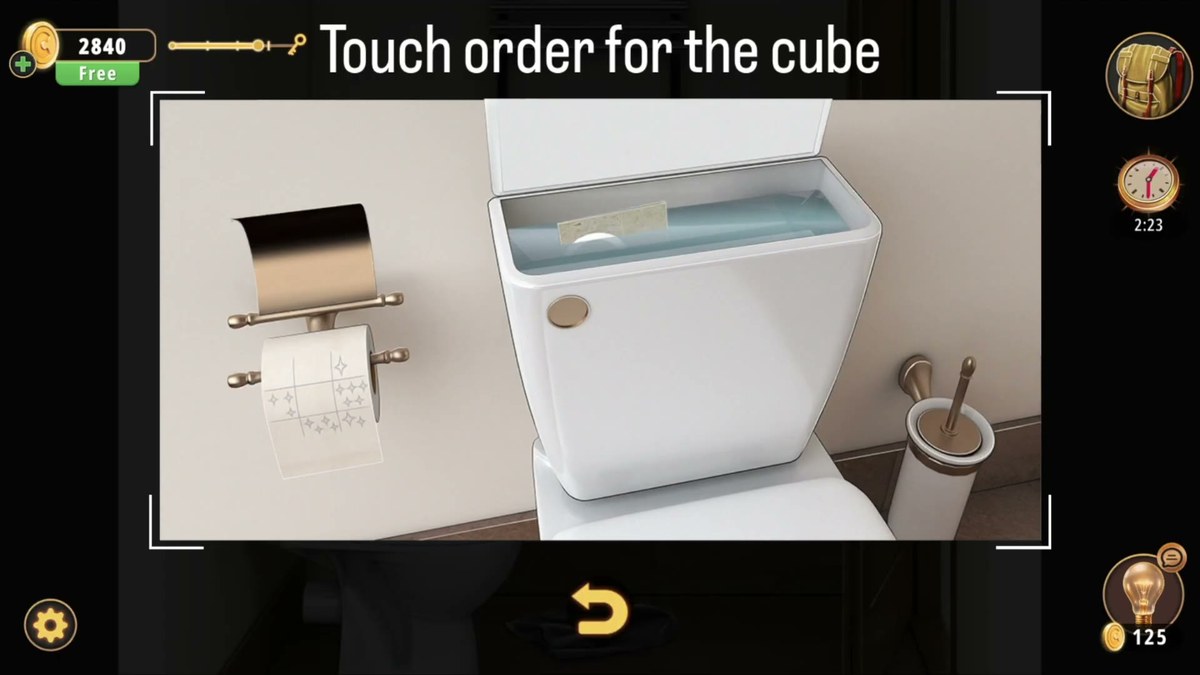
- Open the toilet alcove and look at the cistern lid: three tiles sit in shaped slots — 27 in a parallelogram, 16 turned upside down as 91 in the oval, and 51 in the rhombus.
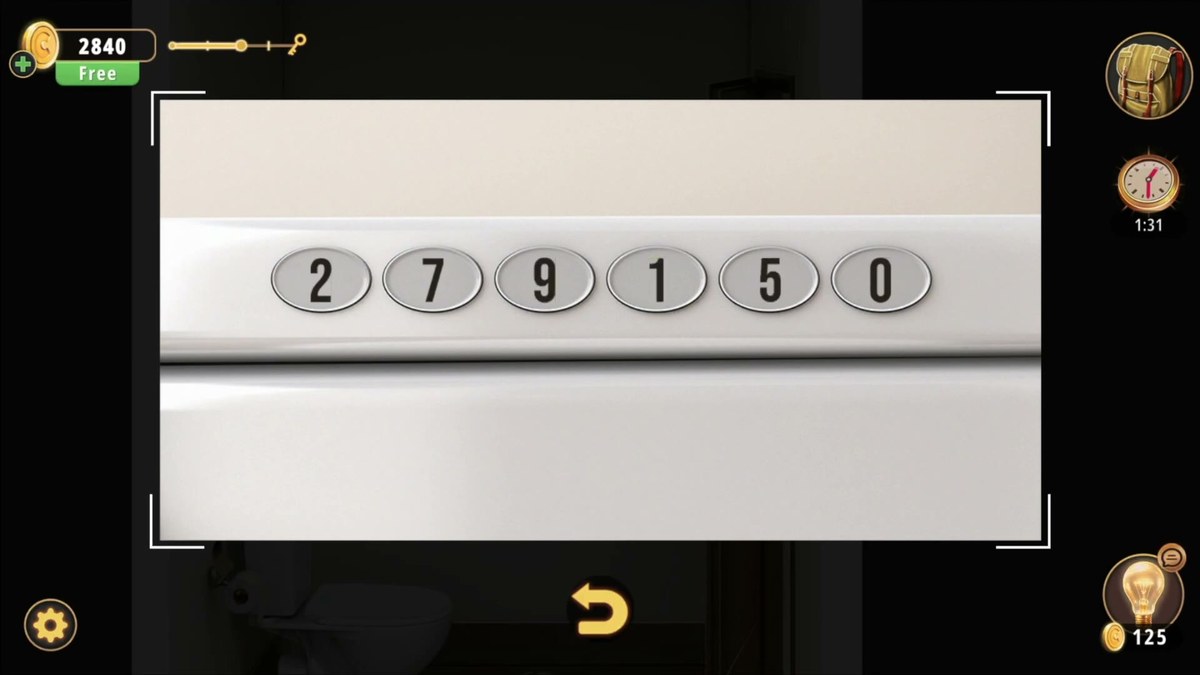
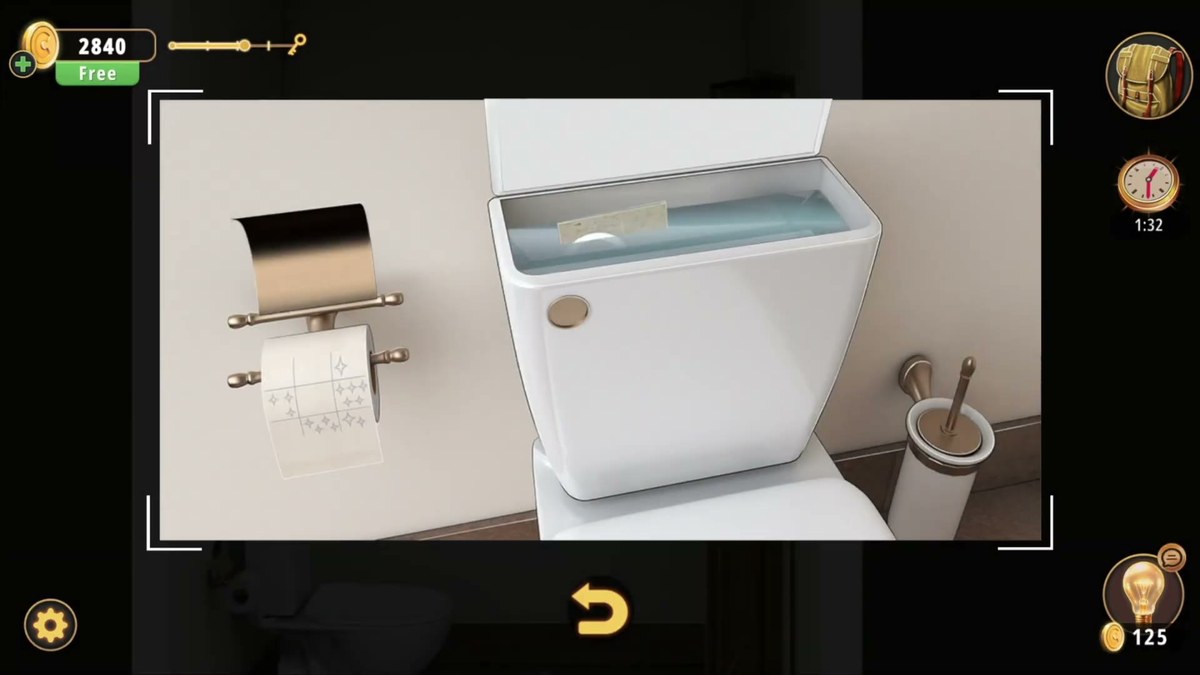
- The six buttons on the front of the cistern read that left-to-right run: 2 7 9 1 5 1. The lid pops open and there is an item floating in the water.
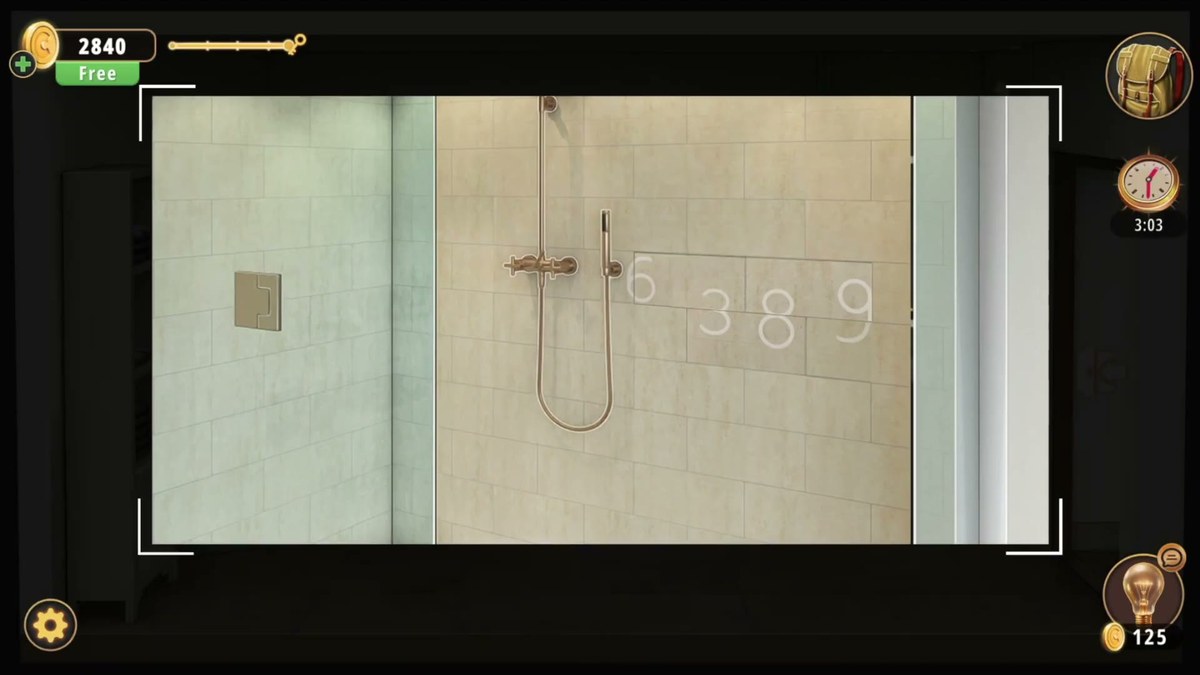
- Look at the shower's beige wall tiles, right of the handheld sprayer, for four pale digits: 6 3 8 9.
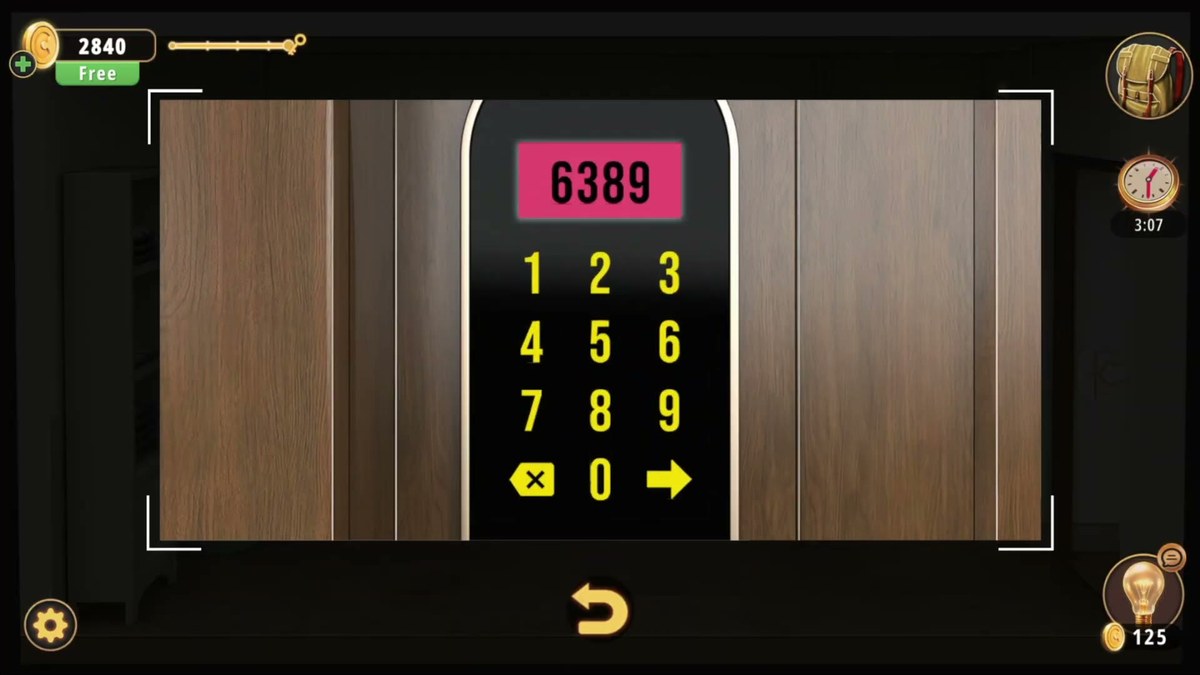
- Type 6389 into the black door keypad — red display, yellow keys — and confirm with the arrow. The door swings ajar and the exit icon appears.

The 3:15 run used for every frame on this page.
What this level actually is.
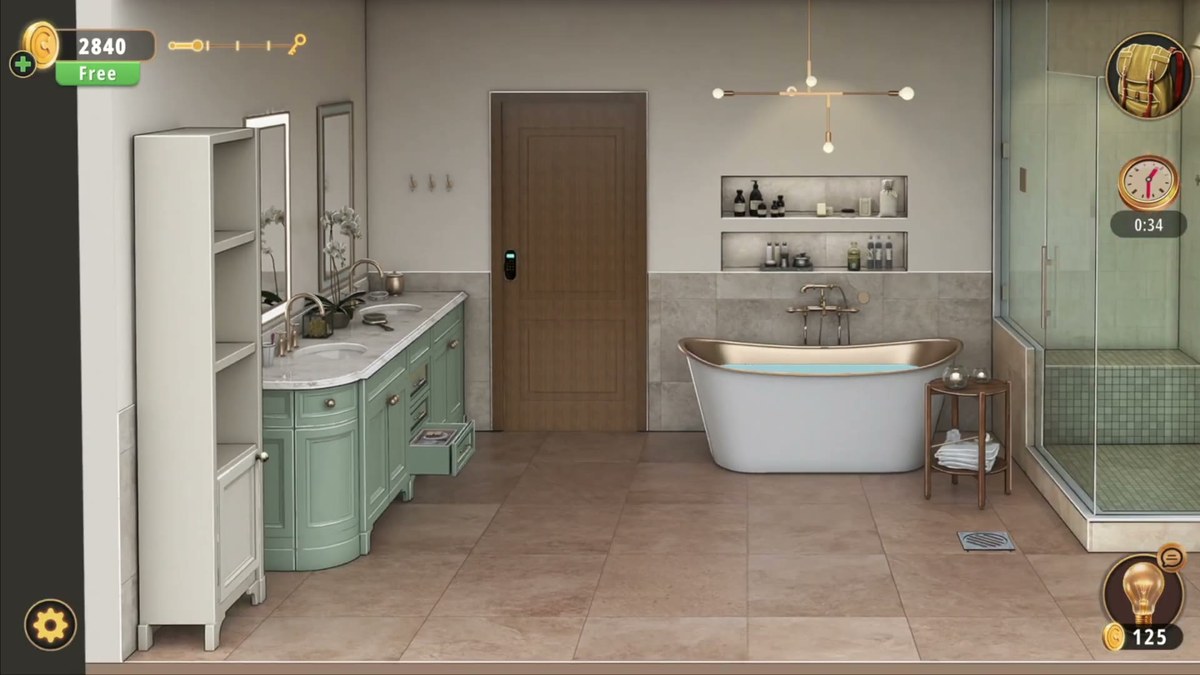
The room is one long wall and one open floor. On the left, a tall white open shelf stands against the wall, then the double vanity: a sage-green cabinet run with two white basins, gold taps, two rectangular mirrors above and drawers below. In the middle stands a panelled wooden door with a black keypad on it. To its right the freestanding tub sits under a multi-bulb brass chandelier, with two recessed niches in the tiled wall above holding bottles, and a two-tier wooden side table beside it carrying folded towels and two candles. On the far right is the walk-in shower, glass panels, a bench of green mosaic tiles and beige brick-laid wall tiles. A square metal floor drain sits in the tiles between the tub and the side table.
Behind a partition, off the main room, is the toilet alcove: a modern white toilet, a wall-mounted brass toilet-paper holder with a patterned roll, a gold-accented brush holder, and a chrome towel rack. This alcove is where the level's main lock lives, which is why the recording spends a full minute there and almost none in the shower.
The level is two keypads and a set of clue props between them. The cistern panel is the one that needs the room read first, because its six digits come from three tiles lying on the lid. The door keypad is the one you can solve the moment you spot the shower tiles. Everything else — the drawer lights, the towel order, the drain, the cube — is either a sub-puzzle with no number attached or a container for an item, and this page says which is which.
The map: what is where.
Every interactive object we could identify, and what it is for.
| Object | Where | What it does |
|---|---|---|
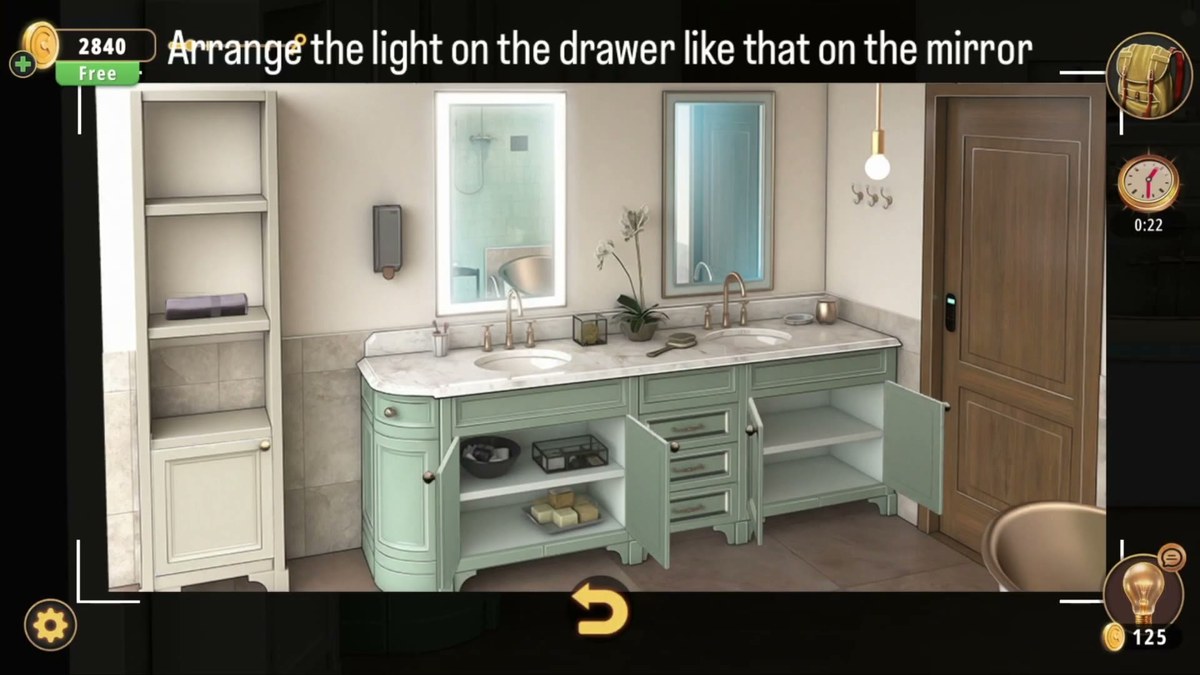
| Vanity drawers and mirrors | Left wall, under the two mirrors | Light pattern puzzle; banner at 0:24 reads "Arrange the light on the drawer like that on the mirror". |
| Tall white shelf | Far left, beside the vanity | Open shelves; the cabinet below opens for a look. |
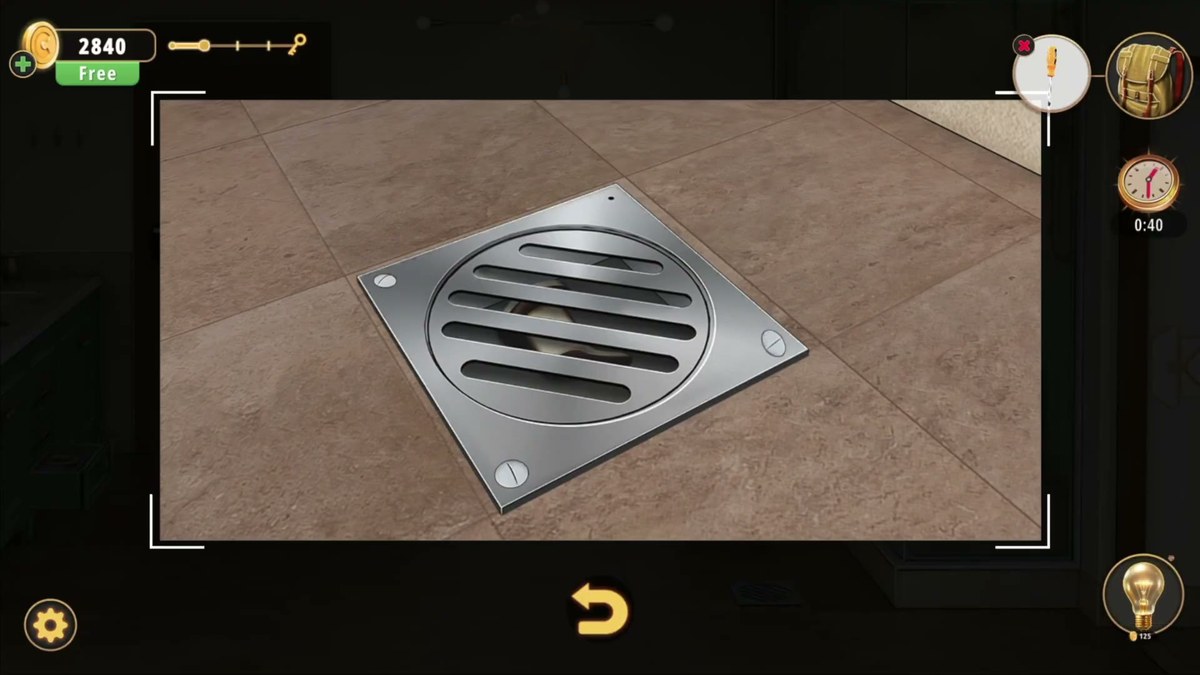
| Floor drain | Tiles between tub and side table | Square metal drain, a hotspot at 0:42; likely where a tool is used. |
| Bathtub | Centre right, under the chandelier | Fills with water during the run; two niches above it hold bottles. |
| Side table | Right of the tub | Two tiers: folded towels and two candles. |
| Shower wall tiles | Far right, behind the glass | Four pale digits set into the tiles: 6 3 8 9. |
| Toilet cistern top | Toilet alcove, behind the partition | Three shaped slots holding numbered tiles: parallelogram 27, oval 16/91, rhombus 51. |
| Six-dial panel | Front of the cistern | Six oval buttons, each 0-9. Code 279151; opens the lid. |
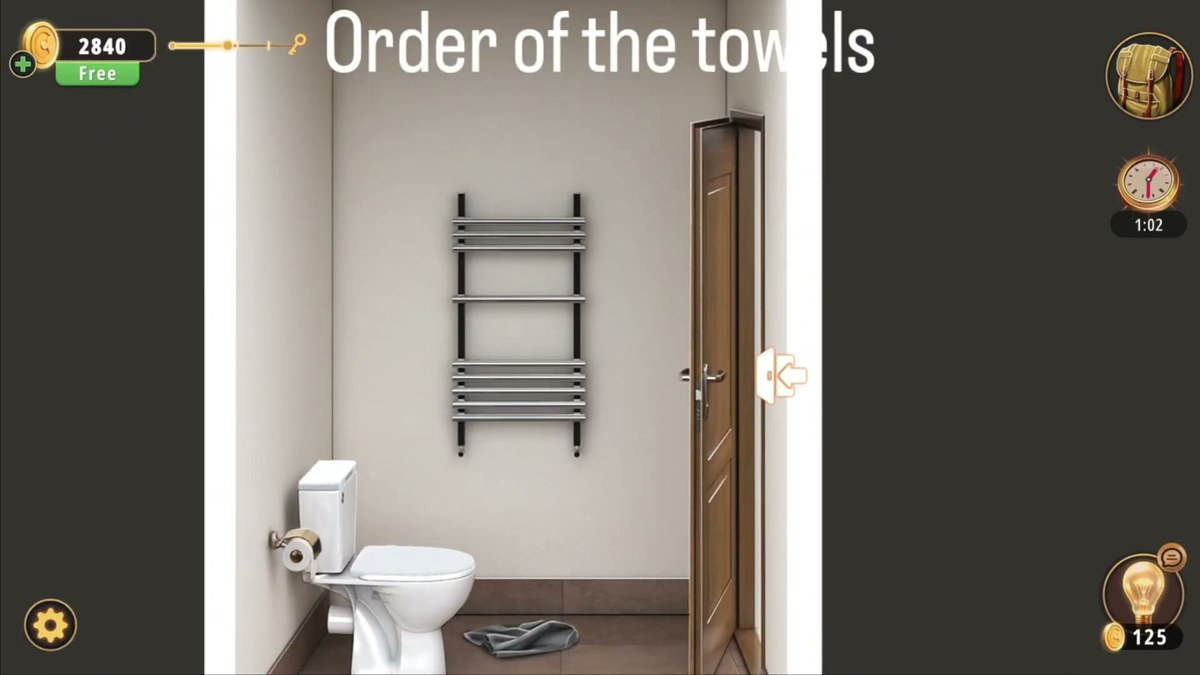
| Towel rack | Toilet alcove wall | Folded grey towels; banner at 1:04 reads "Order of the towels". |
| Toilet-paper roll | Brass holder beside the toilet | Patterned paper — a grid and stars — that reads as a clue rather than a container. |
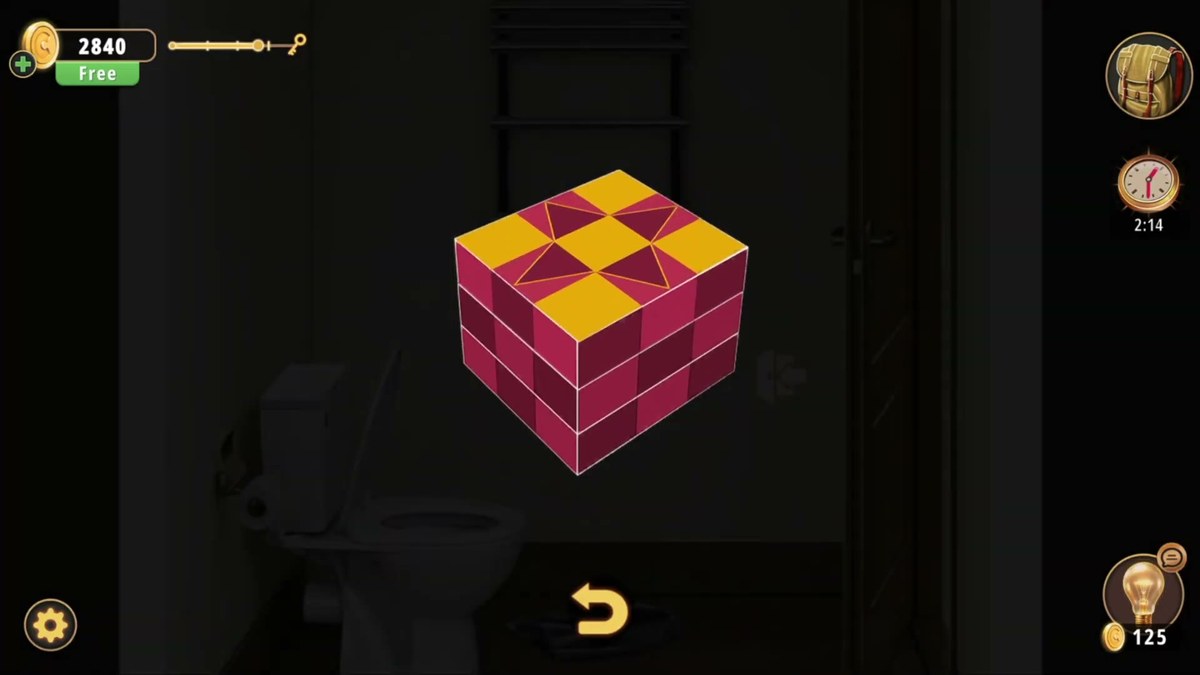
| Cube | Floating centre-screen at 2:16 | Yellow and maroon block cube; banner at 2:25 reads "Touch order for the cube". |
| Door keypad | On the wooden door | Black panel, red display, yellow 1-9 keys, X and enter. Code 6389. |
Step by step.
The order below follows the recording. Timestamps are video time; the links jump to the matching second.
Where people get stuck.
The cistern will not take 271651. It will not, and that is the point of the middle tile. The oval tile is rotatable — the curved arrow above the slot is the tell — and 16 upside down is 91. The panel wants 279151. If you typed the tile as you first saw it, the last four digits are wrong and nothing happens: there is no error message on this panel, the lid simply stays shut.
You cannot find the second keypad. It is on the door you walked past in the first ten seconds — the panelled wooden one in the middle of the room, with a black panel and a red display. It does not look like an exit while the level is running, because the exit icon only appears once the code is in. If you have 6389 and nowhere to type it, go back to the door and tap the panel rather than the handle.
The digits on the shower tiles will not read. They are the same colour as the tiles. Move the camera so the tiles are lit from the side rather than head-on, and look right of the handheld sprayer, not at the shower head. The four digits are 6 3 8 9 and they do not change.
The drawer light puzzle does nothing. It is a matching puzzle, not a container: you move the light pattern on the drawer fronts until it matches what the mirrors show, and the game moves you on. Tapping the mirrors themselves will not help.
The towels will not stay in order. The rack is a sequencing puzzle with a banner — "Order of the towels" — and the recording solves it in a few seconds without a readable target. If you are stuck there, the practical advice is the same as for any sequencing puzzle in this game: try the order the towels are stacked rather than the order you would hang them.
The cube eats your taps. "Touch order for the cube" means exactly that: the faces have to be touched in sequence, and a wrong touch resets it. Nothing on the cube tells you the sequence; the flattened 3x3 grid at 2:34 does. This is the one puzzle in the room we could not document properly, and we would rather say so than sell you a guess.
Where Master Bathroom sits in Chapter 3.
Chapter 3 is Murder Dressed in White, and Master Bathroom is room 7 of 15: after Workshop (5) and Guest Bedroom (6), before Kids Playroom (8). It is the point in the chapter where the rooms stop being single-wall scenes. Guest Bedroom and Workshop both keep you in one frame; Master Bathroom gives you a vanity wall, a tub, a shower and a separate toilet alcove, and expects you to remember which end of it you left a clue at.
The pattern it sets is the one the rest of the chapter uses: one lock whose code is composed from found objects (the three tiles), and one lock whose code is printed somewhere in the room and just needs spotting (the shower tiles). If you have done Dining Room in Chapter 3, you have seen the same grammar with two locks; the difference here is that the found-object lock needs a rotation, not just a reading.
- 1 Dining Room guide
- 2 Living Room guide
- 3 Study Room guide
- 4 Guest Toilet guide
- 5 Workshop guide
- 6 Guest Bedroom guide
- 7 Master Bathroom you are here
- 8 Kids Playroom guide
- 9 Backyard guide
- 10 Garden guide
- 11 Kitchen guide
- 12 Driveway guide
- 13 Kids Bedroom 1 guide
- 14 Storage Room guide
- 15 Garage guide
- 16 Attic guide
- 17 Terrace guide
- 18 Basement guide
- 19 Garden Shed guide
- 20 Kids Bedroom 2 guide
- 21 Hobby Room guide
- 22 Master Bedroom guide
- 23 Entertainment Room guide
- 24 Hallway guide
Previous room: Chapter 3 Level 6 — Guest Bedroom
Next room: Chapter 3 Level 8 — Kids Playroom
Frequently asked questions.
What is the code in Rooms & Exits Chapter 3 Level 7 Master Bathroom?
There are two keypads and two codes. The six-dial panel on the toilet cistern takes 279151, built from the three numbered tiles that sit on the cistern lid: 27, 91 and 51. The four-digit keypad on the door, the black panel with a red display, takes 6389, the four digits printed on the shower wall tiles. Both were read at least twice from separate frames, and the cistern code was confirmed on the frame where the panel closed and the lid opened.
Where does 279151 come from?
From the three tiles on top of the toilet cistern. Reading the slots left to right gives 27 on the parallelogram tile, 91 on the oval tile and 51 on the rhombus tile — six digits in a row, 2 7 9 1 5 1. The six buttons on the front of the cistern are turned to that value and the lid releases.
Why does the middle tile look like 16 instead of 91?
Because it rotates. The oval tile sits in a slot with a curved arrow above it, and in the recording it is first placed reading 16. Turn it 180 degrees and the same tile reads 91. The cistern only opens with the rotated value, which is why 279151 works and 271651 does not.
Where is the 6389 clue?
On the shower wall. Stand at the shower, look at the beige rectangular tiles to the right of the handheld sprayer, and four light-coloured digits are set into the tiling: 6 3 8 9. It is easy to walk past because the shower is the last place you would look for a number, and the digits are the same tone as the grout.
Where do I enter 6389?
On the door. The wooden door has a black keypad with a red four-digit display above a yellow 1-9 grid, a yellow X and a yellow enter arrow. Type 6389 and confirm; in the recording the display holds 6389 in black on red and the door swings ajar at 3:12, showing the orange door icon that ends the room.
What is the 'Arrange the light on the drawer like that on the mirror' puzzle?
It is the vanity puzzle at 0:24. The instruction banner reads exactly that, and the target pattern is reflected in the two mirrors above the sinks while the drawers below carry the lights you move. The recording solves it but never holds a clean shot of the solved drawer, so this page does not print a pattern for it — copying a guessed arrangement would only get you a wrong answer.
What is 'Order of the towels'?
A second instruction banner, at 1:04, over the towel rack in the toilet alcove. The rack holds several folded grey towels and the game wants them in a set order. As with the drawer lights, we could not read the required order off the footage, so no sequence is printed here.
What does the floor drain do?
The square metal drain on the tiled floor between the bathtub and the side table is a hotspot at 0:42. In the recording the player zooms on it right after opening the vanity cabinets, which suggests it is where a tool gets used, but the action itself happens off-camera between cuts. Treat the drain as a place to check with the screwdriver in your bag rather than as a code.
What is the cube puzzle?
A floating cube of yellow and dark-red blocks appears at 2:16, and the banner at 2:25 reads Touch order for the cube. Later, at 2:34, the same pattern is shown flattened as a 3x3 grid of yellow, green and maroon triangles. The sequence itself is a touch order, not a number, and we could not read the order reliably from one frame per second — it is listed as unverified on this page.
Is Master Bathroom the seventh room of Chapter 3?
Yes. Chapter 3 is Murder Dressed in White, and Master Bathroom is room 7 of 15, after Workshop (5) and Guest Bedroom (6), before Kids Playroom (8). The room is the largest in the chapter so far: a double vanity wall, a freestanding tub, a walk-in glass shower and a separate toilet alcove behind a partition.
What is the reward for finishing Master Bathroom?
We cannot tell you. The recording runs 3:15 and the last clear gameplay frame is the door swinging ajar at 3:12 with the exit icon; after that the picture fades out at 3:15 without a LEVEL COMPLETED card, a coin figure or a results panel. Since we have not seen the reward, this page does not print one.
What this page could not verify.
1. The drawer-light pattern. We have the instruction word for word — "Arrange the light on the drawer like that on the mirror" — and we can see the player complete it, but no frame in the recording holds a clean view of the solved drawer or the mirror pattern it has to match. Any arrangement printed here would be invented, so none is.
2. The towel order. Same problem. The banner "Order of the towels" is legible at 1:04; the sequence the rack wants is not, because the towels are handled between cuts. If you find the answer in your own run, it is worth writing down — the recording does not give it to us.
3. The cube's touch order. The banner at 2:25 is clear and the flattened 3x3 grid is visible around 2:34, but the order of taps happens faster than one frame per second can carry. We can tell you it is a sequence puzzle and that a wrong touch resets it; we cannot tell you the sequence.
4. The reward and the results panel. The video ends at 3:15, three seconds after the door opens, on a fade. No LEVEL COMPLETED card, no coin figure, no results screen. We do not print a reward for Master Bathroom because we have not seen one — the number would be a guess, and this page does not guess numbers.