 GridPaw
 Shikaku
 Akari
 Kakuro
 Nonogram
 Nurikabe
 Pictomino
 KenKen
 Binary
 Star Battle
 Hashi
 Slitherlink
 Murder Sudoku
 Meowdoku
 Crazy Cleanup
Rooms & Exits Chapter 3 Level 12 Walkthrough: Driveway
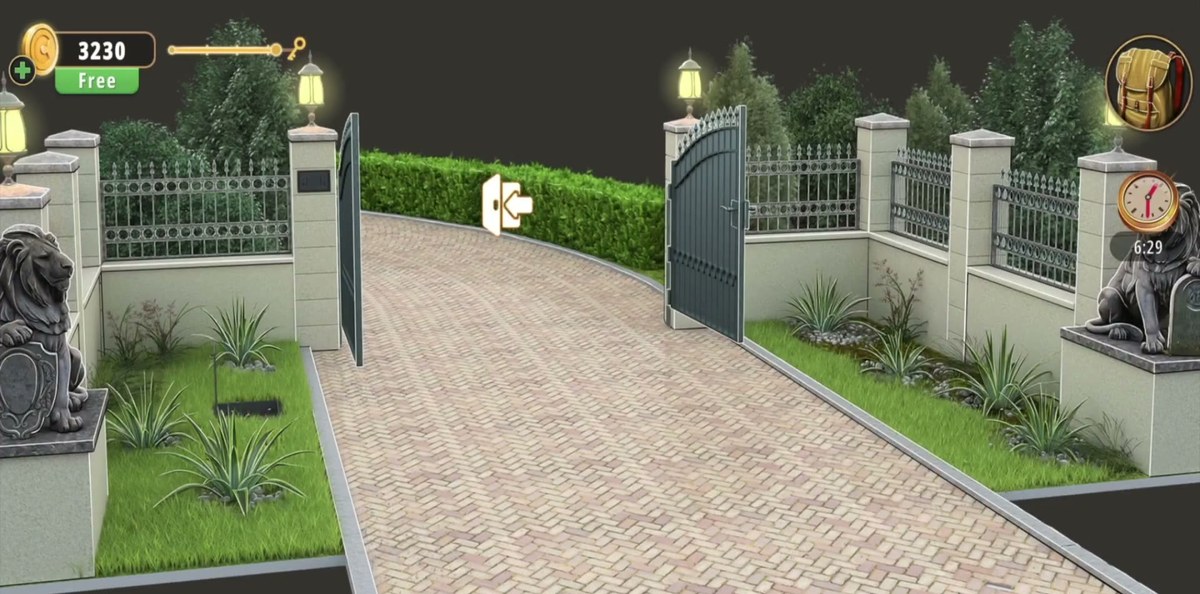
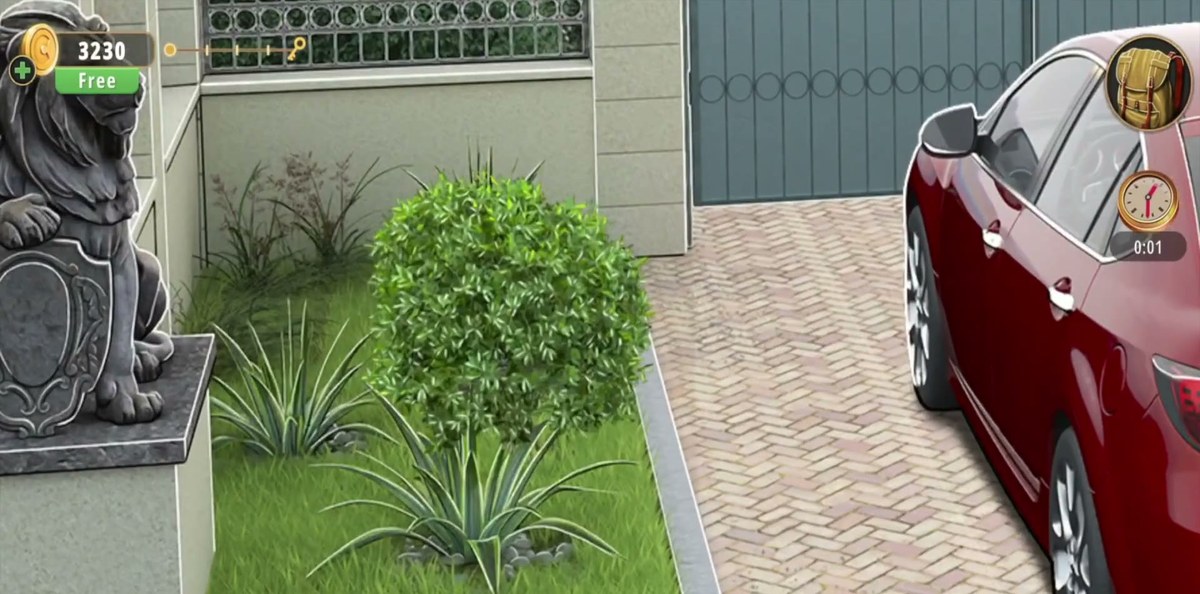
Driveway is the twelfth room of Chapter 3, Murder Dressed in White — the last of the chapter's outdoor rooms, following Garden and leading back inside to Kids Bedroom 1. It starts outside a walled mansion entrance at night: a shut wrought-iron gate, a red sedan parked nose-in with the number plate 18-D-12345, two stone lions on pedestals looking down at the driveway, and a circular fountain further up the herringbone paving. There is no keypad here — that is the single most useful thing to know before you start tapping things.
Driveway is room 12 of 15 in Chapter 3. There is no typed code in this level — no keypad appears anywhere in the recording. The four things that matter are:
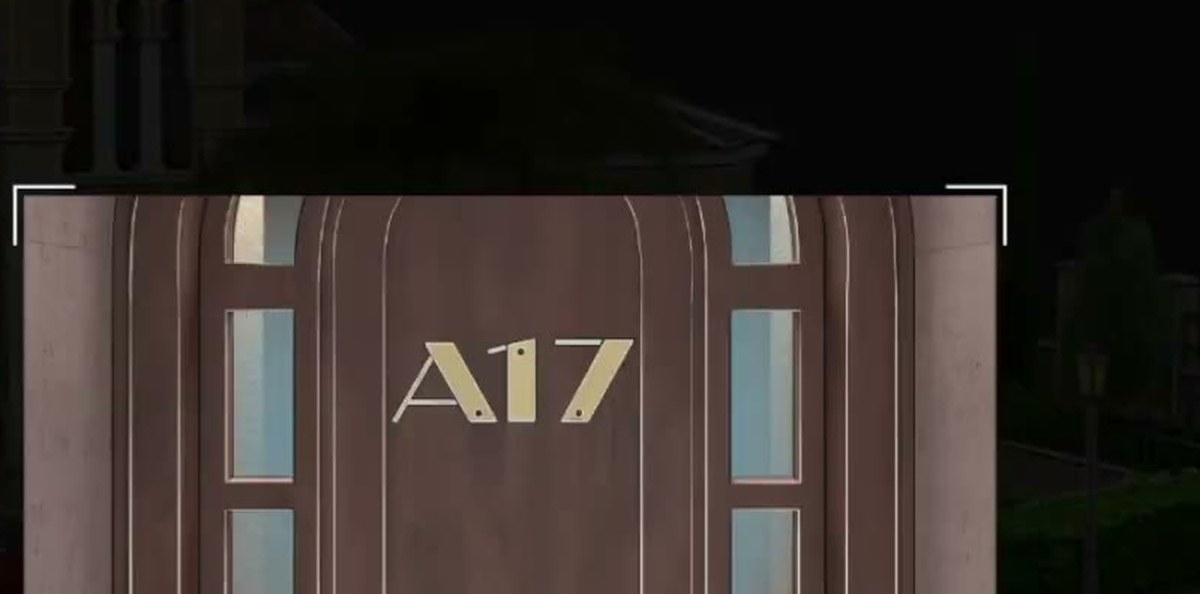
- A17 — the plate on the mansion's front door. A later hint sends you back to the A17 on the door; it is a location, not a code to enter.
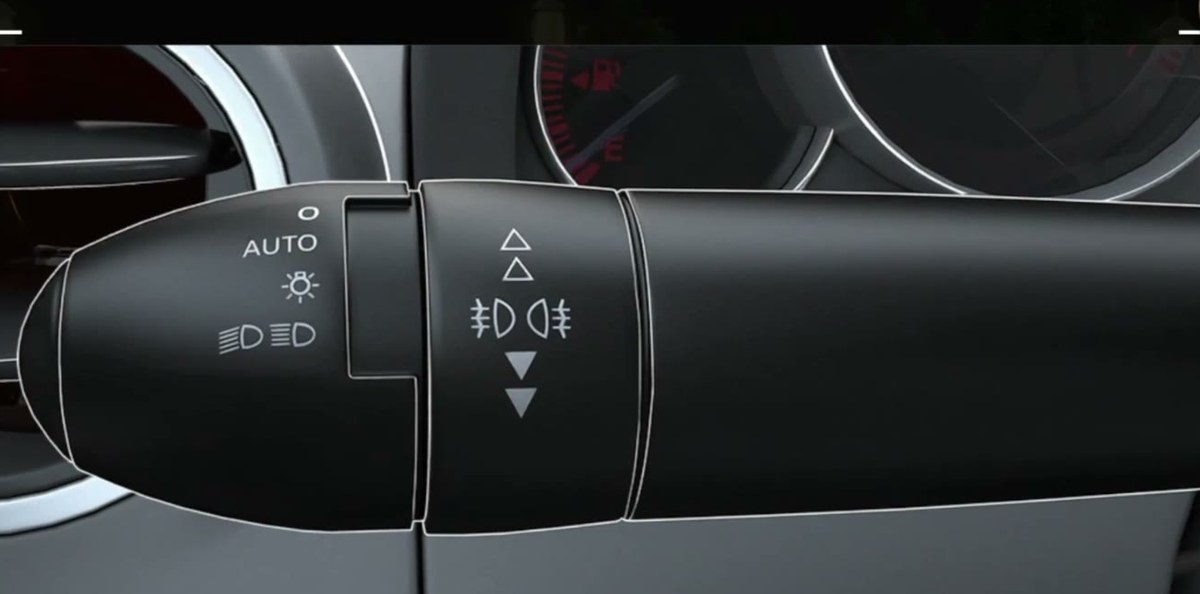
- AUTO — the position of the car's light-control stalk. Read twice; the dial sits on AUTO with O, the parking-light and headlight symbols above and below it.
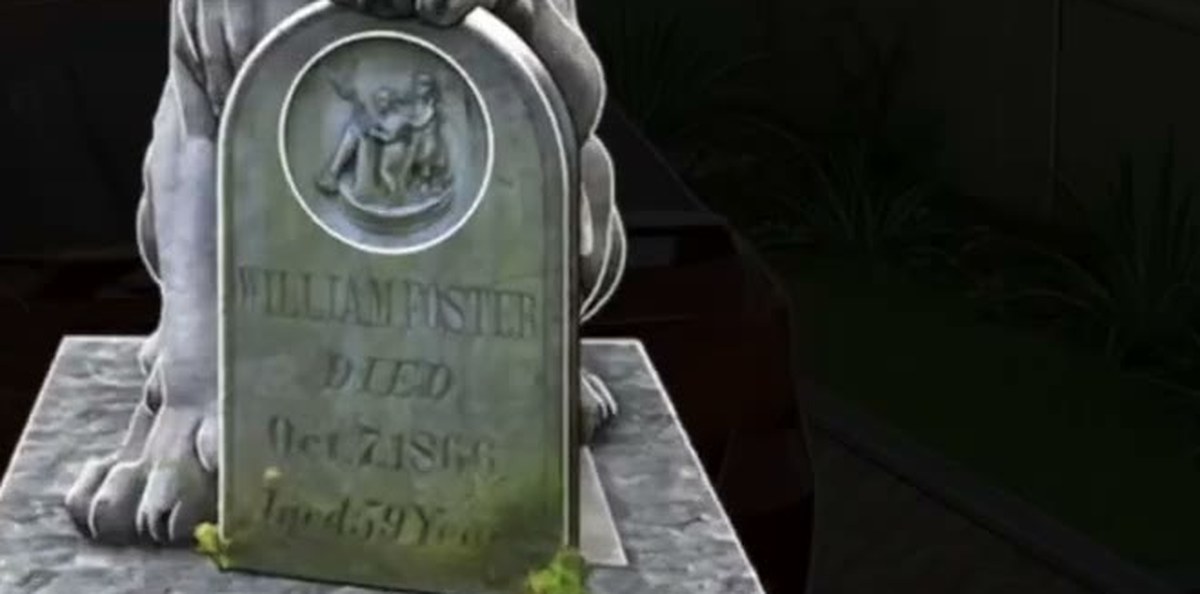
- WILLIAM FOSTER / DIED / Oct. 7, 1866 / Aged 59 Years — the memorial tablet under the lion's paw. The date and age are the only real numbers in the room.
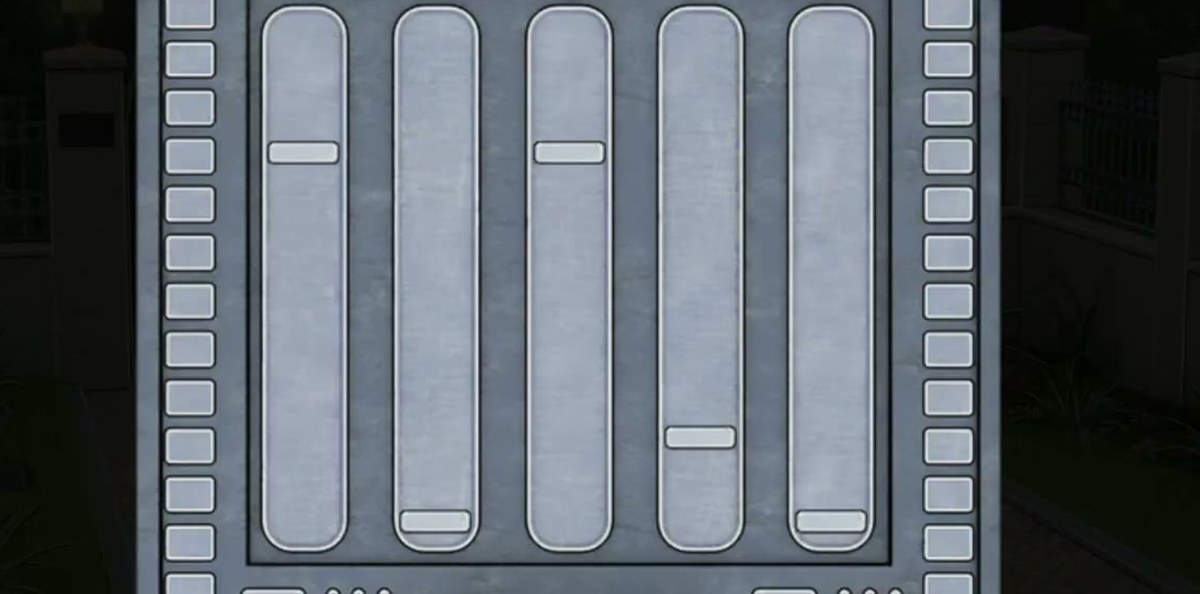
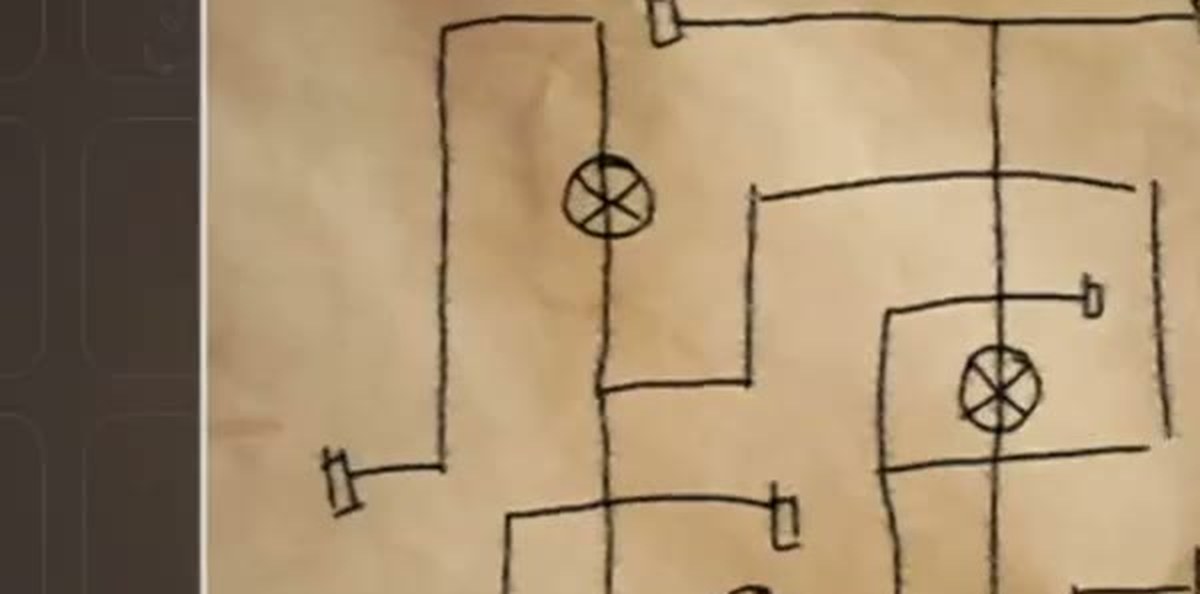
- Five-slider valve panel between the two lions, plus the pipe network with red levers. The Piece of paper in your bag (labelled Valve handle position) is the clue: five X-marked circles wired with arrows. Match handles, do not type digits.
End of the level: pick up the skeleton key, select it in the inventory, use it at the gate, and the LEVEL COMPLETED! card appears at about 4:42.

The 4:42 Driveway run used for every frame on this page — the in-game clock in the corner runs faster than the video, so ignore the timer in the screenshots.
What this level actually is.
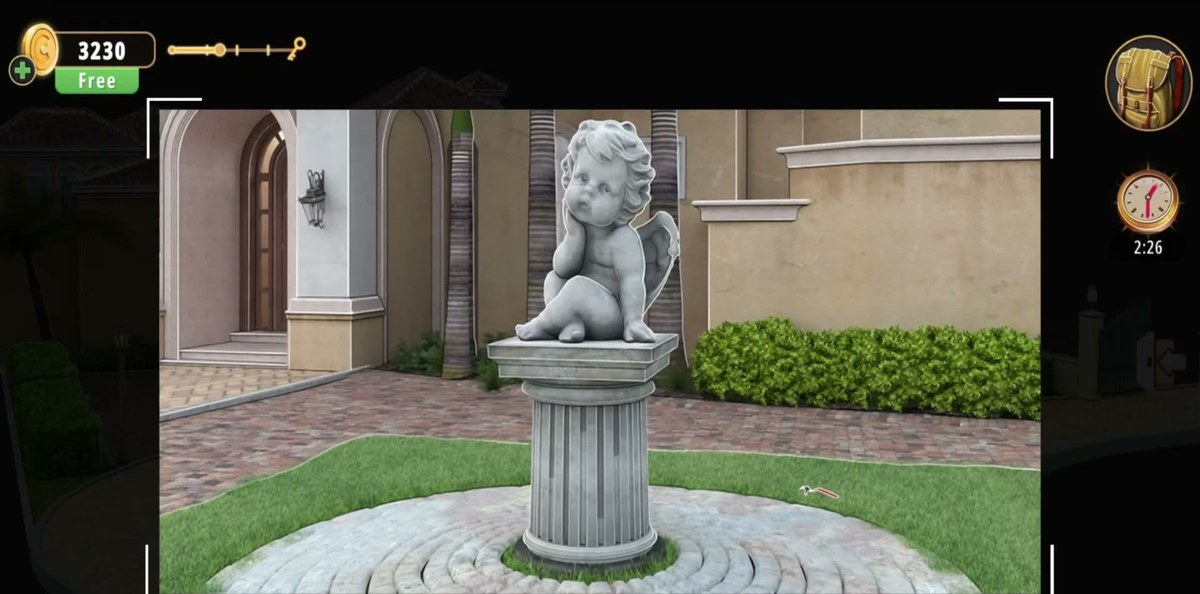
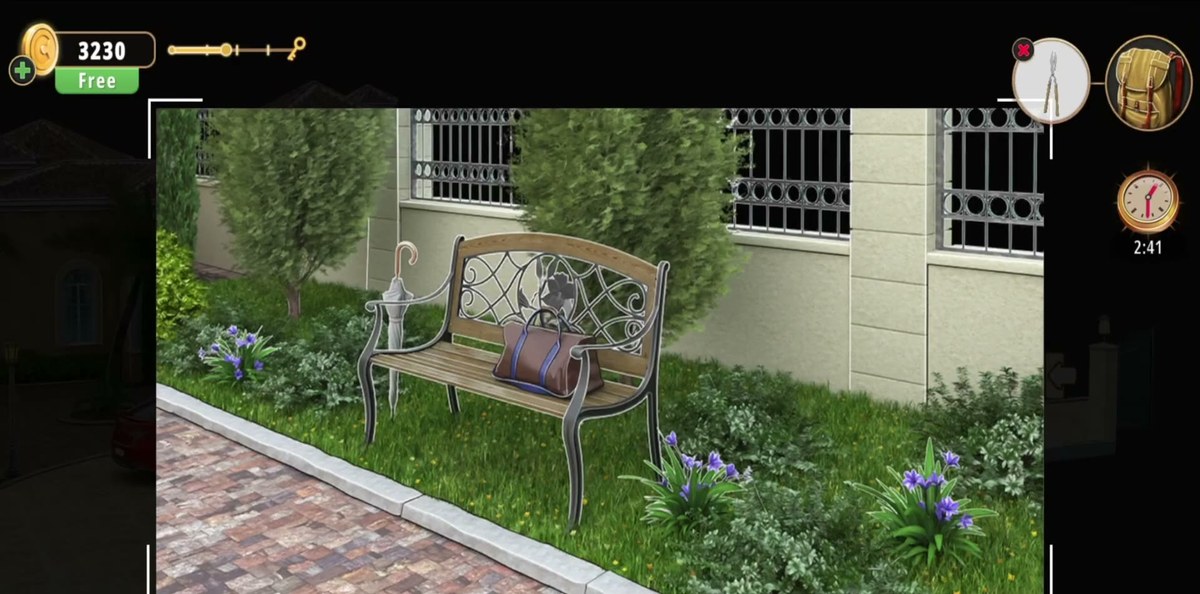
One outdoor area, three separate puzzle sites. The entrance end has the gate and the two lions with their memorial tablet; the middle has the circular driveway, the working fountain and the parked sedan; the house end has the front door marked A17, a bench with a duffel bag, and a cherub statue on a fluted pedestal in a small lawn. Everything is reachable by tapping, and the camera swings between a wide property view and tight one-object views with the usual white corner brackets.
The puzzle logic is physical rather than numeric, which is why the room feels different from Kitchen. The car's light stalk is a rotary switch you turn; the metal panel between the lions is a bank of five sliders; the pipe network is a set of red levers you flip until flow reaches a green lamp. Nothing in this level asks you to type a number, and nothing asks you to spell a word.
What the room does have is one very readable piece of prose on stone. The near lion rests its paw on an upright tablet, and the tablet is engraved with a name, a death date and an age. In a chapter that has so far hidden its clues on notes and mugs, carving them into a gravestone is a nice piece of theatre — and it is the one clue in Driveway you can read at a glance.
The map: what is where.
Everything we could identify, and what it is for.
| Object | Where | What it does |
|---|---|---|
| Wrought-iron gate | Entrance end of the driveway | Where the level ends. A pale left-pointing arrow — the exit marker — floats beside it from about 1:15 onward. |
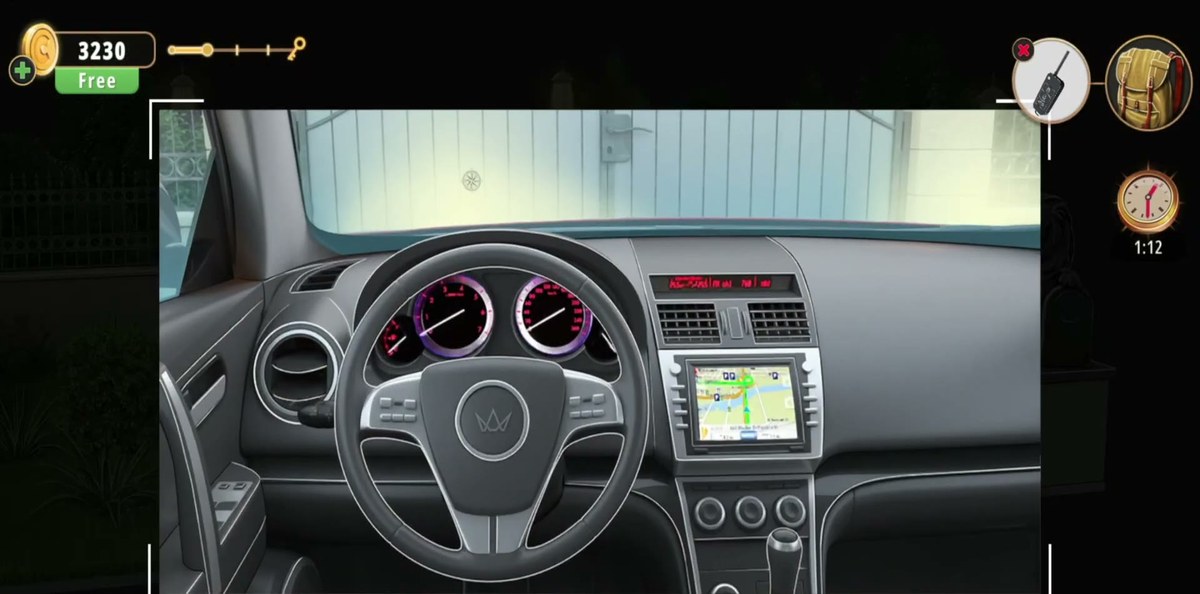
| Red sedan | Parked facing the gate | Plate 18-D-12345. Enter it for the light-control stalk puzzle; later a car key fob is in your inventory. |
| Light-control stalk | Left of the steering wheel, inside the car | Rotary dial marked O, AUTO, parking-light symbol, headlight symbol. Sits on AUTO. |
| Two stone lions | On pedestals flanking the gate | Frame the entrance. The near lion's paw rests on the memorial tablet. |
| Memorial tablet | Under the near lion's paw | Engraved WILLIAM FOSTER / DIED / Oct. 7, 1866 / Aged 59 Years. The room's clearest written clue. |
| Five-slider valve panel | Wall between the two lions | Five vertical sliders, square indicator rows down both sides, a horizontal slider along the bottom. |
| Piece of paper | Inventory item | Labelled Valve handle position. Hand-drawn schematic: five circles with an X through each, joined by arrows. |
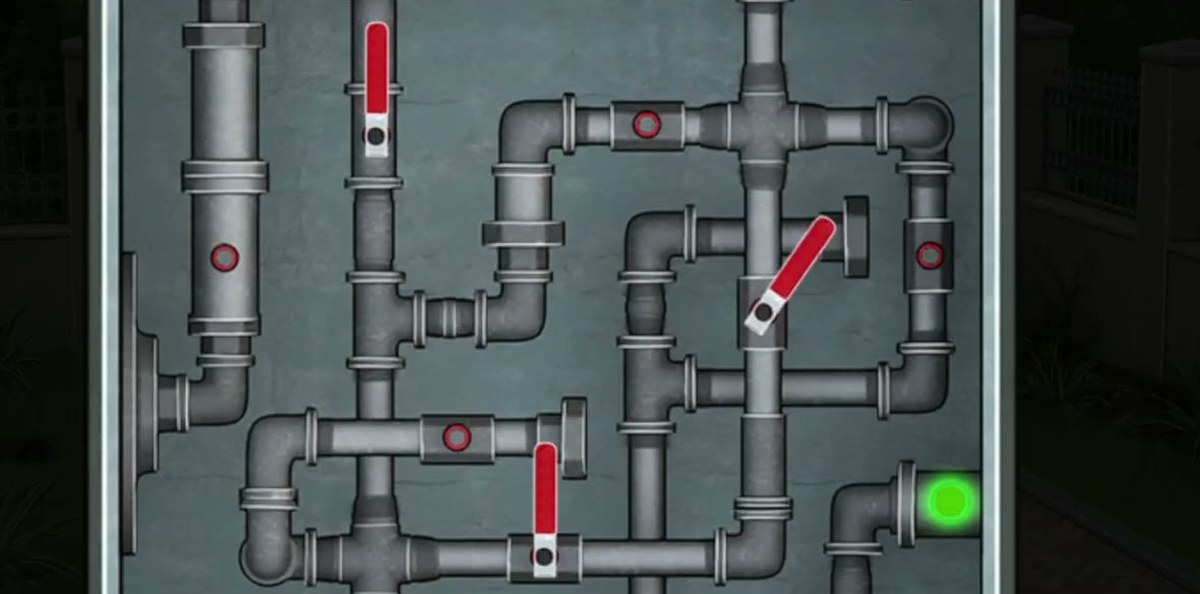
| Pipe network | Full-screen puzzle | Grey pipe segments, red lever handles at junctions, green flow indicator lower right. |
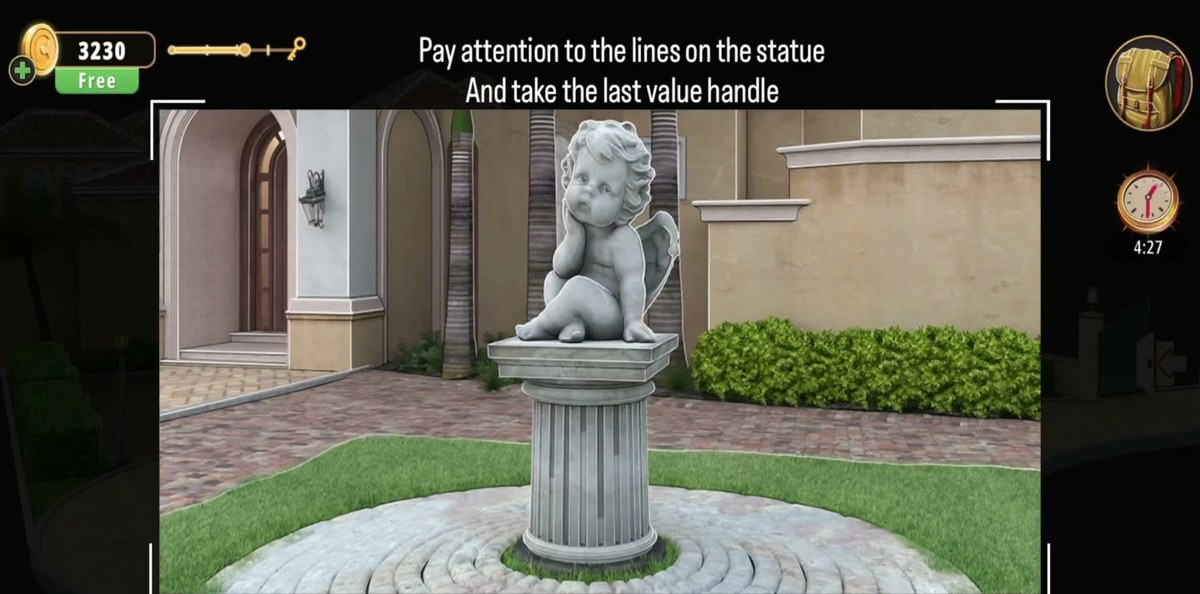
| Cherub statue | Circular lawn right of the driveway | On a fluted pedestal. Raises the caption about the lines on the statue. |
| Bench | Against the house wall | Wooden slats on ornate iron legs, with a duffel bag and a furled umbrella on it. |
| Front door A17 | Mansion entrance, up the driveway | Dark wooden door with glazed panels and a central A17 plate. The hint later sends you back to it. |
| Skeleton key | Inventory, near the end | The last item collected. Select it, choose Use, and the gate ends the level. |
Step by step.
The order below follows the recording. Timestamps are video time; the links jump to the matching second.

Where people get stuck.
You keep looking for a keypad. There isn't one. Driveway is one of the chapter's outdoor rooms and every input in it is physical: a rotary stalk, five sliders, a bank of pipe levers. If you are stuck because you cannot find somewhere to type the year on the gravestone, the answer is that no such place exists — the tablet is atmosphere with a usable number in it, not a code to enter here.
The gate will not open when you tap it early. It is not meant to. From about 1:15 there is a pale left-pointing arrow floating beside the gateway — that is the exit marker, and it is showing you where the level finishes, not inviting you to try the gate now. The gate becomes usable at the very end, after the skeleton key is in your bag.
The valve panel looks like a combination lock. Five sliders in a row reads as five digits if you are coming straight from a keypad room, and then you cannot work out what the numbers should be, because there are no numbers. The panel is a valve bank: the sliders are handle heights, and the Piece of paper labelled Valve handle position is the diagram that tells you which handle goes where.
The statue caption says "value handle" and you cannot find a value handle. That is a typo in the game's own text. The item you are meant to take is the Valve handle, and the panel between the lions is where it belongs.
The pipe puzzle never lights green. The green lamp is in the lower right of the network, so trace from there backwards rather than from the top. The red levers at the junctions are the parts that change the route; the plain flanged segments are fixed.
Where Driveway sits in Chapter 3.
Chapter 3 is Murder Dressed in White, and its fifteen rooms run: Dining Room, Living Room, Study Room, Guest Toilet, Workshop, Guest Bedroom, Master Bathroom, Kids Playroom, Backyard, Garden, Kitchen, Driveway, Kids Bedroom 1, Storage Room, Garage. Driveway is room 12 of 15, straight after the Kitchen and immediately before Kids Bedroom 1.
It is also the chapter's change of scenery. Kitchen is a dense indoor room with four puzzle types stacked on three walls; Driveway opens the camera out, drops the keypad entirely and gives you a car, a gate, a gravestone and a fountain instead. If you have just finished Kitchen, expect the pace to feel slower and the clues to feel more spread out — the walk between the gate, the bench and the front door is most of the level.
- 1 Dining Room guide
- 2 Living Room guide
- 3 Study Room guide
- 4 Guest Toilet guide
- 5 Workshop guide
- 6 Guest Bedroom guide
- 7 Master Bathroom guide
- 8 Kids Playroom guide
- 9 Backyard guide
- 10 Garden guide
- 11 Kitchen guide
- 12 Driveway you are here
- 13 Kids Bedroom 1 guide
- 14 Storage Room guide
- 15 Garage guide
- 16 Attic guide
- 17 Terrace guide
- 18 Basement guide
- 19 Garden Shed guide
- 20 Kids Bedroom 2 guide
- 21 Hobby Room guide
- 22 Master Bedroom guide
- 23 Entertainment Room guide
- 24 Hallway guide
Previous room: Chapter 3 Level 11 — Kitchen
Next room: Chapter 3 Level 13 — Kids Bedroom 1
Frequently asked questions.
What is the code in Rooms & Exits Chapter 3 Level 12 Driveway?
There is no typed code. We sampled all 283 seconds of this recording and no keypad, dial bank or number panel ever appears — the only inputs are a car light-control stalk, a five-slider valve panel and a pipe network with red levers. The three pieces of text people mistake for codes are labels: the 18-D-12345 number plate on the red sedan, the A17 plate on the mansion's front door, and the memorial tablet under the lion's paw, which reads WILLIAM FOSTER / DIED / Oct. 7, 1866 / Aged 59 Years.
Is there a keypad in the Driveway?
No. Frame by frame across the whole clip there is no keypad, no safe dial and no letter lock. Driveway is one of the chapter's outdoor rooms, and its interactives are physical: the car's light stalk, the valve panel between the two lion statues, and the pipe-and-valve network. If you are hunting for a four-digit pad, that is why you cannot find one.
What does the memorial tablet under the lion say?
The tablet held under the near lion's paw is engraved with four lines: WILLIAM FOSTER, DIED, Oct. 7, 1866, Aged 59 Years. We read it three ways — the whole frame at 0:56, a 3.4× crop of the tablet, and a wide 2.2× crop that included the paw and the base — and all three passes agreed. The date and the age are the two numbers worth writing down.
What does the statue hint say?
At roughly 2:21 a caption appears over the cherub statue on its fluted pedestal: PAY ATTENTION TO THE LINES ON THE STATUE / AND TAKE THE LAST VALUE HANDLE. It is printed as "value", which is the game's own typo for valve — and the item you get is literally called Valve handle. So the line is telling you two things: count or read the grooves on the pedestal, and take the last valve handle you find.
What is the five-slider panel between the lions?
A metal service panel mounted in the wall between the two lion statues, with five vertical sliders, a row of square indicator lights down each side, and a single horizontal slider along the bottom. The Piece of paper in your inventory — the one labelled Valve handle position — is its clue: the paper is a hand-drawn schematic of five circles with an X through them, wired together with arrows. The panel is a valve bank, not a keypad: you are matching handle positions, not typing digits.
How do I get through the gate?
Not with a code, and not at the start. At roughly 1:15 the camera moves to the gateway and a pale left-pointing arrow floats beside it — that arrow is the level's exit marker and it stays there for the rest of the run. It is a signpost rather than a lock, and tapping the gate early does nothing. The gate is dealt with last: the recording selects the skeleton key from the inventory at about 4:39, uses it, and the LEVEL COMPLETED! card follows at 4:42.
What is the A17 door?
The mansion's front door, up the driveway past the fountain, carries a plate reading A17. Read twice — the OCR pass and a 1.9× crop of the door both give A17, and the plate is set centrally on the dark wooden door between its glazed panels. A later hint at about 3:41 reads BACK TO THE A17 ON THE DOOR, which is the game sending you back to that door rather than naming a code.
What is the pipe puzzle with the red levers?
A full-screen network of grey pipe segments joined by flanges, with red lever handles at the junctions and a green flow indicator in the lower right. The recording works it between roughly 3:30 and 3:45 and returns to it later. It behaves like the standard flow puzzle: turn the valves so the run connects through to the green lamp. We are not printing a lever-by-lever list, because the clip is sped up and cut and a half-right order would cost you more time than working it out.
What does the car's light stalk do?
Inside the sedan, the left stalk behind the wheel is a rotary light switch with four markings, top to bottom: O (off), AUTO, a parking-light symbol, and a headlight symbol. In the recording the dial sits on AUTO, and that is the state the level wants — we read the stalk twice, whole frame and a 1.7× crop, and both reads put the pointer on AUTO. The right-hand rocker on the same stalk carries the front and rear fog-light symbols.
What ends the level?
A skeleton key. The inventory at the end holds two items — the car key fob and an old-fashioned key — and the recording selects the key, uses it at the gate, and the level completes. The gate is the level exit: the outline-arrow icon sits on the gateway itself, and the results card follows about a second later.
Is Driveway room 12 of Chapter 3?
Yes. Chapter 3 is Murder Dressed in White and its fifteen rooms run: Dining Room, Living Room, Study Room, Guest Toilet, Workshop, Guest Bedroom, Master Bathroom, Kids Playroom, Backyard, Garden, Kitchen, Driveway, Kids Bedroom 1, Storage Room, Garage. Driveway is room 12 of 15, directly after Kitchen and before Kids Bedroom 1.
Does the recording show the level being completed?
Yes — this is the first room in the chapter where our copy includes the ending. The card reads LEVEL COMPLETED! at about 4:42. What it does not show is a reward figure: the card carries the title and two rule lines and nothing else, and our copy ends on that frame, so this page prints no coin amount for Driveway.
What this page could not verify.
1. The exact slider positions on the valve panel. The panel is clearly five vertical sliders plus a horizontal one, but the handle heights in the footage were read three different ways across passes — one pass put them high/low/middle/low/high, another put them all at the bottom. At this resolution the handles are a few pixels tall and the panel is dark, so this page describes the mechanism and points you at the paper clue rather than printing a height for each slider.
2. The lever order for the pipe network. We can see red levers, flanged pipe segments and a green indicator, and the recording clearly works the puzzle in two sittings. What we cannot honestly reconstruct is the winning sequence — the clip is cut and sped up, and a partial order would be worse than no order.
3. Where the skeleton key comes from. The key is in the inventory at 4:39 and is used at the gate a second later, but the pickup itself happens off-camera between our sampled frames. This page therefore does not claim a source for it — only that it is the item that finishes the level.
4. The reward and the coin count. The LEVEL COMPLETED! card is in our copy, which is more than most rooms in this chapter gave us, but it carries only the title and two rule lines. There is no coin figure, no star rating and no "next" button on the frame our clip ends on, so no reward number appears on this page. The coin balance in the top bar reads 3230 throughout the run, before and after the card.