 GridPaw
 Shikaku
 Akari
 Kakuro
 Nonogram
 Nurikabe
 Pictomino
 KenKen
 Binary
 Star Battle
 Hashi
 Slitherlink
 Murder Sudoku
 Meowdoku
 Crazy Cleanup
Rooms & Exits Chapter 3 Level 14 Walkthrough: Storage Room
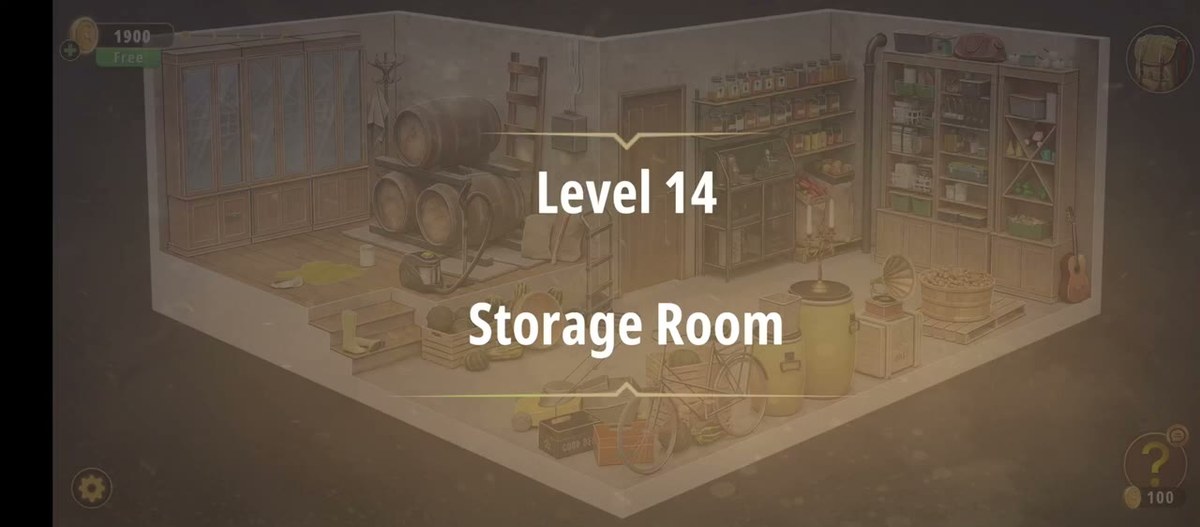
Storage Room is the fourteenth room of Chapter 3, Murder Dressed in White, and it is one of the few rooms in the chapter built on two levels. An upper wooden deck holds the glass-fronted cabinets, the barrel stack and the switchboard; a short flight of stairs drops you onto bare concrete where the crates, the bicycle, the mower and the gramophone live. Nothing here is typed into a keypad. The room locks itself with colours and object states: a switch panel with six coloured level bars, a painted floor stain with four numbers around a missing centre, a wine rack whose caps are deliberately mismatched, and a four-quadrant dial that visibly changes value.
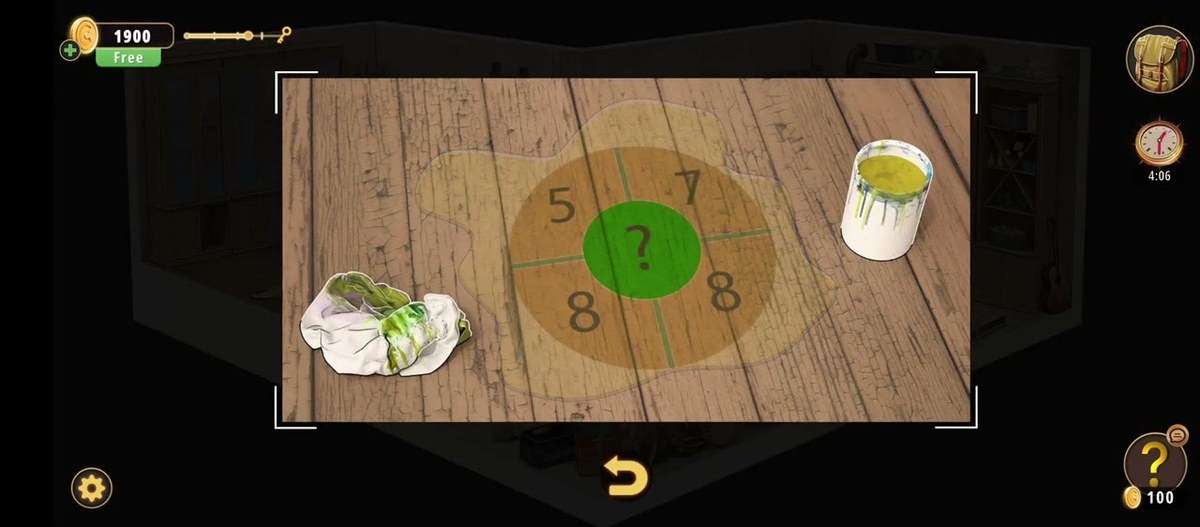
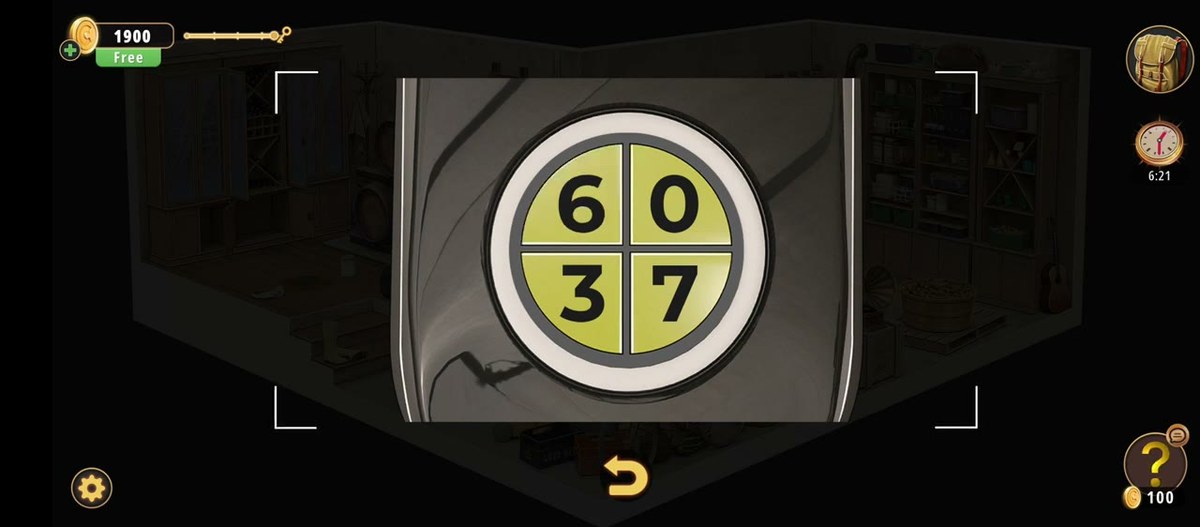
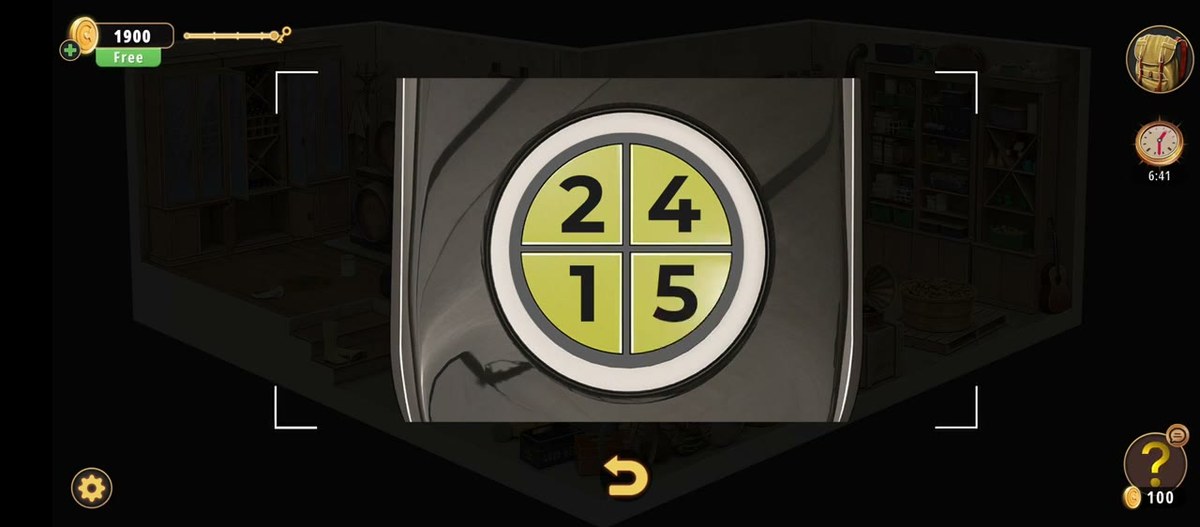
Storage Room is room 14 of 24 in Chapter 3. The four printed numbers are on the floor: 5, 7, 8, 8 around a green centre holding a ?. The four-quadrant dial reads 6 / 0 / 3 / 7 and later 2 / 4 / 1 / 5.
- Walk the room before touching anything: the upper deck on the left, the concrete floor on the right, and the stairs between them.
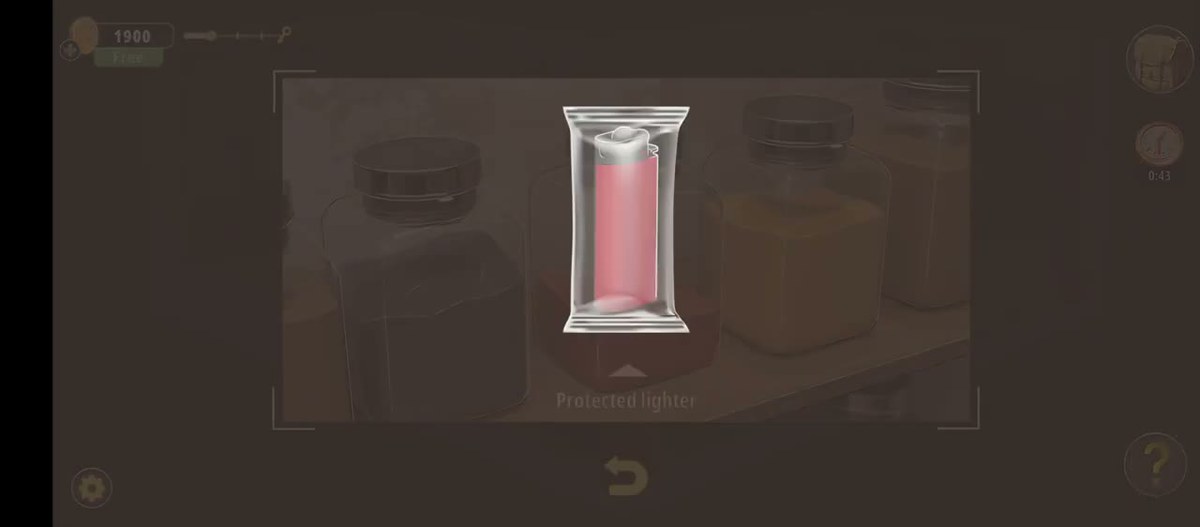
- Pick up the Protected lighter at 0:45. It is the first inventory item you are shown by name.
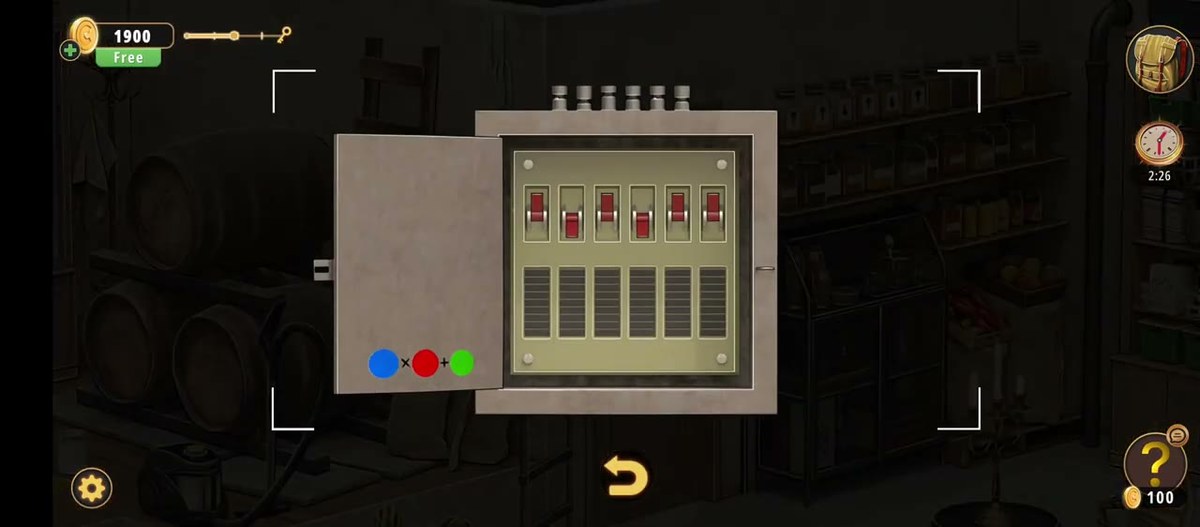
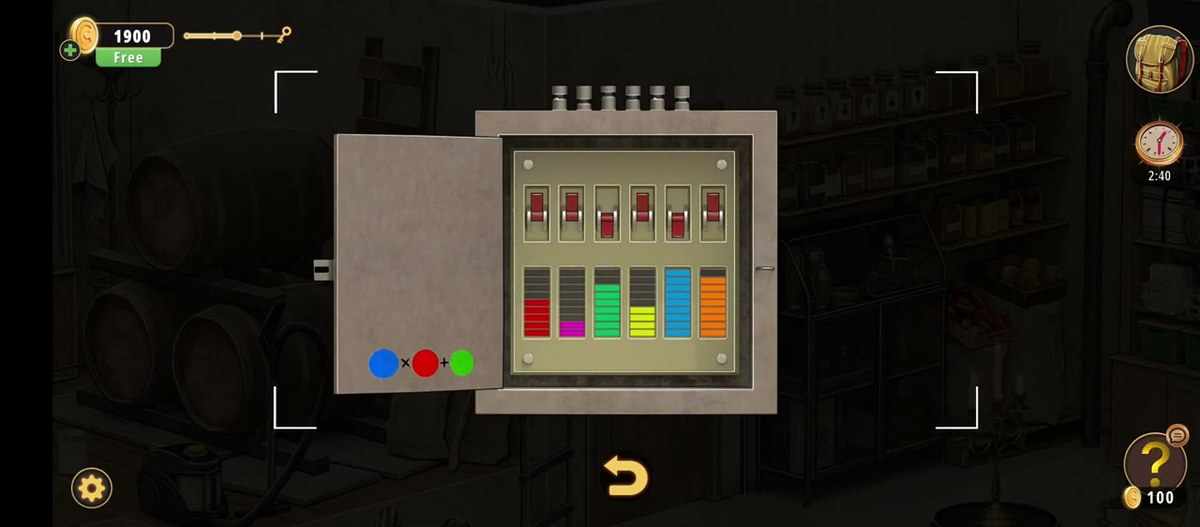
- Open the wall switchboard. The inside of its door carries the formula blue × red + green; the box carries six coloured level bars under a row of red toggles.
- Read the paint stain on the floor: 5 top-left, 7 top-right, 8 bottom-left, 8 bottom-right, ? in the middle.
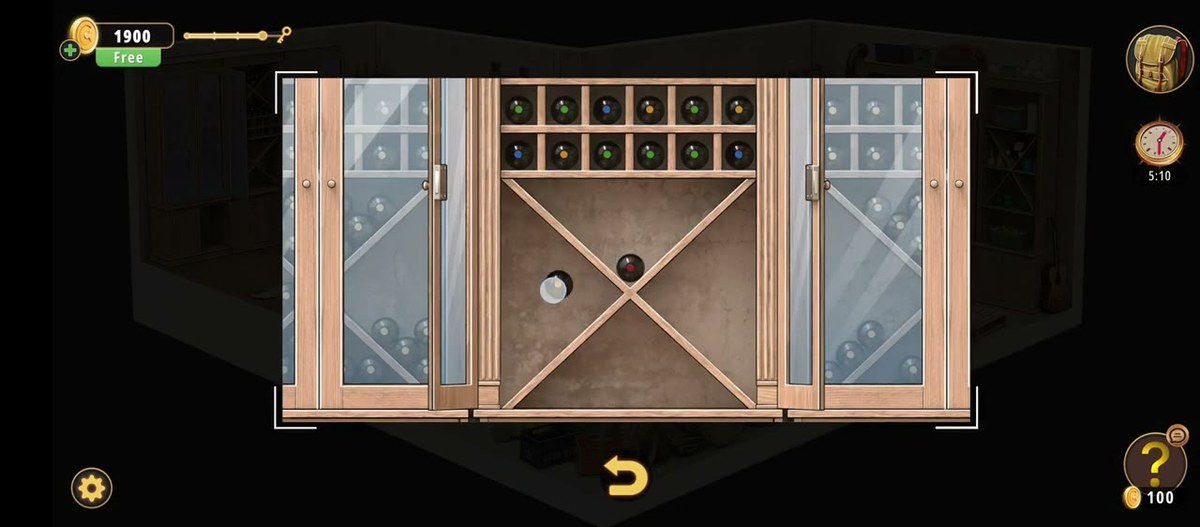
- Count the wine-rack caps. Colour, not position, is the variable — the rack is built so you can see six caps per row.
- Set the four-quadrant dial. It reads 6 / 0 / 3 / 7 at 5:29 and 2 / 4 / 1 / 5 at 5:49.
- The results card lands at 6:02: +50 coins, Time: 6:50, piggy bank 300.
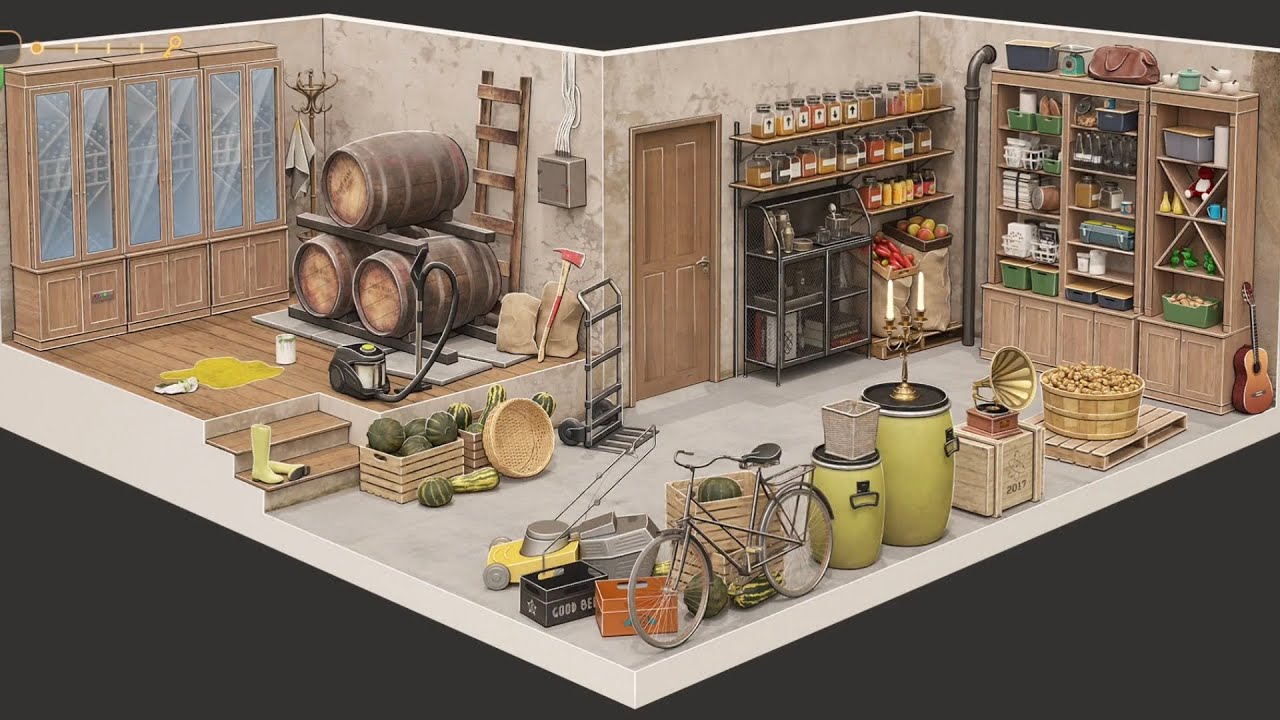
The Storage Room run used for every frame on this page.
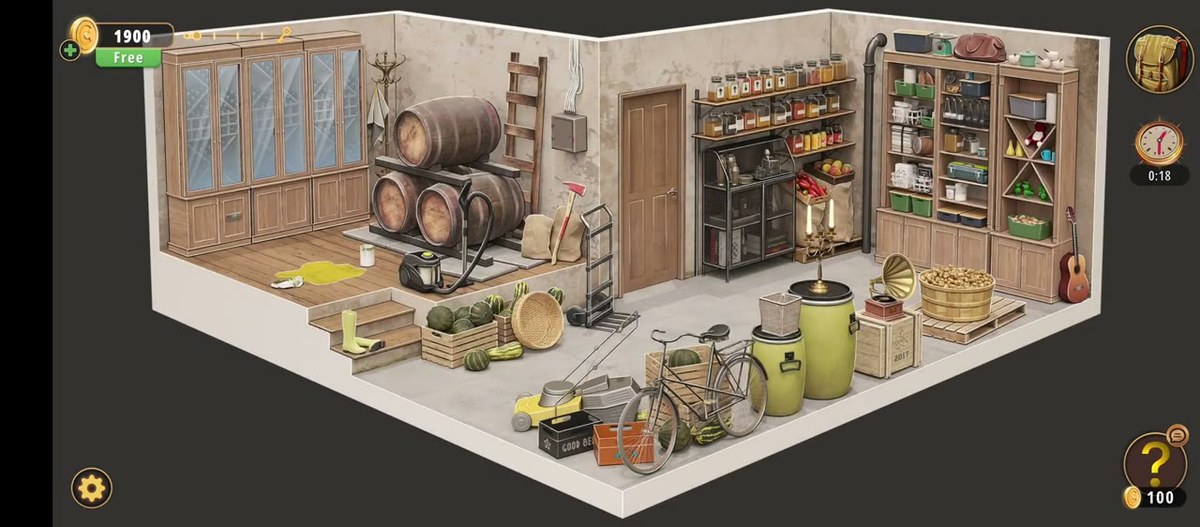
What this level actually is.
A cellar split across two heights. The left half is a raised wooden deck: a wall of glazed cabinet doors, a coat rack, three big barrels on a steel stand, a canister vacuum sitting in front of them, and a bright yellow spill on the boards with a white tin beside it. A short wooden staircase with three steps joins the deck to the concrete, and a pair of pale rubber boots is parked on the bottom step.
The concrete half is the cluttered one. Wooden crates of striped green gourds are stacked against the stair, a bicycle leans nearby with a bottle in its front basket, a yellow push mower sits on the floor, a black crate marked GOOD BEER and an orange crate sit beside it. Against the right wall there are two lime-green drums, an antique gramophone on a wooden crate stamped 2017, a barrel of root vegetables on a pallet, and a guitar leaning by the tall shelving. The back wall is where the room keeps its information: a rack of jars, a metal mesh-fronted cabinet, a plain wooden door, and the switchboard.
Structurally this is a scavenger room rather than a chain. Kids Bedroom 1 made you feed one puzzle into the next; Storage Room lets you roam, and the only real dependency is that the switchboard has to be opened before you can read the formula on the inside of its door. Everything else — the stain, the rack, the dial — can be read in any order.
The map: what is where.
Everything we could identify, and what it is for.
| Object | Where | What it does |
|---|---|---|
| Switchboard | Wall above the concrete floor, right of the door | Door opens left. Inside the door: blue × red + green. Inside the box: red toggles over six coloured level bars. |
| Paint stain | Floor of the upper deck, left of the stairs | Four-segment ring: 5, 7, 8, 8, with a green centre and a white ?. |
| Four-quadrant dial | Wall-mounted; only ever shown in close-up | White ring, four yellowish-green quadrants with one digit each. |
| Wine rack | Built into the upper wall, between two glass doors | Two rows of six neck-out bottles with coloured caps; X-divider below holding a white and a dark ball. |
| Protected lighter | Inventory pickup | Pink lighter in a sealed clear wrapper; the label reads Protected lighter. |
| Barrel stack | Upper deck, against the back wall | Three large barrels on a stand; the vacuum cleaner sits at their foot. |
| Bicycle | Concrete floor, centre | Front basket holds a bottle; the bike is a prop you can inspect. |
| Gramophone | Concrete floor, right | Brass horn on a wooden crate stamped 2017. |
| Lime-green drums | Concrete floor, right | Two tall drums, a woven basket balanced on the upper one. |
| Candle stand | On the lower right, beside the drums | Three-armed brass candelabra with lit candles — the room's only warm light. |
| Jar shelves | Back wall, right of the door | Two long shelves of glass jars over a mesh-fronted metal cabinet. |
| Good Beer crate | Concrete floor, by the mower | Black crate with GOOD BEER stencilled on the side. |
Step by step.
The order below follows the recording. Timestamps are video time; the links jump to the matching second.

Where people get stuck.
You keep hunting for a keypad. There is none, and that is the design. Storage Room does its locking with state — a switch panel, a quadrant dial, a rack of coloured caps, a stain painted on the floor. The only four digits in the room are on the floor and on the dial face, and neither is typed into anything.
You try to do arithmetic on 5, 7, 8, 8 and get nowhere. Every plausible rule — sums, pairs, opposites — gives a different centre, and the level never writes one down. If a rule is not printed on the stain, treat the numbers as four positional values rather than a sum. This page deliberately prints no computed centre for that reason.
You read the switchboard's formula as the order of its bars. They are different orders. The door says blue × red + green; the bars run red, purple, green, yellow, blue, orange. Mapping one straight onto the other without checking is the most common way to burn ten minutes here.
You miss that the doors are glazed. The cabinet on either side of the wine rack is glass-fronted, so the bottles behind it are visible without opening anything. The rack in the middle is the interactive part; the doors are there so you can compare what is inside with what is out.
You treat the spilled paint as decoration. It is not — the stain is the room's only printed four-number puzzle, and the rag and the paint tin flanking it are placed deliberately to make you look down. If you walked past it, that is the step to go back to.
Where Storage Room sits in Chapter 3.
Chapter 3 is Murder Dressed in White, and it lists twenty-four rooms rather than the fifteen some guides quote. Storage Room is room 14 of 24, coming straight after Kids Bedroom 1 and immediately before the Garage. Both neighbours are indoor utility spaces, so expect the colour-and-state logic you learn here to carry into the Garage's workbenches.
Mechanically it is a widening step. Kids Bedroom 1 was one small room with a single chain running through a box and a calculator; Storage Room gives you two floors and no chain at all, which is why the recording can wander between the switchboard, the stain and the rack without breaking anything.
- 1 Dining Room guide
- 2 Living Room guide
- 3 Study Room guide
- 4 Guest Toilet guide
- 5 Workshop guide
- 6 Guest Bedroom guide
- 7 Master Bathroom guide
- 8 Kids Playroom guide
- 9 Backyard guide
- 10 Garden guide
- 11 Kitchen guide
- 12 Driveway guide
- 13 Kids Bedroom 1 guide
- 14 Storage Room you are here
- 15 Garage guide
- 16 Attic guide
- 17 Terrace guide
- 18 Basement guide
- 19 Garden Shed guide
- 20 Kids Bedroom 2 guide
- 21 Hobby Room guide
- 22 Master Bedroom guide
- 23 Entertainment Room guide
- 24 Hallway guide
Previous room: Chapter 3 Level 13 — Kids Bedroom 1
Next room: Chapter 3 Level 15 — Garage
Back to: All Rooms & Exits walkthroughs
Frequently asked questions.
What is the code in Rooms & Exits Chapter 3 Level 14 Storage Room?
There is no single typed code that opens the room. The numbers the level actually prints are on the paint stain on the floor: 5 top-left, 7 top-right, 8 bottom-left and 8 bottom-right, arranged around a green centre that holds a question mark. That reading was taken twice, from two separate seconds, and both passes agreed. The other number surface in the room is a four-quadrant circular dial that was seen in two states: 6 / 0 / 3 / 7 and then 2 / 4 / 1 / 5.
What do the numbers 5, 7, 8 and 8 around the question mark mean?
They are four values around one missing centre value, and the level never states the rule in words. The frame shows a translucent brown ring divided into four segments with a solid green circle in the middle carrying a white ?. Green lines separate the segments from each other and from the centre. Because the operation is never written down anywhere in the decodable part of the recording, this page prints the four numbers exactly as read and does not invent an arithmetic answer for the centre.
What is on the open switchboard?
The panel is mounted on the wall above the lower floor and its door swings open to the left. On the inside of the door are three coloured circles with operators between them: blue, a multiplication sign, red, a plus sign, green. Inside the box there is a row of red toggle switches and, below them, a row of vertical level bars, each in a different colour. In the sampled frames the bars read red, magenta-purple, green, yellow, blue and orange, at different fill heights.
Where is the protected lighter?
The Protected lighter is an inventory pickup, shown at 0:45 as a pink disposable lighter sealed inside a clear foil wrapper with crimped edges. The label under it reads exactly Protected lighter. It sits in the inventory grid alongside a dustpan, a white stick, a pink candle and a small shovel.
What is the wine rack and why do the bottle caps matter?
The wine cabinet is set into the upper wall: a glass-fronted door on each side and an open rack in the middle with two rows of six square bottle slots, plus an X-shaped divider below that holds one white ball and one dark ball with a red centre. The bottles sit neck-out, so their caps are what you see, and the caps are different colours — in the frames sampled, the top row alternates green and black, and the second row mixes green, blue and yellow. Colour is clearly the variable the puzzle is built on, which is why the caps are painted rather than plain.
What is the four-quadrant dial?
It is a circular face with a thick white outer ring, divided into four yellowish-green quadrants by a dark cross, with one large digit in each quadrant. Unlike a keypad it does not seem to take typed input — the quadrants are the display. It was read at two separate seconds: 6 / 0 / 3 / 7 at 5:29 and 2 / 4 / 1 / 5 at 5:49. Both readings were checked twice and both passes agreed each time.
Does the recording show the level being completed?
Yes, and this is one of the few Chapter 3 rooms where the ending survives. The results card appears at 6:02: LEVEL COMPLETED!, a coin reward of +50, an efficiency bar nine of ten segments filled, Time: 6:50, and a piggy-bank contribution of 300 with the piggy bank showing Full!. The +50 and the 6:50 were each read twice, once from the whole frame and once from a crop of the results panel.
How long is the Storage Room run and is it edited?
The source file runs 6:03. It is not a continuous take: the in-game clock jumps between sampled frames — for example from 0:34 at 0:45 to 1:48 at 1:29 — so the upload is cut and sped up in places. That is why the timestamps on this page are video time, not the in-game clock, and why a puzzle can look like it solves itself between two cards.
How many rooms does Chapter 3 have, and where is Storage Room?
Chapter 3, Murder Dressed in White, lists twenty-four rooms. Storage Room is room 14 of 24, straight after Kids Bedroom 1 and immediately before the Garage.
Is there a keypad or a safe in this room?
No keypad on a wall and no safe. Storage Room does its locking with object state instead: a switch panel with coloured bars, a dial with four quadrants, a wine rack whose caps are colour-coded, and a painted floor stain carrying four numbers. If you are hunting for a number pad, you are looking for something the room does not have.
What this page could not verify.
1. What the four stain numbers actually compute. The digits 5, 7, 8 and 8 are solid — two independent passes agreed on all four, and on the green centre holding a question mark. What the level never does is state the operation, and the recording never holds a frame where the centre is revealed. This page therefore prints no answer for the centre rather than guessing at one of several arithmetic rules.
2. Which dial state is the target. Both readings are reliable — 6 / 0 / 3 / 7 at 5:29 and 2 / 4 / 1 / 5 at 5:49 — but the footage between them is cut, so we cannot tell whether the second state was reached by solving something or was simply the next value in a cycle. Treat them as two observed states, not as a before-and-after solution.
3. The exact switch pattern on the switchboard. We can state the door formula (blue × red + green) and the six bar colours with confidence, because both were read from clean close-ups. What we cannot do is state which toggles end up on: the panel is only on screen in short bursts, the toggle row is small in frame, and two passes over the same second disagreed on whether there are five or six toggles. The bar count is six; treat the toggle count as unresolved.
4. What the wine-rack colours are for. The caps are visibly mismatched and there are twelve of them, but no frame in the recording links a specific cap colour to a specific bar on the switchboard or a specific quadrant on the dial. The connection is strongly implied by the room's design and is never demonstrated, so it stays a description rather than a step.