 GridPaw
 Shikaku
 Akari
 Kakuro
 Nonogram
 Nurikabe
 Pictomino
 KenKen
 Binary
 Star Battle
 Hashi
 Slitherlink
 Murder Sudoku
 Meowdoku
 Crazy Cleanup
Rooms & Exits Chapter 3 Level 24 Walkthrough: Hallway
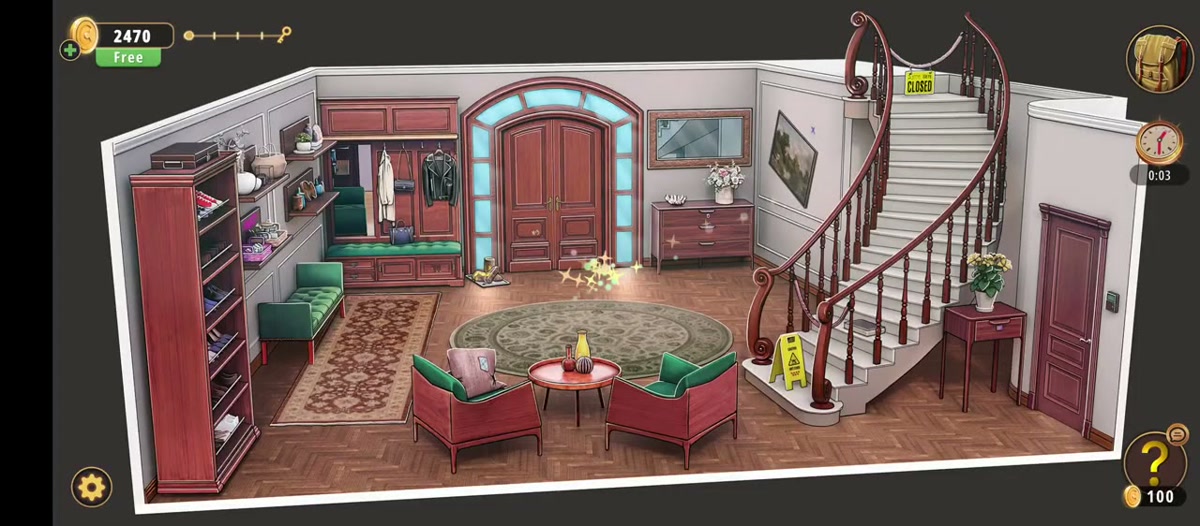
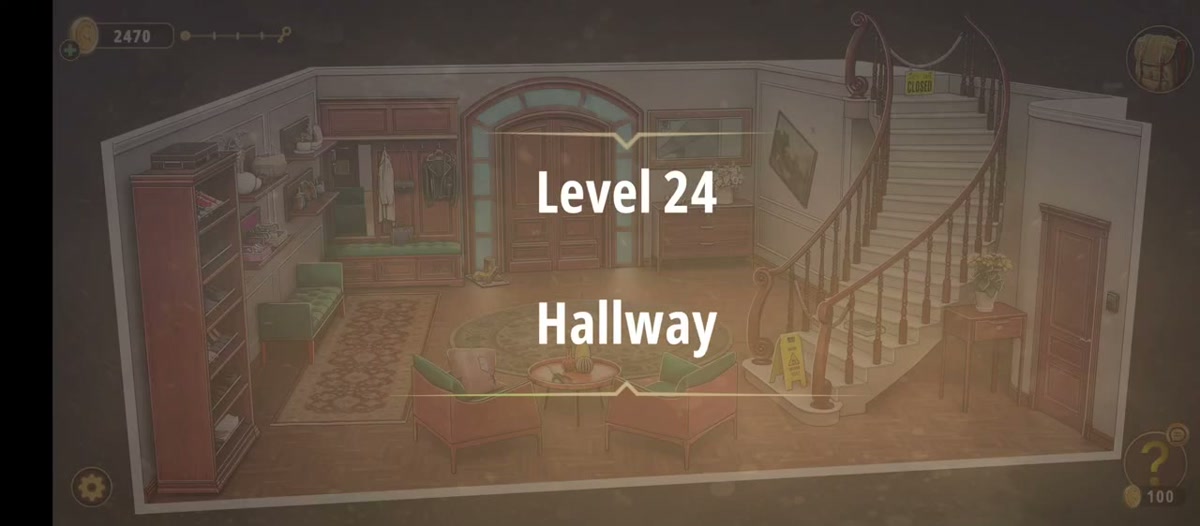
The Hallway is the last room of Chapter 3, Murder Dressed in White — room 24 of 24 — and it is the chapter's closing argument. A herringbone floor, a grand curved staircase with a CLOSED sign on the banister and a WET FLOOR sign at its foot, an arched double door in the back wall, two red-framed armchairs on a round rug, and a shoe rack, a coat unit and a dresser along the left and back walls. After twenty-three rooms of locks, this one ends on a five-letter word that you read as a number.
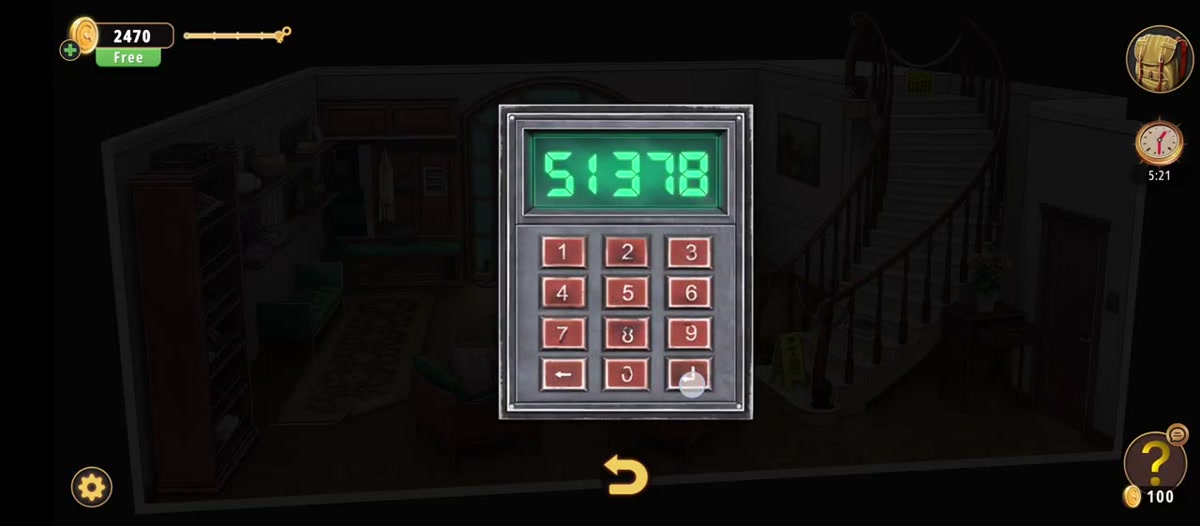
Hallway is room 24 of 24 in Chapter 3. The last door takes 51378, which is R A N D Y written as numbers.
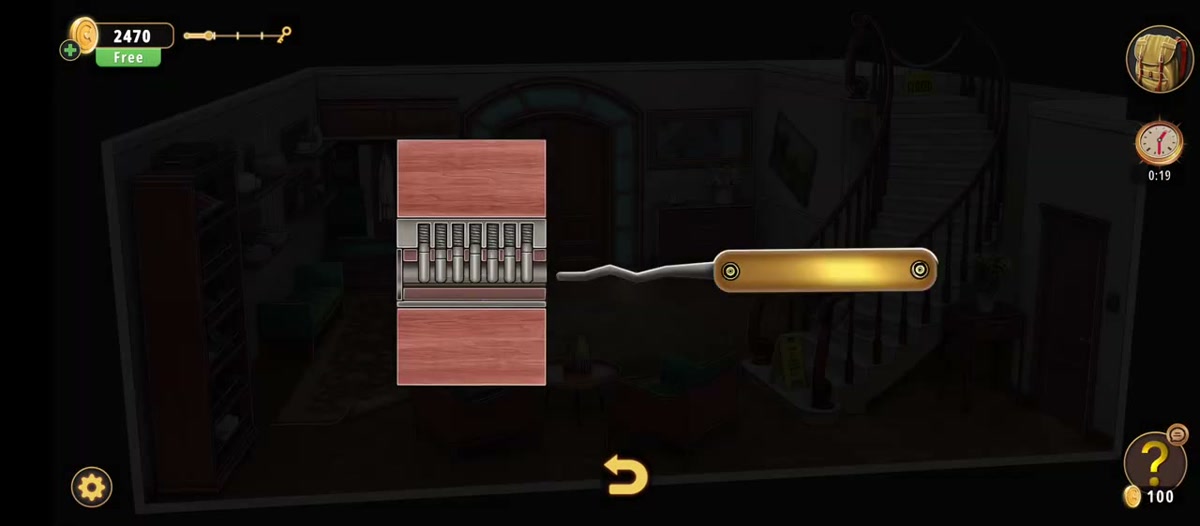
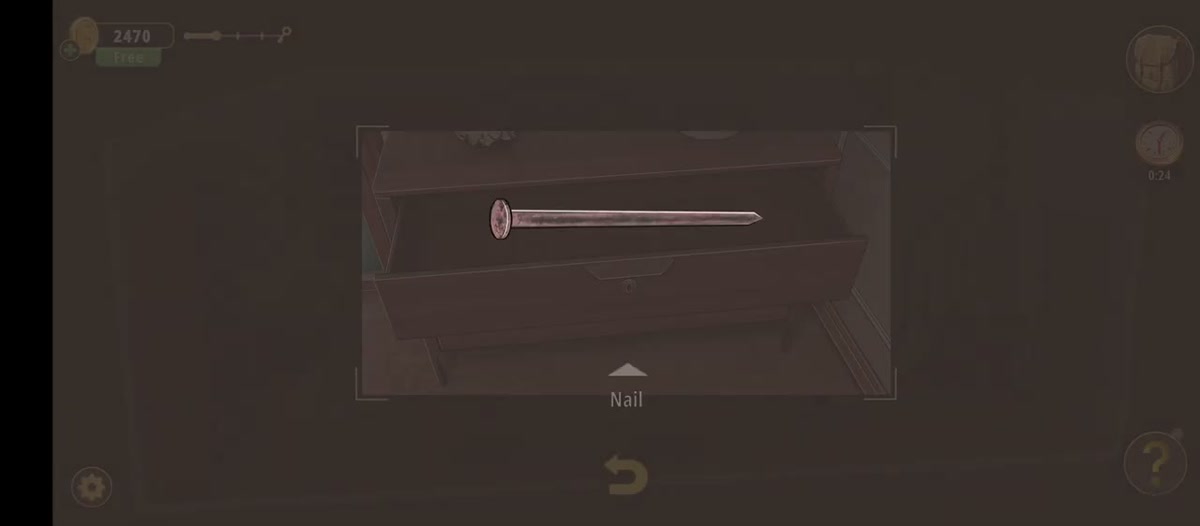
- Lock pick (0:14) on the wall lock (0:21) → drawer → Nail.
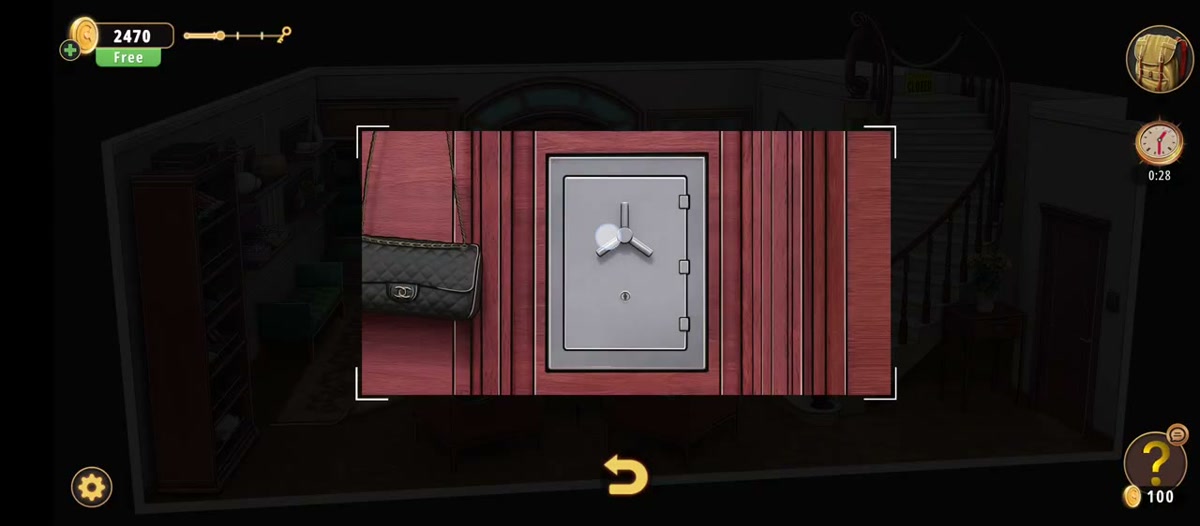
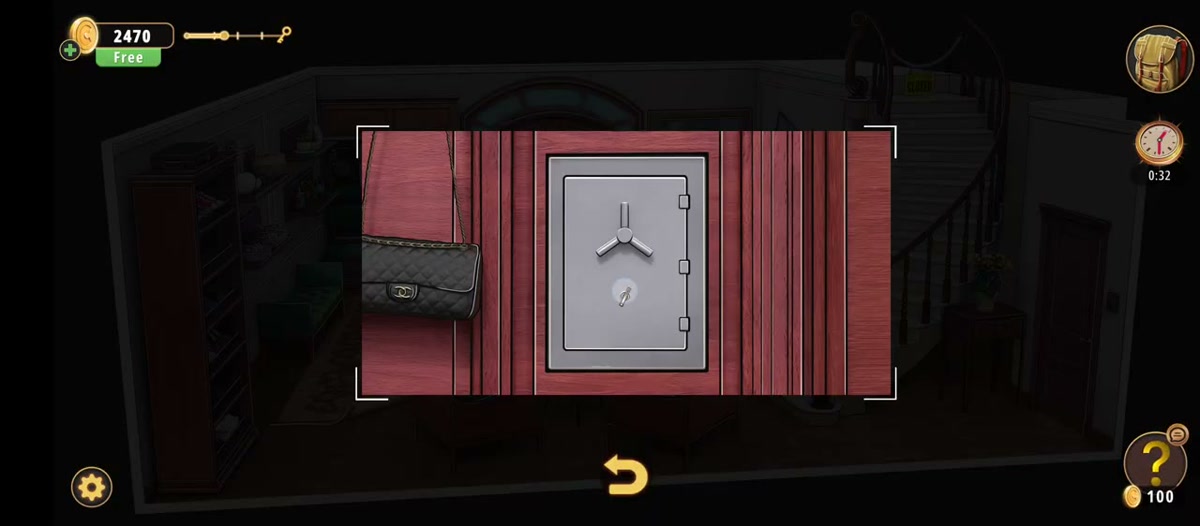
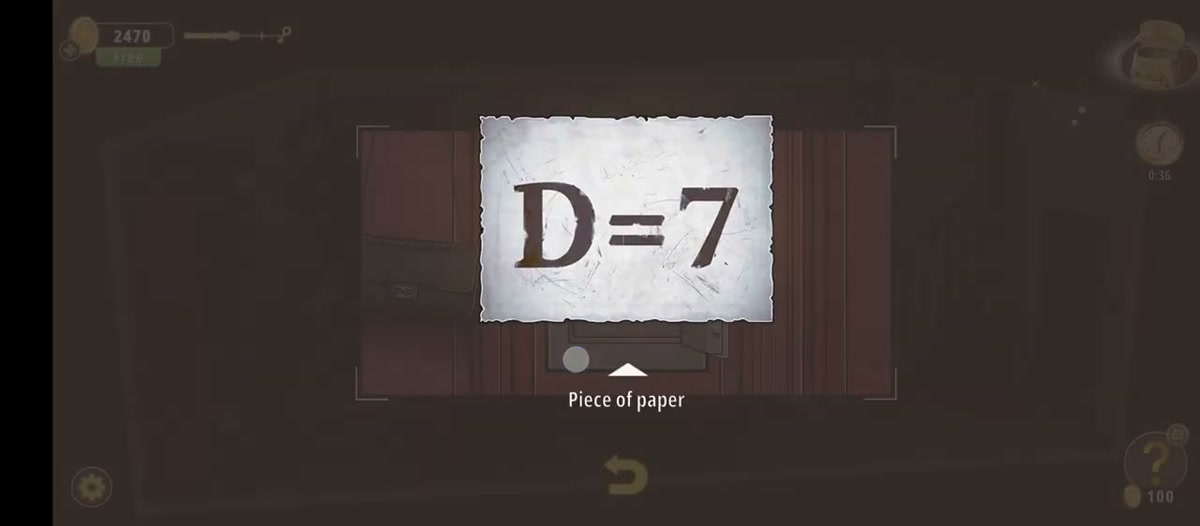
- Move the hanging coat → wall safe → Key opens it → Cube + D=7.
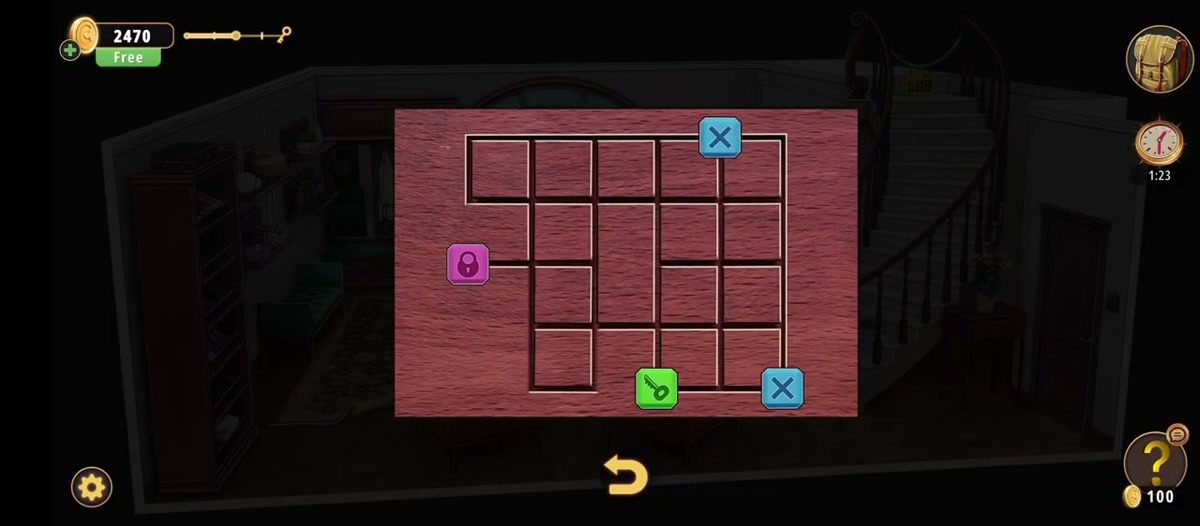
- Cube → the four-by-four sliding board (0:54–2:18): walk the green key tile onto the purple padlock.
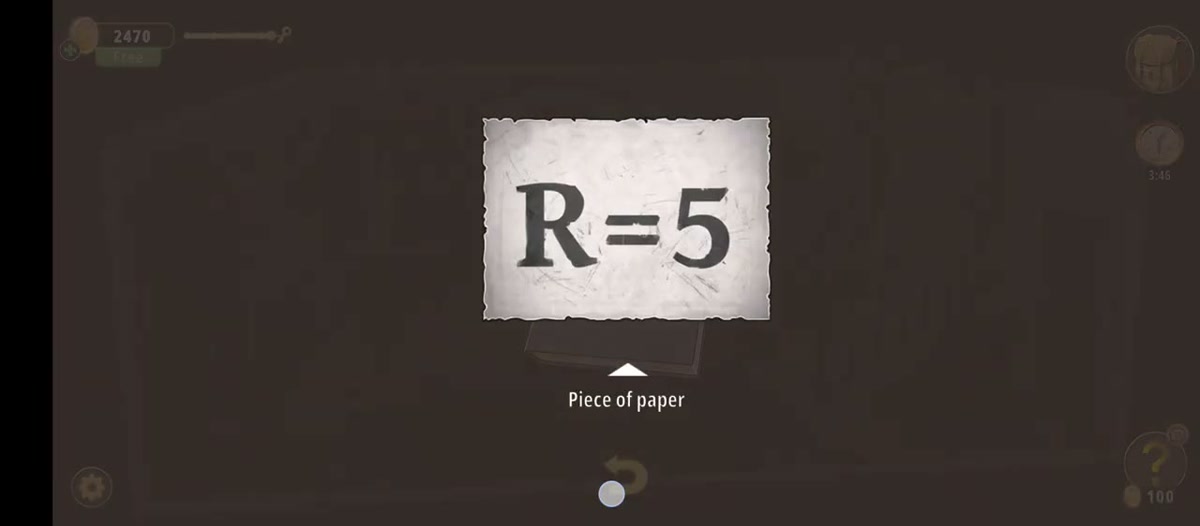
- Four-drum lock on the shoe-rack box → Hammer. Combine with the Nail → pry the painting → R=5.
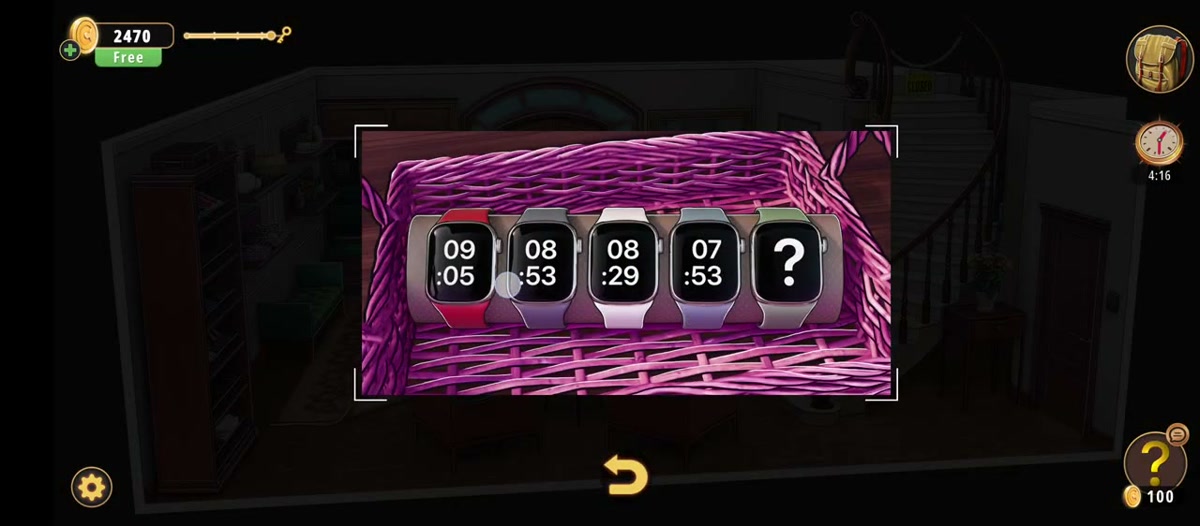
- Five watches (3:51) step down 12 / 24 / 36 minutes, so the missing one is 07:05.
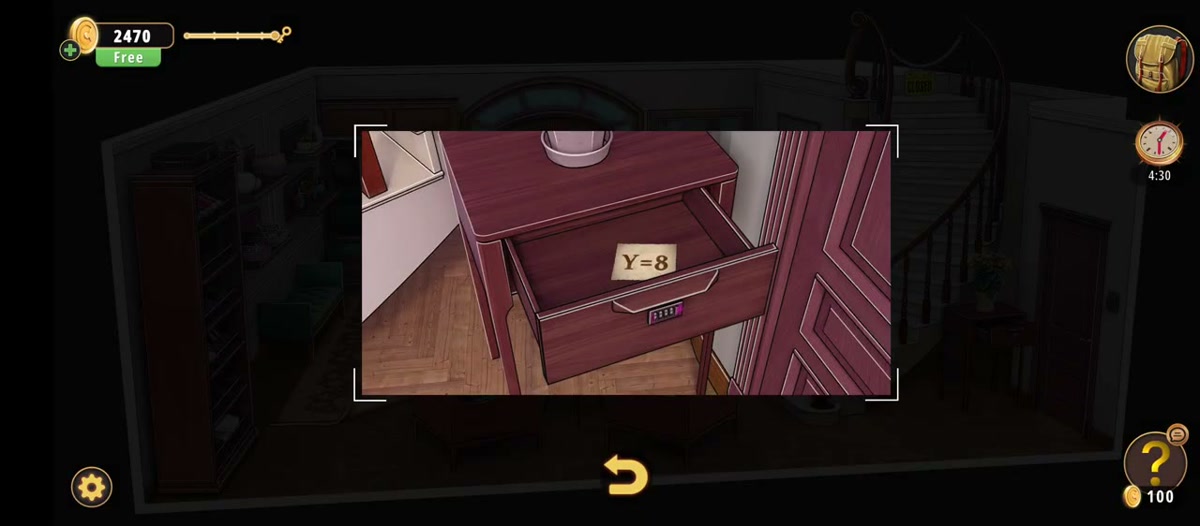
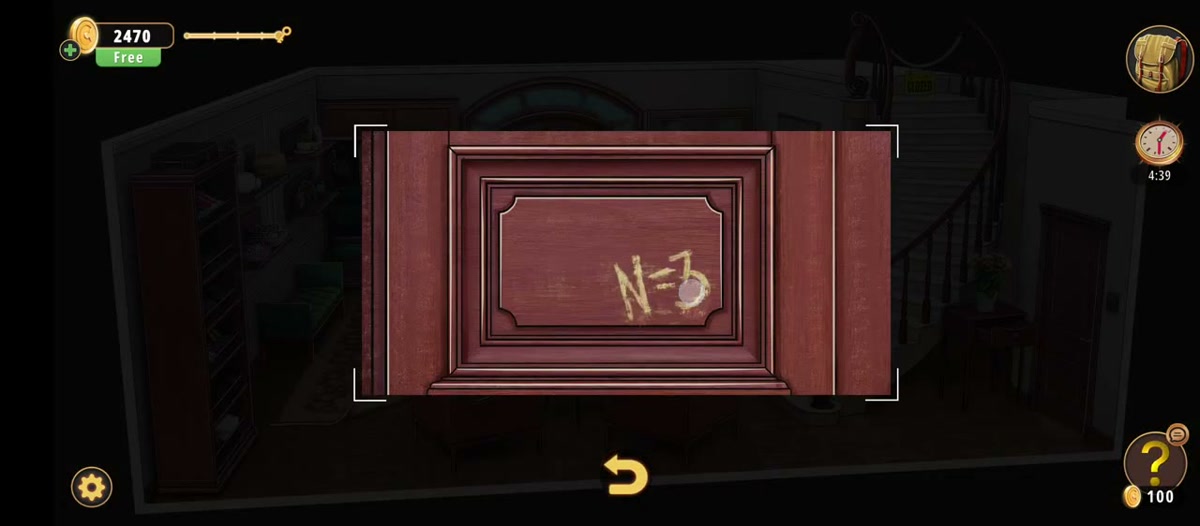
- Drawer → Y=8. Door panel → N=3. Keypad → 51378.

The Hallway run used for every frame on this page.
What this level actually is.
An entrance hall, seen from above with the near wall cut away. Left to right: a tall dark shoe rack stacked with shoes and a suitcase on top, three floating shelves, a long tufted green bench, then the coat unit — a dark wood built-in with a mirror back, a green bench and hooks holding a white coat, a black leather jacket and a blue bag. The back wall has the arched double door with light-blue glass, a dresser with flowers beside it, and a landscape painting hanging visibly askew. The right side is the curved staircase, a side table under it with a plant, and a plain door on the right wall next to a small electronic panel.
In the middle of the floor is the round patterned rug with the two armchairs and a low table holding a yellow bottle and red spheres. It is furniture, not a puzzle, but it tells you where the room's centre of gravity is: almost everything interactive is against a wall.
The chain here is the tightest in the chapter, and it is a real chain — each tool unlocks the next, and the level will not let you skip ahead. Lock pick to nail, key to safe, cube to board, drum lock to hammer, hammer and nail to painting, and only then the five letters. Miss one link and the final keypad is genuinely unsolvable, because you will be one or two slips short of a word.
The map: what is where.
| Object | Where | What it does |
|---|---|---|
| Scissors | Item card at 0:04 | First pickup of the level, before you have moved. |
| Lock pick | Item card at 0:14 | Opens the wall lock; pin-tumbler mini-game, six pins. |
| Wall drawer | Coat-rack wall, left | Opens after the lock pick; holds the Nail. |
| Wall safe | Behind the hanging coat | Two-dial safe. The Key opens it: Cube + D=7. |
| Sliding board | Full-screen overlay | 4x4 grid; purple padlock tile, green key tile, two blue X tiles. |
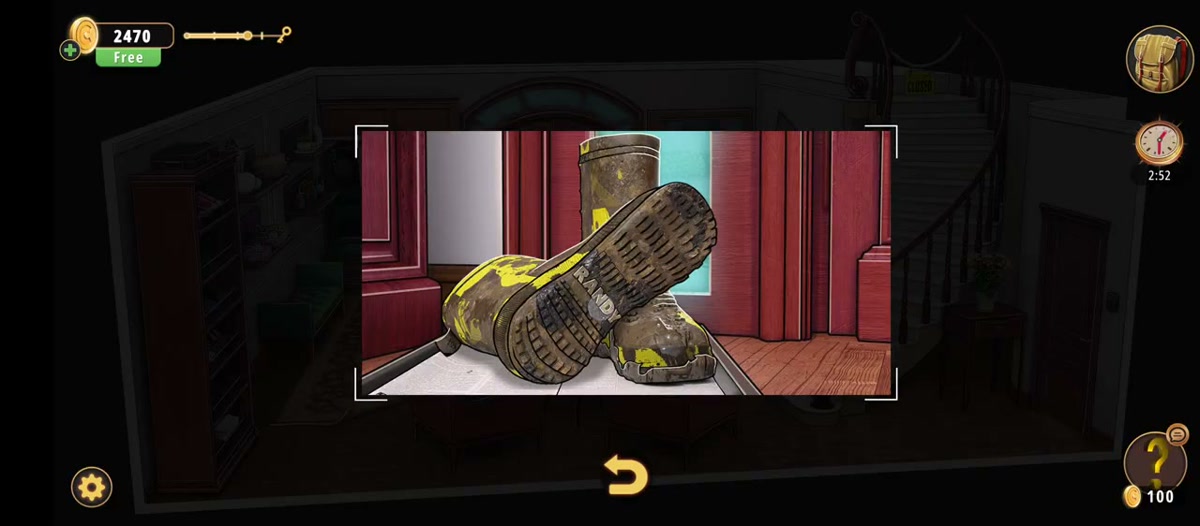
| Boots | Left wall, on the floor | Muddy boots close-up at 2:30; part of the shoe area. |
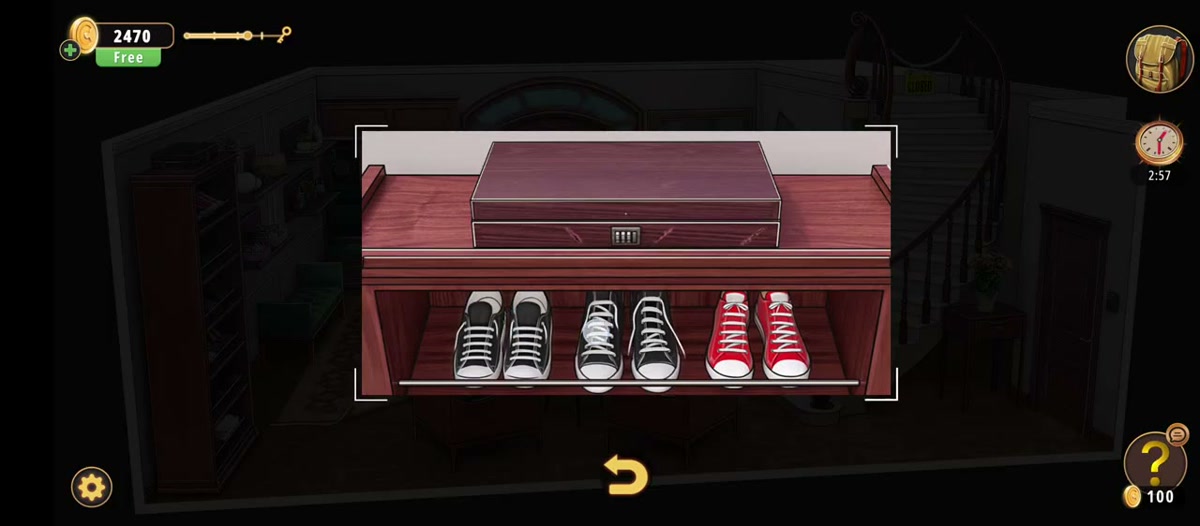
| Shoe-rack box | On top of the shoe rack | Wooden box with a four-drum lock. Holds the Hammer. |
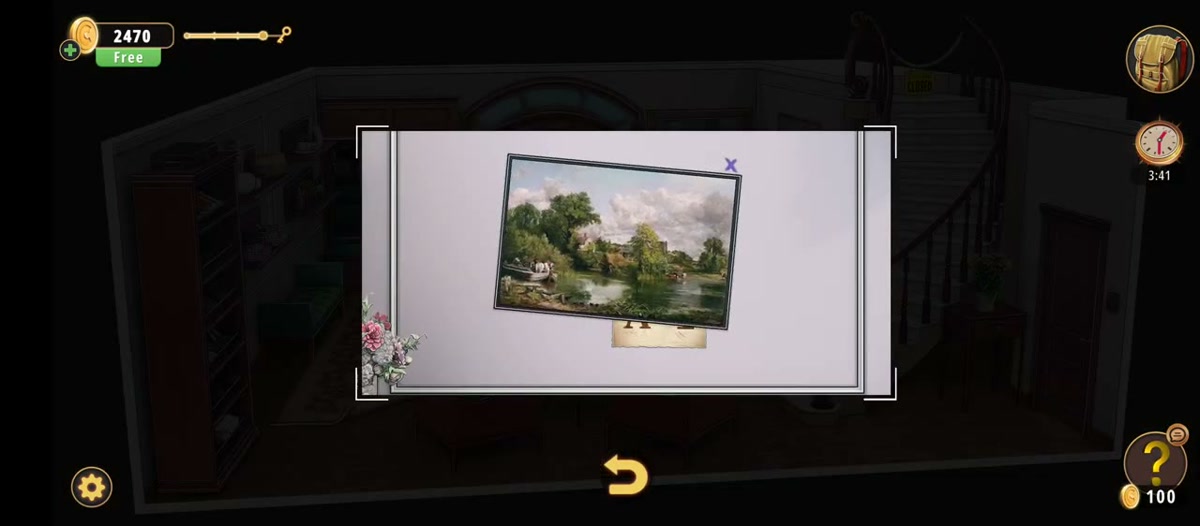
| Painting | Back wall, right of the dresser | Hanging askew. Hammer and nail it to free the R=5 slip. |
| Watches | Five watches on a purple basket | Times 09:05, 08:53, 08:29, 07:53 and one "?" — the sequence clue. |
| Bedside drawer | Small table by the stairs | Opens on the Y=8 slip around 4:08. |
| Door panel | Below the stairs, right wall | Scratched N=3 on the wood at 4:18. |
| Keypad | Right wall, by the door | 12-key pad with a green display. Takes 51378. |
The code, spelled out.
This is the one thing worth understanding rather than copying. The room gives you five letters, each carrying a digit. Put them in the order they appear and read the digits straight off:
| Letter | Digit | Where it comes from |
|---|---|---|
| R | 5 | Paper slip freed from the painting (3:24) |
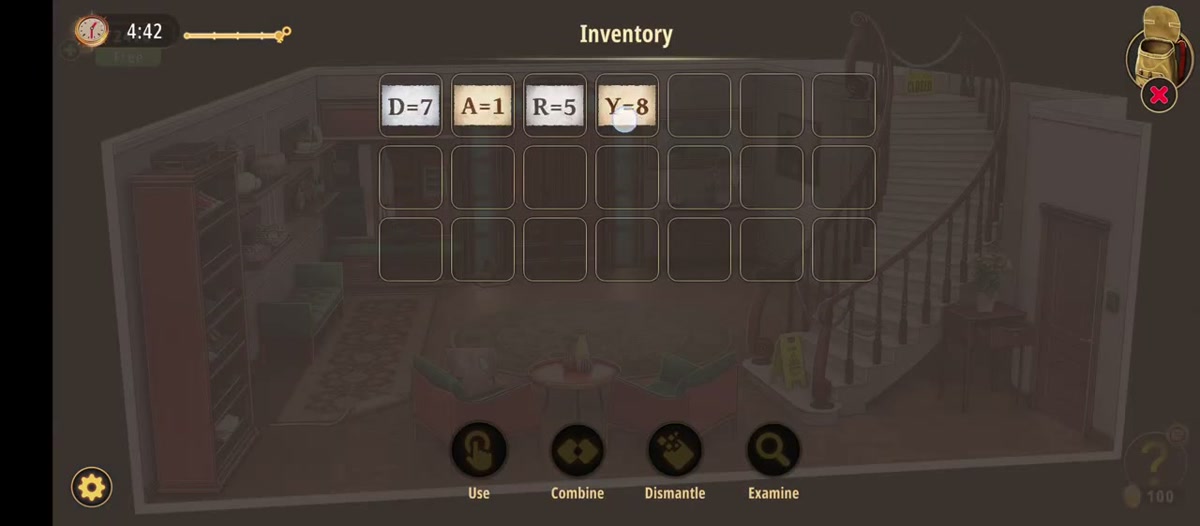
| A | 1 | Paper slip in the inventory by 4:12 — pickup not filmed cleanly |
| N | 3 | Painted on the wooden door panel below the stairs (4:18) |
| D | 7 | Paper slip inside the wall safe, next to the Cube (0:35) |
| Y | 8 | Paper slip in the bedside drawer (4:08) |
Five letters, five digits, and the keypad wants five digits. If you have been reading the room properly you should have all five slips in the backpack at 4:20, when the inventory shows D=7, A=1, R=5 and Y=8 in a row, with N=3 left on the door because it was never a slip.
Step by step.
The order below follows the recording, and it is also the order the level enforces. Timestamps are video time; the links jump to the matching second.
Where people get stuck.
You never find the N=3. This is the number one blocker. Every other letter arrives as a paper slip you can see in the backpack, so the inventory feels complete at four. The fifth is scratched on a door and never becomes an item. If your code attempts keep failing with four letters accounted for, go and look at the door panel again.
You do not combine the hammer and the nail. The tool only works as one item. A hammer alone does nothing on the painting, and the combine action is in the inventory menu, not on the painting itself.
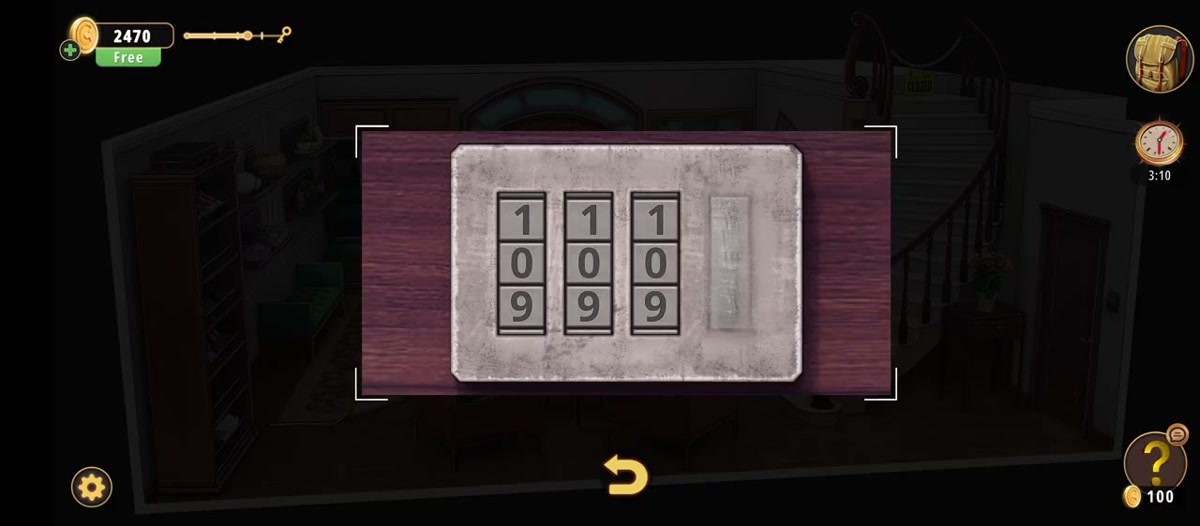
You read the drum lock's outer rows. Every drum shows three digits at once. The top and bottom are just the neighbours. Only the middle row counts, and at rest it reads 0000 — if you are "reading" 109 you are looking at the wrong row.
You try to brute-force 51378 from the watches. The watches are a separate clue with its own answer (07:05); they are not the door code. The door code is five digits and the watches give you four times and a question mark. Two different puzzles that happen to sit a minute apart.
You look for a way up the stairs. There is not one. The CLOSED sign on the banister is the game telling you the staircase is scenery for this level, and the exit is the small door on the right wall, not the main entrance.
Where Hallway sits in Chapter 3.
Chapter 3 is Murder Dressed in White and it runs twenty-four rooms. Hallway is 24 of 24 — the last one, straight after the Entertainment Room. It is also the chapter's exit: the door you open with 51378 is what takes you out of the hall and into Chapter 4, Pharaoh's Bride.
In structure it is the inverse of the room before it. Entertainment Room was loose and parallel — a dozen stations, none of them gating the others. The Hallway is a single chain of six links and it will not let you skip a step. If you have just come from the Entertainment Room, the adjustment is to stop looking for side puzzles and start looking for the next tool.
- 1 Dining Room guide
- 2 Living Room guide
- 3 Study Room guide
- 4 Guest Toilet guide
- 5 Workshop guide
- 6 Guest Bedroom guide
- 7 Master Bathroom guide
- 8 Kids Playroom guide
- 9 Backyard guide
- 10 Garden guide
- 11 Kitchen guide
- 12 Driveway guide
- 13 Kids Bedroom 1 guide
- 14 Storage Room guide
- 15 Garage guide
- 16 Attic guide
- 17 Terrace guide
- 18 Basement guide
- 19 Garden Shed guide
- 20 Kids Bedroom 2 guide
- 21 Hobby Room guide
- 22 Master Bedroom guide
- 23 Entertainment Room guide
- 24 Hallway you are here
Previous room: Chapter 3 Level 23 — Entertainment Room
Next: All Rooms & Exits walkthroughs — Chapter 4 walkthroughs coming soon
Frequently asked questions.
What is the code for the last door in Rooms & Exits Chapter 3 Level 24 Hallway?
The five-digit code is 51378. It is not a random number: the room hands you five letter-to-digit slips and one letter painted on a door, and each letter of the answer maps to a digit. R=5, A=1, N=3, D=7, Y=8 in that order gives 5 1 3 7 8. The display reads 51378 at 5:00, one frame before the lock releases, and the letter set was read twice off the inventory at 4:20. The two agreeing with each other is the real check.
Where do the five letter clues come from?
D=7 is inside the wall safe behind the hanging coat, next to the Cube. R=5 comes from the painting propped askew against the back wall, once you have the hammer and nail. Y=8 is in a drawer that opens after the four-drum lock is worked, around 4:08. A=1 is in the inventory by 4:12 but the recording does not show a clean pickup for it, so its exact source is the one thing on this page we could not pin down. N=3 is not a slip at all — it is painted on the wooden door panel at 4:18.
Why 51378 and not 73155 or any other order?
Because the numbers spell the word. Read the five letters that have digits attached — R, A, N, D, Y — left to right as they appear in the inventory, substitute each digit, and you get 5-1-3-7-8. Any other permutation produces a number that matches no word in the room. That self-consistency is also the cross-check: the digits we read off the keypad display are exactly the digits those five letters carry.
How do I open the wall safe in the Hallway?
Two steps. First use the lock pick — it is the item card at 0:14 — on the wall lock at 0:21 and work the pin-tumbler mini-game until the drawer pops. That gives you a Nail. Then move the coat hanging on the coat-rack unit: a two-dial wall safe is behind it at 0:30. The Key in your inventory opens it, and the safe holds the blue Cube and the D=7 slip.
What is the Cube for?
The sliding-block board. The board is a four-by-four grid with a fixed purple padlock tile, a movable green key tile and two light-blue X blocker tiles. The Cube is the piece the board is missing. Your job is to slide the green key tile through the free cells until it lands on the padlock; the board closes at 2:18. It is pure sliding-block logic, no numbers involved.
Where is the Hammer and how do I get it?
The wooden box sitting on top of the shoe rack on the far left wall has a four-drum combination lock — three digits visible per drum, the middle row being the active one. Roll the drums and the lid opens at 3:07, and the Hammer card follows at 3:09. You then combine it with the Nail: the inventory shows a single Hammer and nail card at 3:15.
What do I do with the hammer and nail?
Use them on the landscape painting hanging askew against the back wall, right of the dresser. The close-up at 3:19 shows the painting with a torn strip of paper trapped under the bottom of the frame. Once the frame is levered, the R=5 slip comes free at 3:24.
What is the answer to the five watches?
The watches read 09:05, 08:53, 08:29, 07:53 and a fifth showing ?. The gap between them grows by twelve minutes each time: −12, −24, −36, so the next step is −48, which puts the fifth watch at 07:05. The four printed times were read twice, from the full frame and from a 3x crop; the 07:05 answer is arithmetic on those reads, not something the game shows.
What is the four-drum lock in the Hallway?
A metal plate with four rotating digit drums mounted into a dark wooden surface, each drum showing the digit above, the active digit in the middle and the digit below. It appears at rest showing 1 / 0 / 9 down every column, so the active row starts at 000. The recording works it twice — once on the shoe-rack box for the Hammer, and again around 4:05, after which a drawer opens on the Y=8 slip. The middle row at that moment reads 0 7 8 4.
Where is the N=3 clue?
Painted on the wooden door panel below the stairs, on the same wall as the electronic keypad. The camera holds on it at 4:18 and again at 4:29; the marking is a scratched white N=3 on dark wood. It is the only one of the five letters that is not a paper slip.
Is Hallway the last level of Chapter 3?
Yes. Chapter 3 is Murder Dressed in White and Hallway is 24 of 24, the room that closes the chapter. There is a Chapter 4 in the game — Pharaoh's Bride — and the Hallway's exit is what leads into it. We have not written Chapter 4 guides yet, so the next-room link on this page goes back to the walkthrough hub instead.
Does the recording show the level being completed?
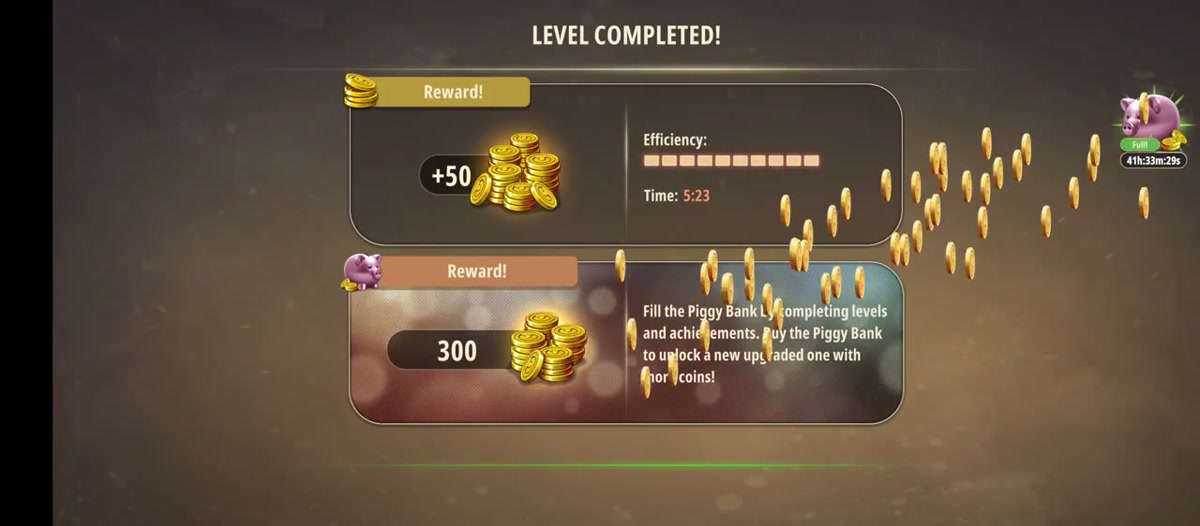
Yes. The keypad accepts the code at 5:00, the door opens, and the LEVEL COMPLETED! card lands at 5:05 with a level reward of +50 coins and a recorded Time: 5:23. The piggy-bank panel sits underneath it as usual.
What this page could not verify.
1. Where the A=1 slip is picked up. The slip is definitely in the backpack — the inventory at 4:12 and 4:20 both show A=1 in the row with D=7, R=5 and Y=8 — but the recording never holds a clean pickup frame for it. The camera moves from the drawer to a storage alcove and back, and the slip is simply there afterwards. Its source is the one clue on this page we cannot point at.
2. The accepted combination on the four-drum lock. The drums never stop moving in the frames we sampled. The middle row reads 0 7 8 4 at 4:05, right before the drawer opens at 4:07, so 0784 is the obvious candidate — but that is one read at one instant, not two agreeing reads, so it is printed here as a candidate rather than a code. The Hammer route at 3:07 has the same problem, which is why neither is presented as "the answer".
3. What the watch answer unlocks. 07:05 is solid arithmetic on four twice-read times, but the recording does not show a lock that takes a time. Either it feeds a puzzle we could not tie to a visible lock, or it is a hint for a step the run skipped. The arithmetic is offered as arithmetic, not as a verified in-game input.
4. The scissors and the boots. Both get full close-ups and both are real pickups, but neither is visibly spent anywhere in the run. They may belong to branches the recording skipped; they are not presented here as required steps.