 GridPaw
 Shikaku
 Akari
 Kakuro
 Nonogram
 Nurikabe
 Pictomino
 KenKen
 Binary
 Star Battle
 Hashi
 Slitherlink
 Murder Sudoku
 Meowdoku
 Crazy Cleanup
Rooms & Exits Chapter 3 Level 1 Walkthrough: Dining Room
Dining Room is the first room of Chapter 3, Murder Dressed in White, and it is a deliberate change of gear from Chapter 2. There is no shop front, no till and no thief: you are locked in a single furnished dining room with a table, a hutch, two windows and a sideboard, and the level is solved almost entirely with two code locks. This page gives you both codes, the arithmetic behind one of them, and an honest account of the parts of the room we could not pin down.
Dining Room is room 1 of 15 in Chapter 3. Two locks, two codes: 358 on the three-dial combination lock (from the equation above it) and 8563 on the four-dial safe (from the crumpled Piece of paper).
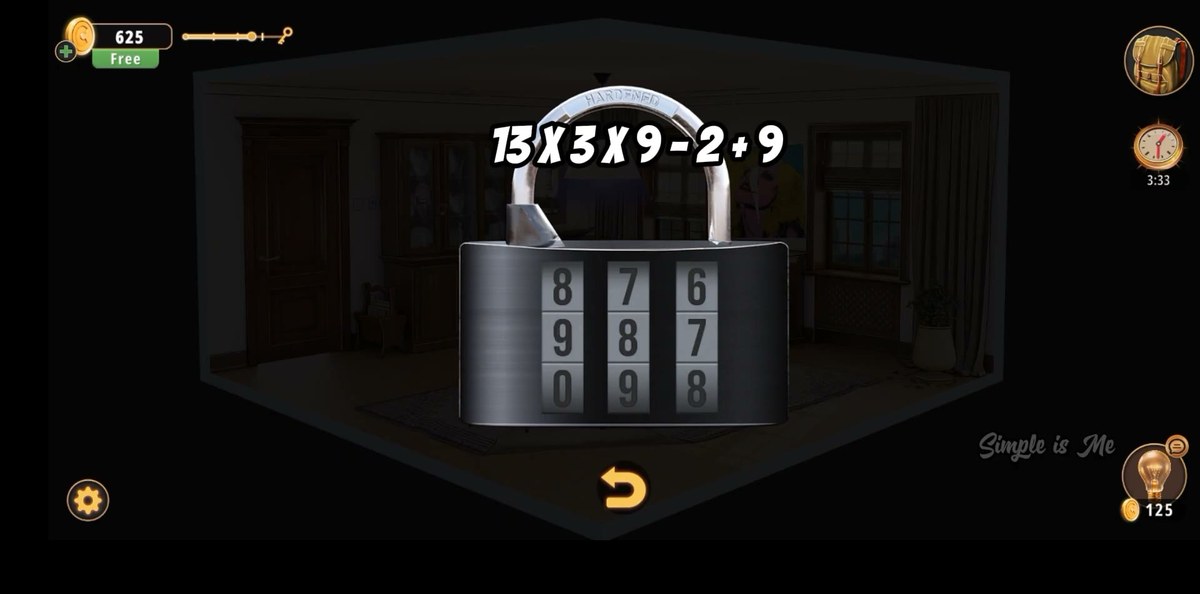
- Look at the black three-dial lock: the white text above it reads 13 X 3 X 9 - 2 + 9. That is 358. Set the dials and it opens.
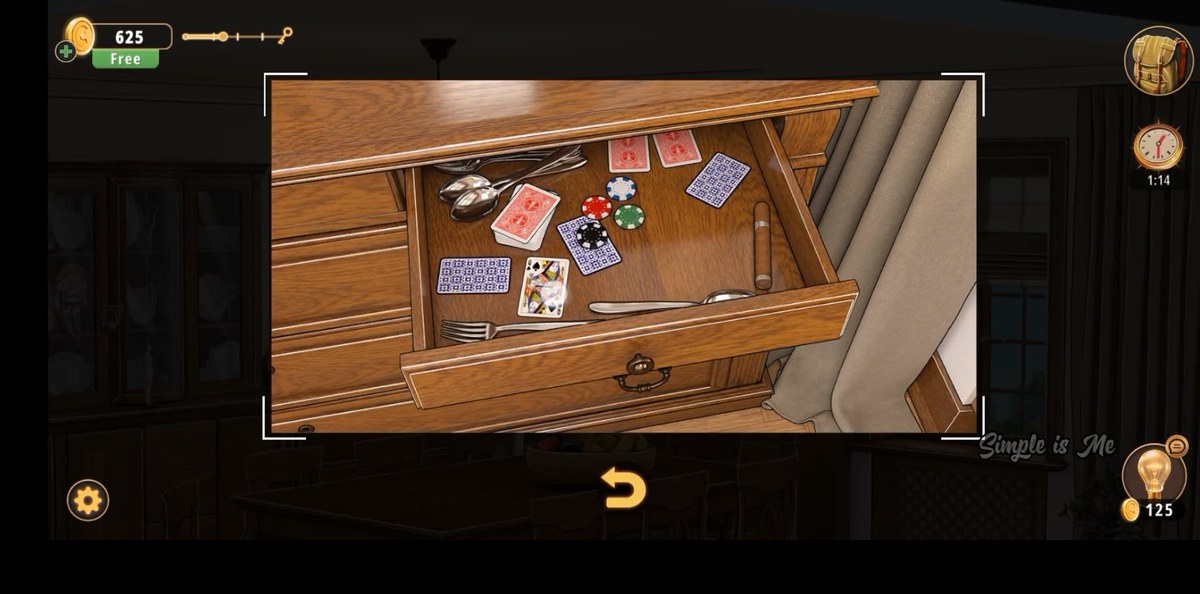
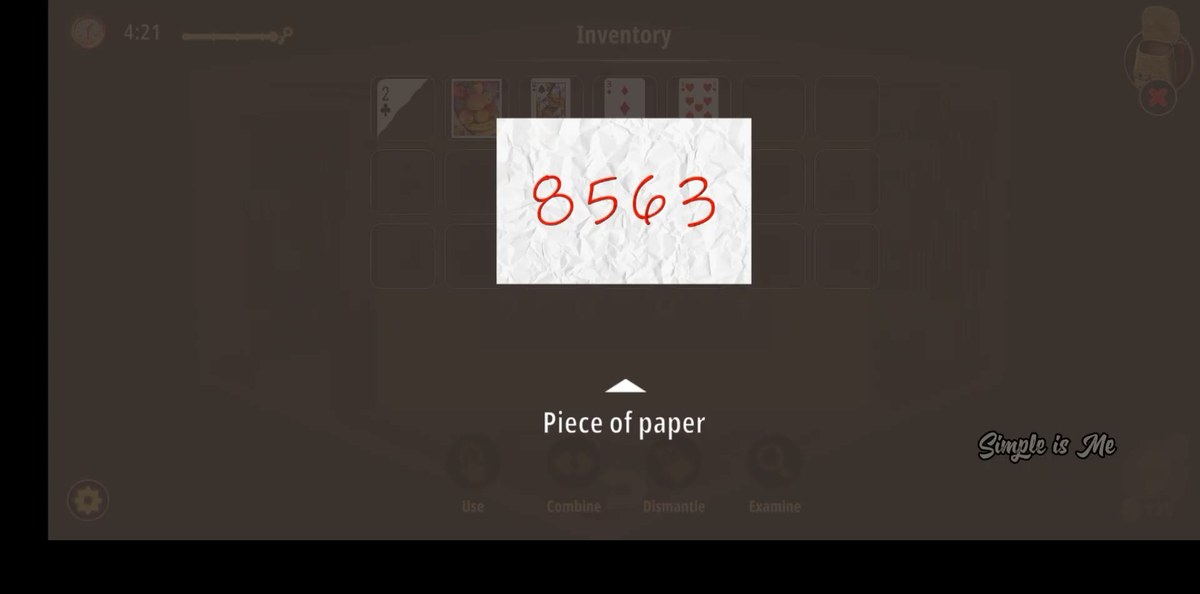
- Work the room for items — the sideboard drawer gives playing cards, and a Piece of paper ends up in your bag with 8563 written on it in red.
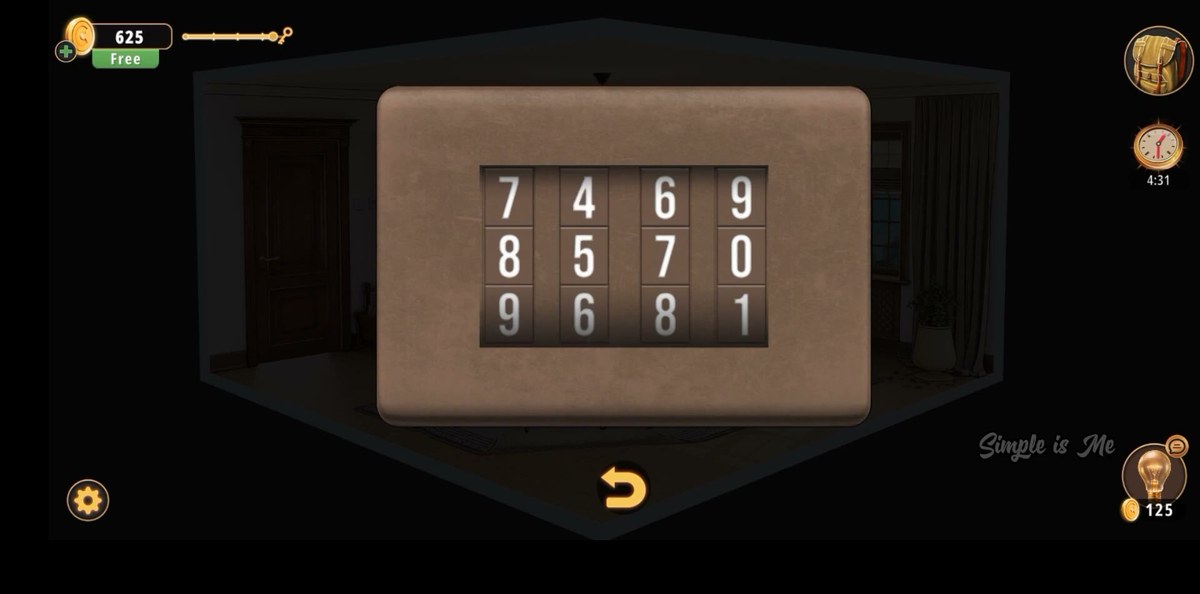
- Set the four-dial safe, the brown box with four stacked-dial columns, to 8 5 6 3.
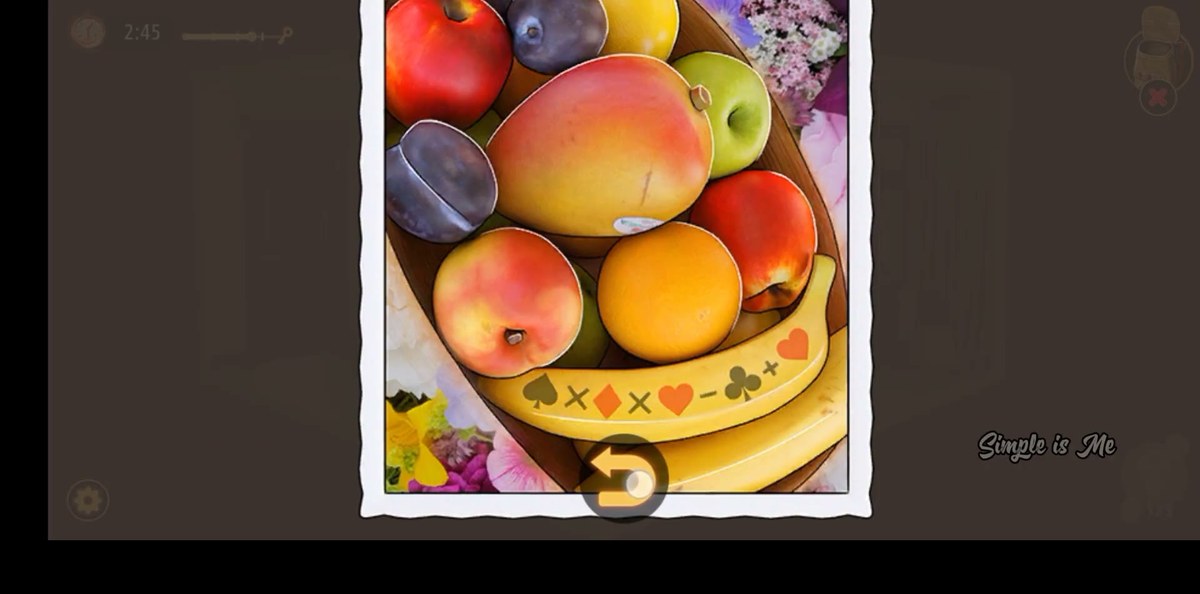
- Check the dining table: a blue projection lands on the fruit bowl partway through, and the bowl itself carries an X, a heart and a banana. It is a clue; we could not tie it to a lock with confidence.
- The recording ends on a THANKS FOR WATCHING card at 2:42, before the results panel — so the reward for this room is not printed anywhere on this page.

The 2:42 run used for every frame on this page.
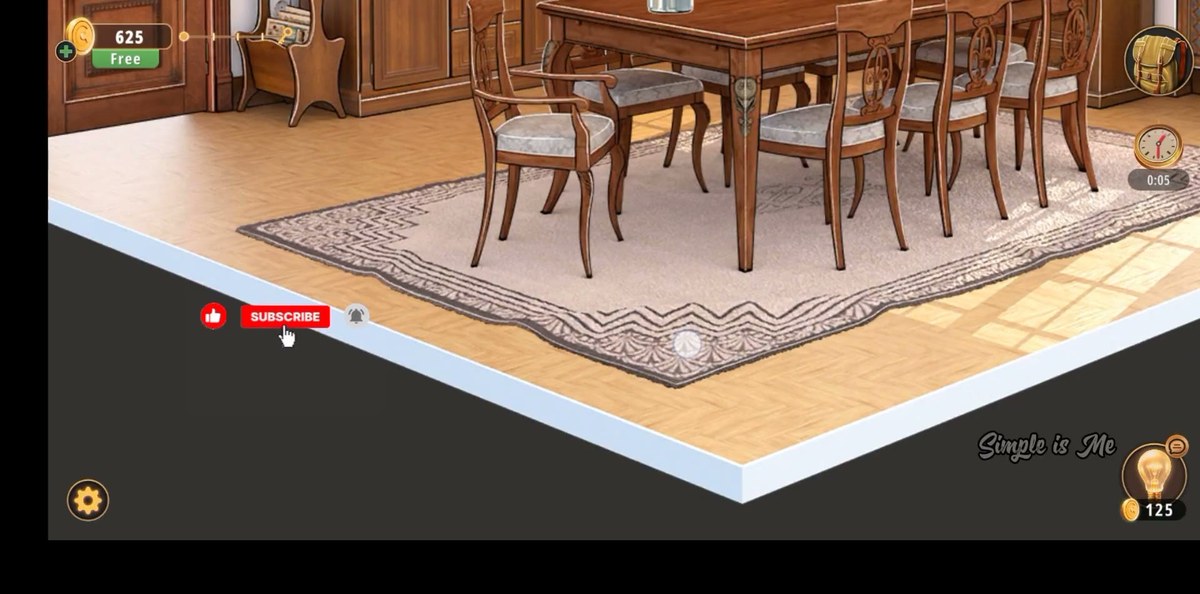
What this level actually is.
One room, and it does not get bigger. The dining room is a single rectangle: a long wooden table with six matching chairs sits on a patterned rug in the middle, a tall wooden hutch with glass doors displays dinnerware against the back wall, two windows flank a large pop-art painting of a woman's face in yellow and pink, a pendant lamp hangs over the table, and a wooden sideboard with a mirror above it runs along the right wall. A plant in a decorative pot sits near the radiator on the right side. That is the whole geography — there is no second area, no corridor, no lift.
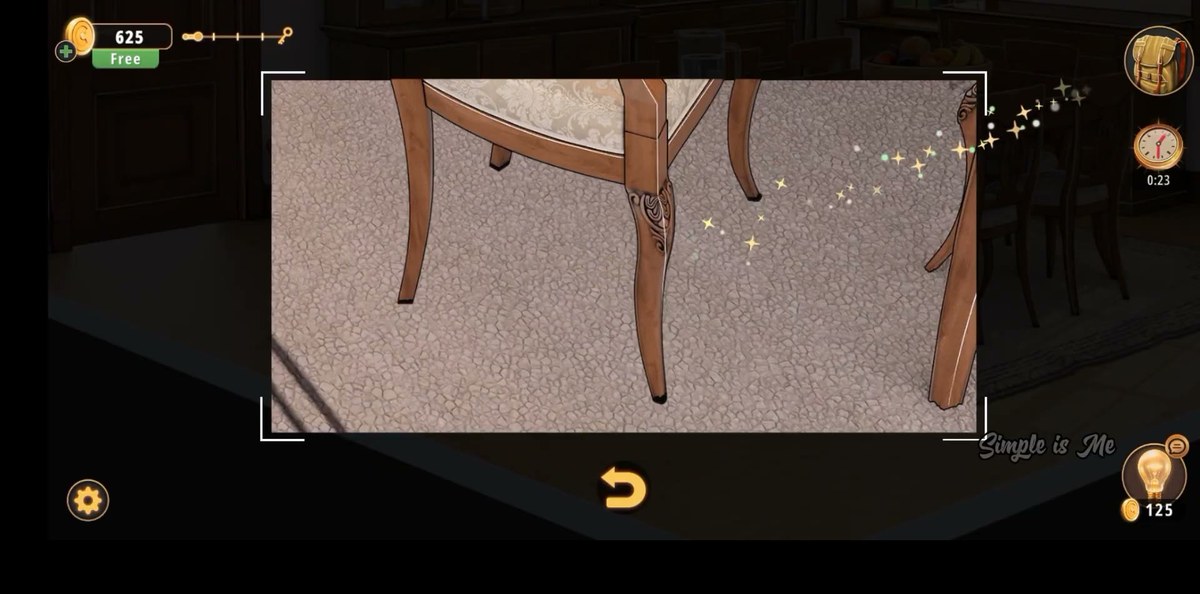
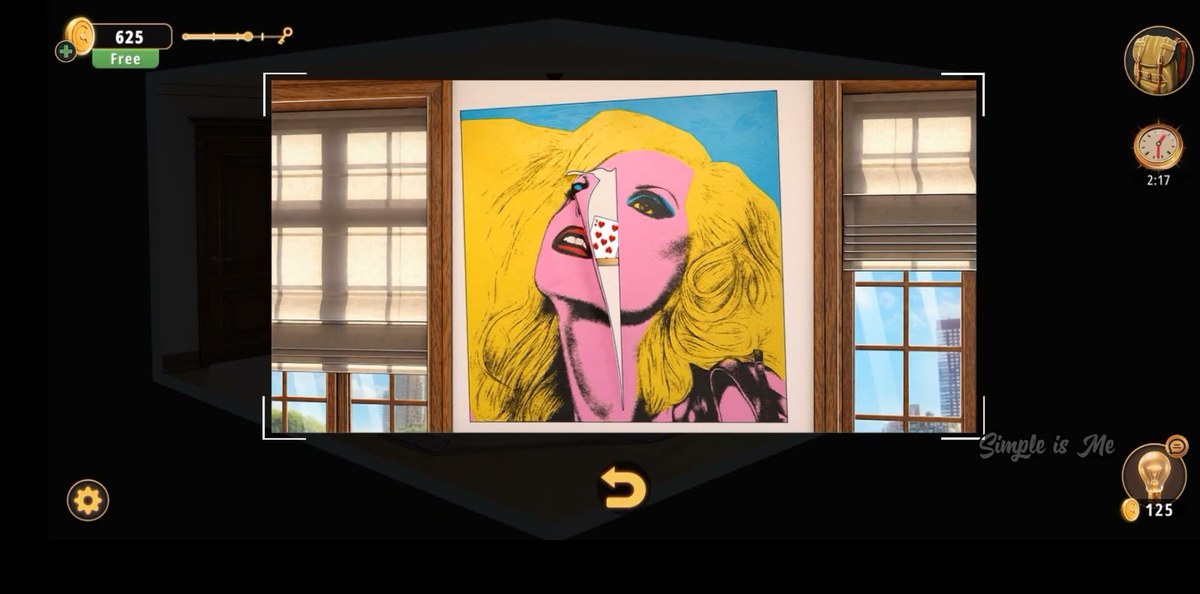
What makes the room feel bigger than it is are the interactive hotspots. Nearly every piece of furniture carries one: the chair legs, the sideboard drawer, the hutch, the fruit bowl on the table, the painting, the plant. Rooms & Exits marks them with the usual sparkle, and in this room the sparkles are dense enough that it pays to sweep the room once without touching anything, so you know how many hotspots you are working with before you start opening drawers.
The level's structure is two code locks and a set of clue props. The three-dial combination lock is the one you can solve on sight, because its clue is printed above it. The four-dial safe is the one that needs the room read first, because its code is on a piece of paper you have to find. Everything else — the cards, the bowl, the nutcracker — feeds those two locks or is scenery, and this page is explicit about which is which.
The map: what is where.
Every interactive object we could identify, and what it is for.
| Object | Where | What it does |
|---|---|---|
| Dining table and chairs | Centre of the room, on the rug | Six chairs; at least one chair leg is a hotspot with a sparkle. |
| Fruit bowl | On the dining table | Carries an X, a heart and a banana symbol; a blue projection lands on it around 1:24. |
| Wooden hutch | Back wall, left of the windows | Glass doors, dinnerware inside; interactive, opens for a look. |
| Pop-art painting | Back wall, between the windows | Large portrait, yellow and pink; a hotspot in its own right. |
| Sideboard with mirror | Right wall, under the windows | Its drawer holds playing cards and poker chips. |
| Pendant lamp | Above the table | Light source; no interaction we could see. |
| Plant in a pot | Right side, near the radiator | Hotspot; we could not confirm what it gives. |
| Three-dial combination lock | On a surface mid-room | Black body, "HARDENED" on the shackle; the equation is printed above it. Code 358. |
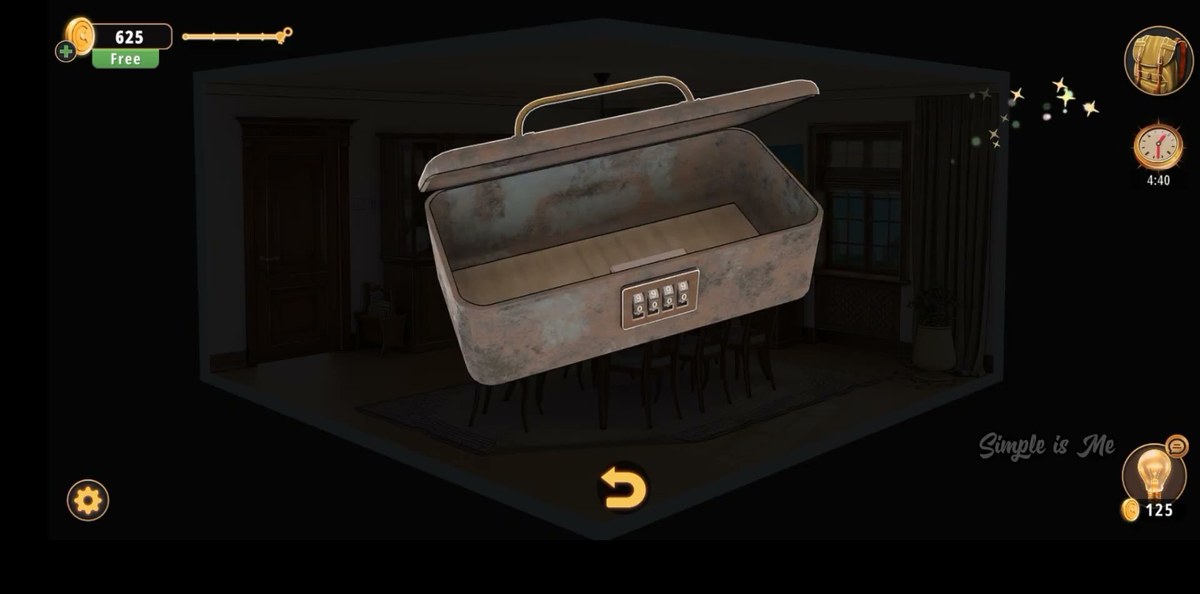
| Four-dial safe | Brown metal box, mid-room | Four stacked-dial columns; rests at 8-5-7-0. Code 8563. |
| Piece of paper | Carried item | Crumpled white paper, four red digits: 8 5 6 3. |
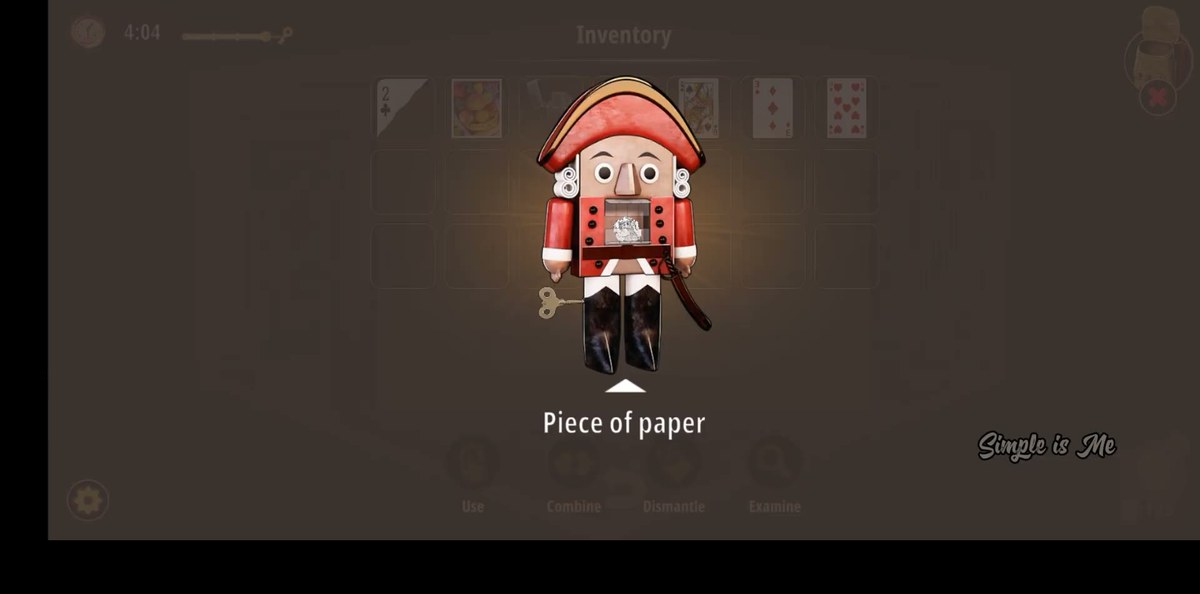
| Nutcracker | Carried item | Appears in the bag just before the paper is examined; probable tool, unconfirmed action. |
| Working lighter | Carried item | In the bag late in the run; we never see it used. |
Step by step.
The order below follows the recording. Timestamps are video time; the links jump to the matching second.
Where people get stuck.
The equation makes no sense. It does if you respect operator order. 13 × 3 × 9 − 2 + 9: multiplication first, so 351, then subtract 2 and add 9. The answer is 358. If you added before multiplying you will land on a different three-digit number and the lock will not take it. There is no display on the lock, so there is no error message — it simply does not release.
You cannot find 8563. It is not written on a wall. It is on the second Piece of paper, and that paper is tied to the nutcracker beat at 2:12. If your bag has no second paper, you have not done whatever the nutcracker does. Check the inventory for the nutcracker first — if it is there and the paper is not, you are closer than you think.
The safe is a different lock from the first one. Two locks, and they look alike at a glance: both are dark metal boxes with dial columns. The difference is the count — three columns versus four. 358 goes in the three-column lock; 8563 goes in the four-column one. Trying 358 on the safe, or 8563 on the padlock, wastes the most time in this room.
The fruit bowl does nothing when you tap it. Correct — it is a display, not a container. The bowl's symbols and the blue projection are clues, and we could not establish which lock they feed, so do not expect tapping the bowl to open anything.
The cards do not open anything. Also correct, as far as we can tell. They go into the bag and stay there. If Chapter 3 later asks you for card values, you have them; in this room they are a collectible, not a key.
Where Dining Room sits in Chapter 3.
Chapter 3 is Murder Dressed in White, and Dining Room is room 1 of 15 — the first room of the chapter, and the first room of the game that takes place in a house rather than a business. The chapter's rooms are the rooms of a domestic interior: dining room, living room, study room, guest toilet, workshop, guest bedroom, master bathroom, kids playroom, backyard, garden, kitchen, driveway, kids bedroom, storage room, garage. If you have finished Chapter 2 you will notice the change immediately: no tills, no shop fronts, no lift, and a much smaller footprint per room.
Dining Room sets the template the rest of the chapter uses: one furnished room, two or three code locks, and clue props that are read rather than manipulated. The two locks here are the two kinds the chapter repeats — an arithmetic lock whose clue is printed on it, and a safe whose code comes off a found item. If you want to know what comes next, Living Room is room 2 and it is the same shape of problem.
- 1 Dining Room you are here
- 2 Living Room guide
- 3 Study Room guide
- 4 Guest Toilet guide
- 5 Workshop guide
- 6 Guest Bedroom guide
- 7 Master Bathroom guide
- 8 Kids Playroom guide
- 9 Backyard guide
- 10 Garden guide
- 11 Kitchen guide
- 12 Driveway guide
- 13 Kids Bedroom 1 guide
- 14 Storage Room guide
- 15 Garage guide
- 16 Attic guide
- 17 Terrace guide
- 18 Basement guide
- 19 Garden Shed guide
- 20 Kids Bedroom 2 guide
- 21 Hobby Room guide
- 22 Master Bedroom guide
- 23 Entertainment Room guide
- 24 Hallway guide
Frequently asked questions.
What is the code in Rooms & Exits Chapter 3 Level 1 Dining Room?
There are two locks and two codes. The three-dial combination lock takes 358 — the answer to the equation printed above it, 13 × 3 × 9 − 2 + 9. The four-dial safe takes 8563, the number written on the crumpled white Piece of paper you pick up in the room. Both were read twice from separate frames of the same recording.
Where does 358 come from?
From the white text above the lock itself. It reads 13 X 3 X 9 - 2 + 9. Multiply first: 13 × 3 = 39, then 39 × 9 = 351. Then 351 − 2 = 349, and 349 + 9 = 358. The lock has three dials, which matches a three-digit answer. Set each dial to the matching digit and the shackle releases.
Where do I find the number 8563?
On a Piece of paper in your inventory. It is a crumpled white scrap with the four digits written in red marker. You pick it up during the level; when you open the inventory and examine it, the digits are legible. The four-digit safe in the room is the lock that takes it. The digits are 8, 5, 6, 3 read left to right.
What is the fruit bowl on the dining table for?
It is a clue, not a container. Partway through the level a blue light projects a pattern onto the bowl and the fruit on it, and the bowl itself carries symbols — an X, a heart and a banana shape are visible. We treat it as a visual clue rather than a code we can read with confidence: the projection is legible as a smiley-face pattern, but we could not establish which lock it feeds, so this page does not print a number for it.
What are the playing cards in the drawer for?
The sideboard drawer near the window opens to reveal playing cards and poker chips. The cards go into your inventory — in the recording we captured the bag holds a 2 of Clubs, a King of Spades and a 7 of Diamonds. We could not establish which lock consumes them, so we do not present them as a code. If you are stuck, they are worth a second look, but we are not going to invent a sequence for them.
What does the nutcracker do?
A Nutcracker figure ends up in the inventory around the same time as a second Piece of paper. Our footage shows the item being collected and the paper being examined immediately afterwards, so the nutcracker is plausibly the tool that reveals the paper — but we never see the exact action in a single clear shot, so treat that as a probable chain rather than a confirmed one.
What is Chapter 3 called, and is Dining Room the first room?
Chapter 3 is Murder Dressed in White, and Dining Room is room 1 of it. The chapter moves the game indoors: instead of storefronts the rooms are the rooms of a house — dining room, living room, study, guest toilet, workshop, and so on. The room count for Chapter 3 in the game's own level list is fifteen.
How do I open the four-dial safe?
The safe is the brown metal box with four rotating dials, each showing three digits stacked vertically. Set the four dials to 8 5 6 3 from left to right. In our footage the dials rest on 8-5-7-0 before the code is entered, which is a useful confirmation that you are looking at the right object — if your dials do not start near those values, you are at a different lock.
What is the reward for finishing Dining Room?
We cannot tell you. The recording we sampled ends on a THANKS FOR WATCHING card at 2:42, before the results panel appears. Rather than quote a reward from another level's footage, this page leaves it blank. Every other Rooms & Exits room we have documented pays a flat coin reward on a LEVEL COMPLETED card, so expect the usual card, but the figure for this room is unverified here.
Do I need to do the locks in a particular order?
No single order is enforced by the game, but the recording we sampled does the three-dial lock first (around 1:54) and the four-dial safe later (around 2:30). That order matches the clues: the equation is printed on the lock itself, so it can be solved on sight, while 8563 requires finding the paper first. If you are speedrunning, solve the equation as soon as you see the lock and keep an eye out for the paper while you work the rest of the room.
What this page could not verify.
1. The fruit bowl and its projection. We can read the symbols on the bowl (X, heart, banana) and we can see the blue projection land on it, but we could not tie either to a lock with confidence, and we did not find a panel in this room that accepts shapes. No shape-to-digit mapping is printed here because any mapping we gave you would be invented.
2. The playing cards. Three cards go into the bag and none of them is used in any shot we captured. Whether they feed a lock in this room, a lock later in Chapter 3, or nothing at all, we do not know.
3. The nutcracker and the lighter. Both appear in the inventory; neither action is shown clearly. The nutcracker is probably what reveals the second paper, and the lighter is never used in the footage at all. Both are listed as collected items, not as steps.
4. The reward and the exit. The recording ends at 2:42 on a THANKS FOR WATCHING card, before any results panel. We do not print a coin reward for this room because we have not seen one. If you finish the level yourself, the results card is the thing to check.