 GridPaw
 Shikaku
 Akari
 Kakuro
 Nonogram
 Nurikabe
 Pictomino
 KenKen
 Binary
 Star Battle
 Hashi
 Slitherlink
 Murder Sudoku
 Meowdoku
 Crazy Cleanup
Rooms & Exits Chapter 3 Level 6 Walkthrough: Guest Bedroom
Guest Bedroom is the sixth room of Chapter 3, Murder Dressed in White, and the quietest one so far: a single bedroom, no corridor, no second floor. That calm is misleading. The room hides a two-dial padlock that most players walk straight past, a chest with five arrow slots, a phone that wants a name rather than a number, and a clock that only becomes a puzzle after the lights go out. This page gives you the two answers that matter — 94 and DAVID — and says plainly which of the remaining puzzles we could not read off the footage.
Guest Bedroom is room 6 of 15 in Chapter 3. The numeric lock takes 94; the phone takes the name DAVID.
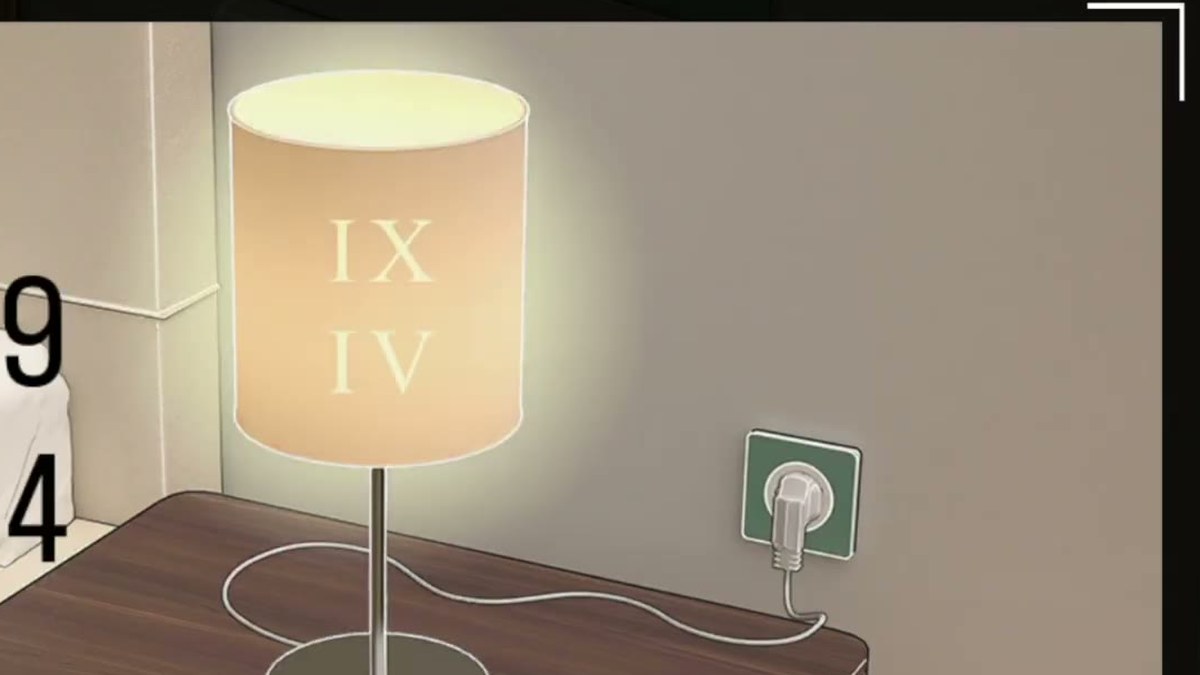
- Look at the table lamp beside the bed. Two Roman numerals are printed on the shade: IX and IV — 9 and 4.
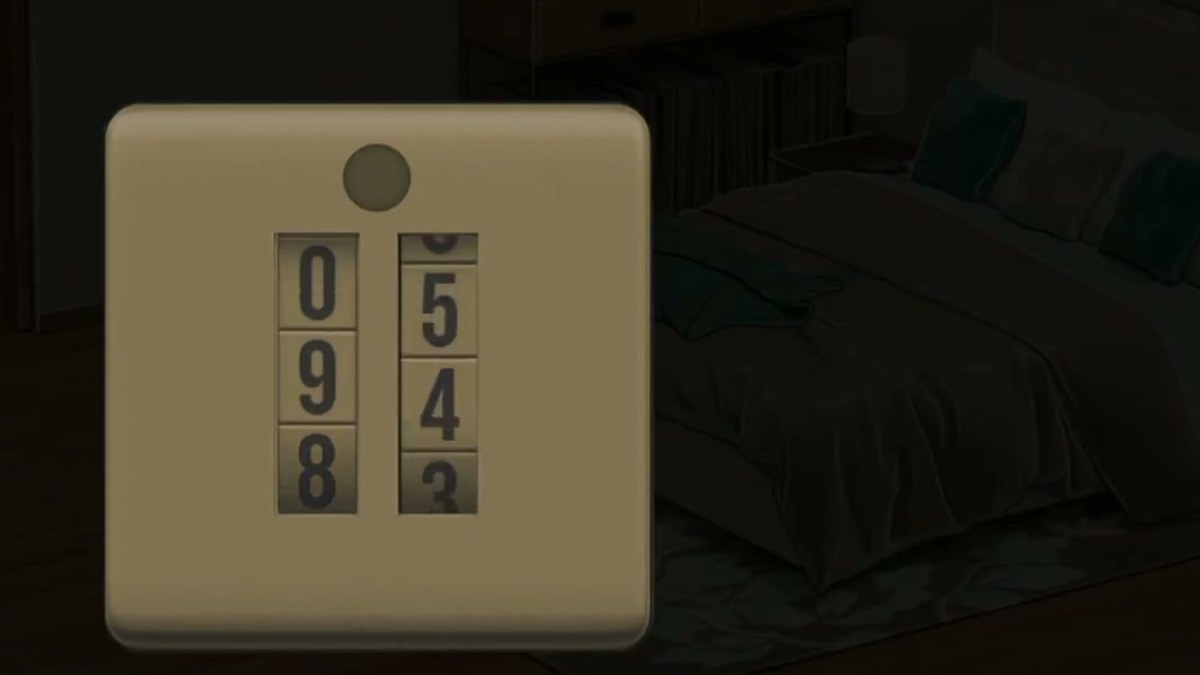
- Turn the two dials of the padlock on the grey quilted hamper so the centre row reads 9 then 4. The hamper opens.
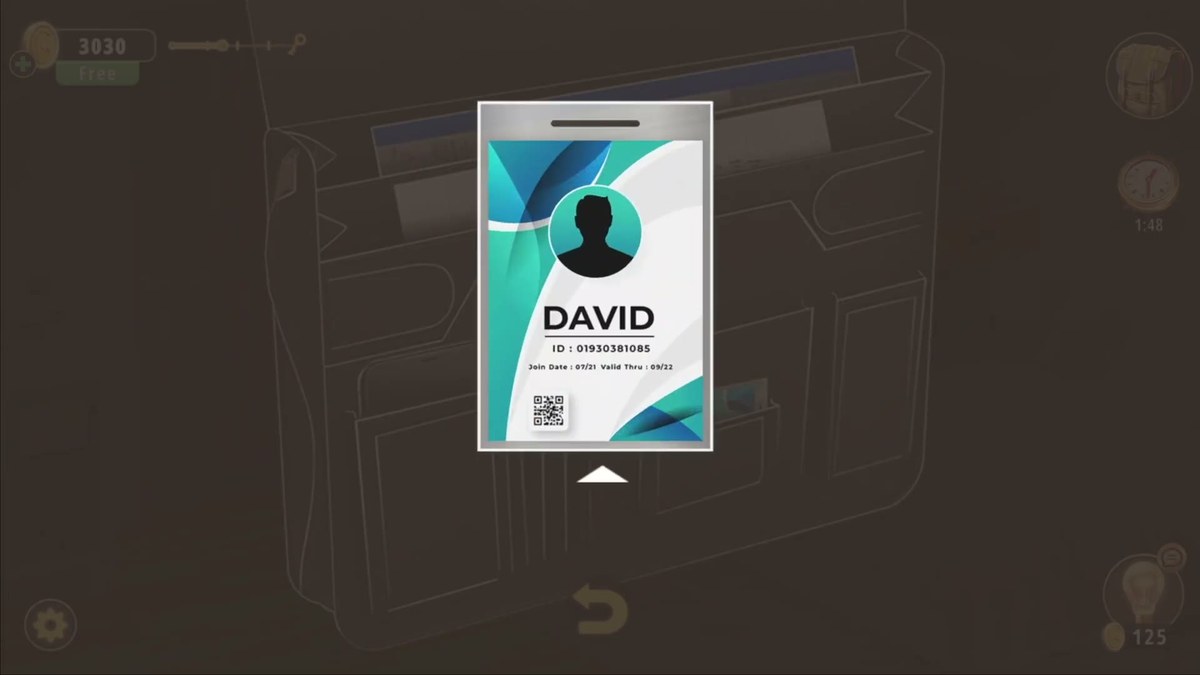
- Open the dark chest under the gallery of nine framed pictures, take the ID card and read the name on it: DAVID.
- Tap the phone on the console and type DAVID into the text bar, then Done. The red padlock turns green.

The 6:25 run used for every frame on this page.
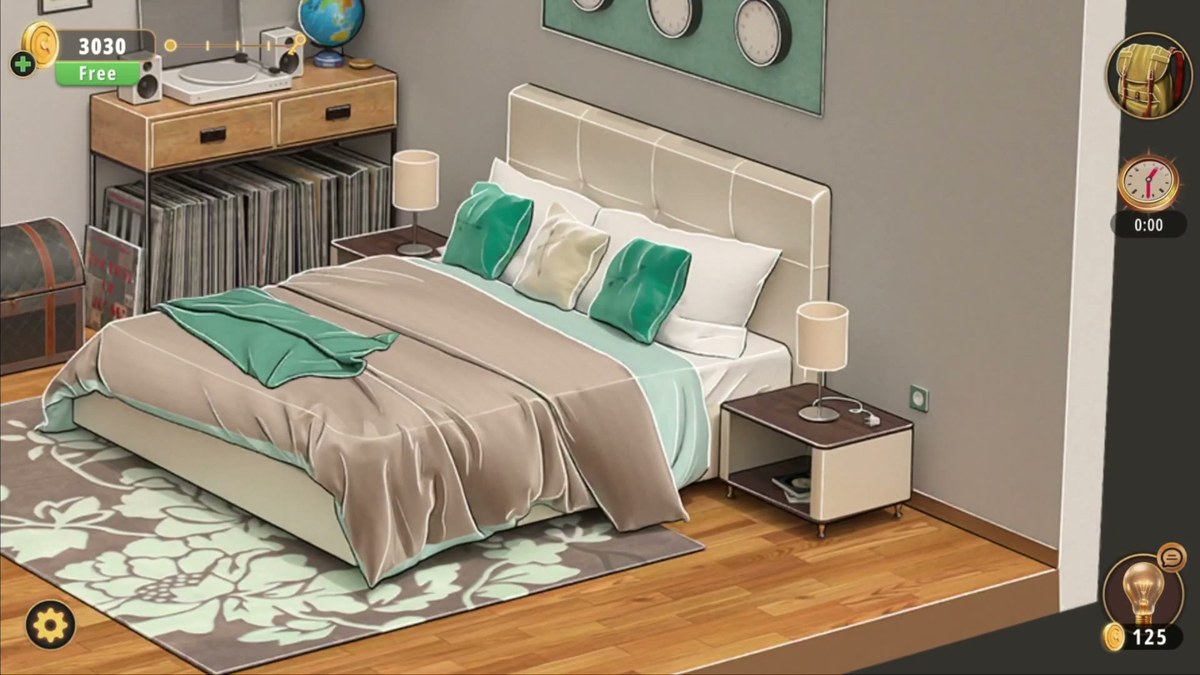
What this level actually is.
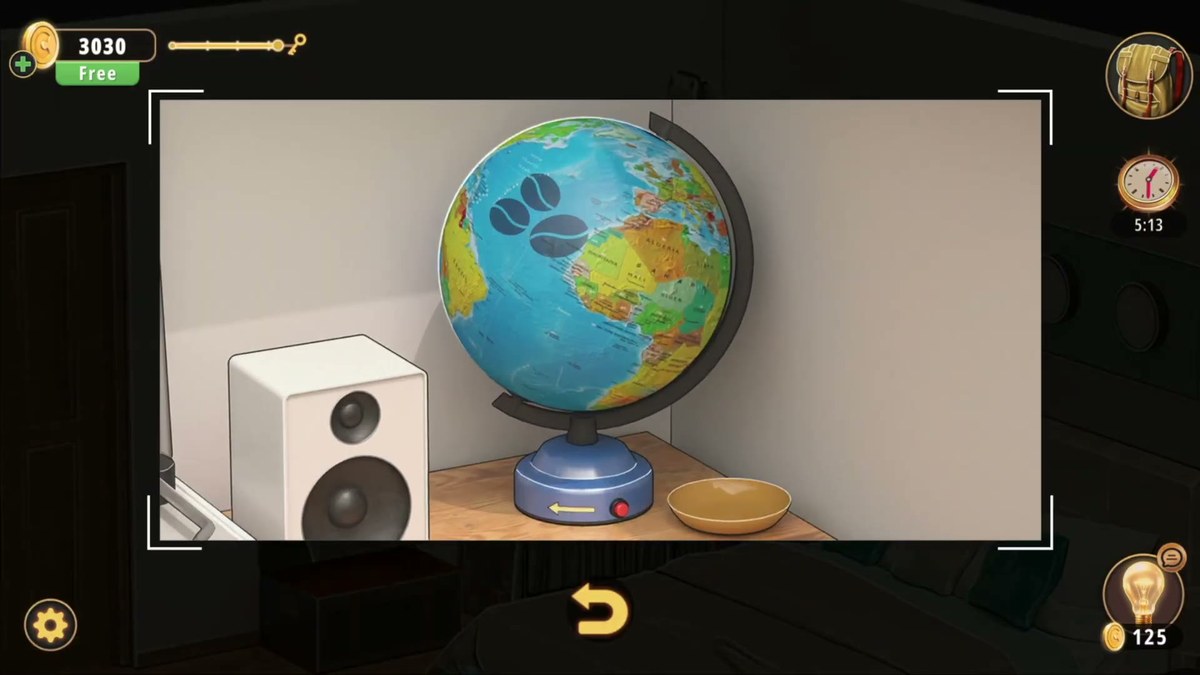
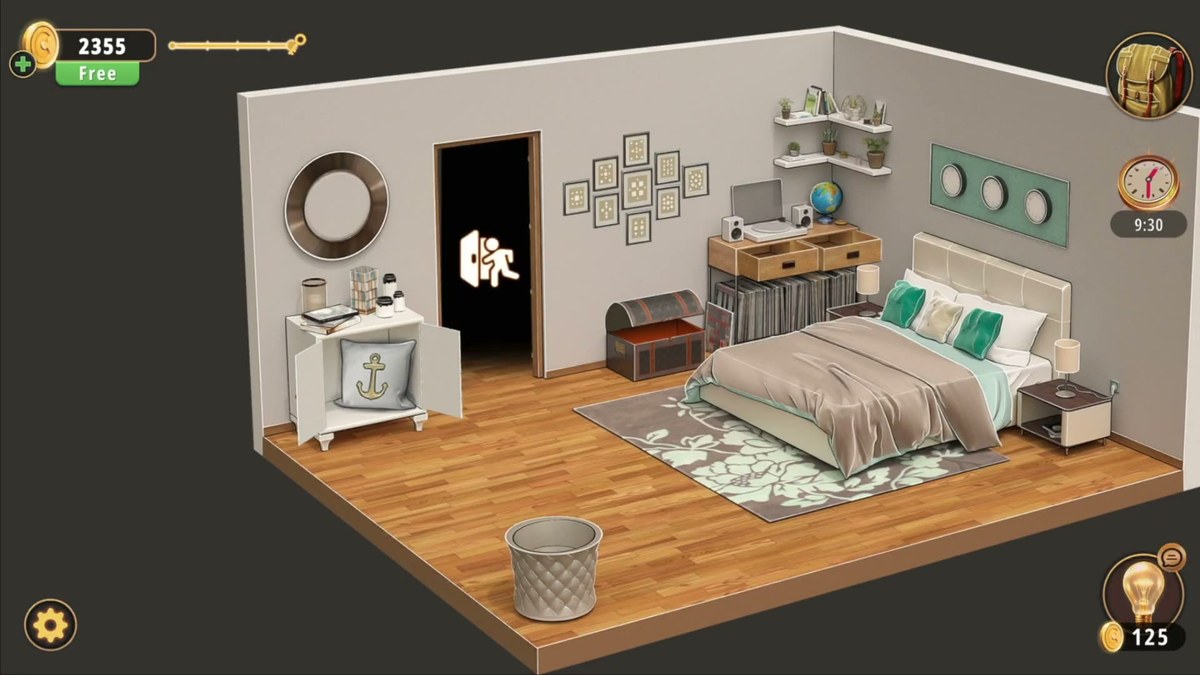
The camera opens on a cutaway of the whole room, which is the best look you get at it: a bed against the back wall with a beige headboard, a light duvet and a teal throw; two matching nightstands, each with a lamp; a large floral rug in grey and pale green; and on the left a long wooden console loaded with vinyl records, with a turntable, a speaker and a globe on top. Above that console a gallery of nine framed pictures hangs in a 3x3 grid, and beneath it, on the floor, sits a dark wooden chest with metal banding.
Against the left wall there is a white two-door cabinet; open it and there is a cushion with a gold anchor on it. The mirror above it is round and dark-framed. In the foreground, near the camera, a grey quilted hamper — that is the object with the padlock, and it is the one thing in the room that is easy to crop out of your view while you hunt for a code.
The level runs on four mechanisms: the padlock (two dials, answered by the lamp), the clock (a set-the-hands puzzle once the lights drop), the chest (five arrow slots, answered by the picture gallery, which yields the ID card), and the phone (a text password, answered by the card). The safe with the fruit keypad is the fifth and last lock, and it is the one we could not finish reading.
The map: what is where.
Every interactive object we could identify, and what it is for.
| Object | Where | What it does |
|---|---|---|
| Table lamp | Left nightstand, beside the bed | Two Roman numerals on the shade: IX and IV — the source of 94. |
| Grey quilted hamper | Foreground, near the camera | Carries the room's two-dial padlock; opens for a hammer. |
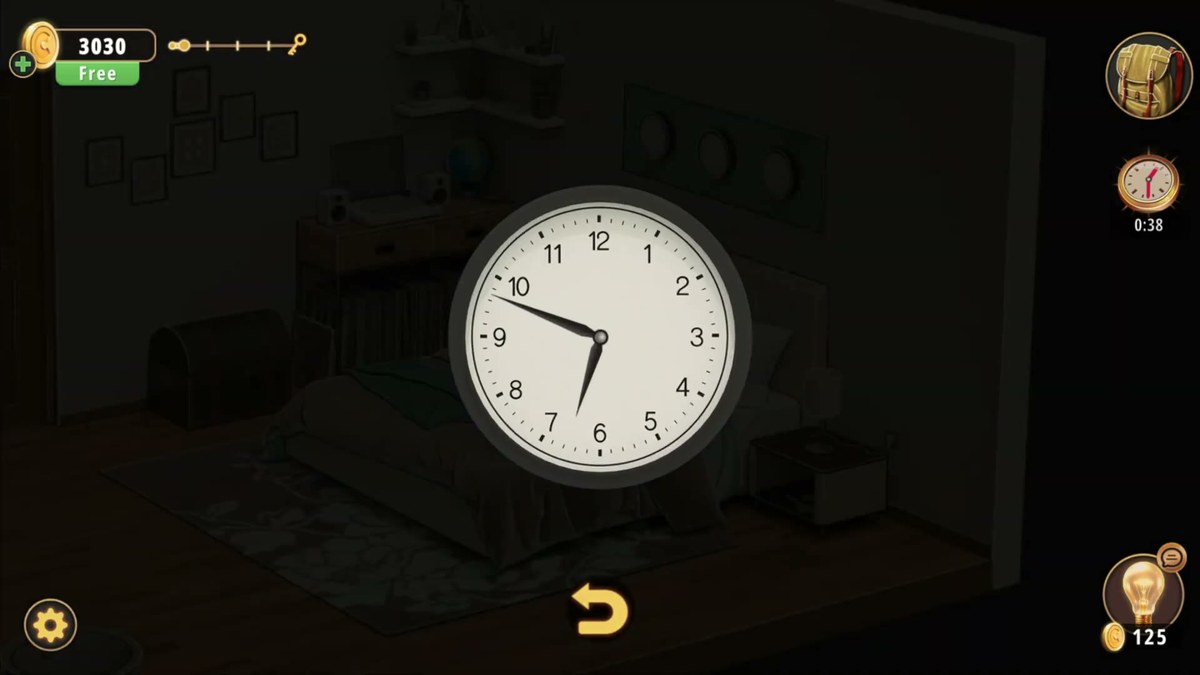
| Wall clock | Floats over the bed once the room dims | Set-the-hands puzzle at 0:36; the only lit object while the lights are down. |
| Console and vinyl shelf | Left wall, under the gallery | Turntable, speaker, globe and a stack of records; the phone lies here. |
| Globe | On top of the console | Lifts to show a pattern of markings; examined closely at 5:13 and 6:03. |
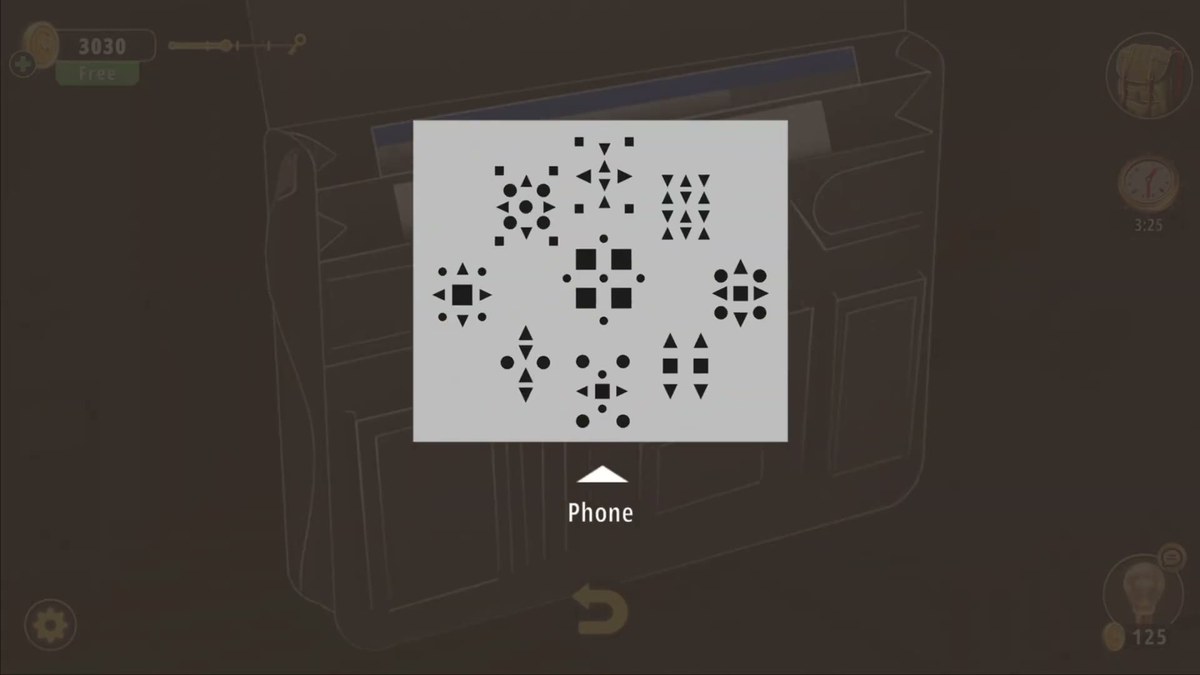
| Nine framed pictures | Left wall, 3x3 gallery above the chest | Each frame carries a small grid-and-arrow pattern — the clue for the chest's five slots. |
| Dark wooden chest | Floor, under the gallery | Five gold-framed arrow slots; opens to the DAVID ID card. |
| Smartphone | On the console | Red padlock screen and a text bar; takes DAVID. |
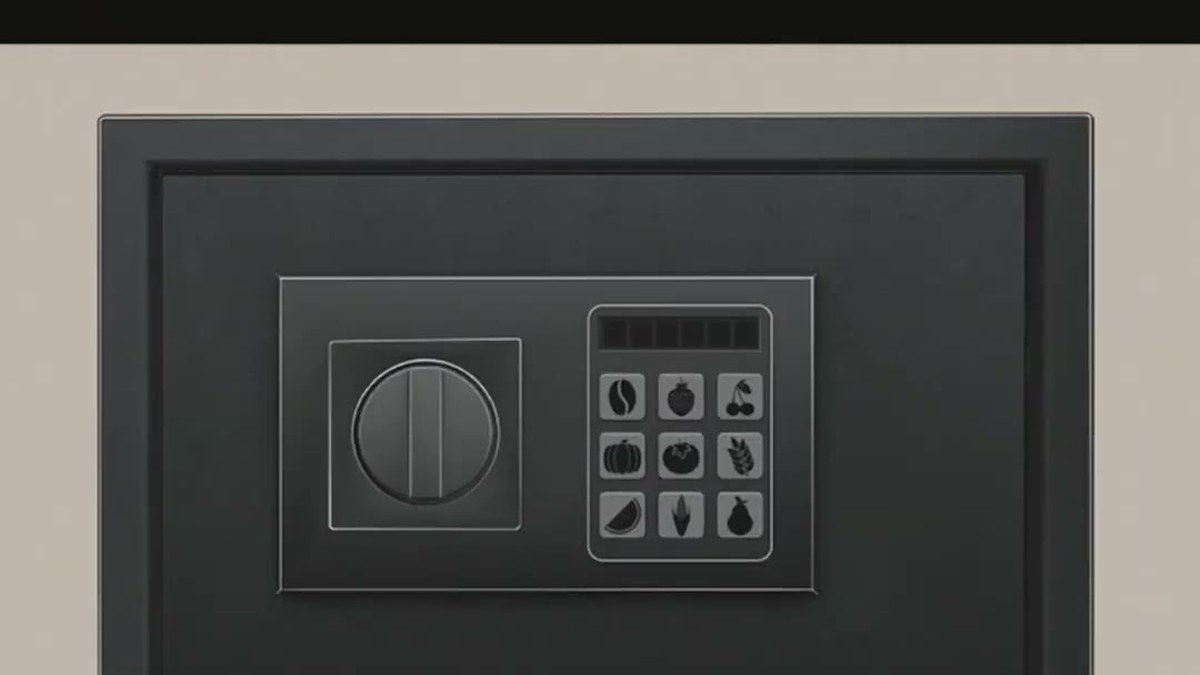
| Black safe | Right side of the room | Circular dial plus a 3x3 fruit-and-vegetable keypad and a six-slot display. |
| White two-door cabinet | Left wall, under the round mirror | Holds a cushion with a gold anchor on it. |
| Door | Left wall, beside the cabinet | Opens with the assembled Key, not a keypad — the exit. |
Step by step.
Where people get stuck.
The padlock looks like it has three dials. It has two. Each dial shows the digit above, the setting and the digit below in one strip, and on a phone screen the three bands read like three separate wheels. Count the columns, not the numbers: two columns, middle row, 9 and 4.
Nobody looks at the lamp. The IX and IV are small, they are on the fabric rather than the base, and the lamp is one of a matching pair, which makes it look like set dressing. If you are hunting a two-digit code with no idea where to start, the lamp is the answer and the shade is where it is written.
The hamper is cropped out of the frame. It sits in the foreground, below the camera's usual eye line, and the zoom into the padlock does not show you where it is in the room. If you have 94 and cannot find the lock, look down and forward, not at the furniture along the walls.
The clock gives no number. When the lights drop and the clock appears, players wait for a code to pop up. It never does — the clock is the lock. Move the hands on the clock face itself.
The chest's arrows seem random. They are not: the nine framed pictures above the chest each carry a small grid-and-arrow pattern, and the chest has five slots. Work the gallery first, in reading order, and treat the frames as a sequence rather than as decoration.
The phone rejects every number you try. It is not a numeric lock and it is not asking for the ID number on the card. It wants the name printed at the top of the card, five letters, typed into the white bar and confirmed with Done.
Where Guest Bedroom sits in Chapter 3.
Chapter 3 is Murder Dressed in White, and Guest Bedroom is room 6 of 15: after Workshop (5) and before Master Bathroom (7). It is the chapter's first bedroom and its first level built around a piece of furniture you have to walk to rather than a wall you can look at — the chest, the console and the hamper are all over the floor, and the camera makes you cross the room to use them.
Its lock design is also a step up. Workshop and Dining Room both hand you a code and a keypad. Guest Bedroom splits the work: 94 comes from two Roman numerals on a lamp, which you have to convert, and DAVID comes from a card you have to find before the phone will even accept input. That two-stage chain — find the card, then use the card — is the pattern Master Bathroom reuses with its three numbered tiles.
- 1 Dining Room guide
- 2 Living Room guide
- 3 Study Room guide
- 4 Guest Toilet guide
- 5 Workshop guide
- 6 Guest Bedroom you are here
- 7 Master Bathroom guide
- 8 Kids Playroom guide
- 9 Backyard guide
- 10 Garden guide
- 11 Kitchen guide
- 12 Driveway guide
- 13 Kids Bedroom 1 guide
- 14 Storage Room guide
- 15 Garage guide
- 16 Attic guide
- 17 Terrace guide
- 18 Basement guide
- 19 Garden Shed guide
- 20 Kids Bedroom 2 guide
- 21 Hobby Room guide
- 22 Master Bedroom guide
- 23 Entertainment Room guide
- 24 Hallway guide
Previous room: Chapter 3 Level 5 — Workshop
Next room: Chapter 3 Level 7 — Master Bathroom
Frequently asked questions.
What is the code in Rooms & Exits Chapter 3 Level 6 Guest Bedroom?
The room's numeric lock is the two-dial padlock on the grey quilted hamper in the foreground, and it takes 94. The other lock that needs a phrase rather than a number is the phone, which wants the name on the ID card found in the chest: DAVID. The 94 was read twice from the dial's centre row; the DAVID comes from the card itself, legible on screen at 1:50.
Where does 94 come from?
From the table lamp beside the bed. Its shade carries two Roman numerals, IX and IV, printed on the fabric at 0:06. IX is 9 and IV is 4, and the padlock has exactly two dials — left and right — so the pair reads straight across as 9 then 4. In the recording the left dial sits on 9 and the right dial is turned down to 4, and the hamper opens.
How many dials does the hamper padlock have?
Two, not three. Each dial shows three digits at a time in a vertical strip — the digit above, the setting in the middle and the digit below — which is why a single frame can look like it has four or six numbers on it. Only the middle row counts. At the moment the hamper opens the middle row reads 9 on the left and 4 on the right.
Where do I type DAVID?
On the smartphone that lies on the room's console. Tap it and the screen shows a red padlock with a keyhole, a row of placeholder dashes underneath, and the game's white text bar at the bottom with Done and Cancel. Type the name and confirm: in the recording the lock turns green and the screen fills with masked characters at 2:15.
Where is the ID card with the name on it?
In the dark wooden chest that sits on the floor under the nine framed pictures. The chest is fastened by a lock with five gold-framed slots, each holding a rotatable arrow, and it opens at 1:50 to reveal a white card with a teal wave design. The card carries the name DAVID in large black capitals, an ID number, a join date of 07/21 and a valid-thru date of 09/22, plus a QR code.
What is the clock that appears in the middle of the room?
At 0:36 the lights in the room drop and a large white analogue clock floats over the bed, its hands and numerals picked out in black. It is a set-the-hands puzzle, not a code you type: the room goes dark, the clock becomes the only lit object, and the player moves the hands. We could not read a reliable target time off the footage — different frames of the same dial give different readings — so this page does not print a time for it.
What is the lock with five arrows on the chest?
A row of five square slots under gold frames, each holding an arrow you rotate. It is the chest's only lock and it guards the ID card. The clue for the arrow directions is the 3x3 gallery of nine framed pictures on the wall directly above the chest — each frame holds a small grid-and-arrow pattern. We could see the frames and the slots clearly but not the exact arrow order the game accepts, so no order is printed here.
What is the safe with fruit on the keypad?
A black safe on the right-hand side of the room, at 3:24, with a circular dial on the door and a 3x3 keypad of fruit and vegetable symbols below it. Above the keypad is a display of six slots, so the code is a sequence of six of those symbols, not a number. The recording works through it around the five-minute mark. We could not read the accepted six-symbol order, so this page leaves it unverified rather than inventing one.
What do the two key parts do?
They combine. Near the end of the run the inventory holds two separate Key part items, and using one on the other produces a single Key. That key is what opens the door on the left wall — the level does not finish on a keypad. At 6:24 the door stands open with the white exit icon in the doorway, which is the last gameplay frame of the video.
Is Guest Bedroom the sixth room of Chapter 3?
Yes. Chapter 3 is Murder Dressed in White, and Guest Bedroom is room 6 of 15: after Workshop (5) and before Master Bathroom (7). It is a single-room level with no corridor: a bed against the back wall, a long console of vinyl records and a turntable on the left, a globe and speaker on top, a chest under a gallery of nine frames, and a white two-door cabinet holding a cushion with a gold anchor on it.
What this page could not verify.
1. The clock's target time. The puzzle is real and the clock is the mechanism, but the dial is read at an angle and different frames of the same second give different readings. No time is printed here. If you solve it, the answer is worth writing down: it is one of the few things in this room that the recording does not give away.
2. The chest's five-arrow order. We can see the five slots and the nine framed pictures clearly, and the chest demonstrably opens at 1:50. The order the arrows are set in changes inside a single second, so any sequence printed here would be a guess dressed up as a fact.
3. The safe's six-symbol code. The fruit-and-vegetable keypad and the six-slot display are both legible at 3:24, but the six symbols the safe accepts are never held long enough to read, and the safe's interior is not shown in a clean frame. This is the one lock in Guest Bedroom we cannot give a code for.
4. DAVID as the literal password string. The card is unambiguous — the name is printed in large capitals at 1:50 — and the phone accepts a masked five-character password at 2:15, which matches the name exactly. The characters themselves are masked on screen, so this is an identification of the card's name rather than a read of the typed string. If the phone refuses DAVID, try the name in lower case before assuming the page is wrong.