 GridPaw
 Shikaku
 Akari
 Kakuro
 Nonogram
 Nurikabe
 Pictomino
 KenKen
 Binary
 Star Battle
 Hashi
 Slitherlink
 Murder Sudoku
 Meowdoku
 Crazy Cleanup
Rooms & Exits Chapter 3 Level 10 Walkthrough: Garden
Garden is room 10 of Chapter 3, Murder Dressed in White, and it is the chapter's daytime room. After the dusk of Backyard and the indoor clutter of Kids Playroom, this one is bright and open: a lawn, a raised deck, a shed, and a stone wall covered in pink flowering vine. It is also the first Chapter 3 room where the main lock is a letter lock rather than a keypad, and the answer is not a word — it is letters sorted by the shape of their letterforms.
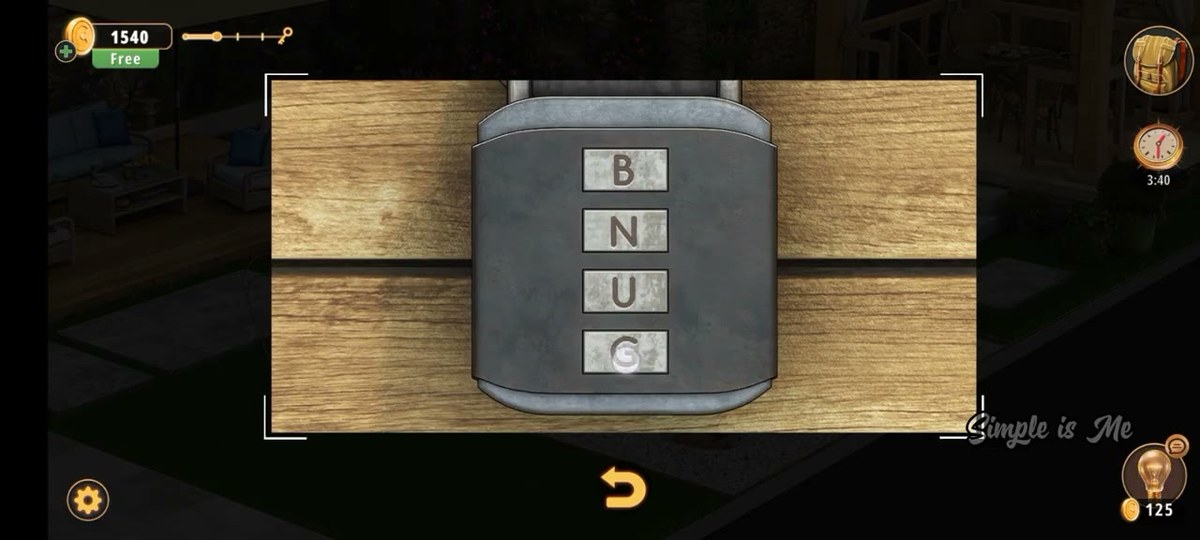
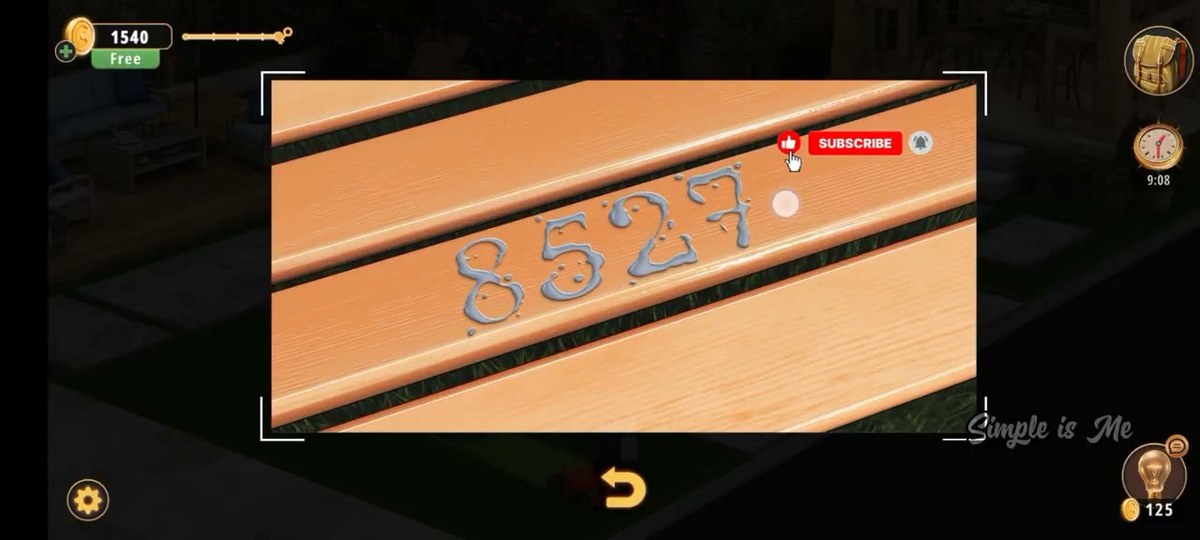
Garden is room 10 of 15 in Chapter 3 and it asks for two codes. The four-dial letter lock takes B · N · U · G, top to bottom, and it is not a word — the clue is the pattern tool's shape order. The shed padlock takes 8 5 2 7, painted on the bench slats.
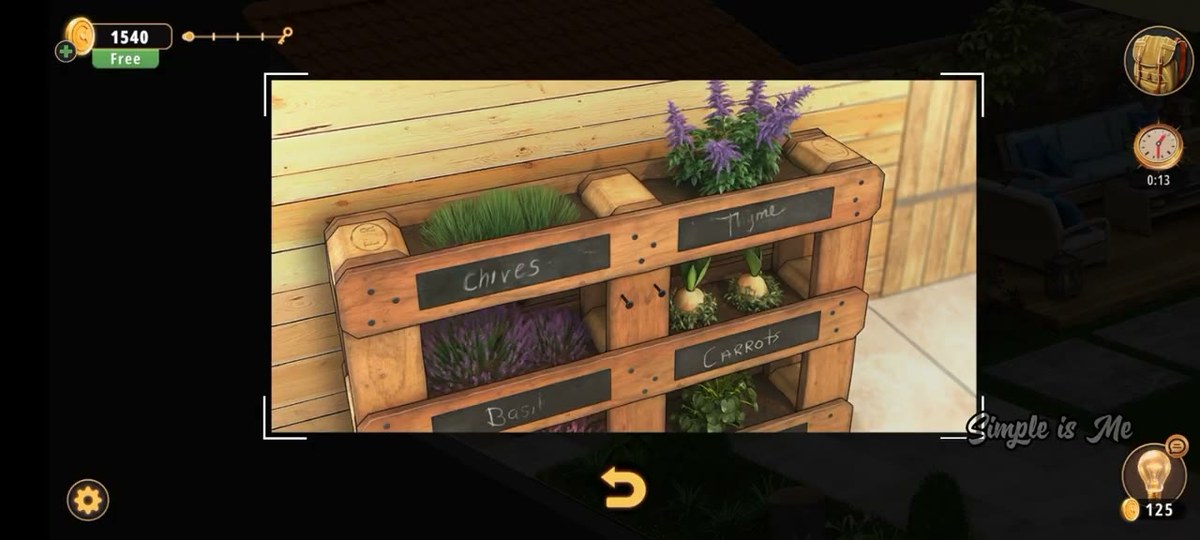
- Read the three-tier planter by the shed: Chives and Thyme on top, Basil and Carrots in the middle. Take the Key at 0:10 and the Trowel at 0:32.
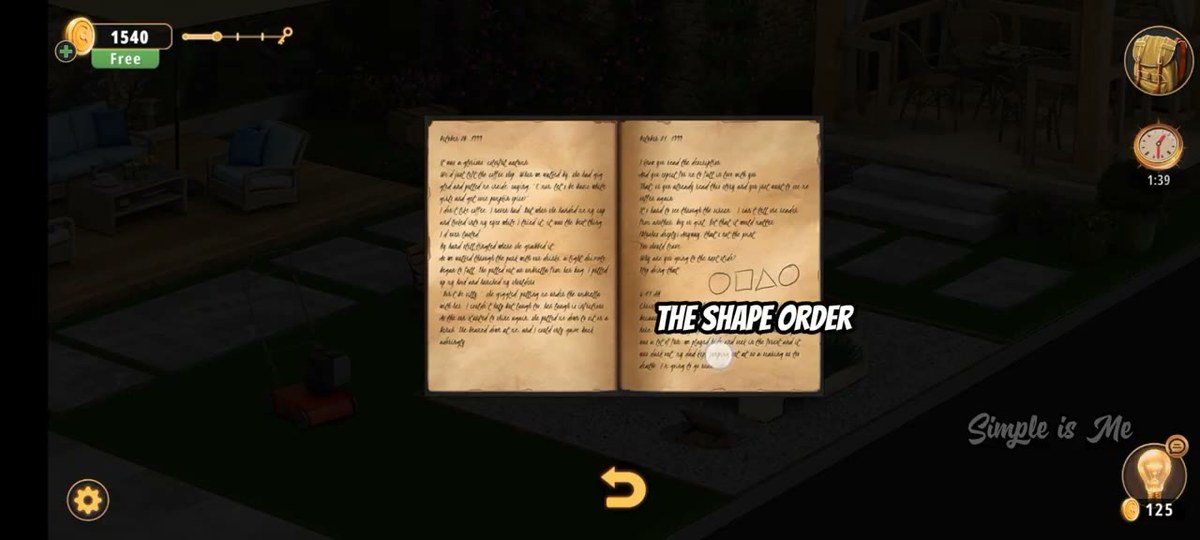
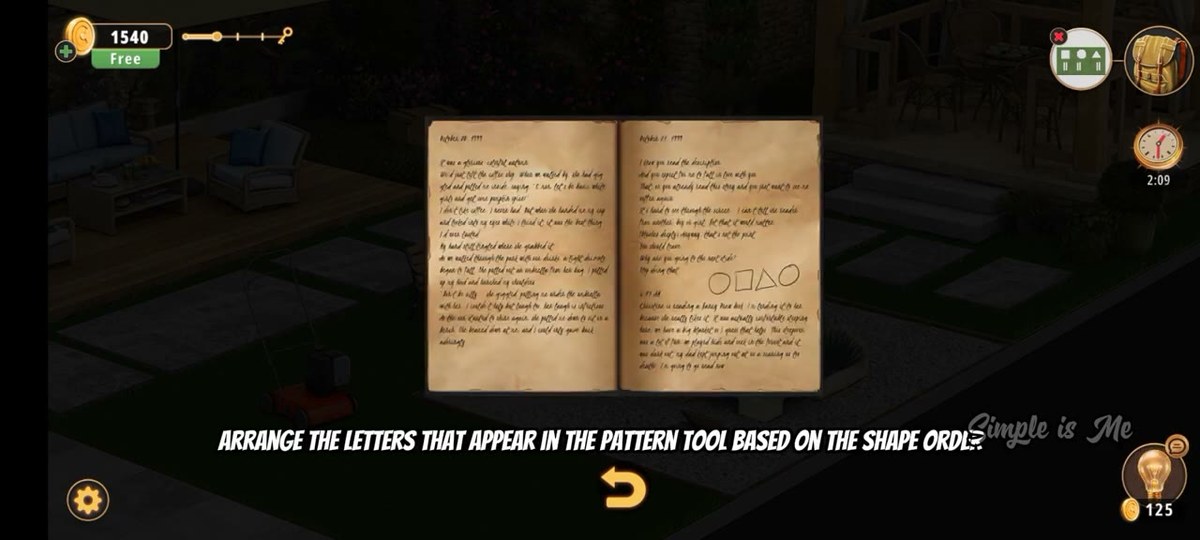
- Open the dated journal — its header reads 1911 and one bold line on it reads THE SHAPE ORDER.
- Open the pattern tool. The instruction reads ARRANGE THE LETTERS THAT APPEAR IN THE PATTERN TOOL BASED ON THE SHAPE ORDER.
- Set the four vertical dials to B, N, U, G. The fourth dial turns through W and K before it lands on G, so do not stop on a letter that merely looks plausible.
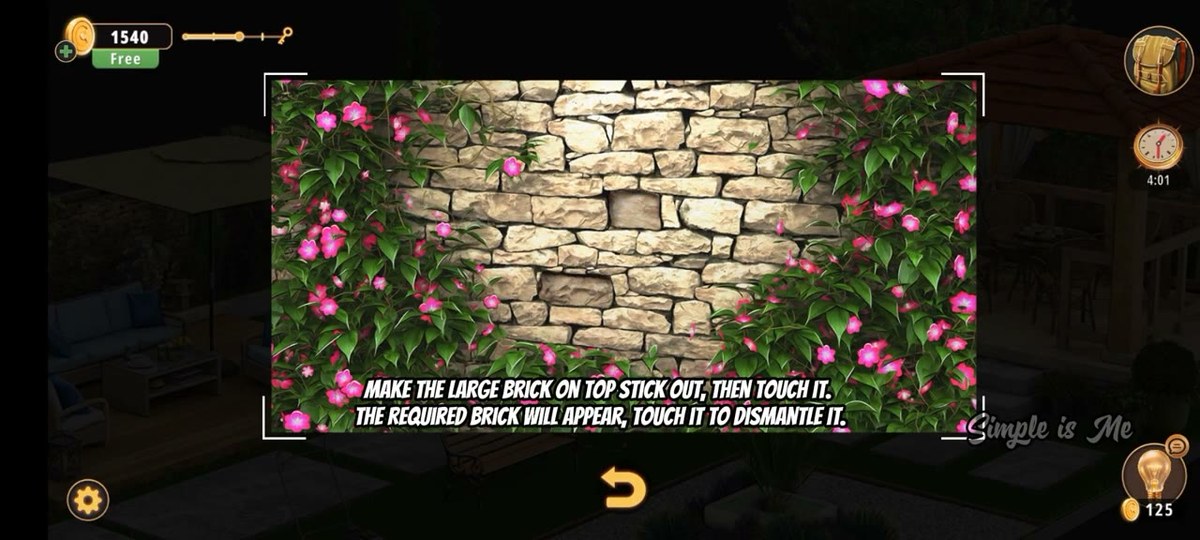
- Work the brick wall: MAKE THE LARGE BRICK ON TOP STICK OUT, THEN TOUCH IT — the wall then shows the brick it wants, and touching that one dismantles it.
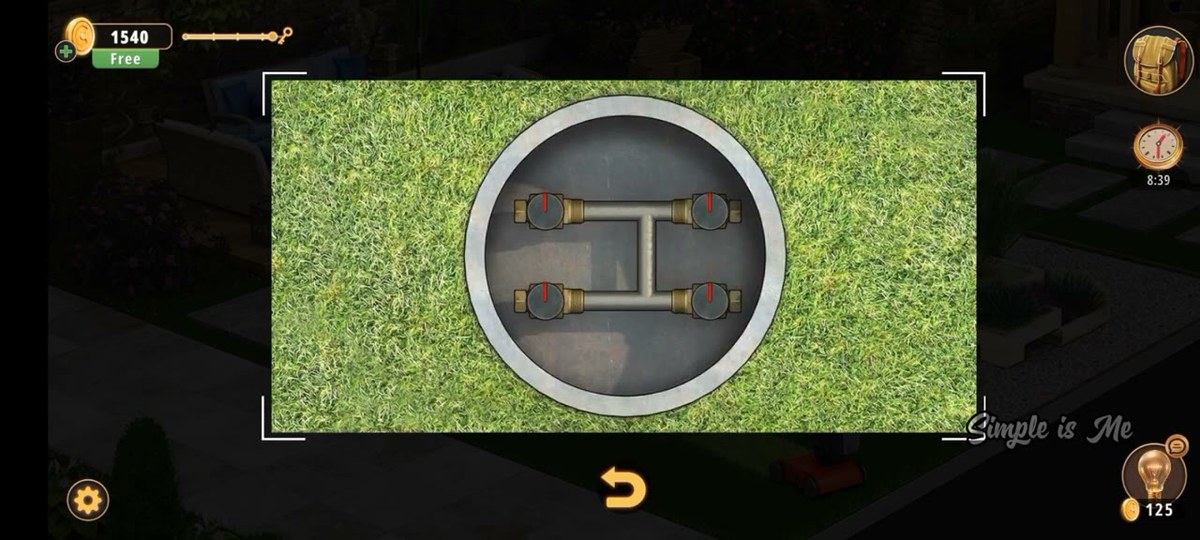
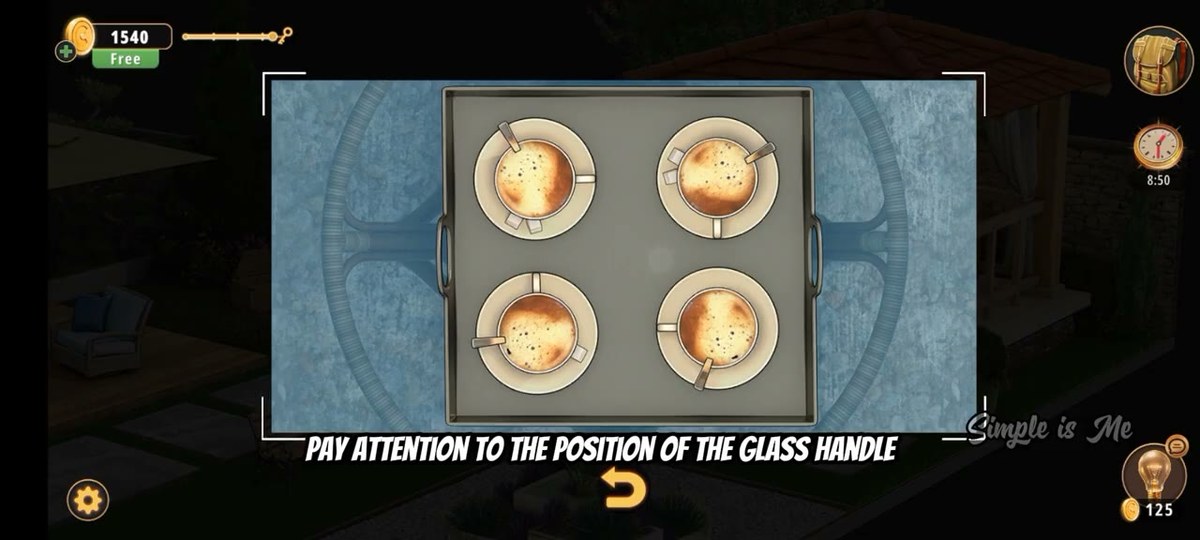
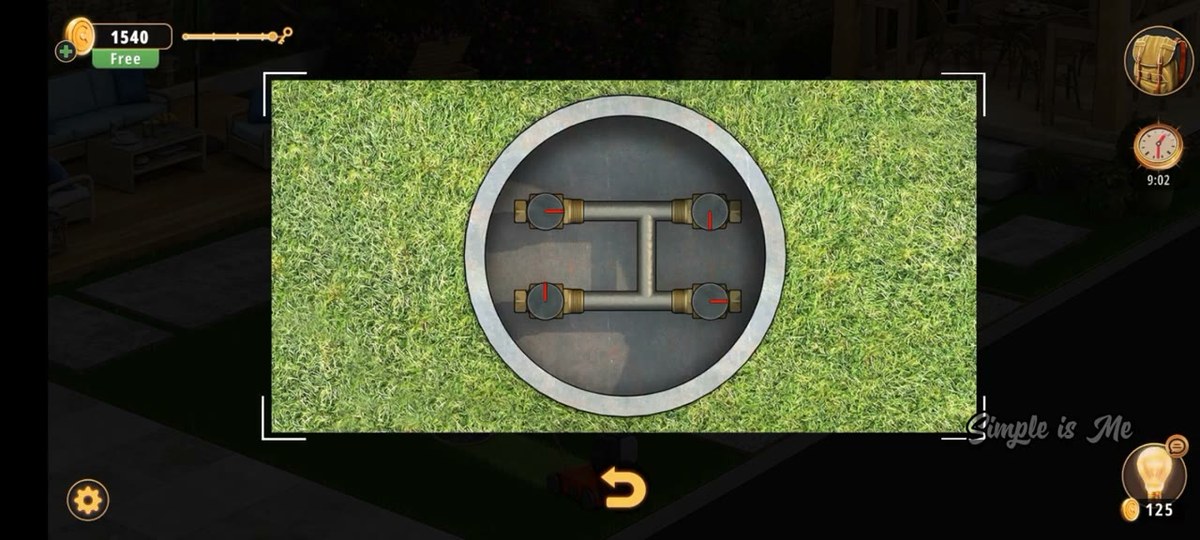
- Clear the round cover in the lawn by running its maze, then turn the four red-capped valves under it to match the four coffee-cup handles on the tray.
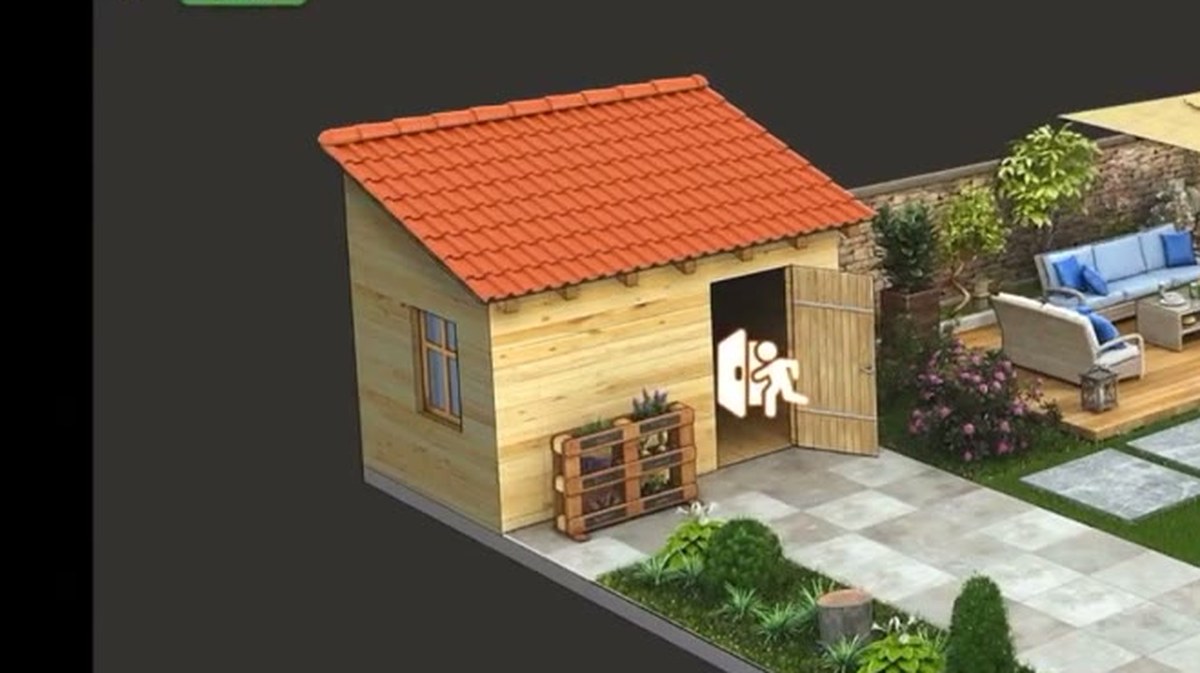
- Take 8 5 2 7 off the bench slats, set it on the shed's four-wheel padlock, and walk through the shed's exit icon.

The run used for every frame on this page.
What this level actually is..
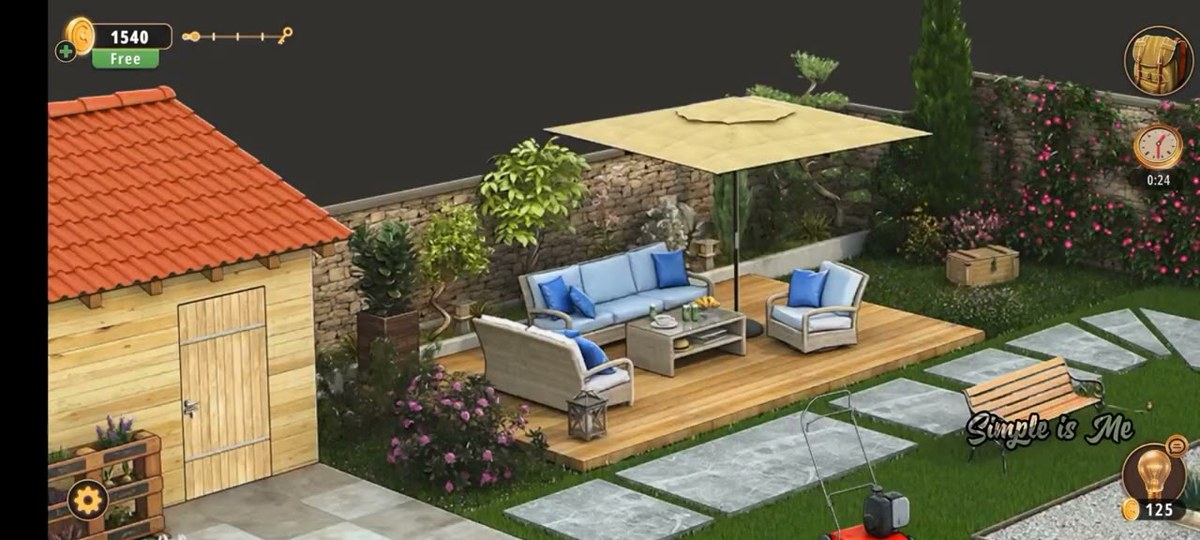
A working garden on a bright day. The lawn is closely mown and cut across by large pale stepping stones that run from the lower corner up to a raised wooden deck. On the deck sits a light wicker sofa set with pale blue cushions and darker blue throw pillows, arranged around a low coffee table under a square beige umbrella. A metal and glass lantern sits at the edge of the decking.
To the left stands a small garden shed, timber-planked with a terracotta-tiled gable and a plain door with a silver handle. Beside it is the most interactive object in the room: a three-tier planter built from stacked pallets, each tier carrying a black chalkboard tag with a plant name. A square planter with a large-leaved plant stands next to it. Along the back runs a low dry-stone wall, heavily covered with a vine of small bright pink flowers — this is the wall the brick puzzle works on. A cypress, a leafy tree and a gnarled smaller tree break up the skyline; a wooden bench with dark metal legs sits on the lawn, and a small wooden chest rests by the back wall.
Design-wise this room is looser than its neighbours. Two codes carry it — the four-dial letter device on the ledge and the four-wheel padlock on the shed — and between them sits a lawn chain: the mower, the mazed cover, the four-valve manifold, and the tray of cups that unlocks it. That makes it faster than Backyard but easier to stall in, because if you do not read the pattern-tool instruction carefully you will keep trying to spell a word on a lock that does not want one, and if you never look down at the bench you will reach the shed with no code at all.
The map: what is where..
Every interactive object we could place, and what it is for.
| Object | Where | What it does |
|---|---|---|
| Three-tier pallet planter | Left, beside the shed | Chalkboard tags: Chives, Thyme (top), Basil, Carrots (middle). Identifies the plants. |
| Garden shed | Far left | Timber, terracotta gable, single door with a silver handle. |
| Raised deck | Centre-left | Sofa set with blue cushions, coffee table, beige umbrella, lantern. |
| Pattern tool | Opened from the bag / a panel | Hexagonal honeycomb pattern with the instruction ARRANGE THE LETTERS THAT APPEAR IN THE PATTERN TOOL BASED ON THE SHAPE ORDER. |
| Four-dial letter lock | On a wooden ledge | Vertical dials. Answer B N U G. |
| Dry-stone wall | Back boundary, under pink vine | Brick puzzle: MAKE THE LARGE BRICK ON TOP STICK OUT, THEN TOUCH IT. |
| Dated journal | Opened from the patio side | Two-page printed sheet with 1911 in the header and a bold line reading THE SHAPE ORDER; the room's document clue. |
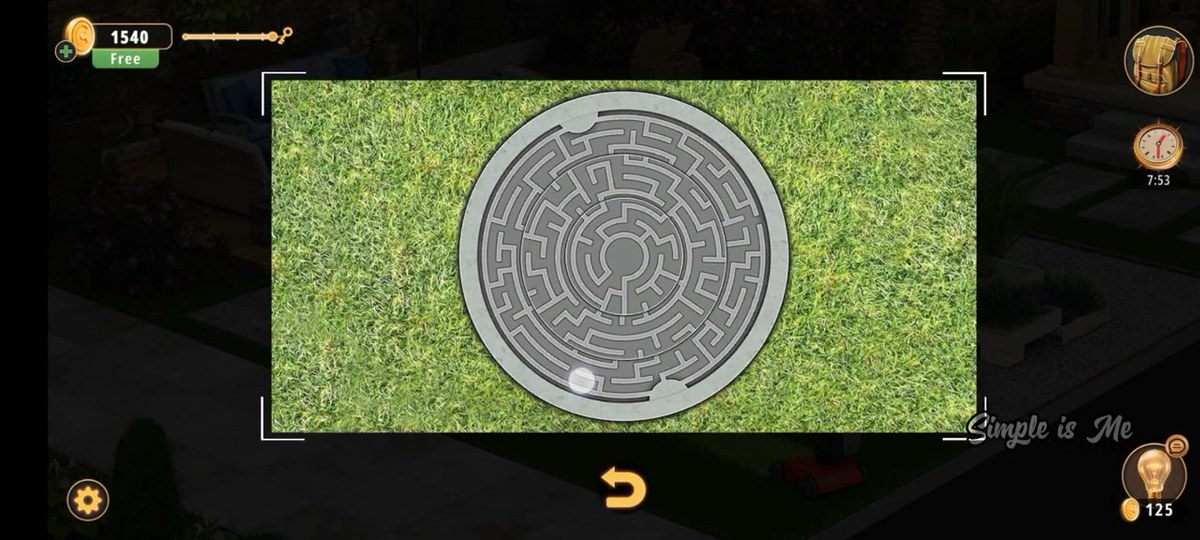
| Round lawn cover | Centre of the lawn, set flush | Circular plate with a maze in concentric bands and a white orb; trace the orb to clear it. |
| Four-valve manifold | In the pit under the cover | H-shaped pipe run with four red handwheels; set them from the cup handles. |
| Tray of four cups | Outdoor table, shown 3:10 | The clue PAY ATTENTION TO THE POSITION OF THE GLASS HANDLE — four handles, four valves. |
| Key | Carried, from 0:10 | The room's first pickup; never shown being used. |
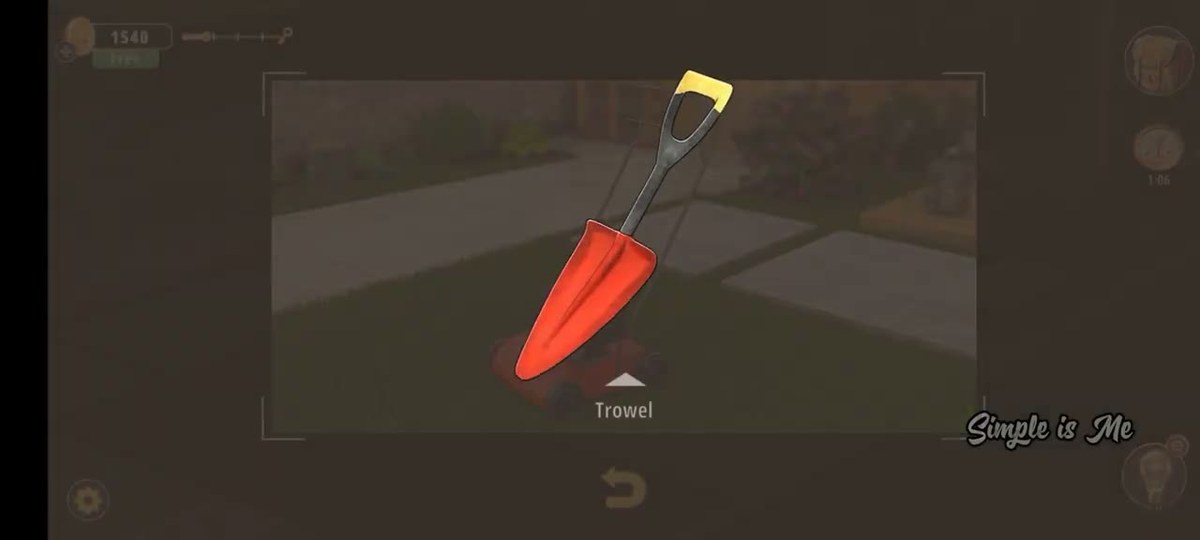
| Trowel | Carried, from 0:32 | Digging tool for the beds and planter tiers. |
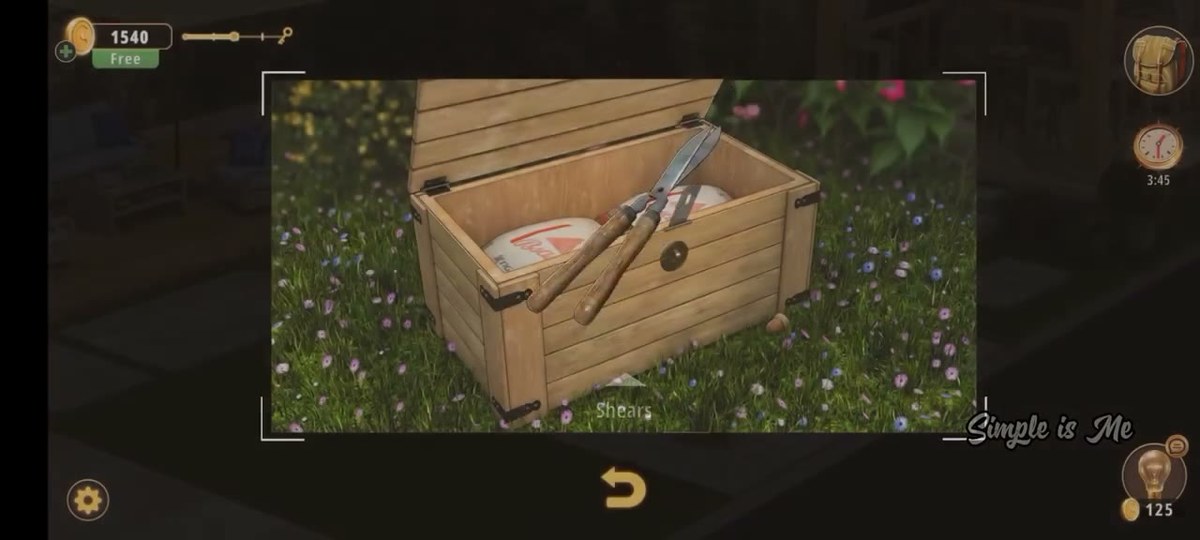
| Shears | Carried, around 1:52 | Cutting tool; the footage does not show the cut. |
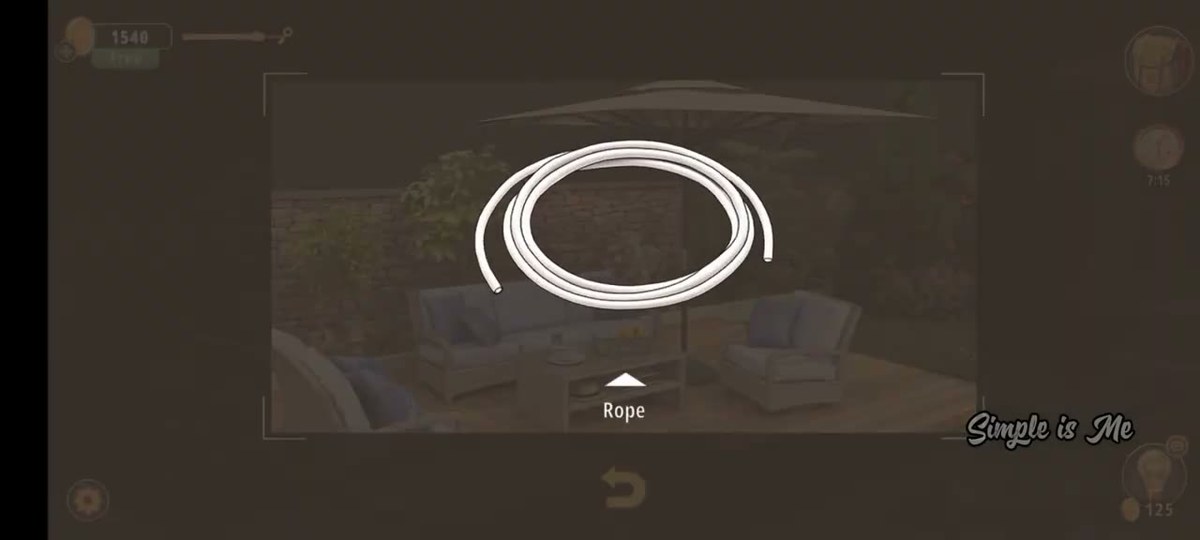
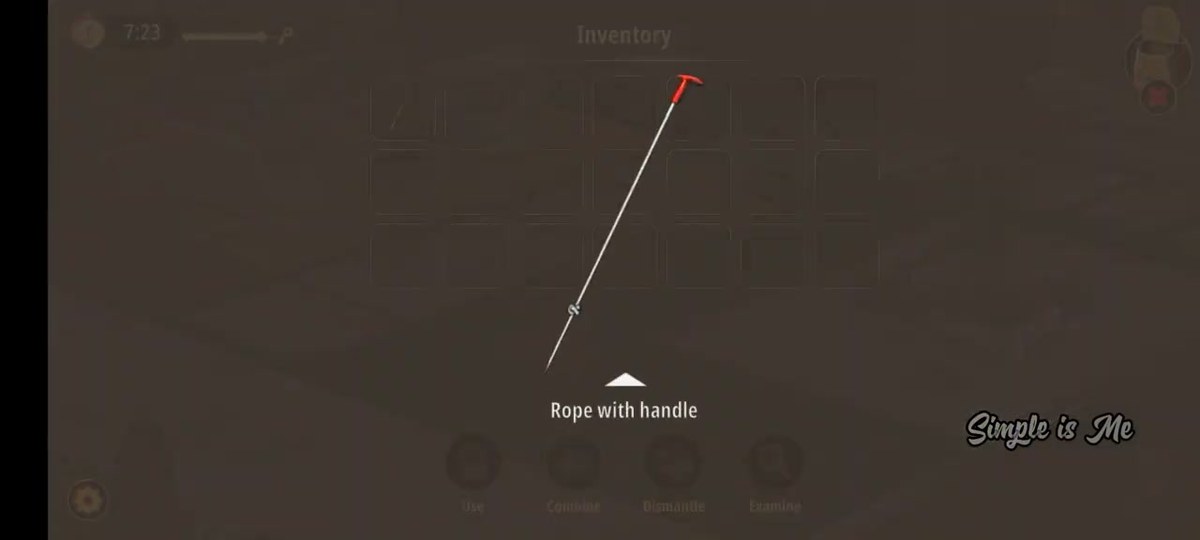
| Rope | Patio side, 2:23 | Combined with the Handle at 2:29 into Rope with handle; never used on screen. |
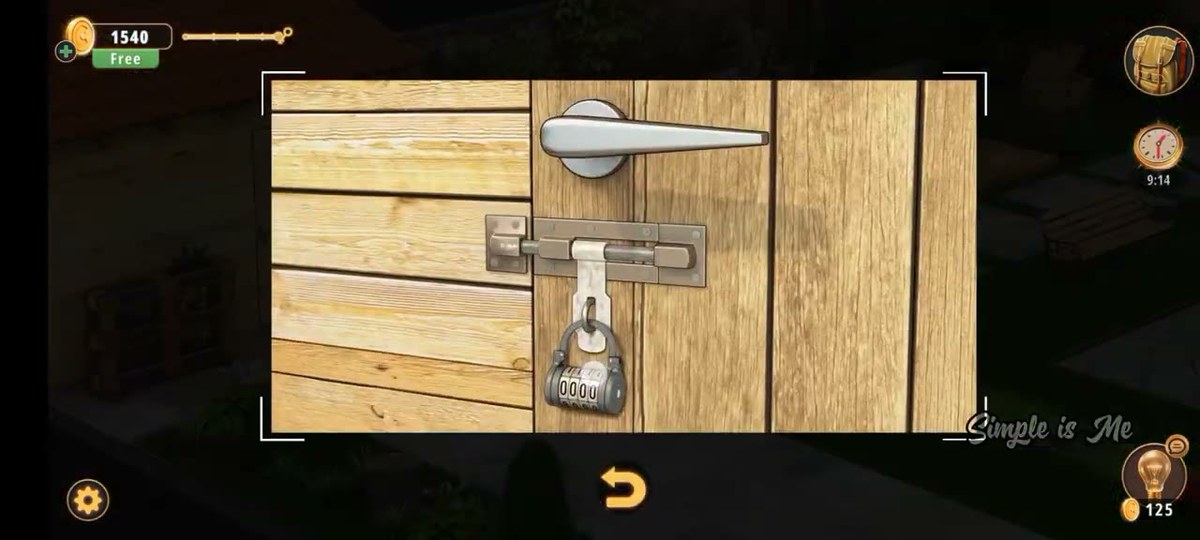
| Shed padlock | Shed door, with a sliding bolt | Four wheels, starts at 0 0 0 0, takes 8 5 2 7. Opening it is the room's exit route. |
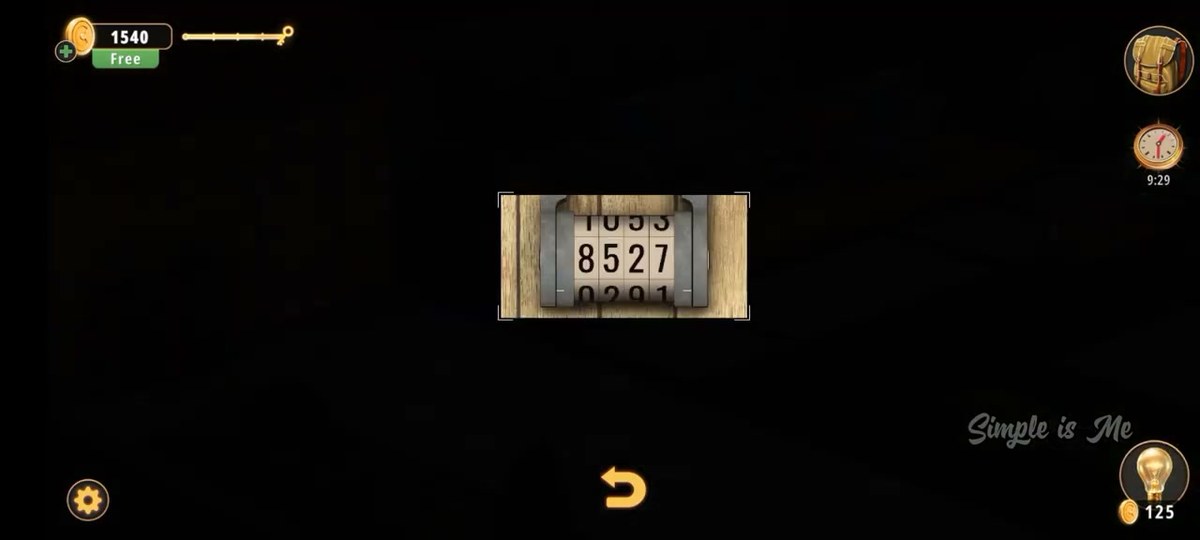
| Wooden bench | Lawn, by the stepping stones | Its seat slats carry 8 5 2 7 in pale grey-blue paint. |
| Wooden chest | Back wall, on the grass | Small and unlocked-looking; not opened in our footage. |
Step by step..
The order below follows the recording. Timestamps are video time; the links jump to the matching second.
Where people get stuck..
The letter lock will not accept a word. It is not supposed to. The instruction says shape order, and the answer is B N U G. Every instinct you have about four-letter locks will fight this; ignore it.
The fourth dial keeps slipping past the right letter. In the recording it goes W, K, U and then G. The dials are small and the letters are close together, so turn slowly and watch the window rather than the wheel.
There is a second code, and it is not on the shed. The padlock is the last thing people try and the first thing they give up on, because nothing near it carries digits. The number is painted along the seat of the bench on the lawn — walk the lawn before you walk to the door.
The brick will not come out. Two touches, in order: first the brick you make stick out, then the one the wall offers you. Touching the offered brick first does nothing, and pushing a different brick proud gives you a different offer.
The herb tags look decorative. They are the only place the plant names exist in the room, and they are worth reading once — Chives and Thyme on top, Basil and Carrots in the middle. This run never asks you to name a plant, so treat them as the room's labelling rather than as a code you have to solve.
Where Garden sits in Chapter 3..
Chapter 3 is Murder Dressed in White, and Garden is room 10 of 15. It follows Backyard and comes two thirds of the way through the chapter. The run of three rooms — Kids Playroom, Backyard, Garden — is where Chapter 3 stops being a series of interiors and starts using larger, more open spaces, and the puzzle design follows: fewer enforced sequences, more scenery that turns out to be interactive, and codes that sit on the scenery rather than on a panel you walk up to.
Carry one habit out of Garden: read the instruction text before touching anything. This room punishes assumptions harder than the two before it, and the whole letter-lock dead end exists because the instruction is easy to skim.
- 1 Dining Room guide
- 2 Living Room guide
- 3 Study Room guide
- 4 Guest Toilet guide
- 5 Workshop guide
- 6 Guest Bedroom guide
- 7 Master Bathroom guide
- 8 Kids Playroom guide
- 9 Backyard guide
- 10 Garden you are here
- 11 Kitchen guide
- 12 Driveway guide
- 13 Kids Bedroom 1 guide
- 14 Storage Room guide
- 15 Garage guide
- 16 Attic guide
- 17 Terrace guide
- 18 Basement guide
- 19 Garden Shed guide
- 20 Kids Bedroom 2 guide
- 21 Hobby Room guide
- 22 Master Bedroom guide
- 23 Entertainment Room guide
- 24 Hallway guide
Previous room: Chapter 3 Level 9 — Backyard
Next room: Chapter 3 Level 11
Frequently asked questions..
What is the code in Rooms & Exits Chapter 3 Level 10 Garden?
The room's letter lock is a vertical four-dial device and the answer is B · N · U · G, read top to bottom. The dials settle one at a time, and the fourth was still turning in our frames — it passes through W and K before landing on G. We read the finished state twice: once on the full frame and once on a 3x crop of the lock.
Why B-N-U-G and not a word?
Because the clue is not a word puzzle. The instruction reads ARRANGE THE LETTERS THAT APPEAR IN THE PATTERN TOOL BASED ON THE SHAPE ORDER, so the answer is letters sorted by the shape of the letterforms in the pattern the tool produces, not letters that spell something. If you are hunting for an English word, you will not find one — the lock accepts the shape order.
What is the pattern tool?
A dark hexagonal honeycomb pattern that fills the screen when you open the puzzle, with the instruction laid across the bottom. The letters that come out of it are the ones you lay into the four dials. It is the room's equivalent of a stencil: the pattern is not a clue you read, it is the thing that defines which order the letters belong in.
What are the herbs in the planter for?
They label the room's gardening chain. The three-tier pallet planter next to the shed carries chalkboard tags reading Chives and Thyme on the top tier and Basil and Carrots on the middle one. The tags are the only place those plant names exist in the room, so read them once — this run never asks you to name a plant, and the plants themselves are not a code.
What does the trowel do?
It is the digging tool. It comes into the bag at 0:32, on the same panel as the Key. Neither is a code, and this run never shows either of them being used — no soil is turned, no keyhole is turned. Take them when they appear; treat them as pickups rather than as keys to a specific lock.
What is the 1911 notice?
An open journal, dated 1911 in its header, that fills the screen for about five seconds at 0:46. One bold line on the same screen is legible — THE SHAPE ORDER — which is the phrase the pattern tool later expands into a full instruction. The body paragraph around it is set too small to read reliably at 720p and is not transcribed on this page.
What is the brick wall puzzle?
The instruction is explicit: MAKE THE LARGE BRICK ON TOP STICK OUT, THEN TOUCH IT. THE REQUIRED BRICK WILL APPEAR, TOUCH IT TO DISMANTLE IT. A dry-stone wall under a flowering vine is the play area. You push one brick proud of the face, touch it, and the wall presents the brick it actually wants; touching that one dismantles it. There are no digits involved — it is a dexterity and observation puzzle, not a code.
Where do the shears and the rope come in?
Late, and the rope is the one that pays off. Shears appear around 1:52. The Rope is picked up at 2:23 on the patio side of the room, and by 2:27 the bag holds two separate items — Rope and Handle; Combine at 2:29 turns the pair into a single item labelled Rope with handle. That is the last thing the inventory does in this run: it is never reopened, so nothing in the recording shows the rope, the shears or the key being used.
What is the shed padlock code in Rooms & Exits Chapter 3 Level 10?
8 5 2 7. The digits are painted across the slats of the wooden bench on the lawn, read at 3:24, and the four-wheel padlock hanging on the shed door takes them at 3:37. The lock starts at 0 0 0 0 when the camera first reaches it at 3:28. We read the finished state twice — the full frame and a 2x crop of the same frame — and both gave 8 5 2 7.
What is the round cover in the lawn?
A circular plate set flush into the grass, ringed by a raised lip and cut with a maze in concentric bands; a small white orb runs in the channels. Tracing the orb through the maze is what clears the plate — at 3:04 it is gone and the pit below is open. Underneath is an H-shaped pipe manifold with four red-capped handwheels, and the clue for those is the tray of four coffee cups shown with the line PAY ATTENTION TO THE POSITION OF THE GLASS HANDLE.
How long is Garden and how much of it does this page cover?
The upload runs 3:46 and decodes end to end — all 226 seconds, sampled at one frame per second. Everything from the opening wide shot to the shed's exit icon at 3:41 is read from that file, and the run ends on a Thanks for watching card from 3:43 rather than on a score screen.
Where does Garden sit in Chapter 3?
Chapter 3 is Murder Dressed in White and Garden is room 10 of 15. It follows Backyard and precedes the next interior. This recording opens on a loading screen and a keyhole vignette rather than a title card, so the room name comes from the chapter list, not from the video. It is the chapter's daytime outdoor room, in contrast to Backyard, which is played at dusk.
Do the puzzles in Garden depend on each other?
They chain, but loosely. The first half is reading: the herb tags, the 1911 journal, the pattern tool and the letter lock. The second half is the lawn: the round cover and its maze, the four-valve manifold under it set from the tray of four cups, and the number painted on the bench that opens the shed padlock. Skip the bench and the shed will not open, no matter how much of the rest you have finished.
What this page could not verify..
2. What the Key and the Shears open. Both enter the bag (0:10 and 1:52) and neither is seen being used. The Rope is now covered — it becomes Rope with handle at 2:29 — but the video never shows the combined item being used either. All three are listed as collected, not as steps with targets.
3. The four cup handles, valve by valve. The line PAY ATTENTION TO THE POSITION OF THE GLASS HANDLE is read at full confidence, and the four valves are visibly turned between 3:14 and 3:21. But at 720p each cup handle is only a few pixels wide and two crops of the same tray gave different readings, so this page does not print a per-valve setting. Copy the handles from your own copy of the room; the count (four cups, four caps) is the part we are sure of.
4. What the valve manifold unlocks. The caps turn, the camera pulls away, and the garden looks the same as it did before — no gate opens, no object appears, nothing new is on the lawn. The manifold is described here as a solved lock with no visible consequence, because that is all the run shows.
5. Whether the brick wall was actually dismantled. The instruction is on screen from 2:01 to 2:10 and the camera studies the wall, but no brick comes away in the frames and the run never returns to that wall. The wording is quoted because it is printed; the solution is not shown on this page because it is not shown in the video.
6. Any completion panel or reward. The recording ends on a Thanks for watching card from 3:43. The coin counter reads 1,540 in every frame we read, from 0:03 to 3:42, and no star, score or payout screen appears, so there is nothing to report for the level's reward.