 GridPaw
 Shikaku
 Akari
 Kakuro
 Nonogram
 Nurikabe
 Pictomino
 KenKen
 Binary
 Star Battle
 Hashi
 Slitherlink
 Murder Sudoku
 Meowdoku
 Crazy Cleanup
Rooms & Exits Chapter 3 Level 4 Walkthrough: Guest Toilet
Guest Toilet is room 4 of Chapter 3, Murder Dressed in White, and it is the smallest room in the chapter so far: one narrow bathroom with a toilet on the back wall, a vanity and mirror on the right, a shelf of ornaments above the toilet, and a door on the left. There is exactly one lock in it — a keypad safe hidden inside the vanity cabinet — plus a key that opens the exit door. This page gives you the safe combination, shows you where every digit of it comes from, and is explicit about the two digits we could not trace to a prop.
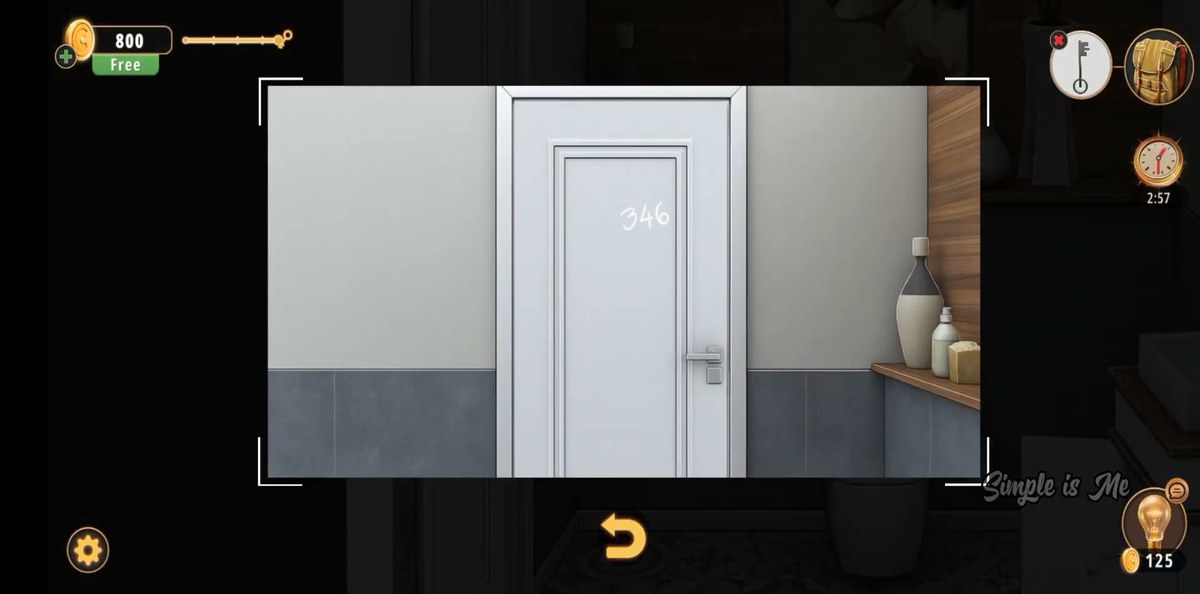
Guest Toilet is room 4 of 15 in Chapter 3. One lock, one key: the cabinet safe takes 34617058, and the number painted on the door is 346.
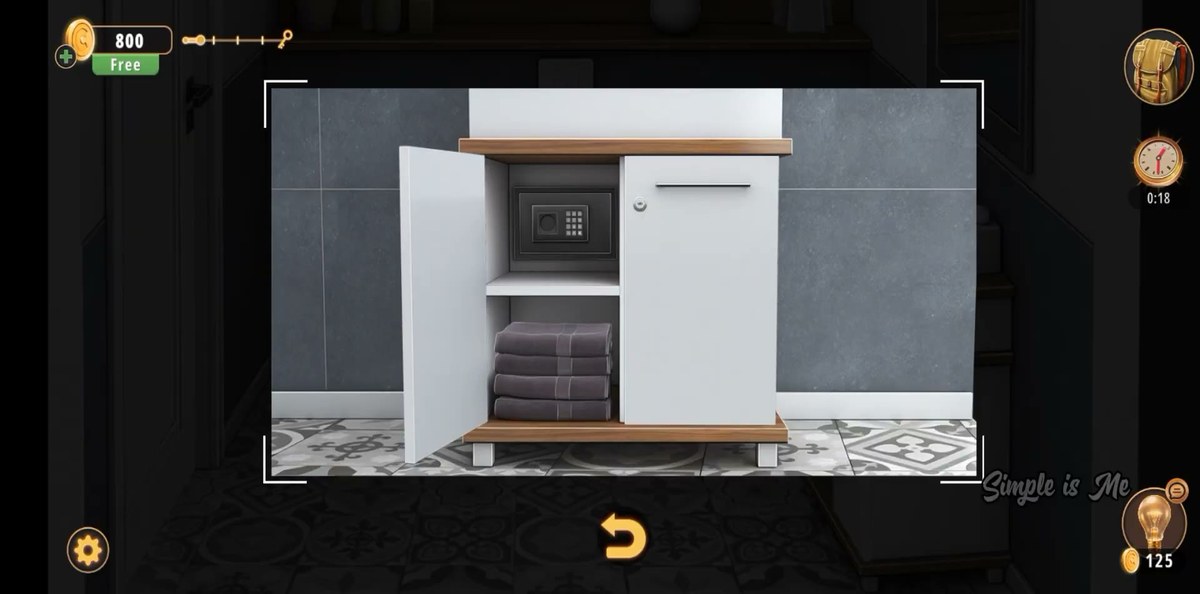
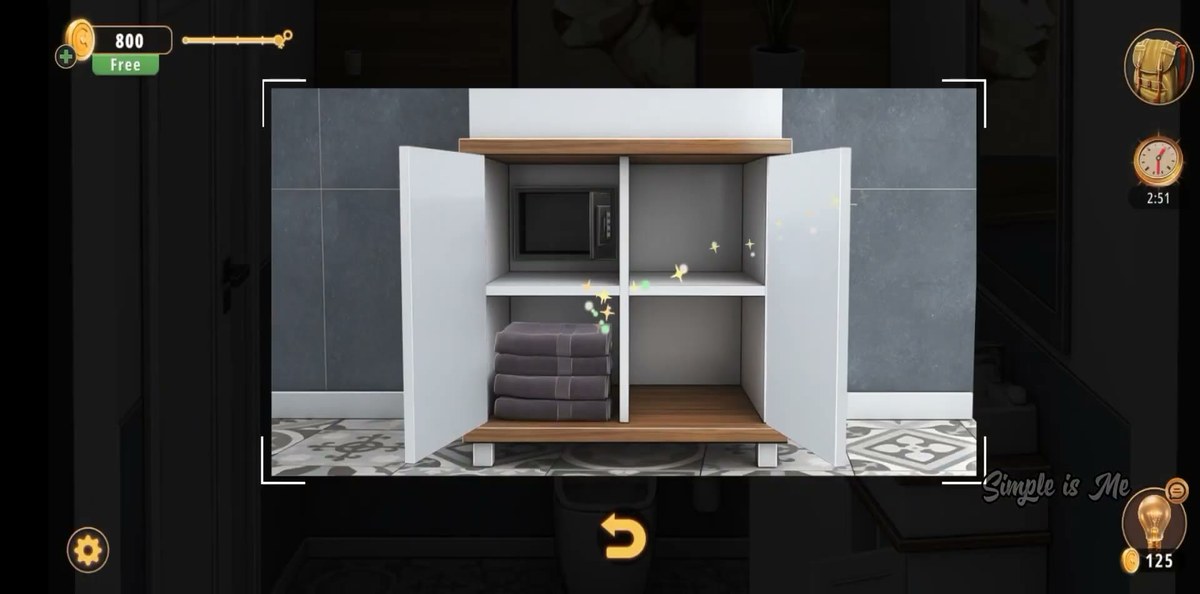
- Open the two doors of the vanity cabinet under the sink. The safe is in the top-left compartment; the towels are below it.
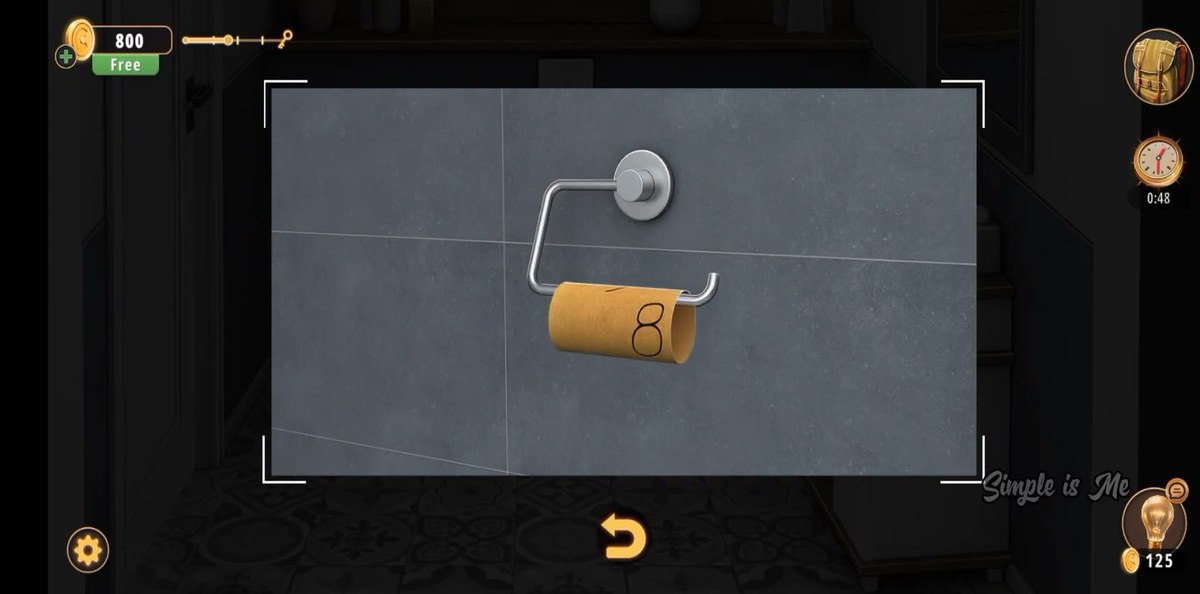
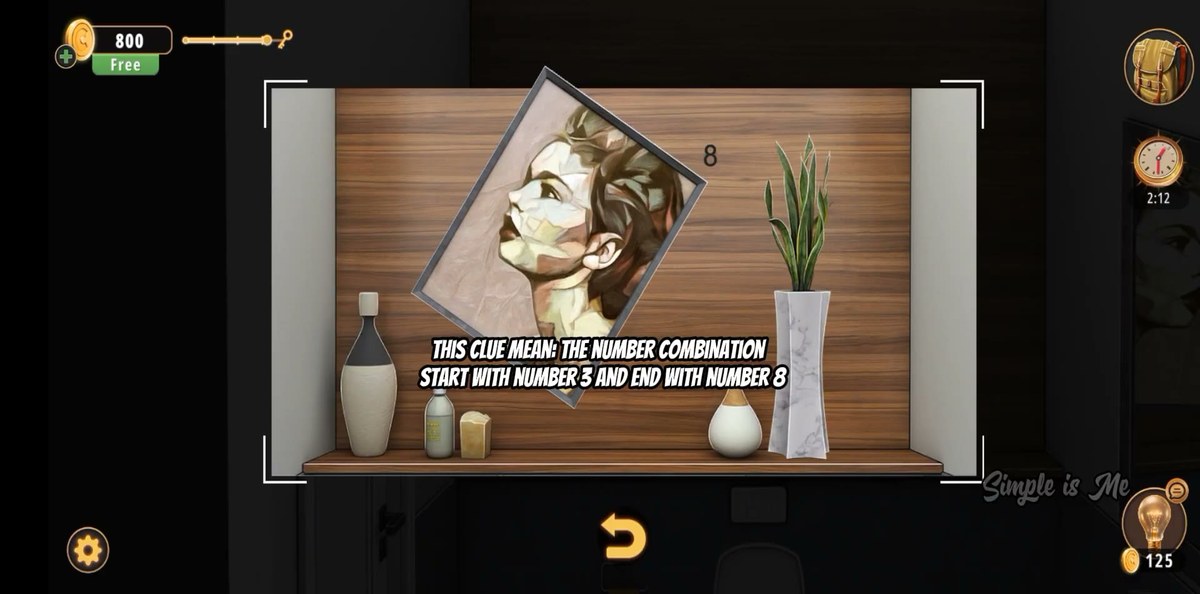
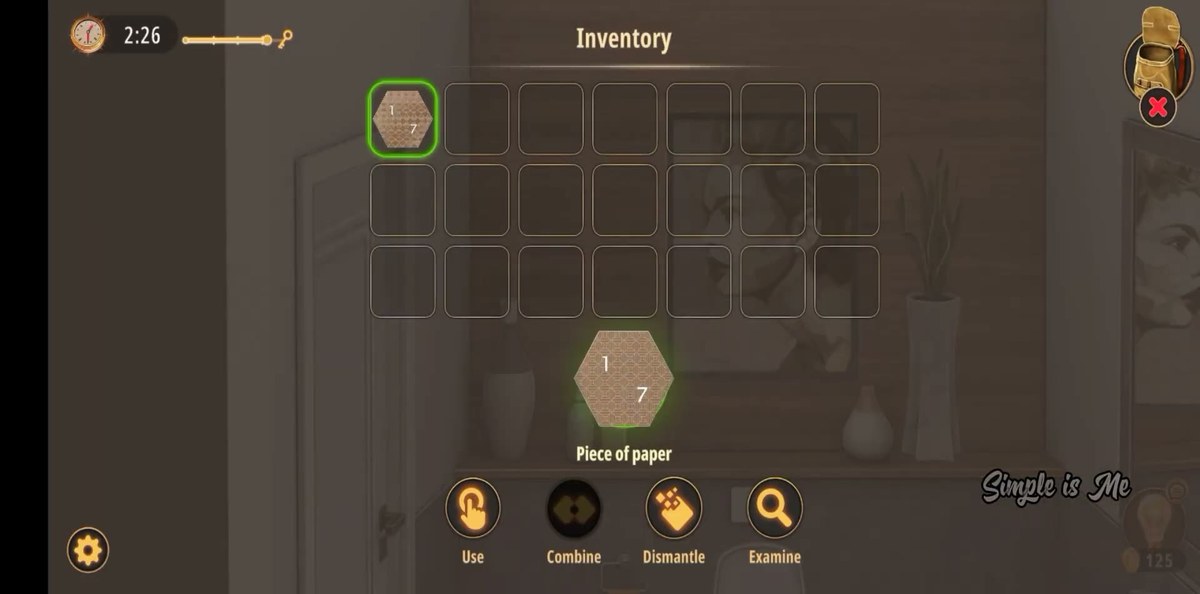
- Read the clues. The exit door carries 346. The Piece of paper in your bag carries 1 and 7. The empty toilet roll carries an 8. The framed portrait tells you the combination "START WITH NUMBER 3 AND END WITH NUMBER 8".
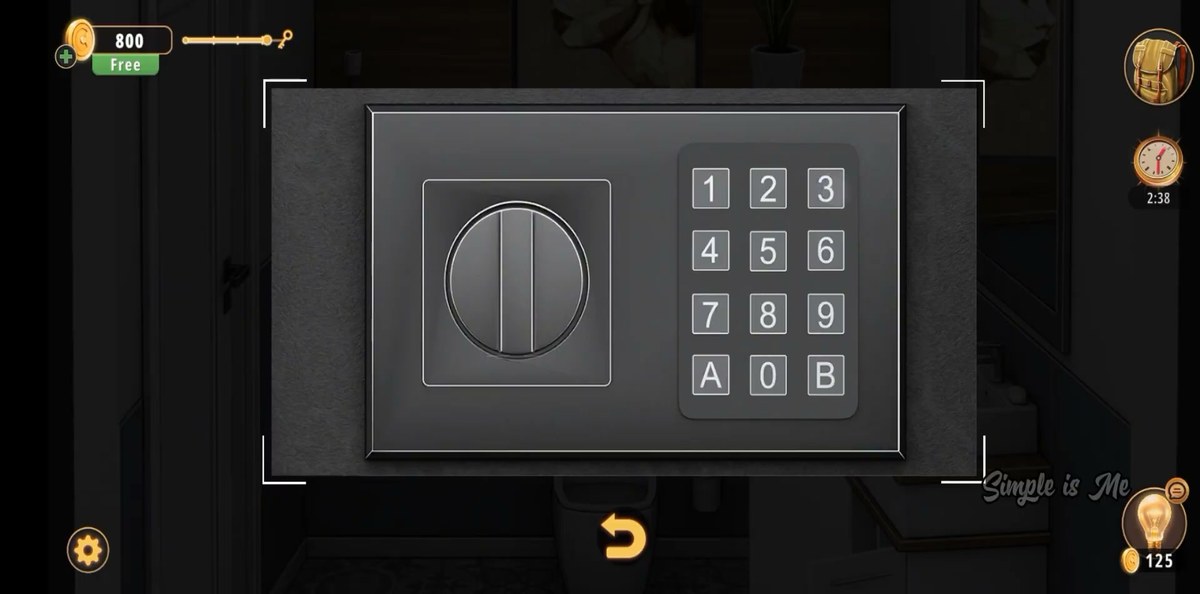
- Set 3 4 6 1 7 0 5 8 on the safe keypad, in that order. It is eight digits, not four — the safe opens after the eighth key.
- Find the Key while the vanity cabinet is open (it is in your bag by 0:55) and use it on the white door at about 2:07. That is the exit; the door has no code lock.
- The recording ends at 2:12 on a THANKS FOR WATCHING card, before any results panel — so no reward figure is printed here.

The 2:13 run used for every frame on this page.
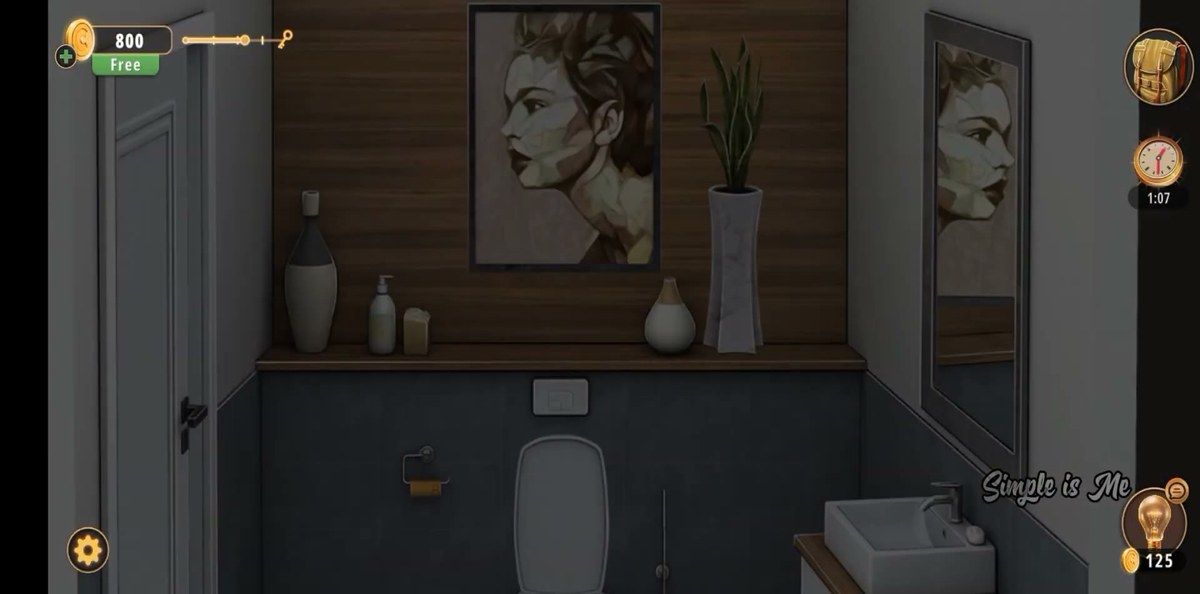
What this level actually is.
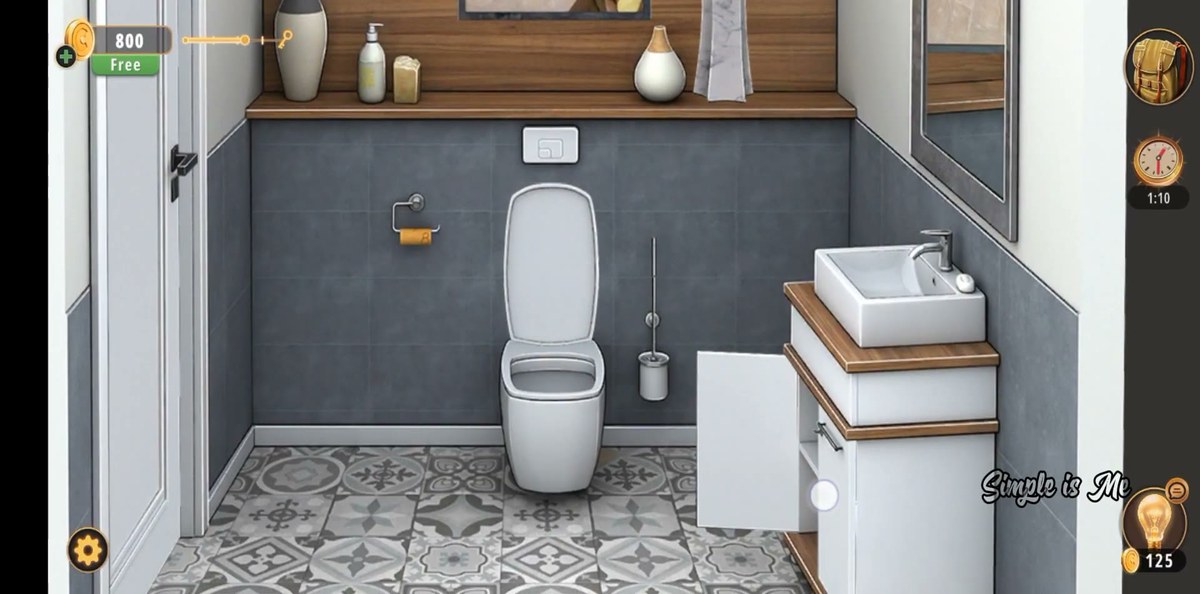
One bathroom, and it is genuinely small — the whole thing fits in a single camera view. The back wall is split: dark grey tiles at the bottom, warm wood panelling at the top, with a long wooden shelf running between them. On the shelf sit a two-tone vase, a soap dispenser, a bar of soap, the framed portrait, a small round pot and a marble-patterned vase holding a snake plant. Below the shelf is the toilet with a white flush plate above it, a toilet roll holder to its left and a toilet brush to its right. On the right wall: a mirror over a white vanity cabinet with a wooden top and a vessel basin. On the left: the white exit door.
The floor is the noisiest thing in the room — a grey, white and black patterned tile that looks like it should be a puzzle and is not. We looked at it repeatedly and there is nothing on it; it is decoration.
Structurally the level is a three-part chain and one lock. Three props hand you digits — the door, the paper, the toilet roll — the portrait tells you how they are ordered at the two ends, and the safe inside the cabinet consumes the result. Then the key from the safe opens the door. That is the whole level, and it took the recording 2:13.
The map: what is where.
Every object we could identify, and what it is for.
| Object | Where | What it does |
|---|---|---|
| Exit door | Left wall | Carries 346 on the upper panel. Plain lever handle, no keypad. Opened with the key from the safe. |
| Vanity cabinet | Right wall, under the basin | Two doors, four compartments. The safe is top left, folded grey towels bottom left. |
| Keypad safe | Top-left compartment of the cabinet | 12-key pad: 1 2 3 / 4 5 6 / 7 8 9 / A 0 B. No display. Code 34617058. |
| Framed portrait | On the shelf, on the wood panelling | Examining it shows the clue text about the combination starting with 3 and ending with 8. |
| Toilet roll | Holder left of the toilet | Empty cardboard core with a hand-drawn 8 in black. |
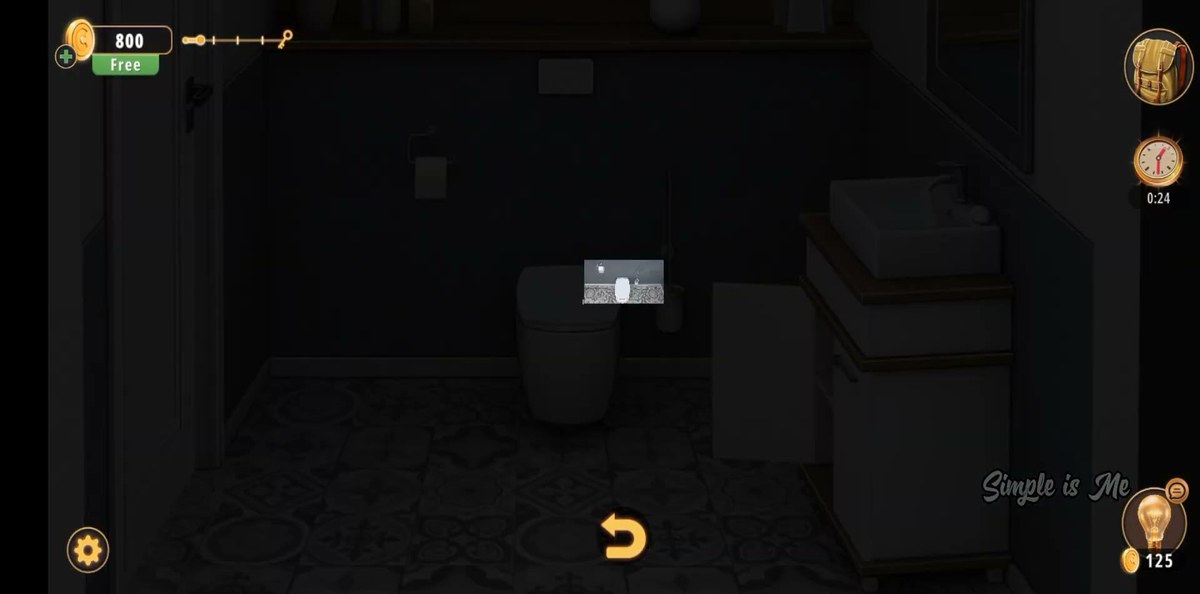
| Toilet | Centre of the back wall | Opens; the bowl is empty. Flush plate above it is never used in the recording. |
| Mirror | Above the basin | Reflects the room; we found no interaction. |
| Toilet brush | Right of the toilet | Scenery — a hotspot in some rooms, but nothing comes of it here. |
| Piece of paper | Carried item | Hexagonal scrap with a pattern and two white characters: 1 and 7. |
| Key | Cabinet / carried item | Silver key. In the bag by 0:55 while the cabinet is open; opens the exit door at 2:07. |
| Powder bottle | Cabinet / carried item | Blue bottle that ends up in the bag; we never see it used on anything. |
| Patterned floor | Whole room | Decoration. It looks like a clue and is not one. |
Step by step.
The order below follows the recording. Timestamps are video time; the links jump to the matching second.
Where people get stuck.
"The code is four digits and nothing works." It is eight. The clue on the portrait only constrains the two ends — starts with 3, ends with 8 — and the keypad has no display, so there is nothing in the room that tells you the length. If you are typing four digits and the safe just sits there, that is expected: keep going.
"I typed 3468 and it did not open." 3468 is the door plate plus the toilet-roll digit, and it looks like the whole answer. It is not — it skips the 1 and 7 on the paper and both middle keys. The full order is 346 1705 8.
"I cannot find 17 anywhere." The Piece of paper is an inventory item, not a wall clue. If your bag is empty, you have not picked up the hexagonal scrap yet; open the inventory and select it to see the two characters enlarged. If the bag is empty and the paper is not in the room, you have not opened the cabinet.
"The door wants a code." It does not. There is no keypad on the door, no dial, no escutcheon keypad — just a lever handle. 346 is painted there as a room number and doubles as the seed for the safe. The door opens with the Key that is already in your bag by 0:55, and with nothing else.
"The toilet and the floor must do something." Neither does. The bowl is empty and the patterned floor is decoration. The only thing on that side of the room that matters is the cardboard roll.
"A and B must be enter and clear." Probably, but the recording never presses either of them: the eight digits go in and the safe releases on its own. If your safe needs a confirmation key, try A — that is the most common layout — but we cannot confirm it from this footage.
Where Guest Toilet sits in Chapter 3.
Chapter 3 is Murder Dressed in White, and Guest Toilet is room 4 of 15, right after Study Room. It is the smallest room in the chapter's opening run and the first one where the puzzle chain is entirely made of printed digits rather than mechanisms: no sliding panels, no colour sequences, no wiring. Three props, one clue sentence, one keypad.
It also breaks the pattern the first three rooms set, where the code is a clean four or five digits. Here the keypad takes eight, and the only way to know that is to count the keys being pressed. If you are working through the chapter in order, that is the habit worth carrying forward: on a safe with no display, count the presses rather than assuming a length.
- 1 Dining Room guide
- 2 Living Room guide
- 3 Study Room guide
- 4 Guest Toilet you are here
- 5 Workshop guide
- 6 Guest Bedroom guide
- 7 Master Bathroom guide
- 8 Kids Playroom guide
- 9 Backyard guide
- 10 Garden guide
- 11 Kitchen guide
- 12 Driveway guide
- 13 Kids Bedroom 1 guide
- 14 Storage Room guide
- 15 Garage guide
- 16 Attic guide
- 17 Terrace guide
- 18 Basement guide
- 19 Garden Shed guide
- 20 Kids Bedroom 2 guide
- 21 Hobby Room guide
- 22 Master Bedroom guide
- 23 Entertainment Room guide
- 24 Hallway guide
Previous room: Chapter 3 Level 3 — Study Room
Next room: Chapter 3 Level 5 — Workshop
Frequently asked questions.
What is the safe code in Rooms & Exits Chapter 3 Level 4 Guest Toilet?
The wall safe inside the vanity cabinet takes 34617058 — eight digits, typed in that order on the keypad. We reconstructed it frame by frame from the recording at 30 frames per second: the keys light up one at a time and the eight lit keys are 3, 4, 6, 1, 7, 0, 5, 8 in that order, with the safe unlocking immediately after the eighth press. It is also consistent with the room's own clue, which says the combination starts with 3 and ends with 8.
Where does 346 come from?
It is written on the exit door — the white door on the left wall carries 346 on its upper panel, above and to the left of the handle. It supplies the first three digits of the safe combination. The door itself has no code lock: you open it with the key that comes out of the safe, so 346 is a clue, not something you type at the door.
Where does 17 come from?
From the Piece of paper in your inventory. It is a hexagonal scrap of paper with a printed pattern and two white characters on it: a 1 near the top and a 7 below it. Those are the fourth and fifth digits of the safe combination. We read the item twice, in two separate frames of the inventory screen, and got the same two characters both times.
Where does the last 8 come from?
The empty cardboard toilet roll on the holder next to the toilet has a single hand-drawn 8 on it in black. The roll is a clue, not an item you collect: after the paper is removed from the holder the bare core is what you examine. That 8 is the last digit of the combination, and it agrees with the picture-frame clue.
What does the picture frame on the shelf tell you?
Examining the framed portrait above the toilet triggers a text overlay: THIS CLUE MEAN: THE NUMBER COMBINATION START WITH NUMBER 3 AND END WITH NUMBER 8. That is the game's own wording, grammar included. It tells you the safe's code begins with 3 and ends with 8 — which is exactly how 34617058 is built — but it does not tell you the length, so it is not enough on its own.
How many digits does the safe take?
Eight. The keypad is a plain 12-key grid — 1 2 3 / 4 5 6 / 7 8 9 / A 0 B — with no display anywhere on the safe, so there is no on-screen counter to tell you how many characters it wants. In the recording eight separate keys are pressed in a row and the door of the safe pops open right after the eighth. If you stop early the safe just sits there, which is why people assume the code is four digits and give up.
What are the A and B keys on the keypad for?
We could not establish it. The keypad has A at the bottom left and B at the bottom right, with 0 between them, and in the recording neither A nor B is pressed at any point — the eight digits sit between them and the safe opens by itself. They are most likely enter/clear keys, but because we never see them used in this level we do not state that as fact.
Where is the safe?
Inside the vanity cabinet under the sink, top-left compartment. The cabinet has two doors and four compartments: the safe sits top left, folded grey towels sit bottom left, and the two right-hand compartments are empty. You have to open the cabinet doors before the safe is even visible — it is not on a wall.
Is there anything in the toilet bowl or the cistern?
No. The recording opens the toilet lid and looks straight down into the bowl and there is nothing inside — no item, no floating clue. The flush plate above the toilet is a dual-flush panel and we never see it used. The only thing on the toilet side of the room that matters is the toilet roll with the 8 on it.
What do I do after the safe opens?
The Key is already in your bag by 0:55 — it is picked up while the vanity cabinet is standing open, and the inventory shows it selected with the Key label. Then go to the white door on the left wall, use it there at about 2:07, and the door opens. That is the exit — there is no second code lock anywhere in this room. What the safe itself contained we could not pin down: at 2:03 its door is open, the interior is empty and the sparkles come from inside it, but no item name appears, so we do not claim the key came out of the safe.
How long is Guest Toilet, and where does it sit in Chapter 3?
Guest Toilet is room 4 of 15 in Chapter 3, Murder Dressed in White. The recording we worked from runs 2:13 and finishes on a THANKS FOR WATCHING card at 2:12 without a results panel, so it is one of the shortest rooms in the chapter — a single small bathroom with one safe and one key.
Is the door code 346?
No. 346 is painted on the door, but the door has no keypad and no dial — it is a plain lever handle with an escutcheon plate, and the level ends by using the key from the safe on it. 346 is the seed for the safe combination, not a door code. Anyone telling you to type 346 at the door is describing a different level.
What this page could not verify.
1. What the safe contained. At 2:03 the safe is open, its interior is empty and the sparkles come from inside it — the game's "collected" effect — but no item name appears on screen in this run. The Key is already in the bag at 0:55, well before the safe is opened, so we cannot say the key came out of it. What the safe paid out is a genuine gap.
2. Where the 0 and the 5 come from. We can see both keys being pressed — 0 at 1:58.3 and 5 at 1:58.7 — and we can see the safe open afterwards, but we could not find a prop in the room that carries either digit. They are not on the door (346), the paper (17) or the roll (8). If a later revision of this page finds their source, the combination stays the same; we are flagging it because it is the one part of the code we cannot derive, only observe.
3. What A and B do. The keypad has them and the recording never touches them. Enter and clear are the obvious guesses and we have not printed either as fact.
4. The powder bottle and the mirror. A blue bottle ends up in the bag and the mirror is interactive-looking, but we never see either used. They are listed as objects, not steps.
5. The reward and the results panel. The recording ends at 2:11 on a THANKS FOR WATCHING card. There is no level-complete card and no coin figure in the footage, so this page prints none.