 GridPaw
 Shikaku
 Akari
 Kakuro
 Nonogram
 Nurikabe
 Pictomino
 KenKen
 Binary
 Star Battle
 Hashi
 Slitherlink
 Murder Sudoku
 Meowdoku
 Crazy Cleanup
Rooms & Exits Chapter 3 Level 17 Walkthrough: Terrace
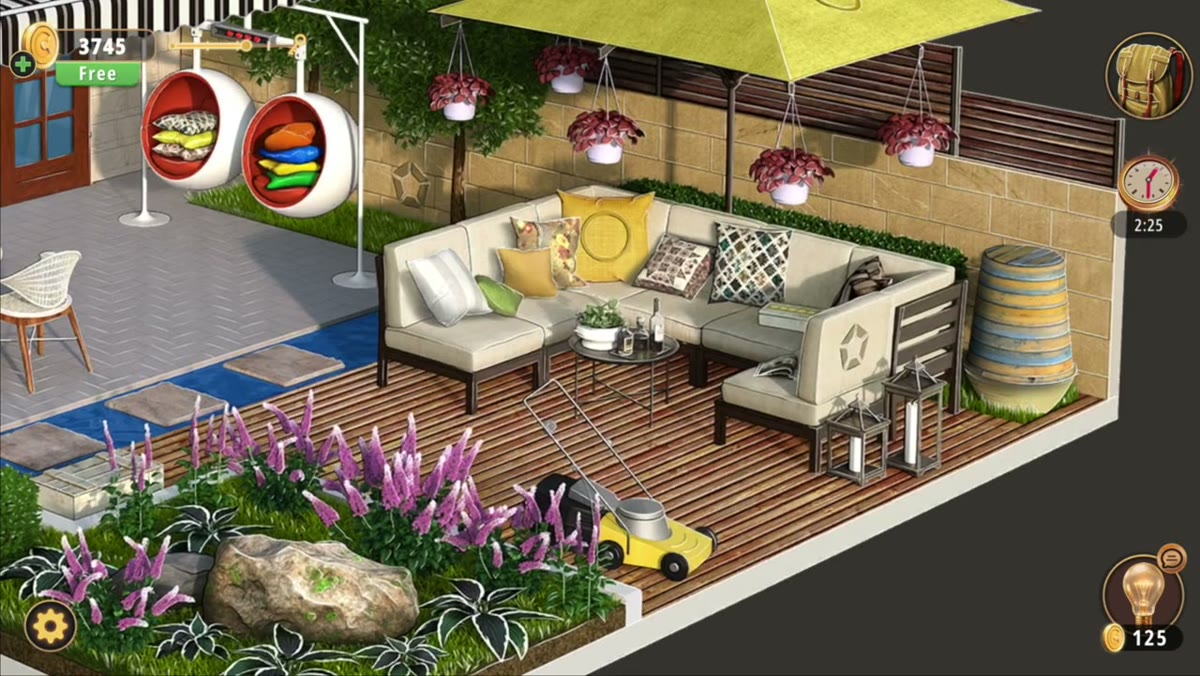
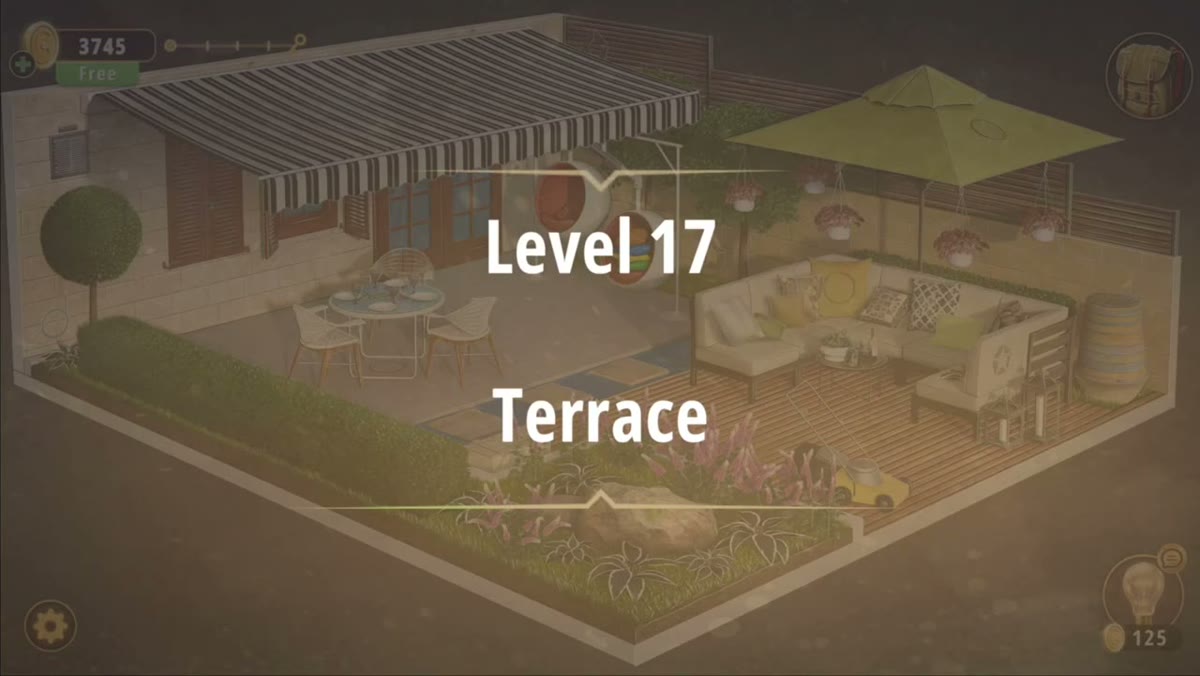
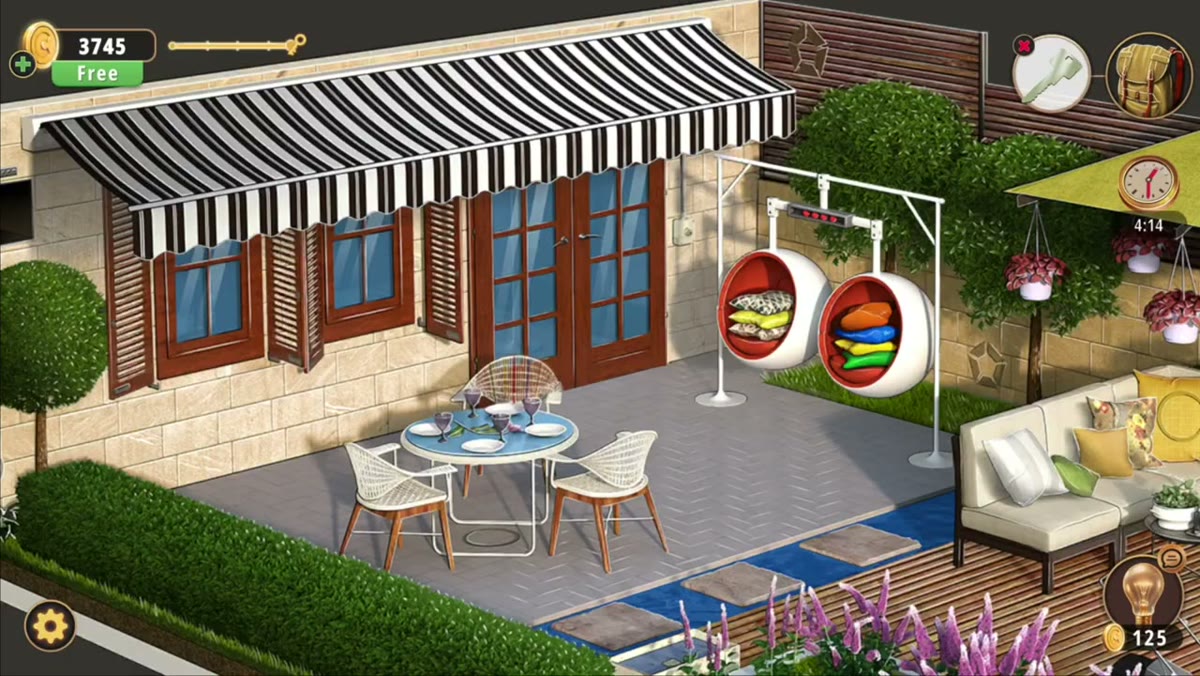
The Terrace is the seventeenth room of Chapter 3, Murder Dressed in White, and the first one in the chapter that is entirely outdoors. You get a paved dining corner under a black-and-white striped awning, a lounge deck with an L-shaped sofa and a green umbrella, a raised garden bed with purple flowers and one big rock, and two hanging pod chairs that nobody in this house ever sits in. There is no keypad on a wall and no door code to type at the exit. The level's two typed numbers live on a white crate and on a balance scale, and both of them are printed — you never have to guess a digit.
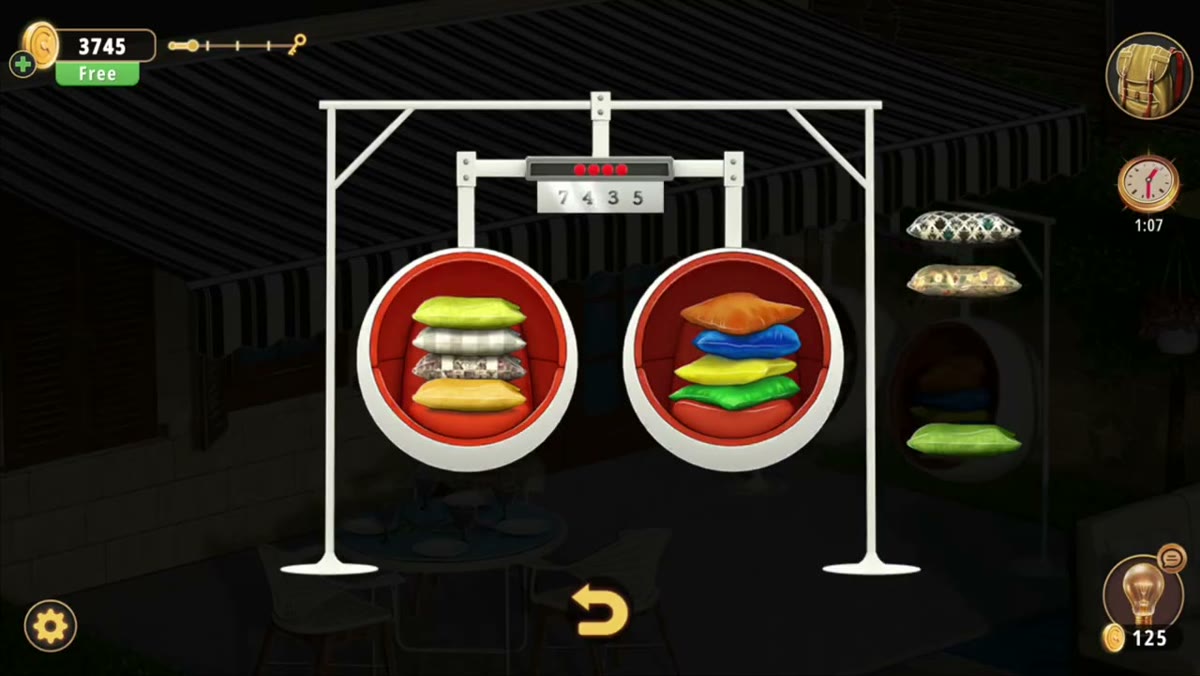
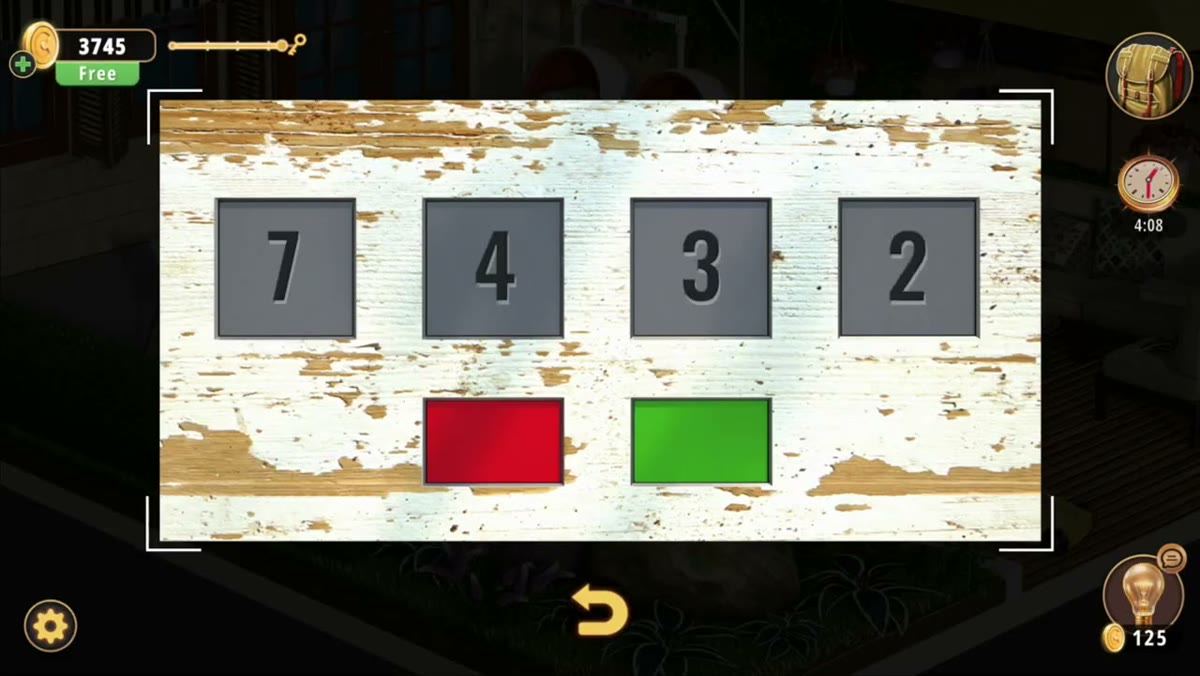
Terrace is room 17 of Chapter 3. The padded white crate's four-digit lock takes 7432; the balance-scale panel above the two red pans reads 7435.
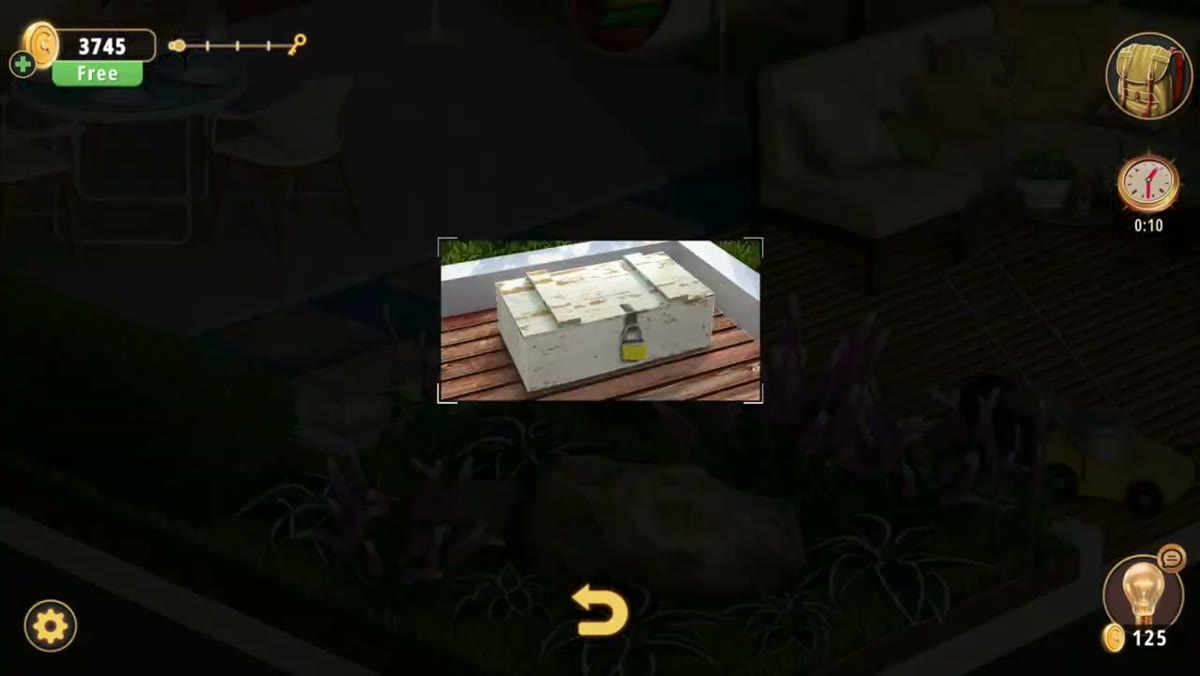
- Open on the garden bed: the white crate with the yellow padlock is the first zoom, at 0:12.
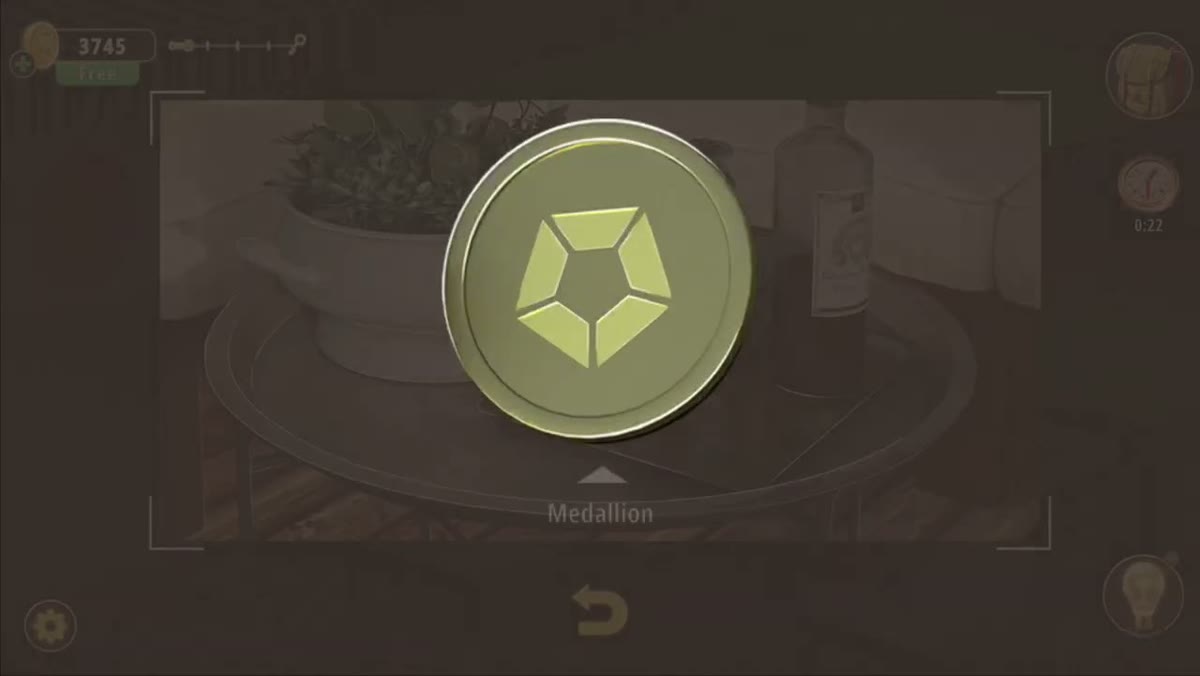
- Take the Medallion (0:24) — an olive-green disc with a three-arrow symbol.
- Work the two big boards: the Balance cushion scale (0:36) and the five-colour button panel on the dining wall (1:00).
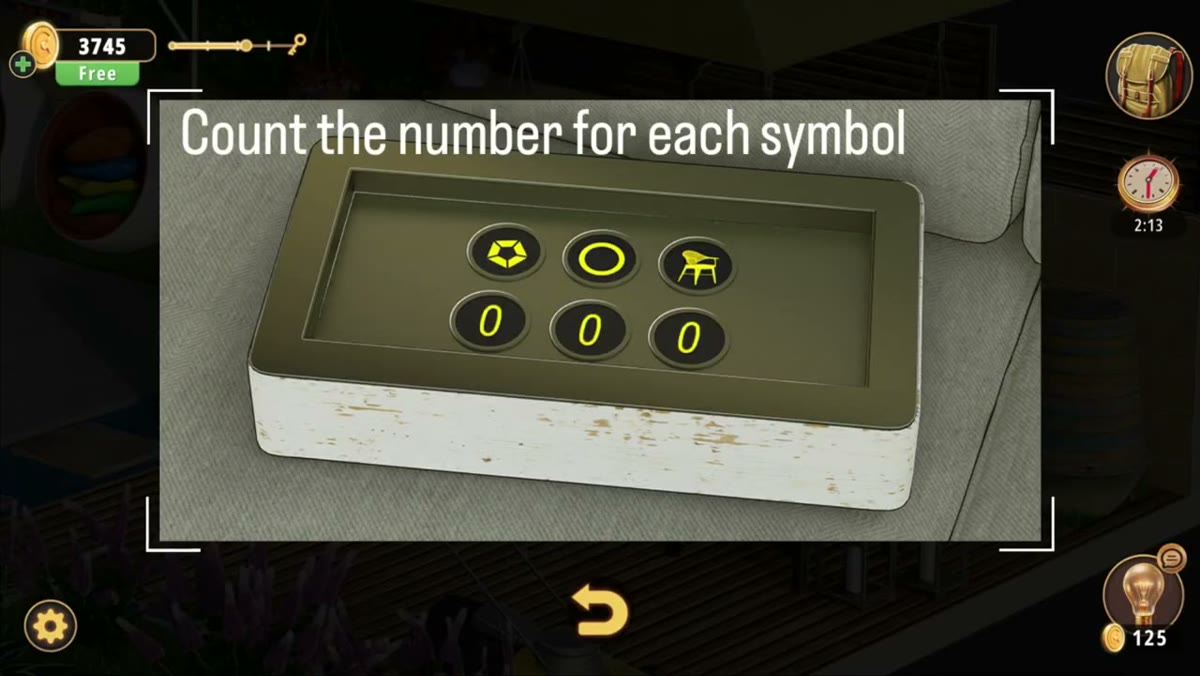
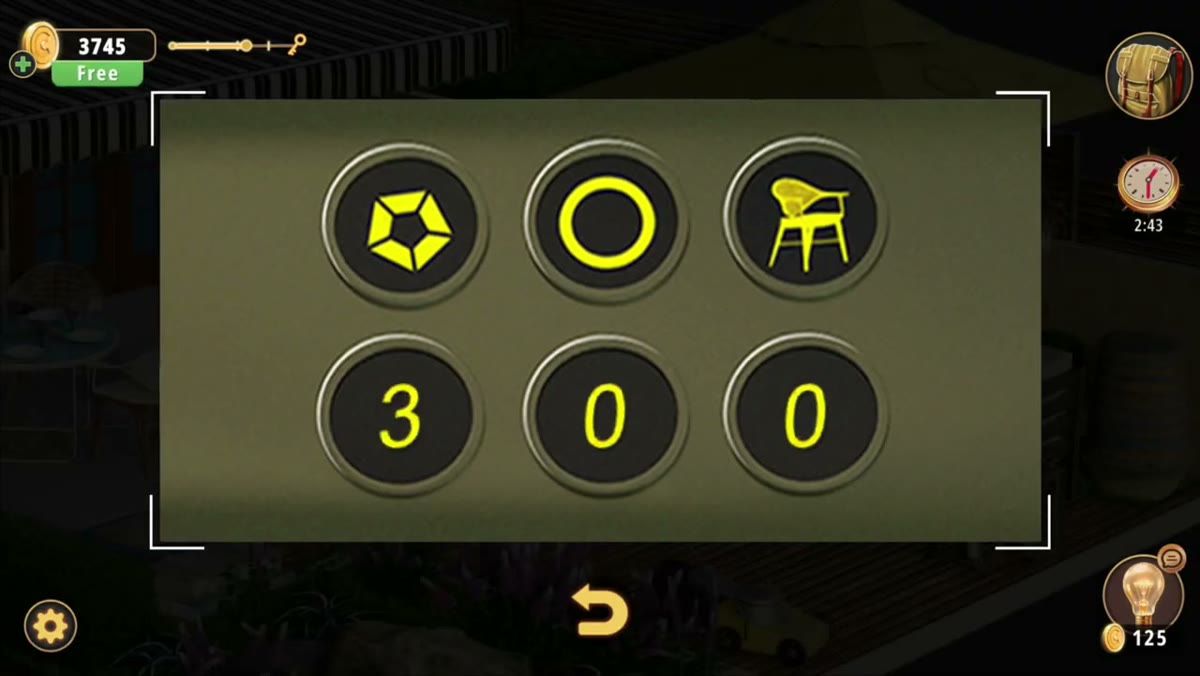
- Count the three symbols — star, ring, chair — on the framed panel at 1:48.
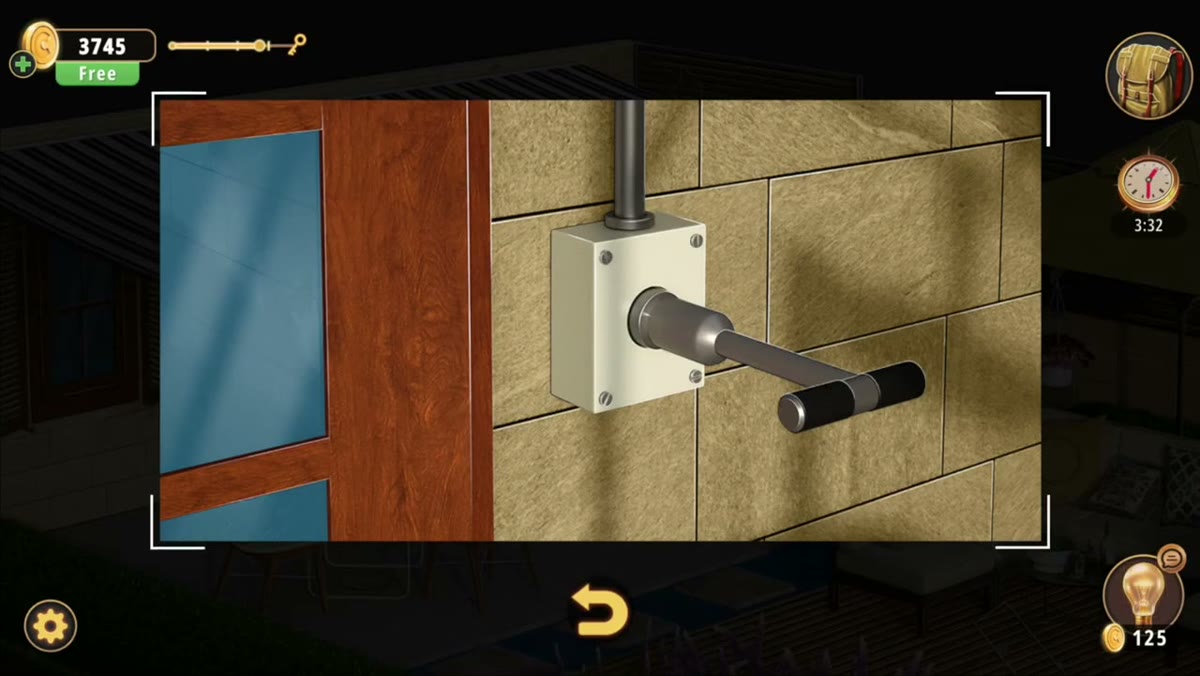
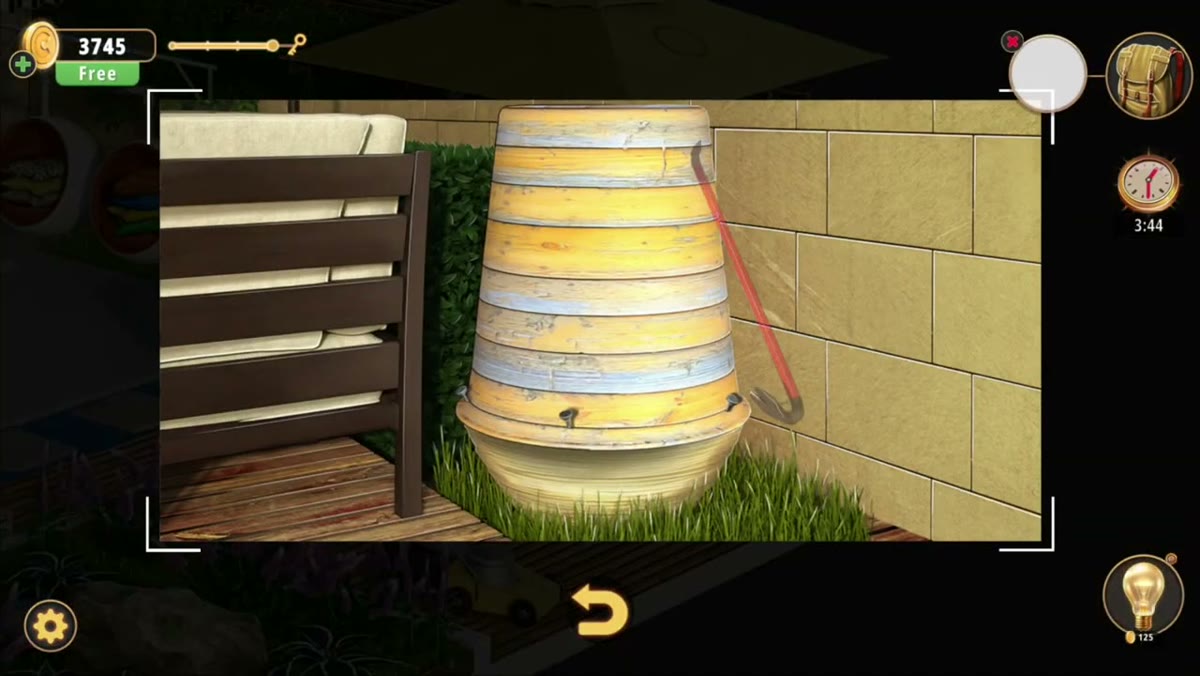
- Throw the wall switch at 2:33 to light the terrace, then collect the crowbar from the barrel at 2:48.
- Set the crate lock to 7432 at 3:12. The recording ends at 3:20 without a results card.

The Terrace run used for every frame on this page.
What this level actually is.
One wide outdoor set, viewed from a high three-quarter angle, with the house wall along the back and left. The dining end is tiled, with a round table, white wire chairs and a hedge; the lounge end is a wooden deck with the sofa, a coffee table, two lanterns and a barrel tucked behind. Between them runs a raised bed of purple flowers with a single large rock sitting in it, and a small yellow toy mower parks on the deck for no reason the level ever explains.
What makes the Terrace unusual is that it hides its puzzles in furniture rather than in locks. The two pans of a balance scale, a five-button panel on a wall, a framed counting puzzle and a box lid full of shallow golden wells are all things you would walk past in a real garden. The only two hard numbers in the room are the crate code and the number on the scale's panel, and neither is written anywhere else — which is exactly why so many players stall here.
Structurally this is a hub, not a chain. The Medallion, the buttons, the counting panel and the scale can be worked in any order, and only the crate at the end actually gates anything. The wall switch at 2:33 is the one sequencing step the level insists on: throw it and the scene relights, the windows open, and the terrace starts sparkling.
The map: what is where.
Everything we could identify, and what it is for.
| Object | Where | What it does |
|---|---|---|
| Padded white crate | Garden bed, front of the terrace | Yellow padlock on the hasp; four-digit lock takes 7432. |
| Medallion | First pickup, 0:24 | Olive-green disc with a raised three-arrow symbol. Item card reads Medallion. |
| Balance scale | Dining end, under the awning | Two red pans on a white frame; display panel reads 7435 with four red lights above it. |
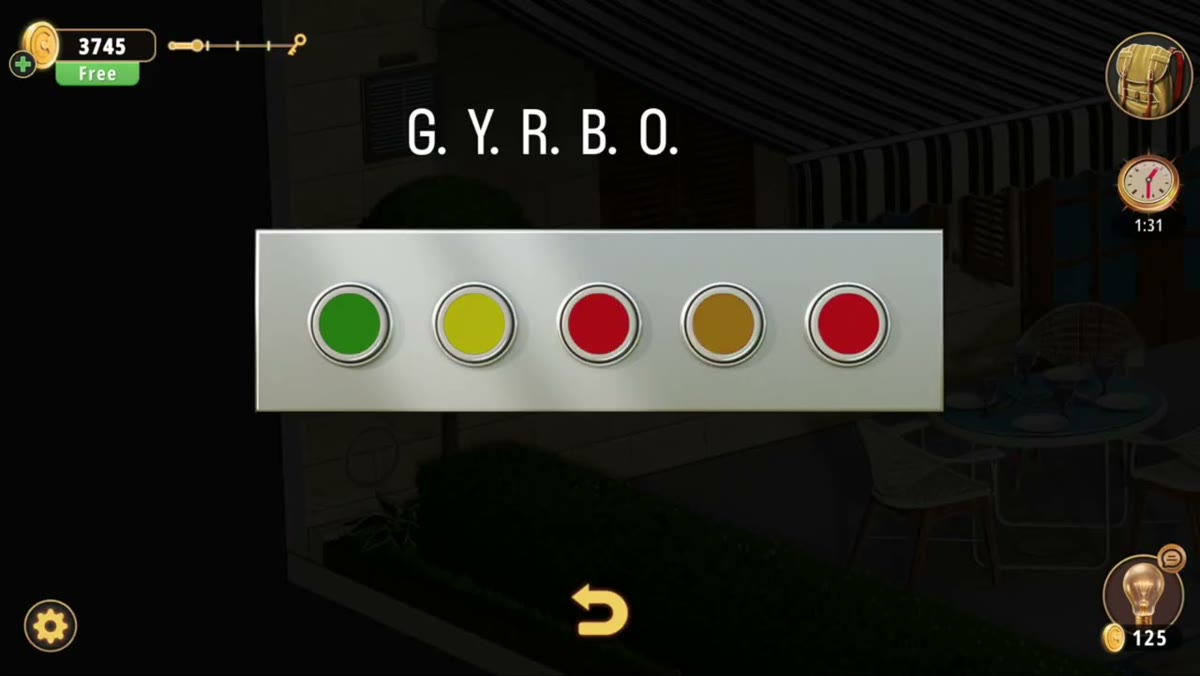
| Five-button panel | Dining wall | Round buttons in green, yellow, red, brown, red. No letters. |
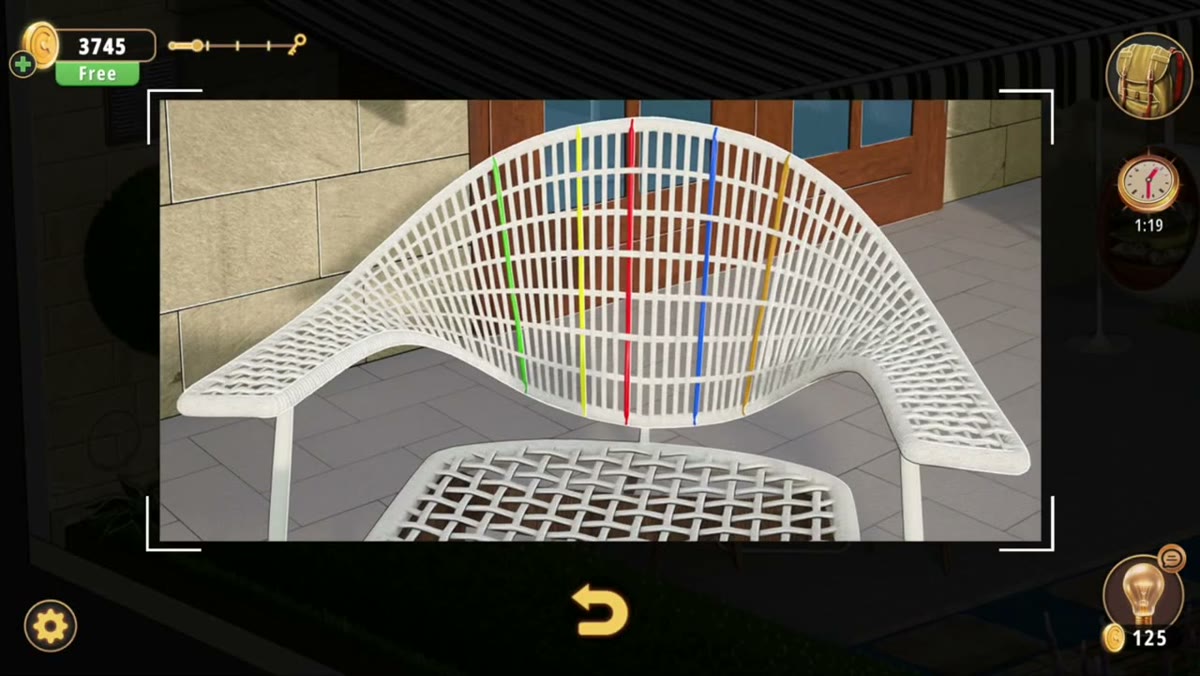
| Striped wire chair | Dining table | Back lattice with five vertical stripes: red, orange, yellow, green, blue. |
| Counting panel | Framed close-up, 1:48 | COUNT THE NUMBER FOR EACH SYMBOL: star, ring, chair, with three dials. |
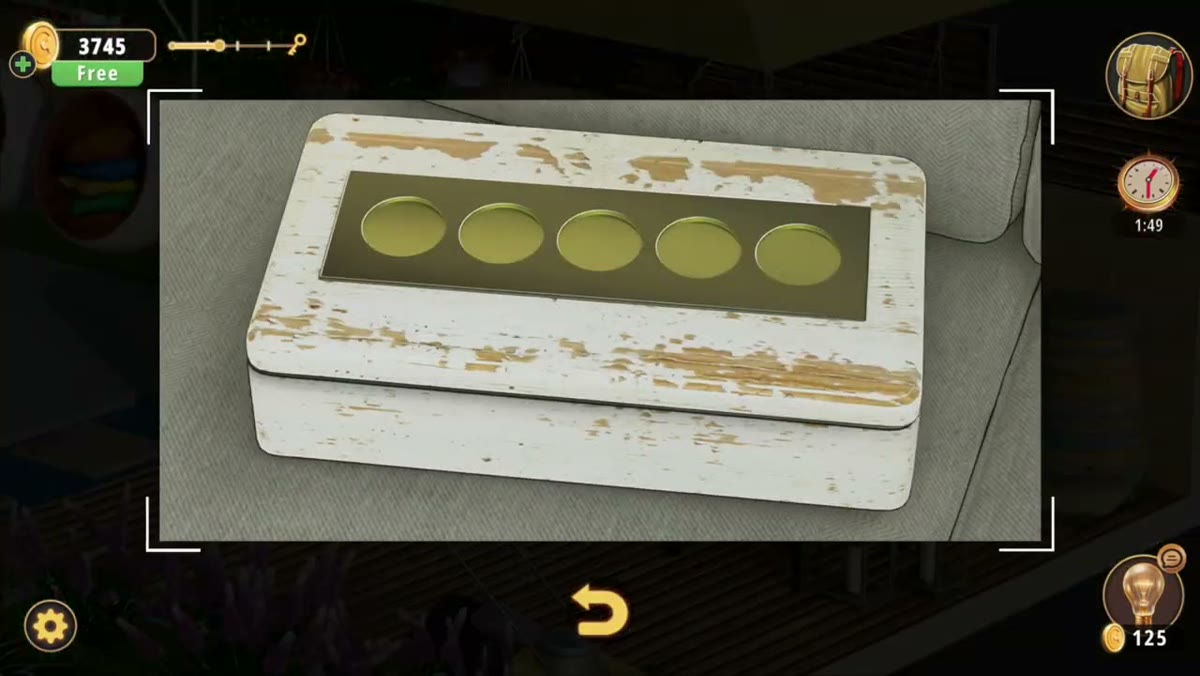
| White box, brass lid | Close-up, 1:24 | Five shallow golden wells in a row. Fits a medallion-shaped object. |
| Wall switch | Beige tile wall by the French doors | Lever; lights the terrace and opens the windows at 2:42. |
| Barrel + crowbar | Behind the sofa, right of the deck | Weathered barrel with faded yellow and blue bands; red crowbar leaning on it. |
| Hanging pod chairs | Deck, left of the sofa | Two woven egg chairs with coloured cushions; sparkle once the lights are on. |
| Toy mower | Deck, near the garden bed | Small yellow push mower; scenery, not a puzzle. |
Step by step.
The order below follows the recording. Timestamps are video time; the links jump to the matching second.
Where people get stuck.
You type 7435 into the crate. That is the most common wrong turn in this level, because 7435 is the number you spend the longest looking at — it is printed on the scale's panel and it looks like an answer. It is not the crate code. The crate takes 7432. If the green button does nothing, check the last digit first.
You never find the second half of the terrace. The barrel with the crowbar is behind the sofa, and the crate sits low in the flower bed. Both are off the first screen you see. Pan right for the barrel, pan down for the crate — the recording does both and it looks like the camera is just idling.
The scale's pans never balance. Four red indicator lights sit above the 7435 display and they light up as progress markers, not as a pass/fail gate. If you are moving cushions and the lights are climbing, you are doing the right thing; the pans are not supposed to sit level until the puzzle is done.
You read the five buttons as a colour code with letters. There are no letters on that panel. Five round buttons, five colours, no printed order. The dining chair's five stripes are the only ordered colour clue in the level, which is why the two objects are six seconds apart in the recording.
You count butterflies. Nothing in the Terrace asks you to count objects in general — the counting panel names three specific symbols. If you are counting flowers or cushions, you are one step off; find the star, the ring and the chair.
Where the Terrace sits in Chapter 3.
Chapter 3 is Murder Dressed in White, and its rooms run through the house and out into the grounds: Dining Room, Living Room, Study Room, Guest Toilet, Workshop, Guest Bedroom, Master Bathroom, Kids Playroom, Backyard, Garden, Kitchen, Driveway, Kids Bedroom, Storage Room, Garage, Attic, Terrace, Basement, Garden Shed, Kids Bedroom 2. The Terrace is room 17, straight after the Attic and immediately before the Basement.
Mechanically it is a holiday from the Attic's enclosed clutter. The Attic was boxes and rafters and one long chain; the Terrace is open air, bright, and almost entirely parallel puzzles. The only dependency is the wall switch — everything else can be picked up or attempted in whatever order you notice it, which makes the Terrace one of the friendlier rooms in the back half of the chapter.
- 1 Dining Room guide
- 2 Living Room guide
- 3 Study Room guide
- 4 Guest Toilet guide
- 5 Workshop guide
- 6 Guest Bedroom guide
- 7 Master Bathroom guide
- 8 Kids Playroom guide
- 9 Backyard guide
- 10 Garden guide
- 11 Kitchen guide
- 12 Driveway guide
- 13 Kids Bedroom 1 guide
- 14 Storage Room guide
- 15 Garage guide
- 16 Attic guide
- 17 Terrace you are here
- 18 Basement guide
- 19 Garden Shed guide
- 20 Kids Bedroom 2 guide
- 21 Hobby Room guide
- 22 Master Bedroom guide
- 23 Entertainment Room guide
- 24 Hallway guide
Previous room: Chapter 3 Level 16 — Attic
Next room: Chapter 3 Level 18 — Basement
Back to: All Rooms & Exits walkthroughs
Frequently asked questions.
What is the code in Rooms & Exits Chapter 3 Level 17 Terrace?
The code the level actually types is 7432, entered on the four-digit lock on the padded white crate. It is on screen at 3:12, with a red button on the left and a green button on the right under the four digit cells. A separate display above the balance-scale puzzle reads 7435 at 0:42. The two numbers are not the same and they are not interchangeable: 7432 goes into the crate lock, and 7435 is what the scale's panel shows while you are loading cushions.
What is the Balance puzzle on the Terrace?
At 0:36 the game opens a two-pan balance with red bowls hanging from a white frame, and the title printed on the panel is BLANACE — a misspelling of Balance that is in the game itself, not in this guide. Both pans hold stacks of cushions, spare cushions sit to the right, and a white display above the pans shows four digits plus four small red indicator lights. The run we worked from leaves the panel reading 7435.
Where do I find the Medallion?
The Medallion is the first named item in the level, picked up around 0:24. It is an olive-green disc with a raised three-arrow symbol in the middle, and the game shows it on its own card with the word Medallion under it. By 1:36 it is sitting in the inventory, where a second, chair-shaped medallion is also visible.
What is the five-button panel on the dining wall?
The dining area has a brushed-metal panel with five round buttons. Read left to right the colours are green, yellow, red, brown, red — the fourth is a dull brown-orange, not a bright orange, and the fifth is red again. There are no letters printed above them; earlier notes claiming a G-Y-R-B-O row do not survive a second read. The recording presses them in different orders between 1:00 and 1:12 without showing a stamped solution.
What does 'Count the number for each symbol' want?
A framed puzzle at 1:48 shows three yellow symbols in a row — a faceted star or gem, a plain ring, and a chair — with one number dial under each and the instruction COUNT THE NUMBER FOR EACH SYMBOL. You count how many times each symbol appears in the room, not how many objects there are. The dials start at 0 0 0 and are being turned from 2:18. The final three digits are the one thing on this page we could not read twice; see the last section.
How do I turn the lights on in the Terrace?
There is a lever switch on the wall by the blue French doors, close-up at 2:33. Throw it and the scene changes at 2:42: the windows and shutters are open, the terrace is lit, and the hanging pod chairs sparkle. That switch is the level's only obvious light control, and it is easy to walk past because the wall around it is plain beige tile.
What is in the barrel by the sofa?
At 2:48 the game zooms a weathered wooden barrel behind the outdoor sofa, painted with faded yellow and blue-grey bands, and a red crowbar is leaning against it. The crowbar is the interaction, not the barrel: it is the only red object in that corner and the camera holds on it. What it pries open is not shown in the part of the recording we can read.
Where is the locked crate?
The padded white crate with the yellow padlock sits in the garden bed at the front of the terrace — it is the first thing the camera zooms, at 0:12, and it comes back as a full close-up at 3:00. Its four-digit lock is the 7432 lock. The crate is white-painted wood with worn edges and a brass-yellow padlock hanging on the front hasp.
What is the striped chair clue?
At 0:54 the game zooms one of the white wire dining chairs. Its back is a lattice of white grid with five vertical colour stripes — red, orange, yellow, green, blue, in that order from the left. It is the only striped object in the level and the five-stripe count matches the five-button panel, which is why most players read the chair as the button clue.
What is the white box with five golden circles?
At 1:24 a distressed white-painted wooden box is pulled up, and its lid holds a brass insert with five round golden depressions in a row. They are shallow wells, not buttons and not digits — the shape is the same as a medallion, and the inventory already holds at least one Medallion by then. The recording never shows the box being filled.
Does the recording show Level 17 being completed?
No. The file runs 3:20 and the last frames are the terrace at 3:18 with sparkles around the pod chairs, right after the 7432 entry. There is no results card, no level completed banner and no coin reward anywhere in the video, so this page prints no reward figure for the Terrace.
Is the Terrace room 17 of Chapter 3?
Yes. Chapter 3 is Murder Dressed in White and the Terrace is room 17, between the Attic (16) and the Basement (18). It is the first room in the chapter that is fully outdoors, which is why it has an awning, a garden bed and a lawn instead of walls on four sides.
What this page could not verify.
1. The three digits of the symbol-counting puzzle. The dials were read at five separate seconds between 2:18 and 2:30 and the passes disagreed: the whole-frame read gave 3 4 2 and a 2.4x crop of the same second gave 2 4 3. The dials are being turned while the camera is on them, so a single second is not a reliable state. This page therefore prints no final answer for the star, ring and chair counts — count them yourself in the room, and if your dials agree with either reading you are almost certainly right.
2. What 7435 is for. The number is solid — three independent reads, three crop scales, all agreeing — but nothing in the decodable part of the recording types it anywhere. It may be the crate code in a different build, the balance target, or a clue for the white box. We are not going to invent a lock for it, and we are certainly not going to swap it with the 7432 that the crate demonstrably takes.
3. The ending and the reward. The file is 3:20 long and the last frame is the terrace at 3:18 with sparkles. No results card, no level completed banner, no coin figure. Any reward number you see quoted for the Terrace did not come from this recording.