 GridPaw
 Shikaku
 Akari
 Kakuro
 Nonogram
 Nurikabe
 Pictomino
 KenKen
 Binary
 Star Battle
 Hashi
 Slitherlink
 Murder Sudoku
 Meowdoku
 Crazy Cleanup
Rooms & Exits Chapter 3 Level 11 Walkthrough: Kitchen
Kitchen is the eleventh room of Chapter 3, Murder Dressed in White, and it is the biggest room the chapter has given you so far: a full working kitchen with an island, a pantry wall, a stove under an arched hood and a breaker panel bolted to the tile. It also has the widest spread of puzzle types in the chapter — a sliding-block puzzle, a colour-sorting letter puzzle, a three-letter lock and a switchboard. This page gives you the two answers you actually have to enter, and is explicit about the parts we could not read.
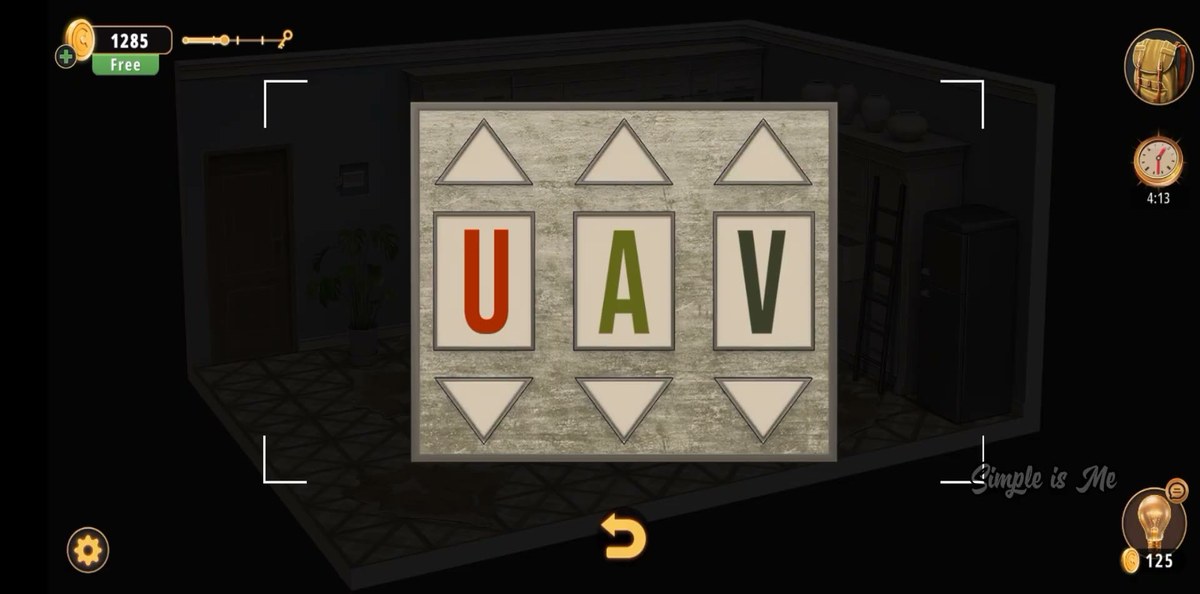
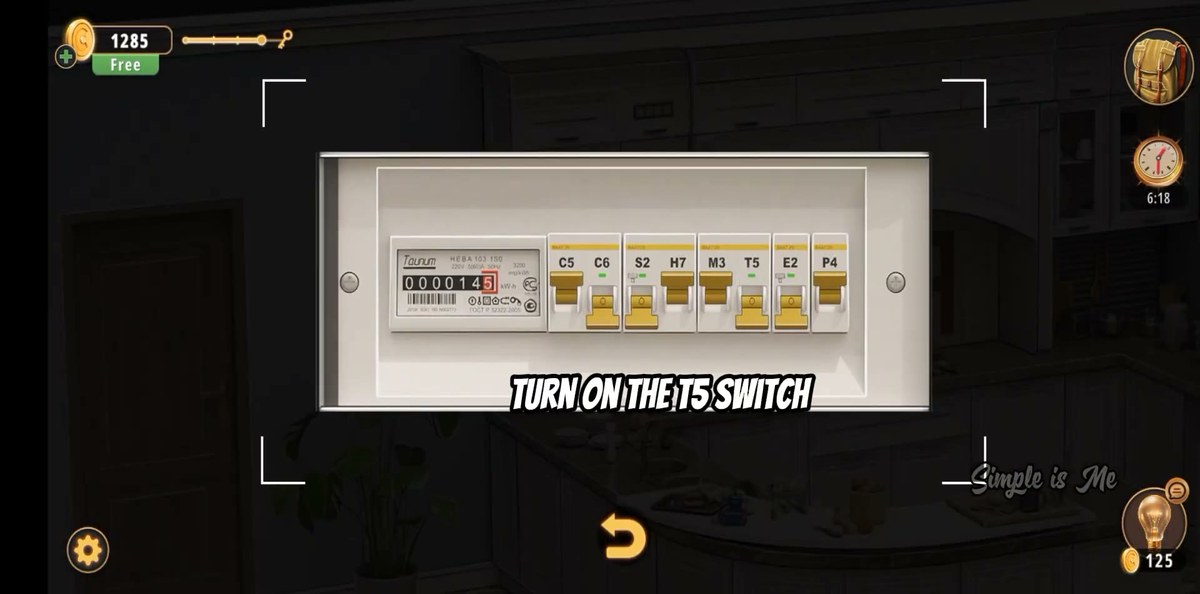
Kitchen is room 11 of 15 in Chapter 3. The three-letter cabinet lock takes U A V; the breaker panel wants the T5 switch switched on.
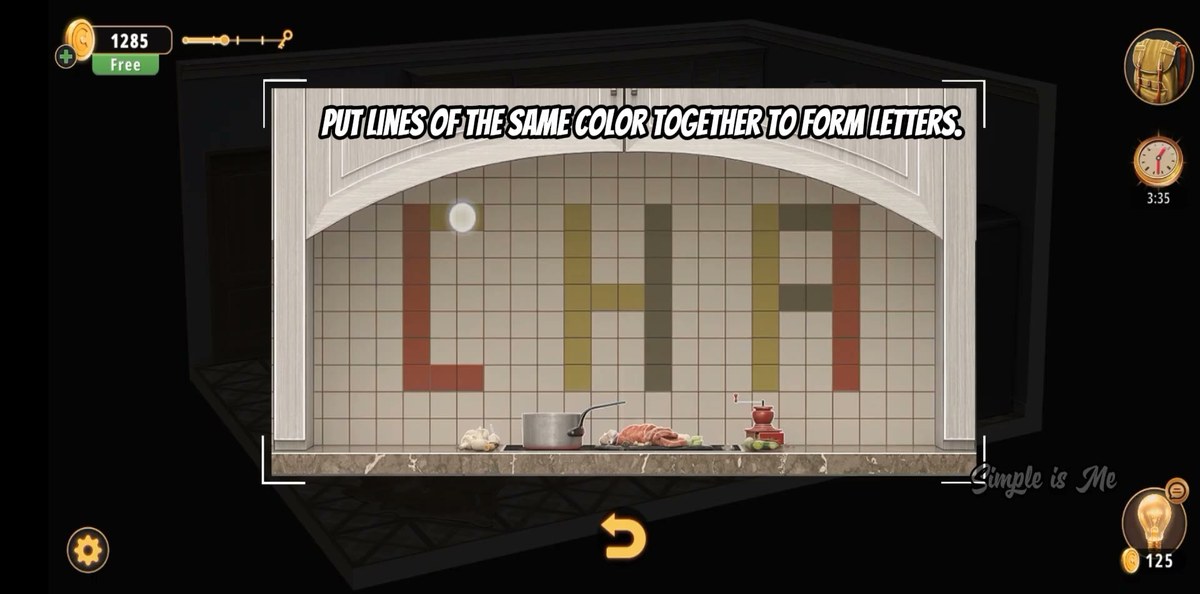
- Work the coloured tile-lines above the stove. Same-colour segments assemble into three letters: red U, olive A, dark green V.
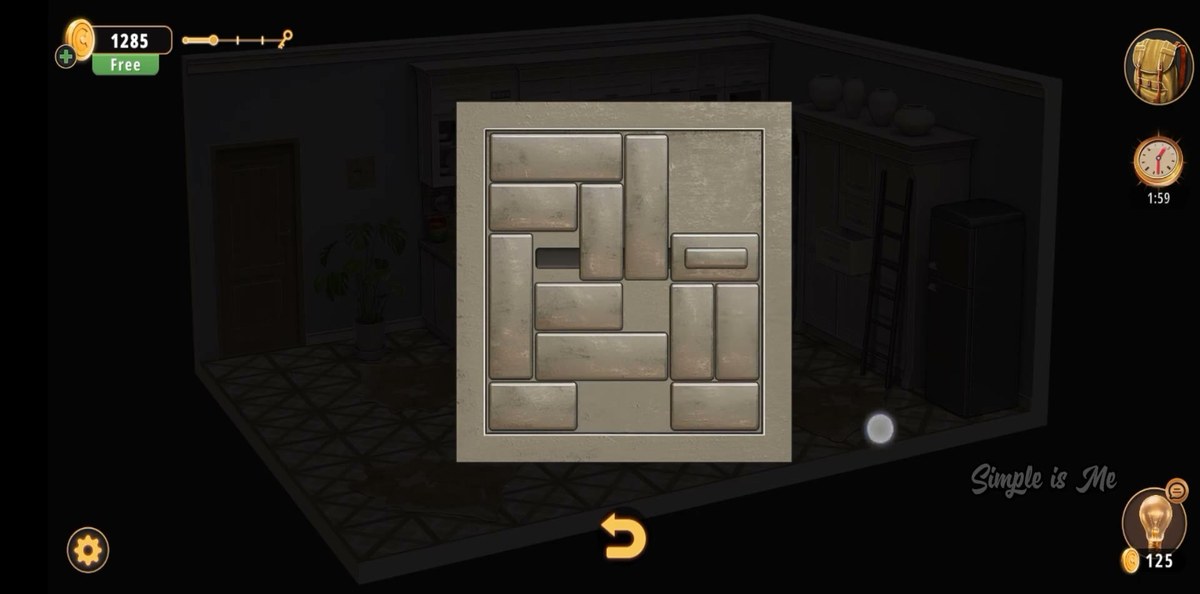
- Open the tall pantry cabinet's full-screen sliding-block puzzle, then set the three-letter lock on the cabinet to U · A · V and the door swings open around 2:07.
- At the breaker panel, flip the switch labelled T5 — the caption on the panel says exactly that.
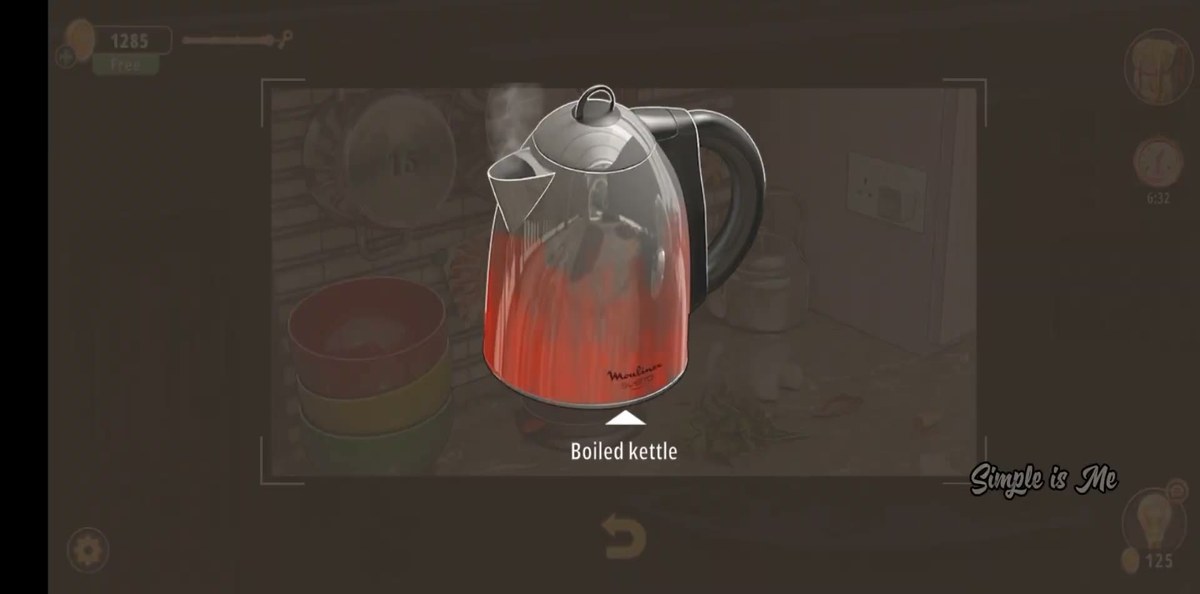
- With power back, boil the electric kettle, then collect the mug and doughnuts on the cutting board.
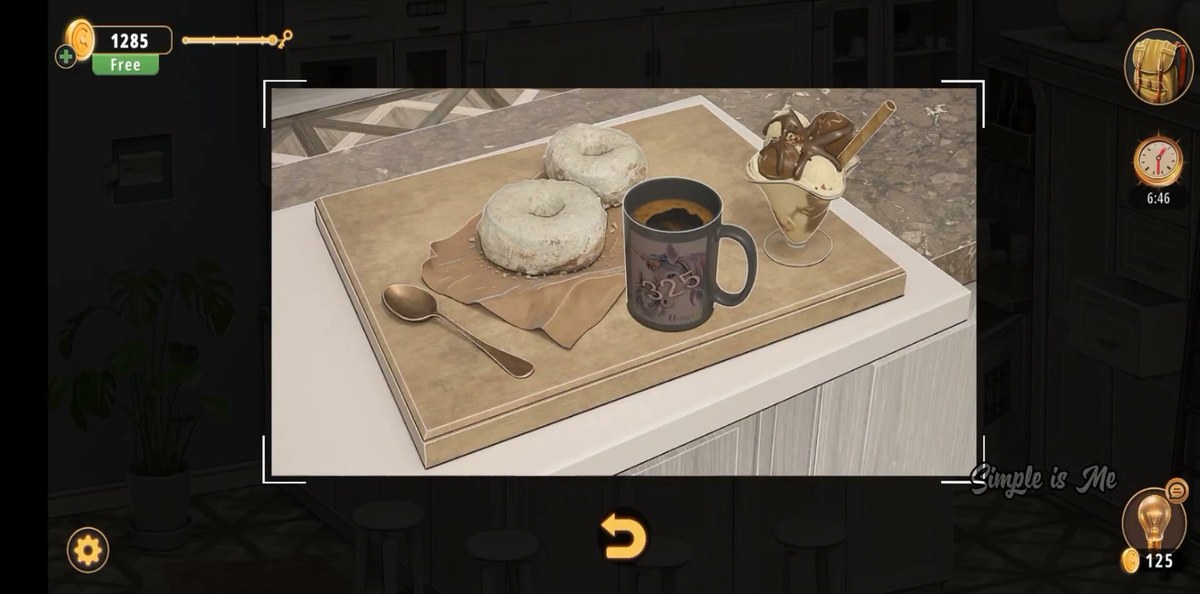
- The digits 325 printed on that mug are real, but no lock in the footage accepts three digits — treat them as a lead, not a code.

The 3:43 Kitchen run used for every frame on this page.
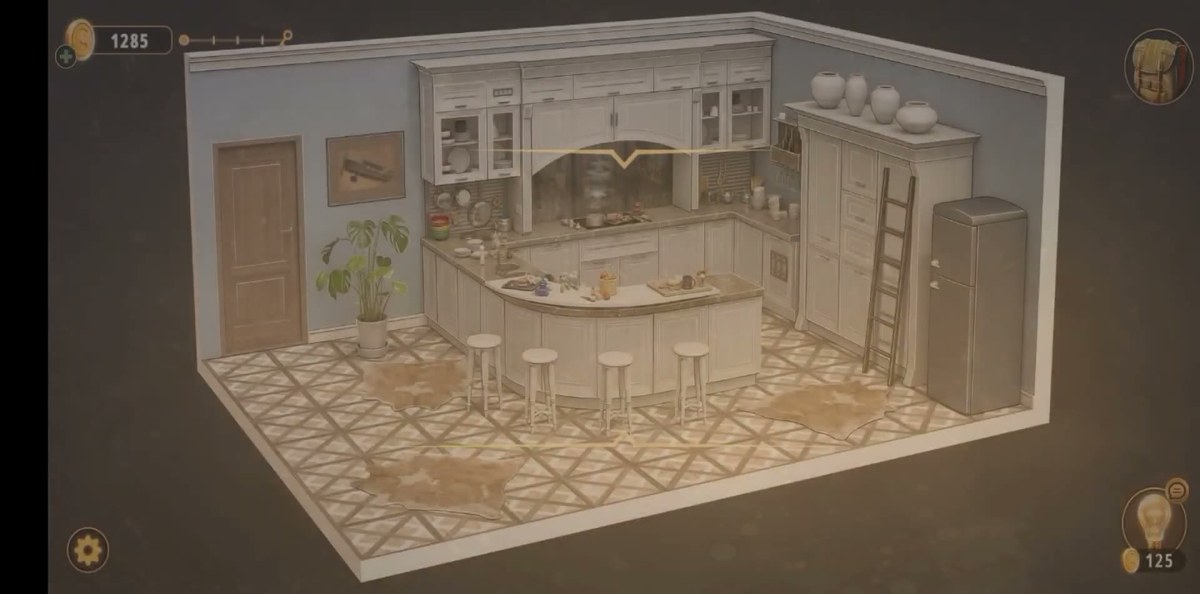
What this level actually is.
One room, but a room with three working walls. The camera sits high and looks down into the kitchen: white cabinets and a pale blue wall run along the back, an arched range hood sits over the stove, and a curved island with three white stools takes the centre. On the right there is a tall pantry unit with a wooden ladder leaning on it and a two-door fridge beside it; on the left a plain wooden door, a monstera in a pot and a framed picture. The floor is a busy geometric tile pattern with two animal-hide rugs thrown over it.
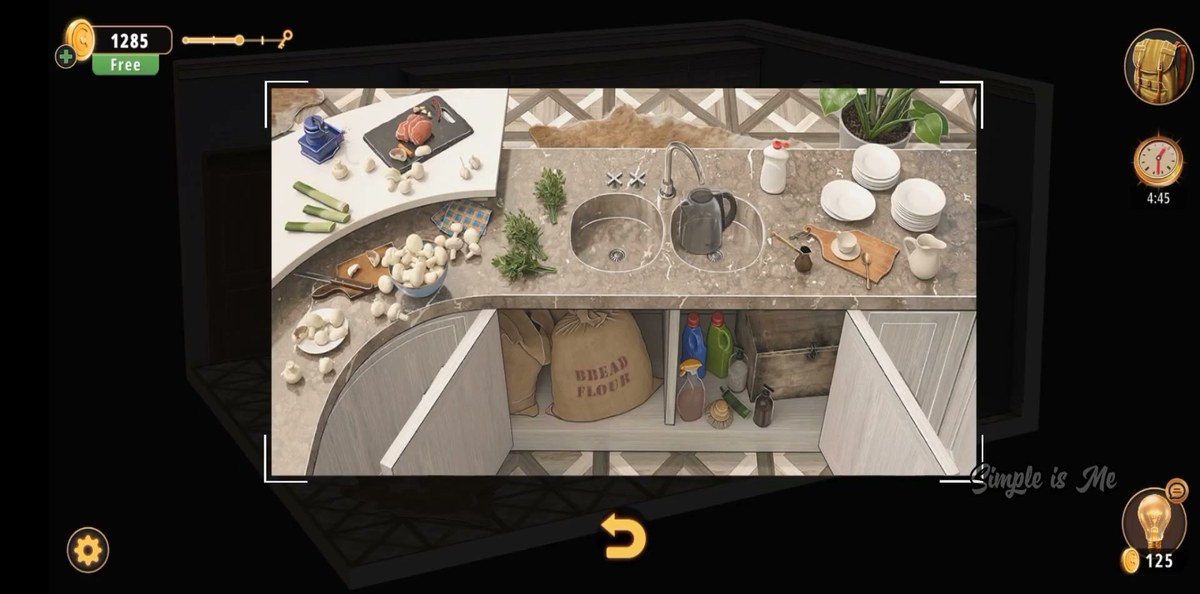
The interactive geography is dense. A drawer in the lower cabinets holds cleaning supplies, the sink counter has a bag of bread flour and a bottle of detergent, the backsplash above the stove carries the colour puzzle, the tall pantry has the sliding-block puzzle built into its front, the switchboard is on the tile by the counter, and the island is where the doughnuts and the mug end up at the end. That is a lot of hotspots for one screen, and the recording spends its first minute doing nothing but opening things.
Structurally the level is a chain rather than a set of parallel locks. Cleaning the walls needs the stove off; the stove is tied to a breaker label; the breaker needs T5; the electric kettle needs the power back. The only straight "type the answer" lock is the three-letter one on the pantry cabinet, and the only place its answer exists is the tile wall two metres to its left.
The map: what is where.
Everything we could identify, and what it is for.
| Object | Where | What it does |
|---|---|---|
| Tall pantry cabinet | Right wall, ladder leaning on it | Front face is a sliding-block puzzle; the door carries the three-letter lock. Code U A V. |
| Three-letter lock | On the pantry cabinet | Three letter windows with up/down arrows, one dial each, coloured red, olive, dark green. |
| Coloured tile-lines | Backsplash above the stove | Caption: PUT LINES OF THE SAME COLOR TOGETHER TO FORM LETTERS. The clue for the lock. |
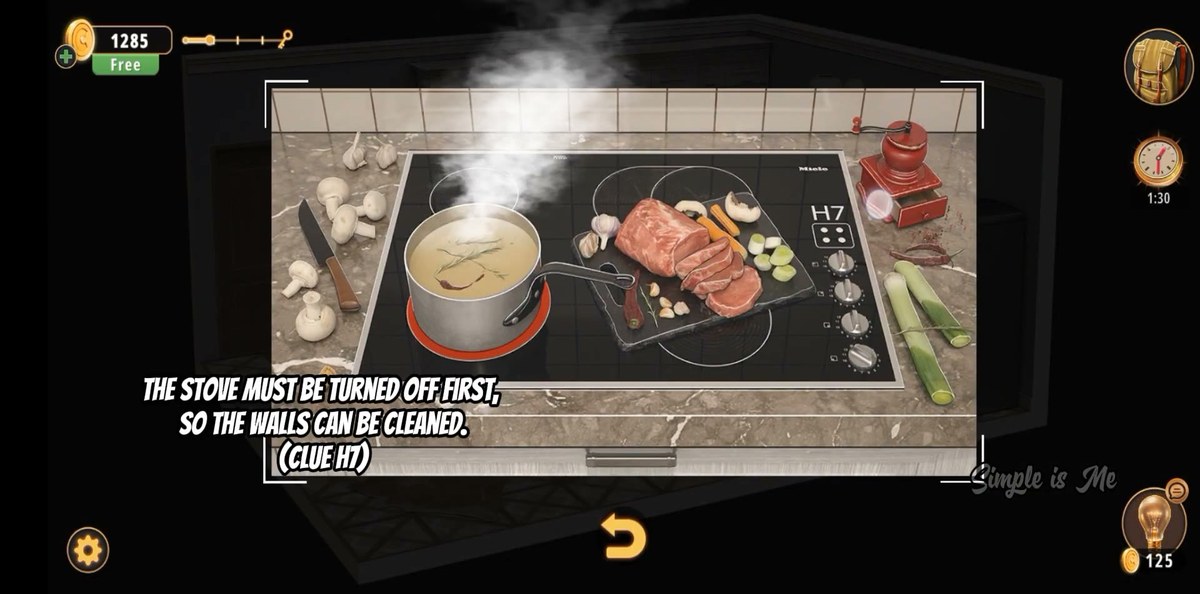
| Stove and range hood | Back wall, centre | Pop-up at 0:46 blocks cleaning until the stove is off; prints (CLUE H7). |
| Breaker panel | Tile wall by the counter | Eight labelled switches; caption reads TURN ON THE T5 SWITCH. |
| Electric kettle | Counter, right of the bowls | Boils once the power is back; gives the Boiled kettle item. |
| Stacked bowls | Counter, far left | Red on top, yellow, green underneath. Colour reference, no lock seen. |
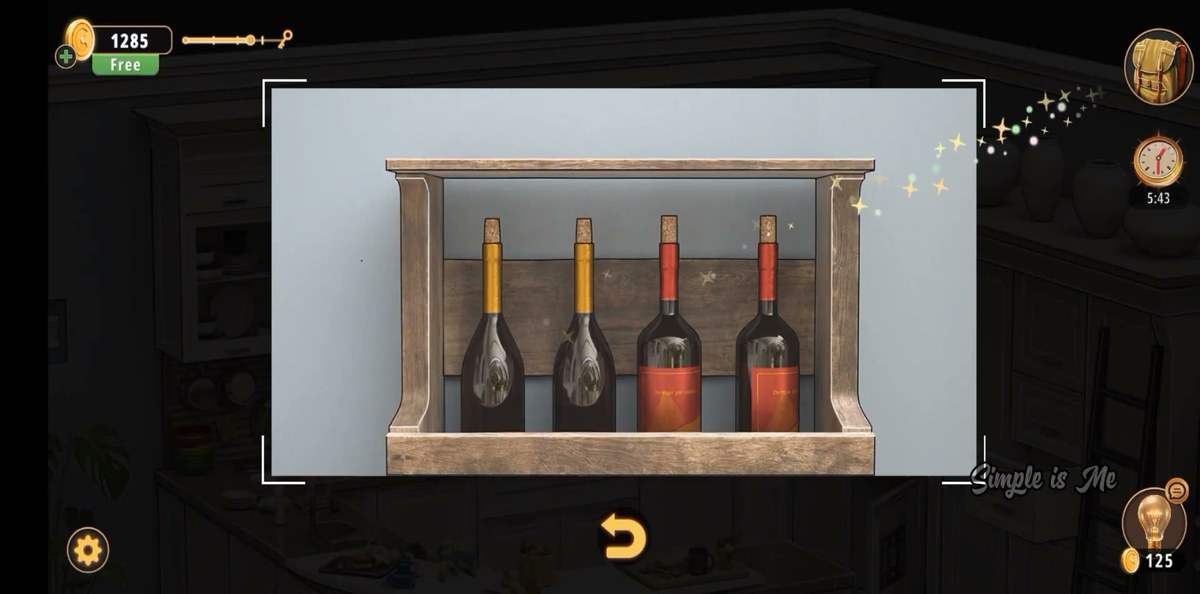
| Bottle shelf | Wooden shelf, left of the hood | Four bottles with yellow and red caps; sparkles when examined. |
| Sink counter | Left of the stove | Bread flour bag, vegetables, cutting board, and the Detergent bottle. |
| Lower cabinet drawer | Right of the island | Opens at 0:26 to cleaning supplies — bucket and cloth. |
| Handle | Tall cabinet unit, right | First inventory item, about 0:14. |
| Soapy sponge | Carried item | In the bag by 1:36; the cleaning tool for the walls. |
| Mug and doughnuts | Cutting board, near the end | Two sugared doughnuts and a dark mug printed with 3 2 5. |
Step by step.
The order below follows the recording. Timestamps are video time; the links jump to the matching second.
Where people get stuck.
The tile wall looks like "LHA" and the lock will not take it. That is the commonest wrong turn in this room. The tiles are scattered segments, so the eye completes them into familiar shapes and stops. The instruction is not "read the letters" — it is "put lines of the same colour together". Once you gather the red segments they close into a U, the olive ones into an A, and the dark green into a V.
You cannot find a keypad. There isn't one. The only typed answer in Kitchen is letters, not digits, and it lives on the pantry cabinet. The switchboard is the other "code" and you operate it by flipping T5 rather than entering anything.
The cabinet is jammed and the lock is not even reachable. The sliding-block puzzle on the pantry front has to be cleared first. There is no skip and no hint that solves it for you; budget real time for it, because the recording spends over half a minute there and the clock in the corner keeps running.
The stove will not let you clean. That is intended. The pop-up is the level's order-of-operations gate, and the label inside the brackets — H7 — is a breaker name, not a code to type. Get the power sorted and come back.
The kettle does nothing. It has no power until T5 is on. If you found the kettle before the breaker, that is why it sits inert in the cabinet.
Where Kitchen sits in Chapter 3.
Chapter 3 is Murder Dressed in White, and its fifteen rooms run from the Dining Room through the house and out into the garden: Dining Room, Living Room, Study Room, Guest Toilet, Workshop, Guest Bedroom, Master Bathroom, Kids Playroom, Backyard, Garden, Kitchen, Driveway, Kids Bedroom, Storage Room, Garage. Kitchen is room 11 of 15, and it sits immediately before the Driveway.
It is also the chapter's widest room mechanically. Earlier rooms stick to one or two code locks; Kitchen hands you a physical puzzle, a colour-sorting puzzle, a letter lock and a switchboard, and then chains them so that the cleaning thread cannot finish until the power is back. If you have just come from Garden, expect the pace to change: Garden is mostly outdoors and mostly reading, while Kitchen is indoor, cluttered and hands-on.
- 1 Dining Room guide
- 2 Living Room guide
- 3 Study Room guide
- 4 Guest Toilet guide
- 5 Workshop guide
- 6 Guest Bedroom guide
- 7 Master Bathroom guide
- 8 Kids Playroom guide
- 9 Backyard guide
- 10 Garden guide
- 11 Kitchen you are here
- 12 Driveway guide
- 13 Kids Bedroom 1 guide
- 14 Storage Room guide
- 15 Garage guide
- 16 Attic guide
- 17 Terrace guide
- 18 Basement guide
- 19 Garden Shed guide
- 20 Kids Bedroom 2 guide
- 21 Hobby Room guide
- 22 Master Bedroom guide
- 23 Entertainment Room guide
- 24 Hallway guide
Previous room: Chapter 3 Level 10 — Garden
Next room: Chapter 3 Level 12 — Driveway
Frequently asked questions.
What is the code in Rooms & Exits Chapter 3 Level 11 Kitchen?
Two things get you through this room. The three-letter cabinet lock takes U A V, read left to right, and it is the answer to the coloured tile-lines puzzle above the stove. The breaker panel is not a typed code at all: the panel's on-screen instruction reads TURN ON THE T5 SWITCH, and T5 is one of the eight labelled switches in the row. Both were read at least twice from separate frames of the same recording.
How do I get U A V from the coloured lines?
The instruction printed over the backsplash reads PUT LINES OF THE SAME COLOR TOGETHER TO FORM LETTERS. The tiles start scattered, so at a glance the wall looks like fragments of an L, an H and a third shape. Read by colour instead: the red segments assemble into U, the olive-yellow segments into A, and the dark green segments into V. The lock's three dials are coloured the same way — red, olive, dark green — which is what ties the wall to the lock.
What are the letters on the lock when it opens?
In the frame immediately before the cabinet swings open the three dials read U (red), A (olive green) and V (dark green). We read that frame three ways: whole frame, a 4× crop of the panel, and a 6× crop of each individual letter. All three passes agreed. Frames a few seconds earlier show the dials mid-scroll (G-M-N, then U-T-N, then U-A-N), which is what a player cycling to the answer looks like.
What is the T5 switch for?
Power. The breaker panel sits on the wall by the counter and carries a row of eight labelled switches: C5, C6, S2, H7, M3, T5, E2, P4. A caption over the panel reads TURN ON THE T5 SWITCH. Flipping T5 brings the kitchen's electrics back, which is what lets you use the electric kettle later in the run. The separate pop-up at the stove also mentions a clue label, H7 — the same naming scheme, used for a different switch.
What does the pop-up at the stove say?
At roughly 0:46 the stove refuses an action and prints: THE STOVE MUST BE TURNED OFF FIRST, SO THE WALLS CAN BE CLEANED. (CLUE H7). So the cleaning chain is gated behind the stove, and the game is pointing you at the switch named H7. We could not see the exact moment the stove is switched off in a single clean shot, so treat the H7 link as the game's own hint rather than something we watched happen.
How do I open the tall pantry cabinet?
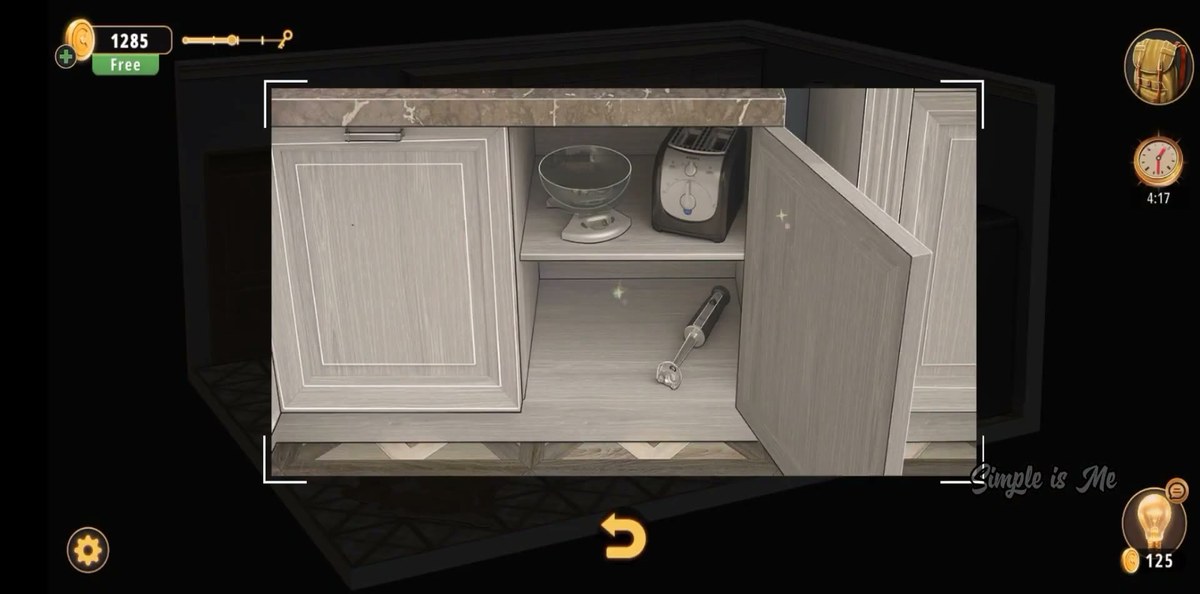
With the sliding-block puzzle on its front. From about 0:54 the recording is inside that puzzle: a square frame of stone-like rectangular blocks with one gap, the classic sliding-tile arrangement. The recording works it for roughly half a minute and the cabinet is open by 2:07, revealing a bowl, a toaster and the kettle. We are not going to hand you a move list for it — the footage is sped up and cut, and a wrong move sequence would waste more of your time than solving it yourself.
Where do I find the handle and the detergent?
The Handle comes off the tall cabinet unit on the right at about 0:14 — it is the first item in the bag. The Detergent is the yellow bottle standing on the counter by the sink, picked up at about 0:38, and a Soapy sponge is in the bag by 1:36. Those three are the cleaning kit, which is why the stove has to be off before the walls can be wiped.
What is the 325 on the mug?
There is a dark mug on the cutting board next to two sugared doughnuts near the end of the recording, and the mug carries a printed design with the digits 3 2 5 on it. We read it twice at high zoom and both reads gave 325. What we could not do is find a lock in this room that accepts three digits — no keypad appears anywhere in the footage we sampled — so this page lists 325 as a lead, not as a code to type.
Is Kitchen room 11 of Chapter 3?
Yes. Chapter 3 is Murder Dressed in White and its room list runs: Dining Room, Living Room, Study Room, Guest Toilet, Workshop, Guest Bedroom, Master Bathroom, Kids Playroom, Backyard, Garden, Kitchen, Driveway, Kids Bedroom, Storage Room, Garage. Kitchen is room 11 of 15, directly before the Driveway.
Does the recording show the level being completed?
Not the copy we worked from. The clip runs 3:43 in total but our sampled copy cut out around 3:20, before any results card, so this page does not print a coin reward or an exit animation for Kitchen. Everything above comes from the part we could decode frame by frame.
What this page could not verify.
1. The digits 325 on the mug. The digits themselves are solid — read twice at high zoom, both passes 3-2-5. What is missing is a lock: no keypad, dial bank or number panel appears anywhere in the footage we sampled, so we will not tell you to type 325 into something. It is a lead for later in the chapter, not a Kitchen code.
2. The breaker meter reading. The electricity meter beside the switch row has an LCD readout that three separate passes read three different ways (0000145, 0000345, and 00001.1). At this resolution the digits are not dependable, so no meter number appears on this page. The switch labels are a different matter — C5, C6, S2, H7, M3, T5, E2, P4 were stable across two reads — and those are what the room actually uses.
3. The stove / H7 step. The pop-up at 0:46 is legible, and it names H7. We never see the stove being switched off in one clean shot, so the exact step — which switch turns the stove off, and whether H7 is that switch — is the game's hint rather than something we watched happen.
4. The ending and the reward. The clip is 3:43 long, but our sampled copy cut out around 3:20, before any results card, exit animation or coin reward. This page therefore prints no reward figure for Kitchen. If you finish the room yourself, the results card is the thing to check.