 GridPaw
 Shikaku
 Akari
 Kakuro
 Nonogram
 Nurikabe
 Pictomino
 KenKen
 Binary
 Star Battle
 Hashi
 Slitherlink
 Murder Sudoku
 Meowdoku
 Crazy Cleanup
Rooms & Exits Chapter 3 Level 23 Walkthrough: Entertainment Room
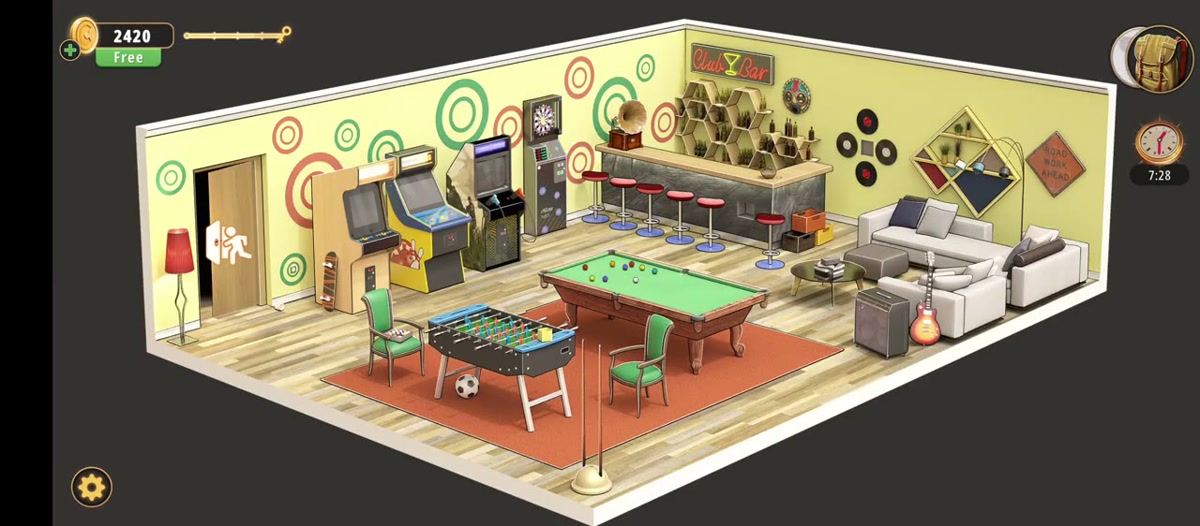
Entertainment Room is the twenty-third room of Chapter 3, Murder Dressed in White, and it is the biggest single space in the chapter. A pool table and a foosball table sit on the rug in the middle, a row of arcade cabinets lines the left wall under a dartboard, a bar with a CLUB BAR neon runs along the back, and a sofa, a guitar and an amp fill the right side. Where Kitchen was a chain and Kids Bedroom was a shelf of small toys, this room is a set of stations: you can work the dartboard, the pool table, the bar tiles and the cabinets in almost any order, and only two of them end in a typed code.
Entertainment Room is room 23 of 24 in Chapter 3. Two typed codes: 7561 on the case by the foosball table, 56941 on the metal box, taken straight off the arcade HIGH SCORE table.
- Read the room. Dartboard, pool table, bar tiles and arcade cabinets are all separate stations.
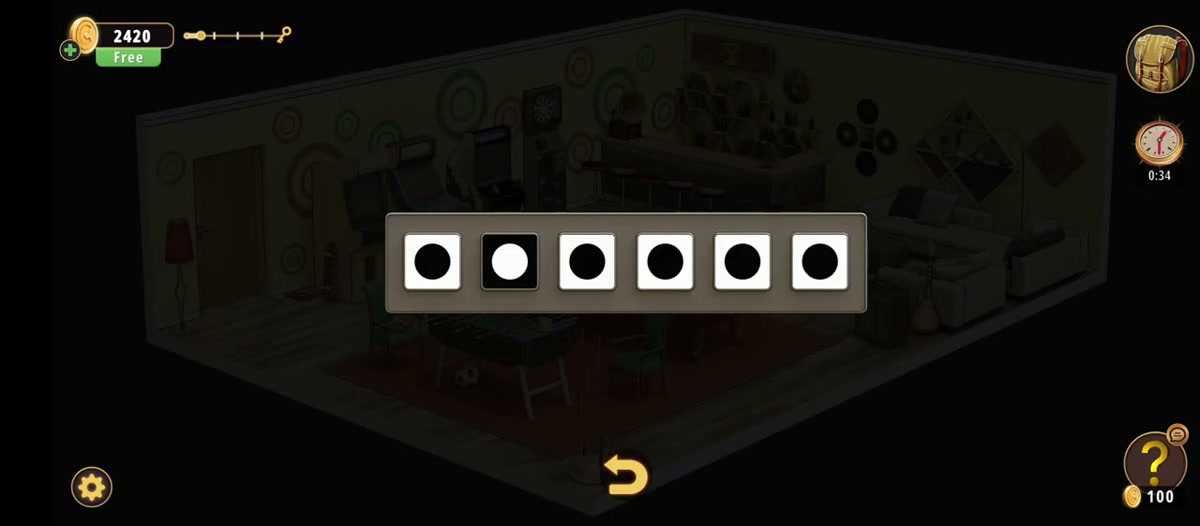
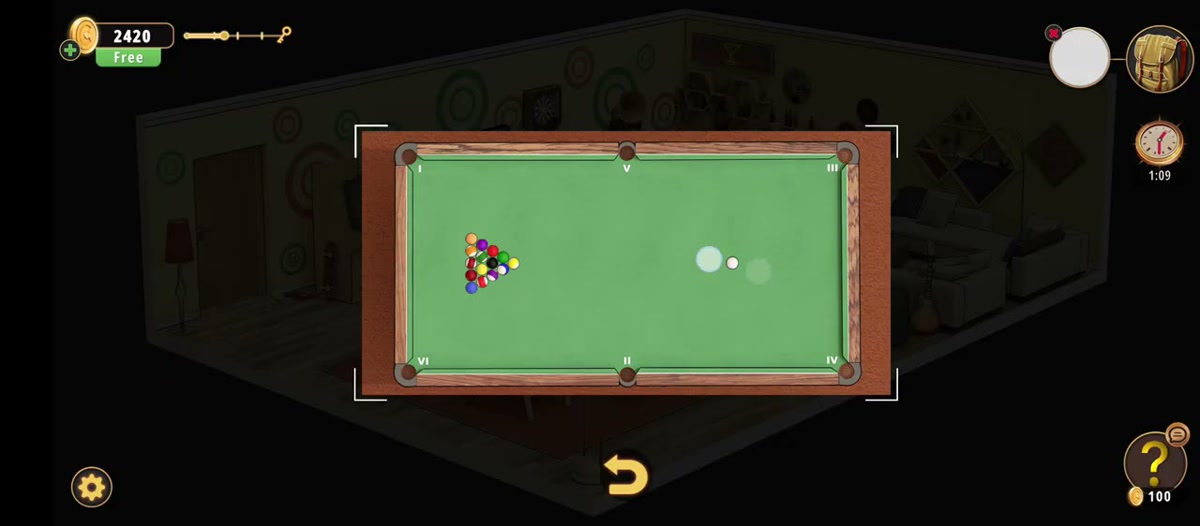
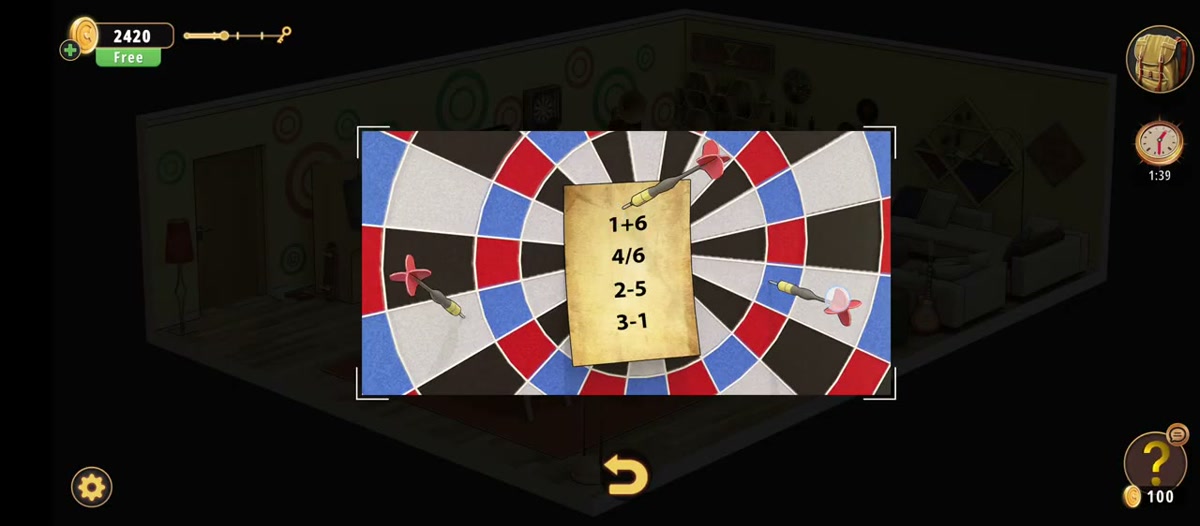
- Work the bar's six black-and-white tiles, the pool table and the dartboard paper: 1+6, 4/6, 2-5, 3-1.
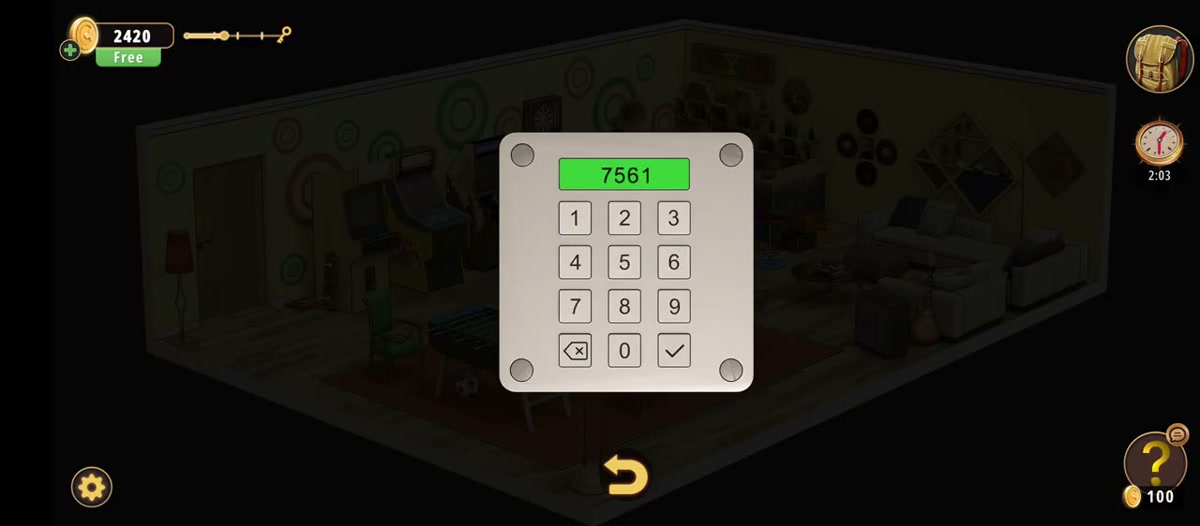
- Open the case by the foosball table with 7561.
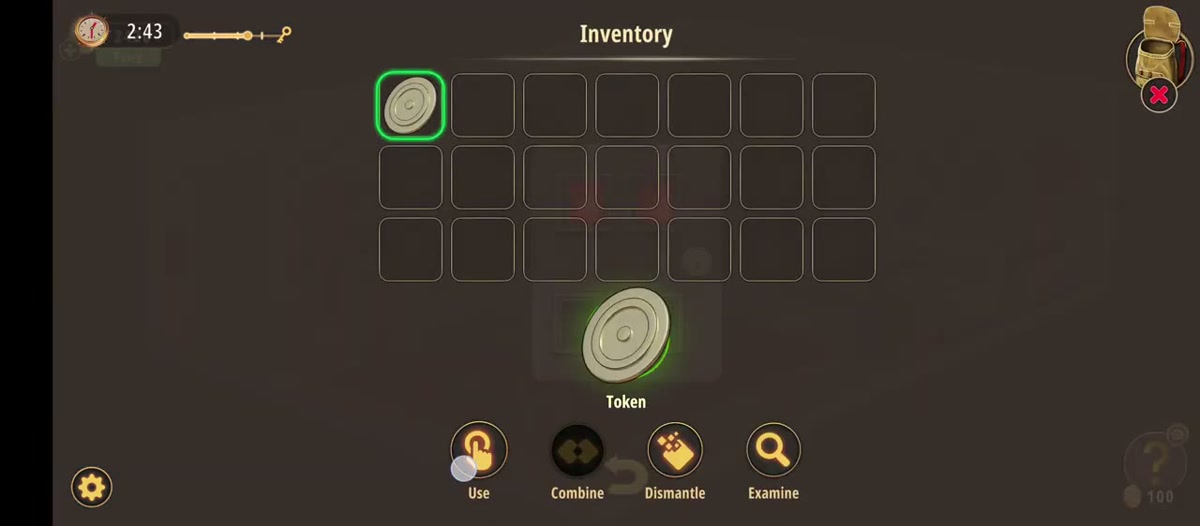
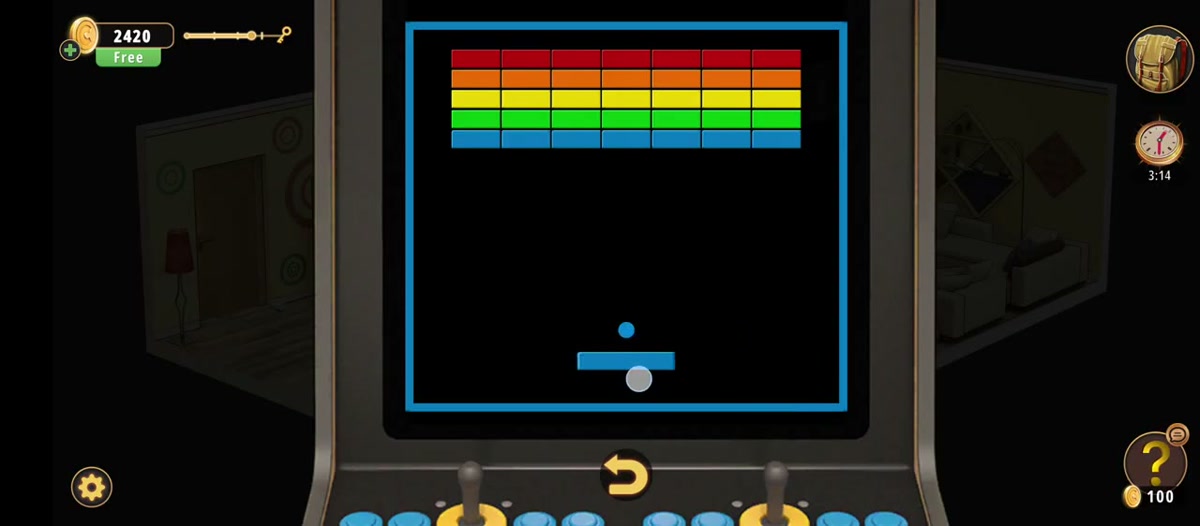
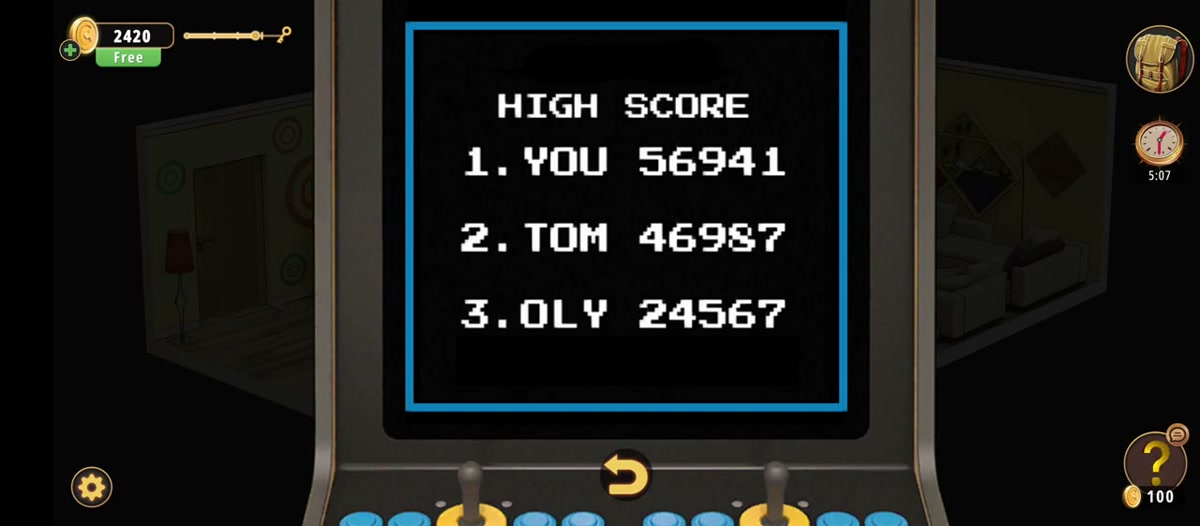
- Pick up the Token, use the arcade cabinet, play the Breakout game out, then read the HIGH SCORE table: YOU 56941.
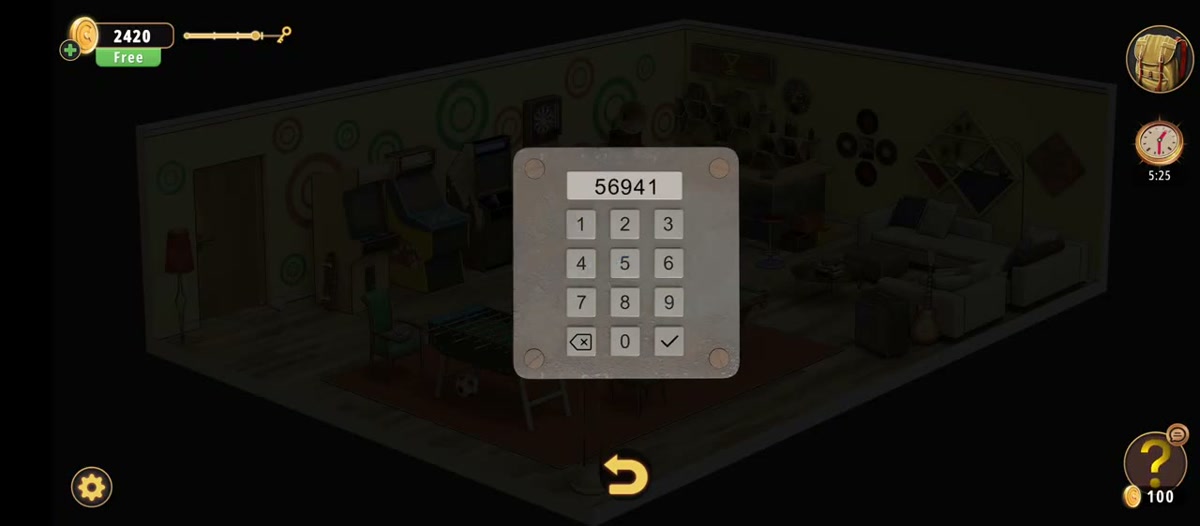
- Type 56941 into the metal box on the books. It opens on an arrow tile.
- Finish the record display, the pinned arrow board and the three-dial letter lock, take the Key, and open the door on the left wall.

The Entertainment Room run used for every frame on this page.
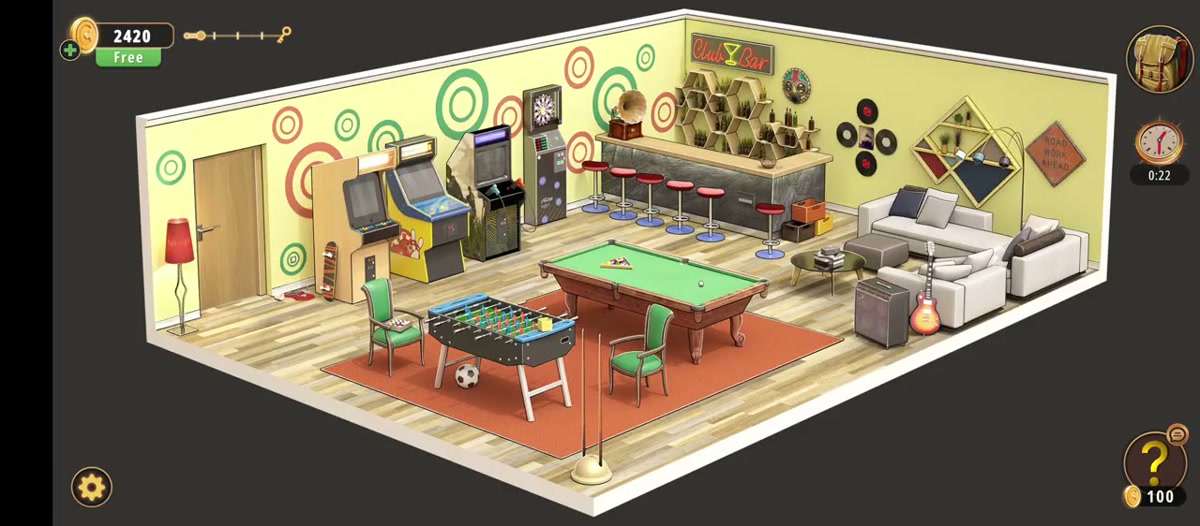
What this level actually is.
One long room seen from above, with the front wall cut away. The left wall is a run of arcade cabinets, a skateboard leaning against the first one, a red-shaded floor lamp by the door, and a dartboard mounted higher up. The back wall is the bar: a grey counter, a run of red-topped stools, a honeycomb shelf of bottles and the glowing CLUB BAR sign with a martini glass on it. To the right of the bar, four vinyl records hang in a square with a framed gramophone picture between them, and further right is a geometric shelf, a ROAD WORK AHEAD sign and the sofa.
The floor is almost all rug. The green-felt pool table sits in the middle with balls scattered on it, a foosball table stands between it and the front of the room, and a stand with two cues sits beside them. The right corner has the sofa, a lamp with a geometric shade, an amp and an electric guitar leaning on it. Everything in that list is either a puzzle station or a clue, which is why the recording opens by panning the whole room before touching anything.
Structurally, this is the loosest room in the chapter. There is no single chain: the two padlocks stand alone, the arcade mini-game stands alone, and the last three puzzles — records, arrows, letters — are self-contained until the letter machine hands you the Key. That also makes it forgiving: if one station stalls you, everything else is still open.
The map: what is where.
Everything we could identify, and what it is for.
| Object | Where | What it does |
|---|---|---|
| Bar tiles | On the bar counter | Six square tiles in a row, one black tile with a white disc among five white tiles with black discs. |
| Pool table | Centre of the room, on the rug | Green felt, balls racked and scattered; opens as its own close-up board. |
| Dartboard | Left wall, above the gramophone | Three darts and a paper clue pinned to the middle: 1+6, 4/6, 2-5, 3-1. |
| Case padlock | By the foosball table | 12-key padlock with a green display. Takes 7561. |
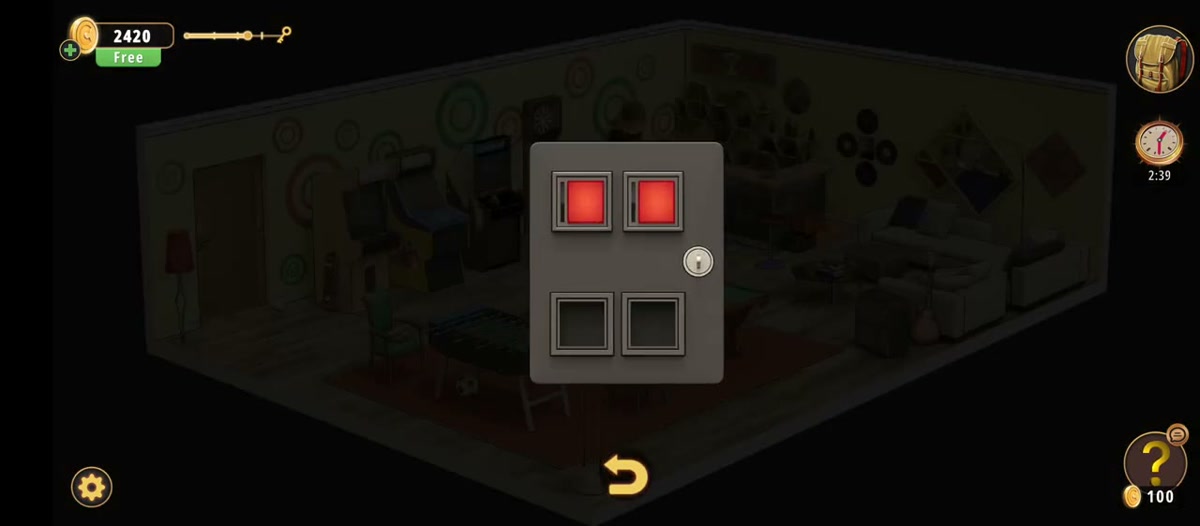
| Arcade control panel | On the arcade cabinet, left wall | Two red button squares on top, two empty slots below, small keyhole icon at the right. |
| Token | Inventory pickup at 2:47 | Flat silver disc, two etched rings, centre dot. Captioned Token. |
| Breakout cabinet | Left wall arcade machine | Playable brick-breaker, about 3:08 to 5:06, ends on the HIGH SCORE table. |
| HIGH SCORE table | On the cabinet screen | 1. YOU 56941 · 2. TOM 46987 · 3. OLY 24567. |
| Metal box | On a stack of books, right of the bar | Battered grey tin with a 12-key padlock. Takes 56941; holds an arrow tile. |
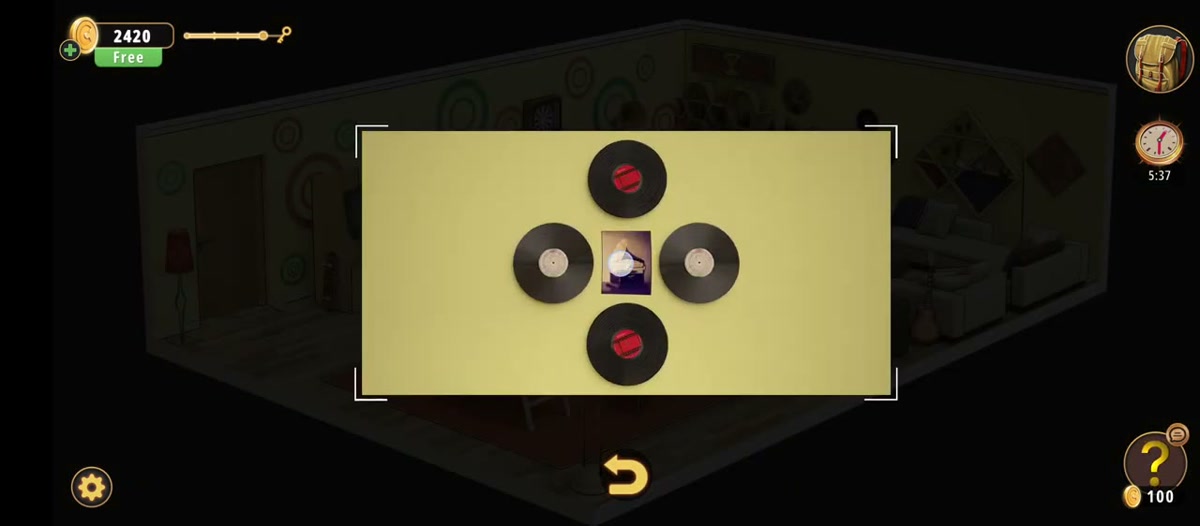
| Record display | Right wall, past the bar | Four vinyls in a cross around a framed gramophone picture. Sparkles when solved at 7:31. |
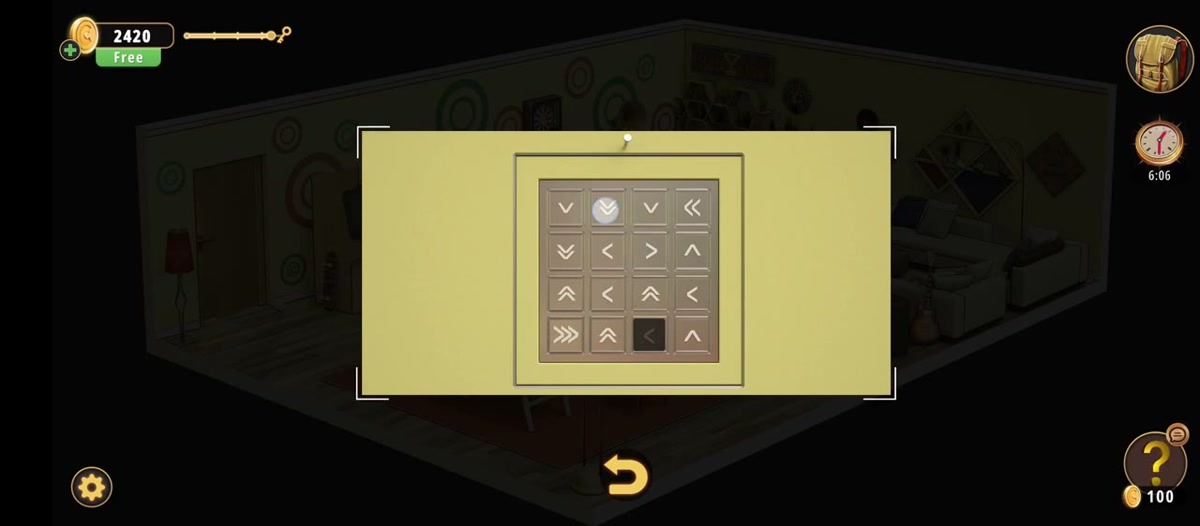
| Arrow board | Pinned yellow panel | 4x4 grid of white arrows, single and double and triple, mixed directions. |
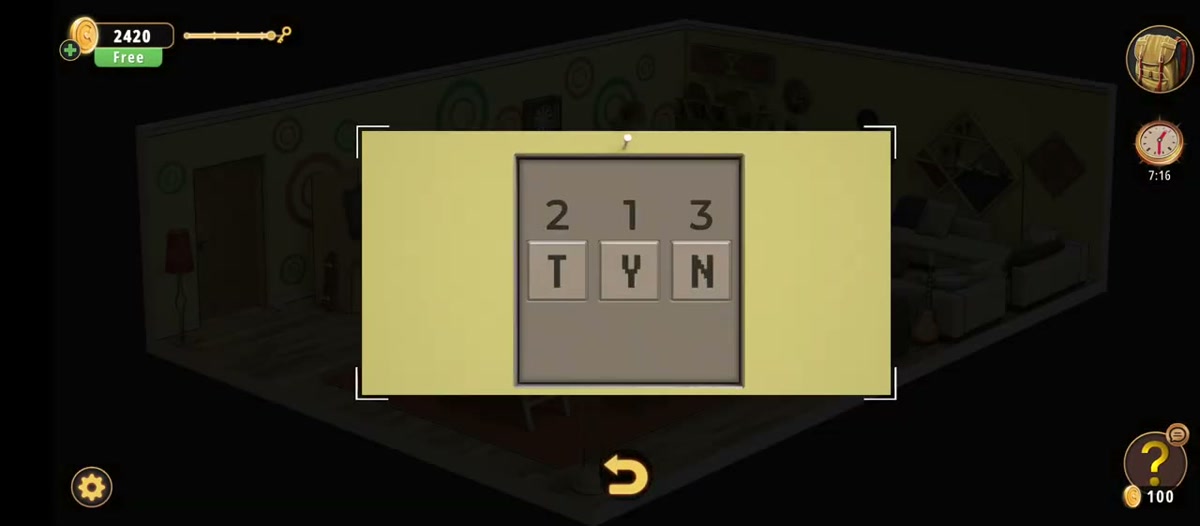
| Letter machine | Wall panel, close-up | Three letter drums under the numbers 2, 1, 3. Yields the Key. |
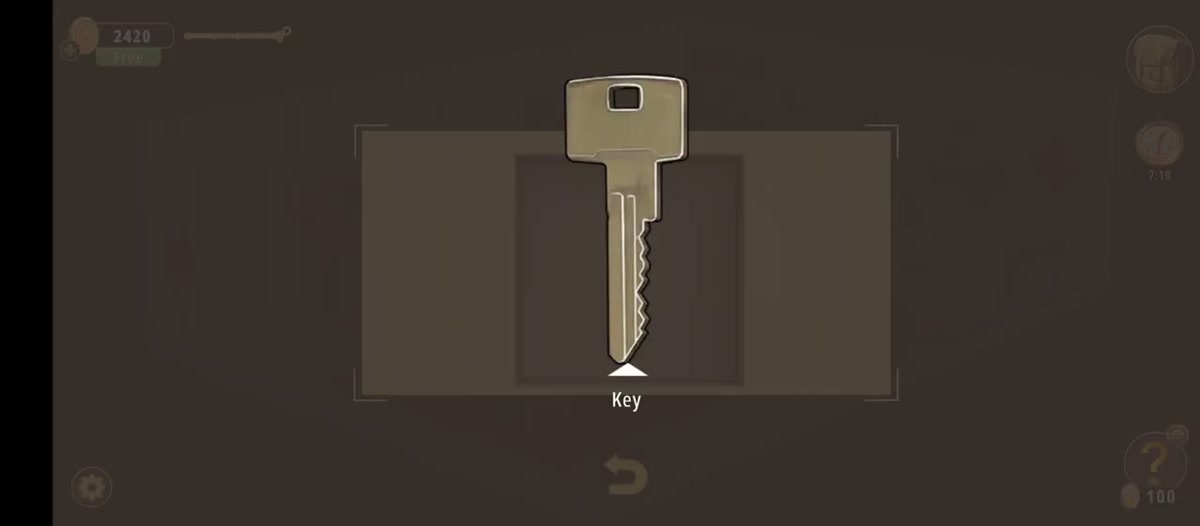
| Key | Item card at 7:26 | Silver key; opens the door on the left wall. |
| Exit door | Left wall, by the lamp | Plain wooden door. Opens at 7:37 on the white exit silhouette. |
Step by step.
The order below follows the recording. Timestamps are video time; the links jump to the matching second.
Where people get stuck.
You assume the dartboard is the code. It is a clue, not a lock. The darts are in the board and the paper is pinned to it, but nothing in the room takes a dart score. Read the four lines, then go to the padlock.
You skip the arcade game. The cabinet is worth two minutes of your life and the whole room turns on it: the HIGH SCORE table only appears once the game ends, and the metal box only opens with the score off it. If you walked past the cabinet, you have no way into the box.
You read 56941 as a five-digit score but not as a code. It is both. The table is the only place that number exists, and the metal box is the only five-digit padlock in the room, which is the level telling you they belong together.
You hunt for a fourth digit on the first padlock. 7561 is four digits because the case padlock is a four-digit padlock. Do not try to push five in.
You wait for the letter machine to say something. It does not. The drums scroll and the panel opens; the key is the whole reward. If it is not opening, you are still one letter off on a drum, not missing a riddle.
Where Entertainment Room sits in Chapter 3.
Chapter 3 is Murder Dressed in White, twenty-four rooms long. Entertainment Room is 23 of 24 — straight after the Master Bedroom and immediately before the Hallway, which is the chapter's final room. So this is the last full puzzle room of the chapter, and the biggest single space in it.
Mechanically it is a reset after the tighter rooms around it. Nothing here chains: the dartboard does not gate the padlock, the token does not gate the high score, and the record display and arrow board sit to one side entirely. That makes it a good room to clear fast — read the clue stations, open the two padlocks, play the arcade game, then roll the letter drums.
- 1 Dining Room guide
- 2 Living Room guide
- 3 Study Room guide
- 4 Guest Toilet guide
- 5 Workshop guide
- 6 Guest Bedroom guide
- 7 Master Bathroom guide
- 8 Kids Playroom guide
- 9 Backyard guide
- 10 Garden guide
- 11 Kitchen guide
- 12 Driveway guide
- 13 Kids Bedroom 1 guide
- 14 Storage Room guide
- 15 Garage guide
- 16 Attic guide
- 17 Terrace guide
- 18 Basement guide
- 19 Garden Shed guide
- 20 Kids Bedroom 2 guide
- 21 Hobby Room guide
- 22 Master Bedroom guide
- 23 Entertainment Room you are here
- 24 Hallway guide
Previous room: Chapter 3 Level 22 — Master Bedroom (walkthrough coming soon)
Next room: Chapter 3 Level 24 — Hallway
Frequently asked questions.
What is the code in Rooms & Exits Chapter 3 Level 23 Entertainment Room?
There are two typed codes, on two different locks. The case sitting by the foosball table has a 12-key padlock and takes 7561. The battered metal box on the stack of books has the same kind of padlock and takes 56941, which is the top line of the arcade machine's HIGH SCORE table: 1. YOU 56941. Both numbers were read twice off the green displays, at two separate seconds, and both reads agreed.
Where does 56941 come from?
From the arcade cabinet. The Breakout-style mini-game runs from about 3:08 to 5:06, and when it ends the cabinet shows a black HIGH SCORE screen with three entries: 1. YOU 56941, 2. TOM 46987, 3. OLY 24567. The first line is the one the level uses. Type it into the metal box's padlock and the lid opens on a small tile carrying an arrow-like symbol.
Where does 7561 come from?
The level never shows the working. What it does show is a dartboard with a piece of paper pinned to it, and the paper carries four short expressions written one under another: 1+6, 4/6, 2-5, 3-1. Those four lines were each read twice from two different crops. How they turn into 7561 is not captured in any frame we could decode, so this page prints the code as a read rather than as a derivation.
How do I beat the Breakout mini-game on the arcade cabinet?
You play it like Breakout: clear the brick wall with the paddle, one ball. The recording spends almost two minutes on it — 3:08 to 5:06 — which tells you it is not a two-second interaction. The part that matters is what comes after: the cabinet ends on the HIGH SCORE table, and that table is the clue for the metal box. The run we used ends the game with 56941 on the top line.
What is the dartboard for?
It is a clue station, not a lock. Three darts are stuck in the board — one high and slightly right, one at the left, one at the right — and a rectangle of aged paper is pinned to the middle with four hand-written lines on it. We read those lines twice and they came out as 1+6, 4/6, 2-5 and 3-1. Read it, then go to the case by the foosball table.
What are the six black-and-white tiles on the bar?
A single row of six small square tiles sits on the bar counter, each holding one big disc. Five of them are white tiles with a black disc; exactly one, second from the left, is a black tile with a white disc. That inverted tile is the read: this is a matching board, not a keypad. There is no instruction text and no counter, and the footage never holds a solved frame of it, so this page does not claim a rule for it.
Where do I find the Token and what does it do?
The Token is a pickup at about 2:47: a flat, silver disc with two rings etched into it and a small centre dot, captioned simply Token. It appears right after the close-up of the arcade cabinet's control panel, which has two red button squares on top and two empty slots underneath them, and right before the cabinet's Breakout game starts at 3:08. The recording shows the panel, then the Token, then the game running — it does not show the Token being dropped into a slot, so treat that step as the obvious reading rather than a filmed one.
How do I open the exit door?
With the Key. The last lock in the room is a three-column letter machine: three square letter drums with the numbers 2, 1 and 3 printed above them. The drums scroll, and at 7:25 the three boxes read T, Y, N; a second later the key is already in the open compartment. Pick up the Key, open the inventory, use it on the door on the left wall, and the door swings open on the exit at 7:37.
What is the four-record wall display?
A close-up on the right wall of the room: four black vinyl records set in a cross, two with red centre labels and two with pale ones, around a small framed picture of a gramophone. It opens as an interactive close-up and sparkles when it is done at 7:31. The recording never holds a solved frame long enough to read a pattern off it, so this page describes it rather than solving it.
What is the pinned arrow board?
A yellow panel pinned to a surface with a single white pin, holding a four-by-four grid of beveled cells, each carrying one white arrow: single up, down, left and right arrows mixed with double and triple ones. It is a directional-board puzzle, not a keypad. The footage covers about fifty seconds of it around 6:10 to 6:43 without ever spelling out the rule, so no move list is printed here.
Is Entertainment Room room 23 of Chapter 3?
Yes. Chapter 3 is Murder Dressed in White and it runs twenty-four rooms; Entertainment Room is 23 of 24, straight after the Master Bedroom and immediately before the Hallway, which is the chapter's last room. That makes this the last room of the chapter with a full set of puzzles before the Hallway closes the chapter out.
Does the recording show the level being completed?
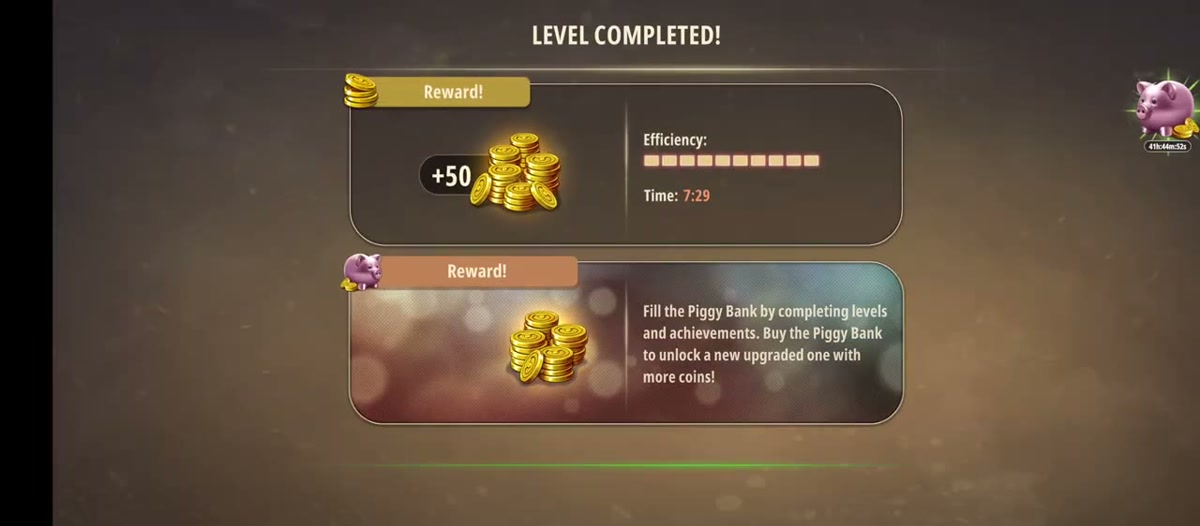
Yes, all the way to the results card. The door opens at 7:37 with a white silhouette in the doorway, and the LEVEL COMPLETED! card follows at 7:39. It shows a level reward of +50 coins and a recorded Time: 7:29, plus the usual piggy-bank panel underneath.
What this page could not verify.
1. How the dartboard paper produces 7561. The four lines read 1+6, 4/6, 2-5 and 3-1, and those reads held up at two zoom levels. But no frame in the recording shows the paper being used, and no frame shows a working being written down. The code 7561 itself is solid — it was read twice off the keypad display — but the arithmetic that gets you there is not on film, so this page does not invent one.
2. The final letters on the three-dial machine. The drums were still moving when the compartment opened. The last clean read was T Y N at 7:25, and a 4x crop of the next second read the third box as an L; the Key appears at 7:26 either way. With three scrolling drums and no solved frame, this page prints the reading rather than a "correct" word.
3. What the Token physically goes into. The control panel with the two red squares and two empty slots is filmed at 2:43, the Token is picked up at 2:47, and the Breakout game is running by 3:08. That sequence is consistent with dropping the Token into a slot, but the drop is never shown, so it stays an inference.
4. The payoffs of the record display and the arrow board. Both open, both are worked, both end cleanly — the records sparkle at 7:31 — but neither shows a readable solved state or a reward we could tie to a later lock. They are described here, not solved.