 GridPaw
 Shikaku
 Akari
 Kakuro
 Nonogram
 Nurikabe
 Pictomino
 KenKen
 Binary
 Star Battle
 Hashi
 Slitherlink
 Murder Sudoku
 Meowdoku
 Crazy Cleanup
Rooms & Exits Chapter 3 Level 5 Walkthrough: Workshop
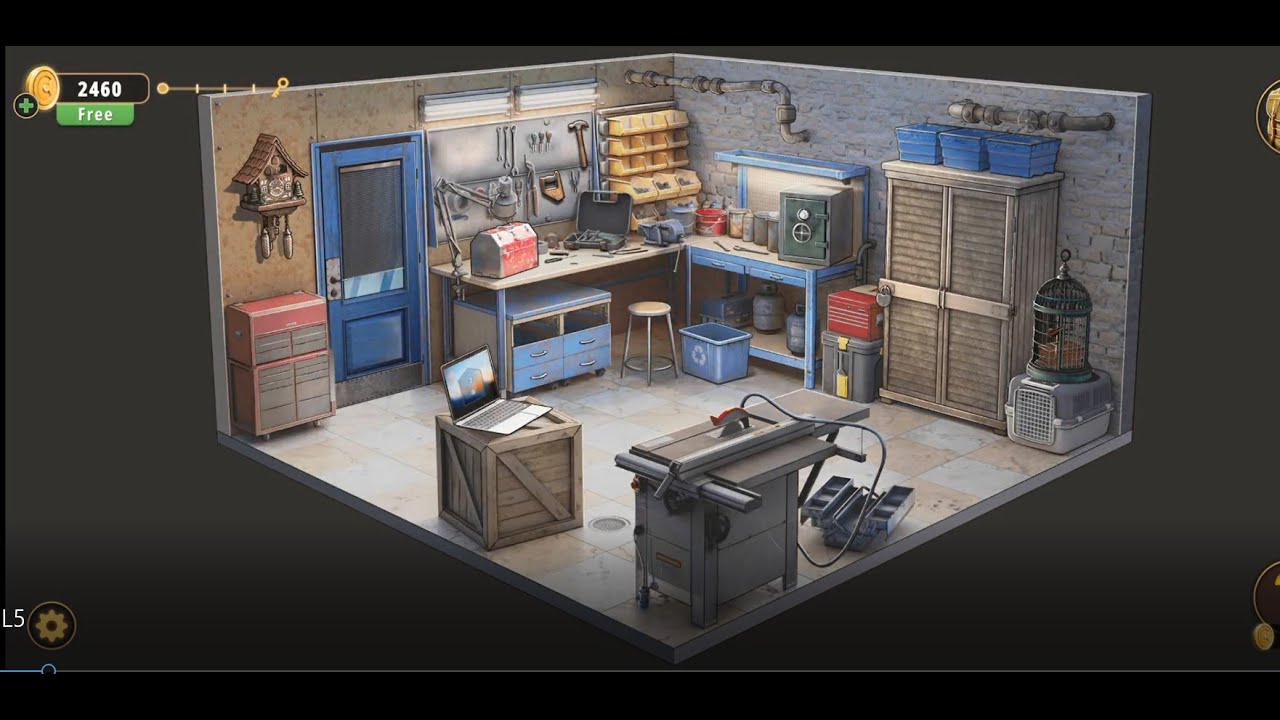
Workshop is the fifth room of Chapter 3, Murder Dressed in White, and the first one that feels like a workshop rather than a room in a house: pegboard, bench, toolbox, a machine bolted to the bench with two glass tubes on it, and a green safe sitting on a blue shelf. The level has one clean numeric answer — 41018 on the machine's five-column display — a laptop that wants text instead of digits, a Morse paper, and a Roman-numeral clock that the laptop feeds. This page gives you the number, the chain, and an explicit account of the three things the recording does not let us finish.
Workshop is room 5 of 15 in Chapter 3. The machine's five-column display settles on 41018. The laptop wants text, not digits, and unlocks to a clock reading 14:00.
- Find the red machine on the bench with two clear glass tubes on it, near the safe.
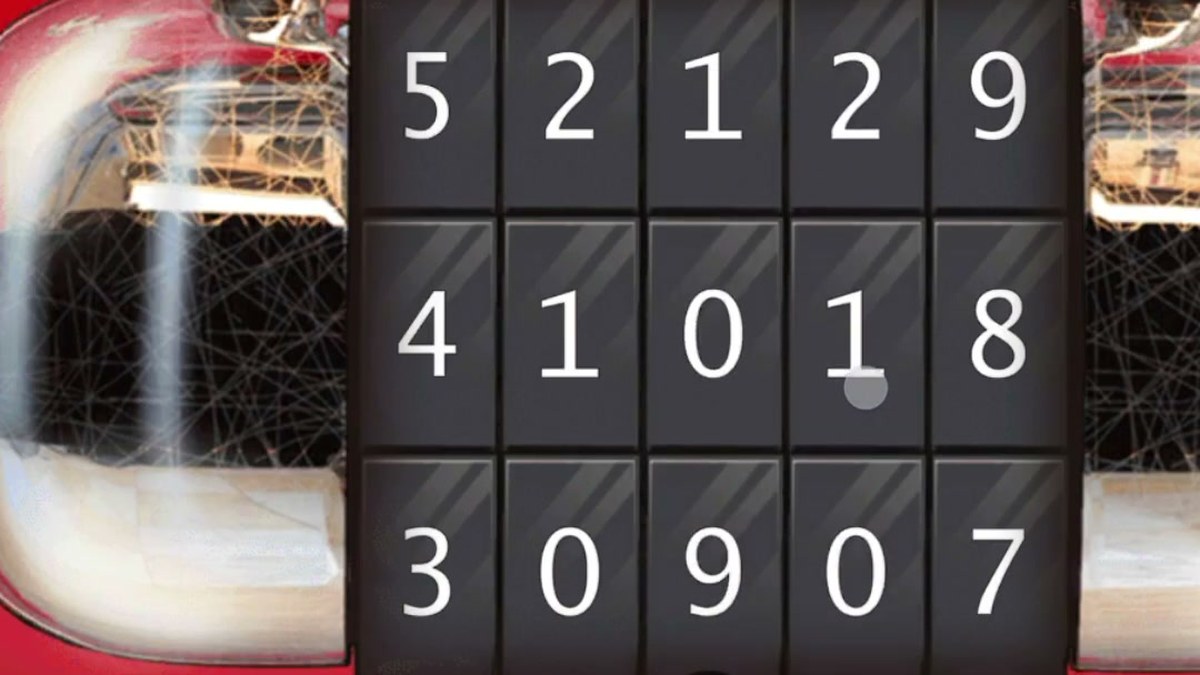
- Read its 3x5 grid by column, middle row only: 4 1 0 1 8. The wheels stop there and the view closes.
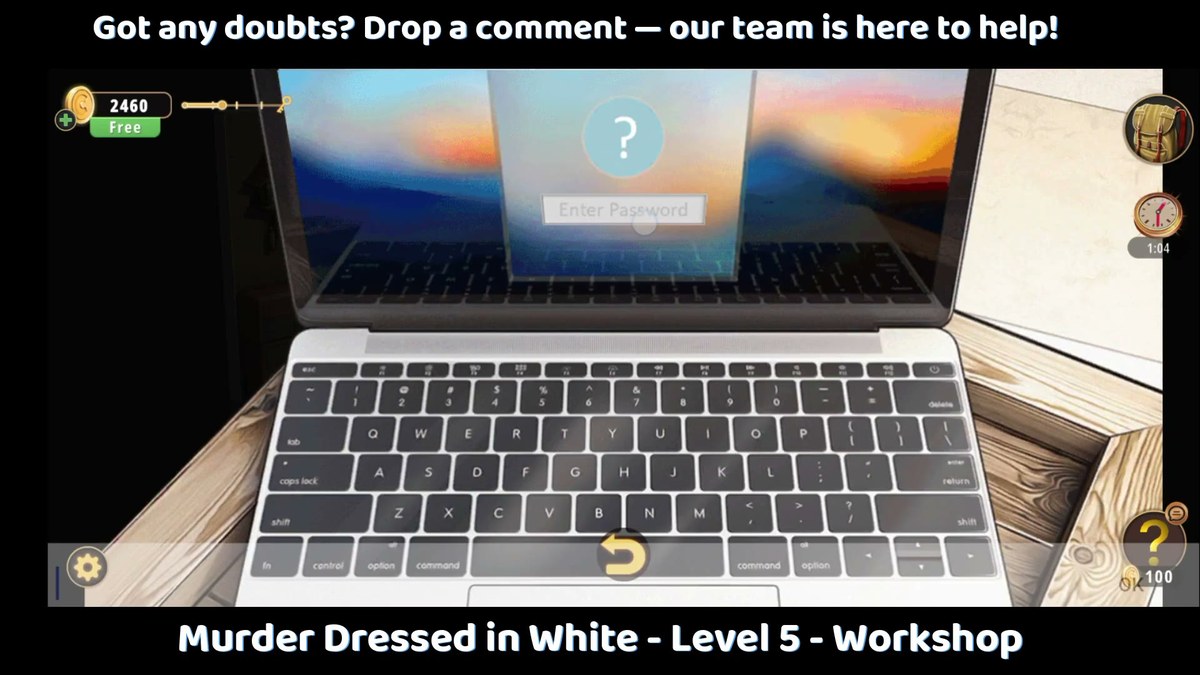
- Open the laptop and enter its password — a short text string, masked on screen — and read the digital clock it shows: 14:00.
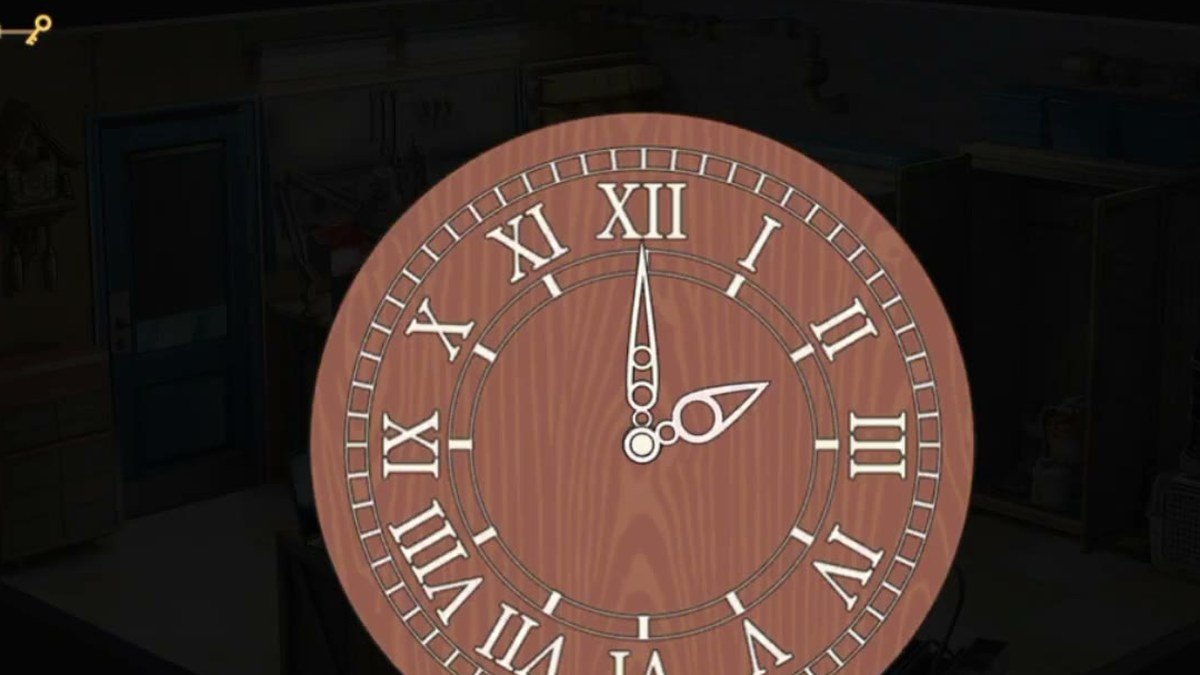
- Use that time on the wooden wall clock with the Roman-numeral face: two o'clock.
The 5:40 run used for every frame on this page.
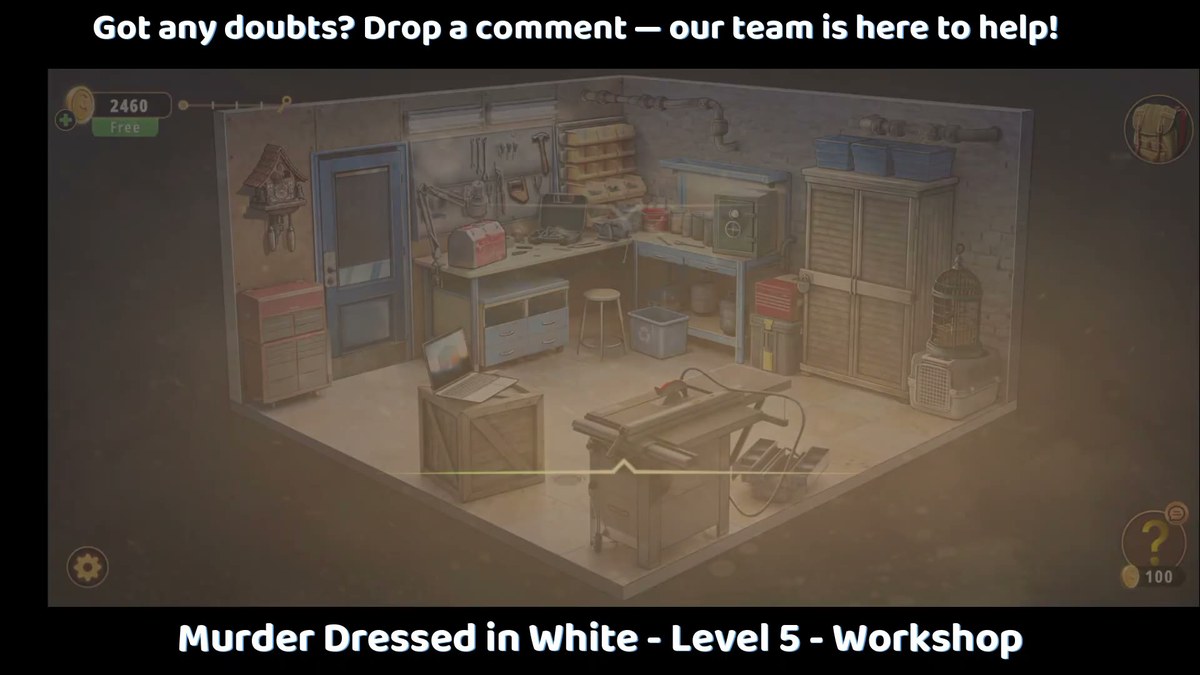
What this level actually is.
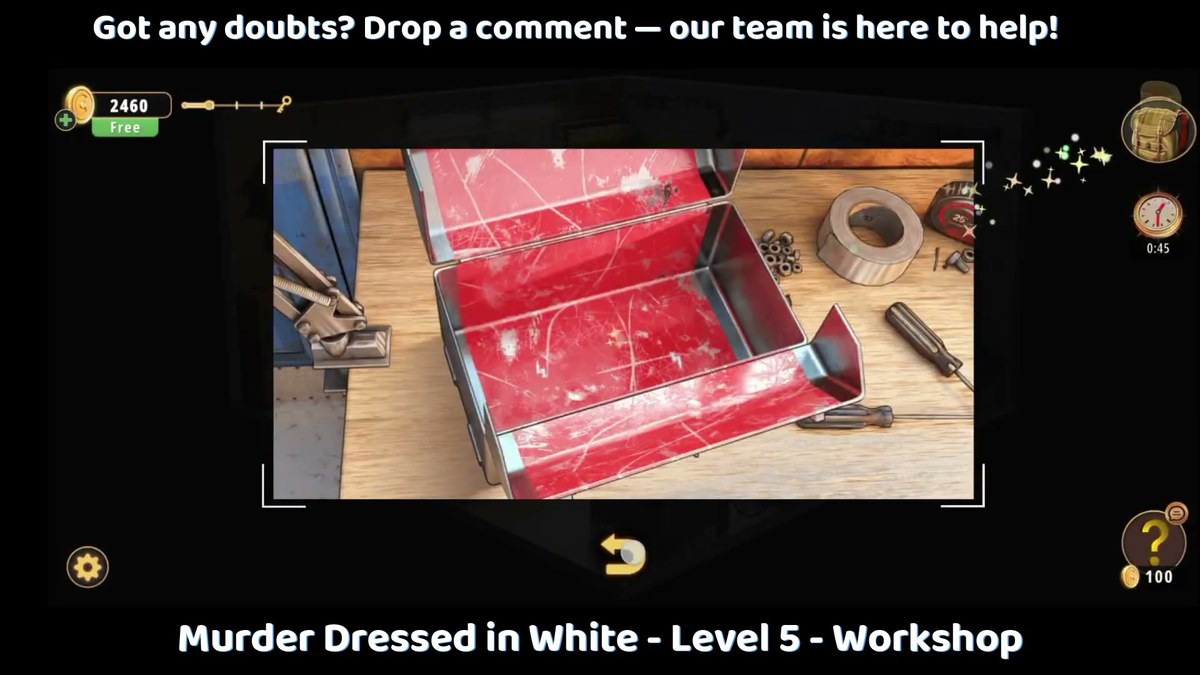
The room is one long bench against a dark panelled wall. On the wall above it, a pegboard holds wrenches, pliers and screwdrivers on hooks; further along there is a big wooden clock with Roman numerals on its face, a cuckoo clock beside a blue-framed window, and a large empty birdcage hanging near the window. On the bench itself: an open red toolbox with a roll of tape, screws and two screwdrivers, a clamp bolted at the left end, and a red machine with two clear glass tubes full of wire standing on it. Over on the left, a blue metal shelf unit carries a green-grey safe with a big circular dial.
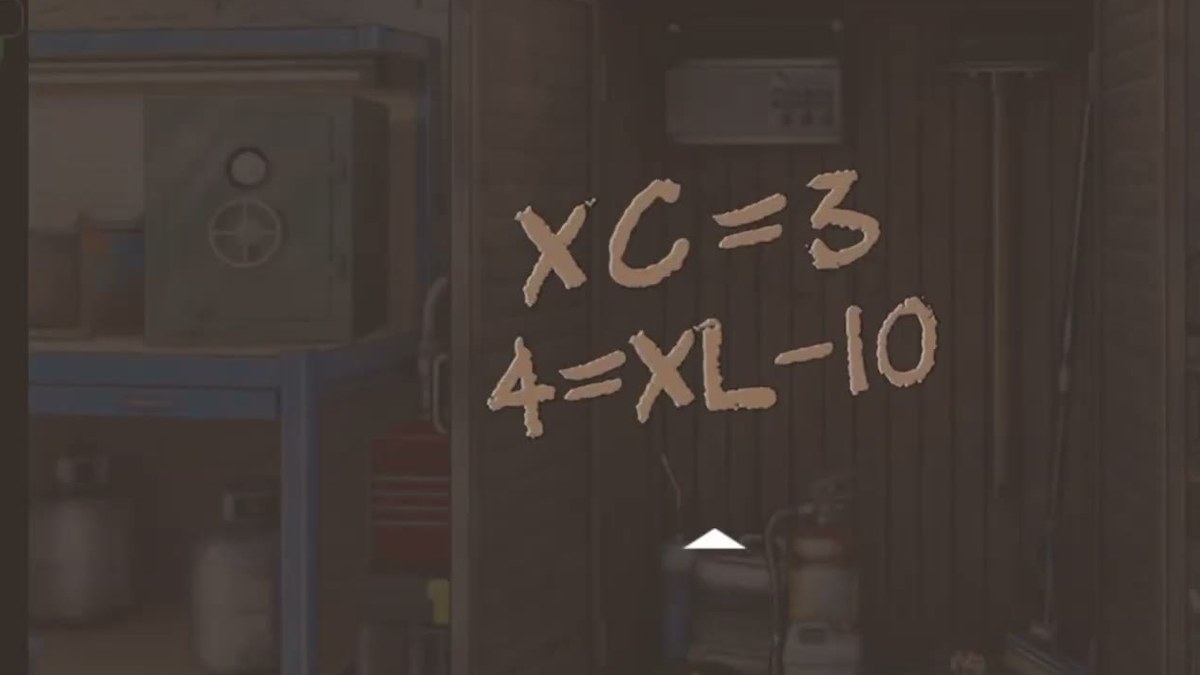
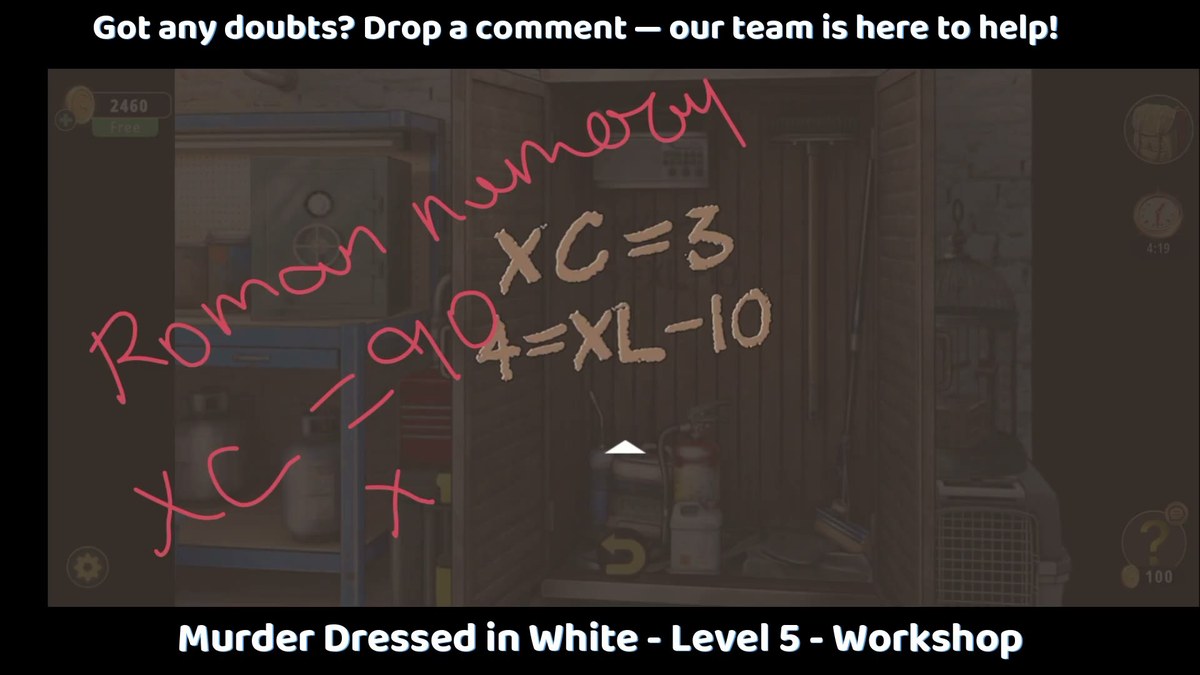
What makes Workshop different from the rooms before it is that most of its clues are written rather than built. There is a note chalked on the wall (XC=3 and 4=XL-10), a crumpled piece of paper covered in Morse marks, and a laptop showing a login window. The one exception is the five-column display on the red machine, which is a physical wheel lock and the only place in the room where a number is set rather than read.
The chain the level wants is roughly: find the tools (hammer, saw blade, saw handle), use them on the furniture, read the two written clues, get the laptop open, and take the time it shows to the wall clock. The safe and the birdcage are the two containers that sit at the end of that chain.
The map: what is where.
Every interactive object we could identify, and what it is for.
| Object | Where | What it does |
|---|---|---|
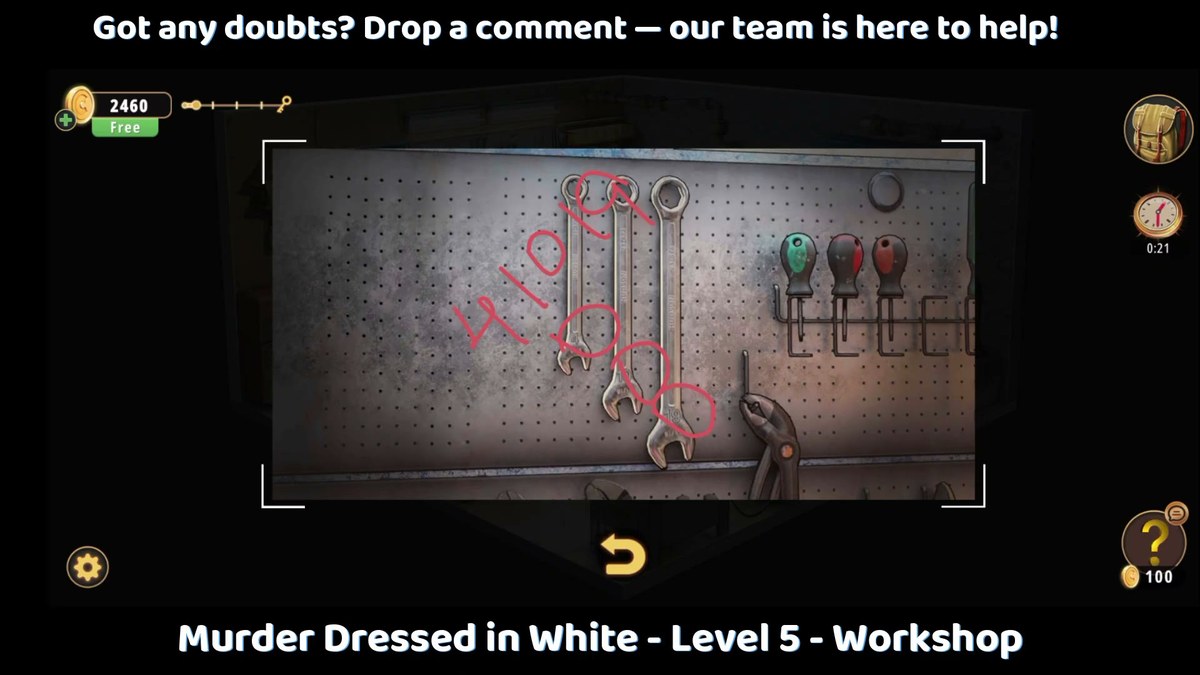
| Pegboard of tools | Wall above the bench | Wrenches, pliers, screwdrivers on hooks, with red marks chalked around them. |
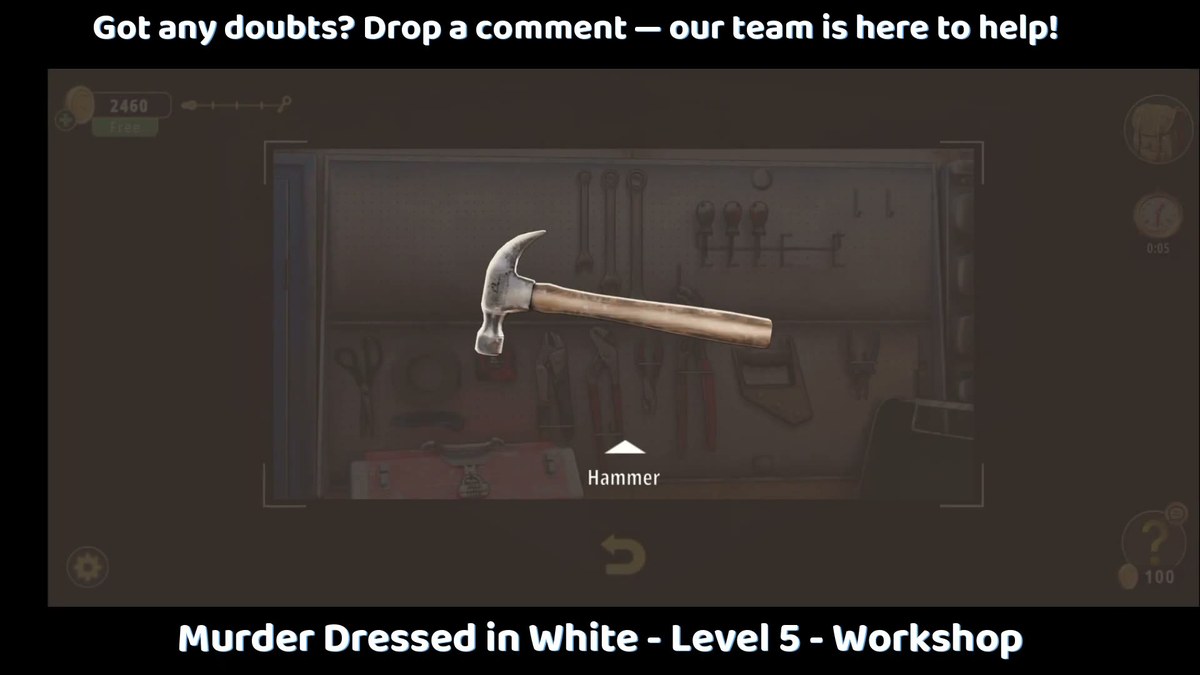
| Hammer | On the bench, near the toolbox | Picked up at 0:40; the level's blunt tool. |
| Red toolbox | Bench, right of centre | Open: tape, screws, two screwdrivers. The saw blade and handle are worked here. |
| Red machine with two glass tubes | Bench, near the safe | Five-column, three-row digit display. Settles on 41018. |
| Wall note | Dark panelling beside the safe | Chalk: XC=3 / 4=XL-10. |
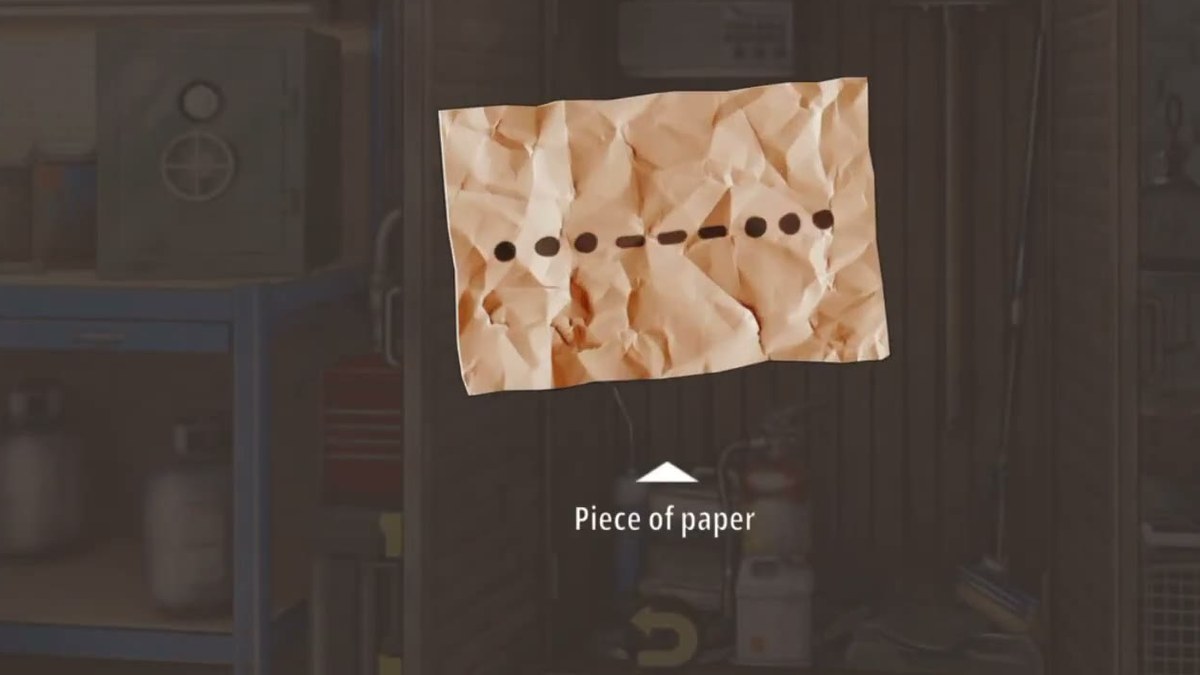
| Piece of paper | On the bench, past the toolbox | Morse row ..- .--. . ... — the room's only text clue. |
| Laptop | Bench, right end | Blue login window, "Enter Password"; unlocks to a clock reading 14:00. |
| Roman-numeral wall clock | Wall, centre of the room | Big wooden face, I to XII; the hands are the puzzle. |
| Birdcage | Hanging beside the window | Holds a small wooden box; the cage latch is the puzzle. |
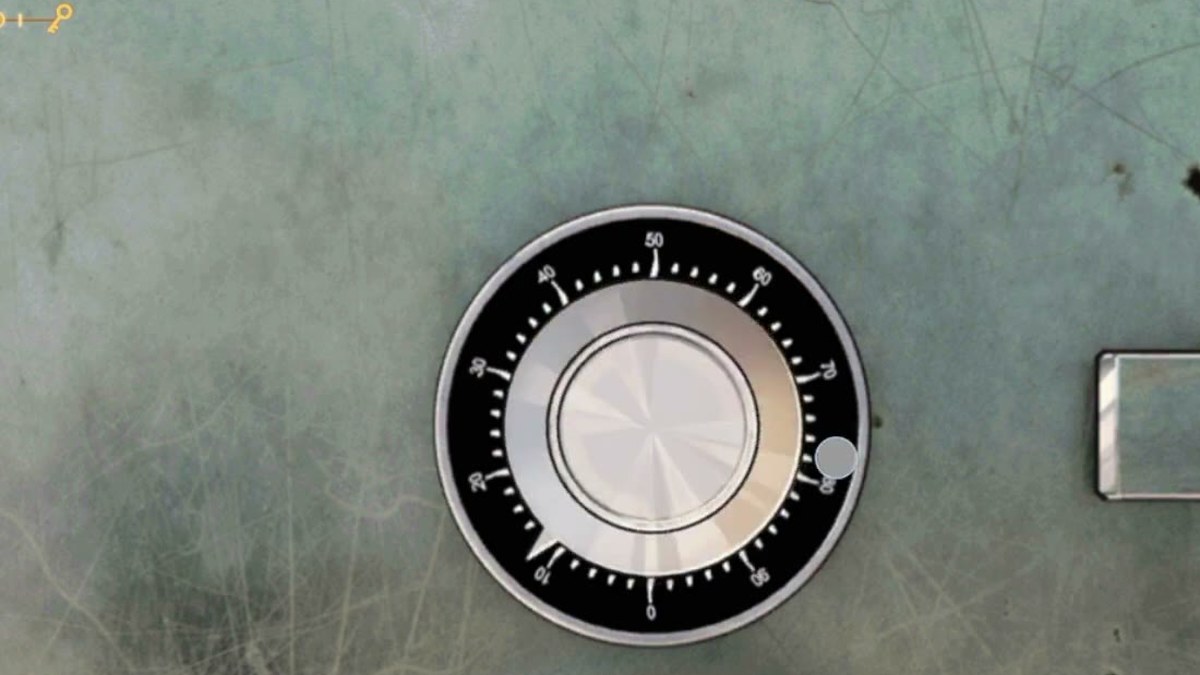
| Green safe | Blue shelf unit, left wall | Circular dial marked 0-90 in tens with fine ticks, plus a small lock above. |
| Cabinet with extinguisher | Left of the bench | Opens to a fire extinguisher and a broom; storage, not a lock. |
Step by step.
Where people get stuck.
The panels read the wrong way. Both number displays in this room are wheel stacks, and both look like grids of digits at a glance. Read them by column and take the middle digit. On the machine that is 41018; the top row is 52129 and the bottom is 30907, and neither does anything.
The wheels are still moving when you look. If you tap the machine and read immediately, you will catch a mid-turn value like 41038 and think it is the answer. Wait for the wheels to stop moving, then read. The settled frame is 0:59.
The laptop password feels impossible. It is not a number and the room never spells it out. The two things to work with are the Morse paper and the wall note; the mask on screen means nobody can copy the string from a recording, so it has to be derived.
The clock does nothing. The wall clock is not a code input — it is the same object you are setting. Drag the hands; do not go looking for a keypad behind it.
The safe never opens in the guides. Because the dial is a free-spinning 0-90 wheel rather than a keypad, a recording has to hold on the exact second the door releases to be useful, and most do not. If you solve it, the three stops are worth writing down.
Tools look like scenery. The hammer on the bench, the saw blade and its handle, the tape in the toolbox: Workshop is a room where half the inventory is lying in plain sight on the work surface. If you cannot open something, the answer is usually a tool rather than a code.
Where Workshop sits in Chapter 3.
Chapter 3 is Murder Dressed in White, and Workshop is room 5 of 15 — the first room you play after the level-select screen, before Guest Bedroom (6) and Master Bathroom (7). Where Dining Room and the rooms before it kept you in one wall of furniture, Workshop gives you a bench, a shelf unit, a hanging cage and a wall of tools, and expects you to walk between them.
It also sets the chapter's habit of hiding the answer in handwriting. The wall note (XC=3, 4=XL-10) and the Morse paper are both text puzzles in a room whose only numeric lock is a set of physical wheels — and the laptop, unusually for this chapter, wants letters rather than digits. Guest Bedroom repeats the trick with its ID card and phone; Master Bathroom goes back to pure numbers.
- 1 Dining Room guide
- 2 Living Room guide
- 3 Study Room guide
- 4 Guest Toilet guide
- 5 Workshop you are here
- 6 Guest Bedroom guide
- 7 Master Bathroom guide
- 8 Kids Playroom guide
- 9 Backyard guide
- 10 Garden guide
- 11 Kitchen guide
- 12 Driveway guide
- 13 Kids Bedroom 1 guide
- 14 Storage Room guide
- 15 Garage guide
- 16 Attic guide
- 17 Terrace guide
- 18 Basement guide
- 19 Garden Shed guide
- 20 Kids Bedroom 2 guide
- 21 Hobby Room guide
- 22 Master Bedroom guide
- 23 Entertainment Room guide
- 24 Hallway guide
Frequently asked questions.
What is the code in Rooms & Exits Chapter 3 Level 5 Workshop?
The one numeric answer the room gives you outright is 41018, on the five-column display of the red machine with the two glass tubes. Read the middle row of the 3x5 grid left to right and you get 4 1 0 1 8; the columns stop moving there, the view closes and the machine is done. The other lock in the Workshop is the laptop, which asks for a text password rather than digits — its characters are masked on screen, so this page does not print a value for it.
Where is the 41018 panel?
On the red machine that sits on the bench under the shelves, the one flanked by two clear glass tubes full of wire. Tap it and the room zooms in on a grid of dark tiles, five columns wide and three rows tall, each tile carrying one white digit. It sits at the end of the bench near the safe, and it is easy to mistake for a label rather than a lock the first time you pass it.
How should I read the 3x5 grid?
By columns, not by rows, and only the middle one counts. Each column is a wheel showing the digit above, the digit you have selected and the digit below — the same three-window arrangement as a padlock. In the settled frame the five columns read 5/4/3, 2/1/0, 1/0/9, 2/1/0 and 9/8/7, so the middle row is 4 1 0 1 8. Reading the top row instead gives 5 2 1 2 9 and nothing happens.
What is the laptop password?
We could not read it. The laptop opens on a blue login window with a question-mark avatar and a field that says Enter Password; at 1:40 the avatar changes to a smiling face and the field shows a short masked string, and by 1:42 the machine has unlocked. The mask hides the characters, and the room's only text clue — the crumpled piece of paper — is a row of Morse marks rather than a word this page can pin to a keyboard.
What does the laptop show once it opens?
A digital clock reading 14:00 on a black screen with a green display. That is the laptop's payoff and it is a clue, not a lock: the Workshop's other time puzzle is the big wooden wall clock with Roman numerals on its face, and 14:00 is the only time value the room hands you. On a twelve-hour dial that is two o'clock.
What is written on the wall note?
Two lines in white chalk on the dark panelled wall beside the safe: XC=3 and 4=XL-10. It is not standard Roman notation — XC is 90 and XL is 40 — which is the point: the note is asking you to treat the numerals as values to manipulate rather than to read. The walkthrough video annotates the same wall in red with XC=90, X=10 and L=50 as it works the puzzle out.
What is on the piece of paper?
A single row of Morse marks. The clearest frame is at 1:20, where the game labels it Piece of paper: the marks read ..- .--. . ... — four groups, which in standard Morse are U, P, E and S. It is the only written clue in the Workshop that is not a number, and the laptop is the only lock in the Workshop that takes text, so the two belong together even though the masked field stops us confirming the exact string.
How do I open the safe?
The safe is the green-grey box on the blue shelf unit on the left wall. Its door carries a large circular dial marked 0 to 90 in tens, with nine fine ticks between each number, plus a smaller lock above it and a latch handle on the right. In the recording the dial is turned repeatedly from 4:28 onwards; the video ends before the door swings, so this page does not print a combination for it.
What is the birdcage for?
At 3:15 the camera settles on a large empty birdcage hanging beside the window, with a small wooden box sitting inside it. The cage is a container puzzle: you have to get the box out. The recording opens the cage and takes the box but never holds a frame long enough to show how the latch works, so treat it as a place to look with a tool rather than a code.
Is Workshop the fifth room of Chapter 3?
Yes. Chapter 3 is Murder Dressed in White, and Workshop is room 5 of 15 — the first room of the chapter after the level-select screen, before Guest Bedroom (6) and Master Bathroom (7). It is the chapter's most mechanical room: a pegboard wall of tools, a workbench with a red toolbox, a bench-mounted machine with two glass tubes, a green safe on a blue shelf, a birdcage, a cuckoo clock and a big Roman-numeral wall clock.
What this page could not verify.
1. The laptop password. The login window, the masked field and the happy-face avatar are all clearly visible, but the characters are hidden by the mask and the game never echoes them. The Morse paper gives four groups (U, P, E, S) and that is where we would start, but we have not seen the string accepted, so it is not printed as an answer.
2. The safe combination. The dial is legible — 0 to 90 in tens, nine ticks between — and the recording turns it for the best part of a minute, but the door never opens inside the footage we could extract. No combination is given here.
3. The exit and the closing sequence. The run used for this page was reconstructed from a partly downloaded file: the last seconds, where the door opens and the level ends, are not in it. We therefore cannot show you the exit frame or a completion card for Workshop, and this page does not claim a reward figure for it.