Unofficial fan-made guide. Not affiliated with Webelinx Games, the developer of Rooms & Exits: Escape Room Games.
Rebuilt frame by frame from a 1080p recording of the current build. Where the recording does not show a number or a result clearly enough to read twice, this page says so instead of filling the gap.
Chapter 1 · Wicked Games11 of 11 with full written steps · 11 with a video
Quick answer
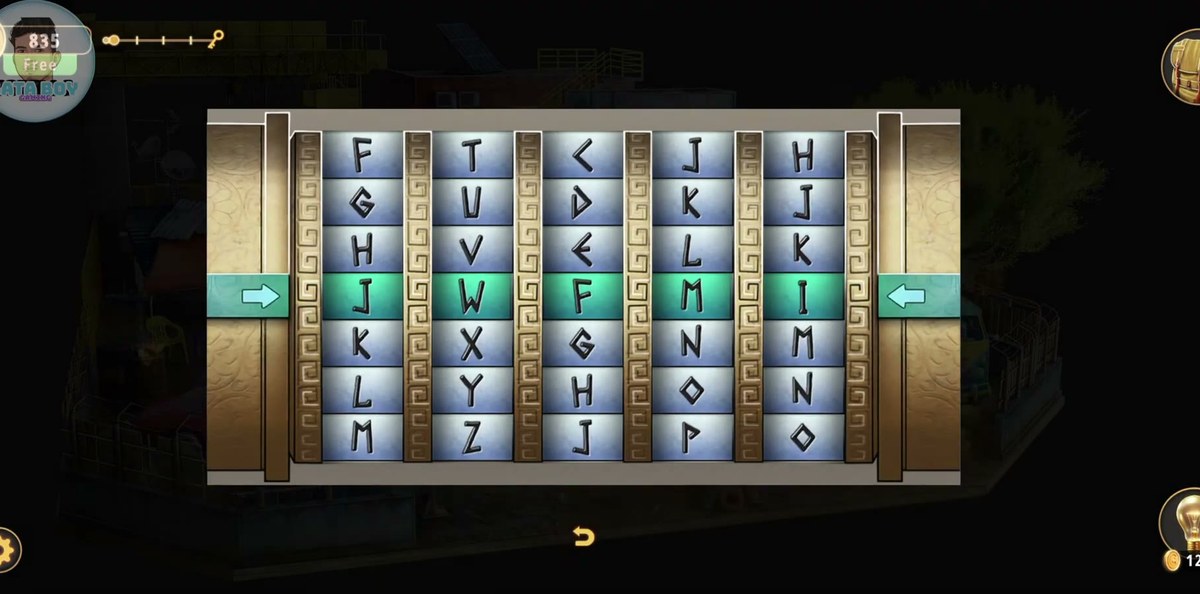
JWFMI opens the letter lock on the trailer door, and 99452 opens the yellow keypad panel beside the crane. Those are the only two codes the level asks you to type.
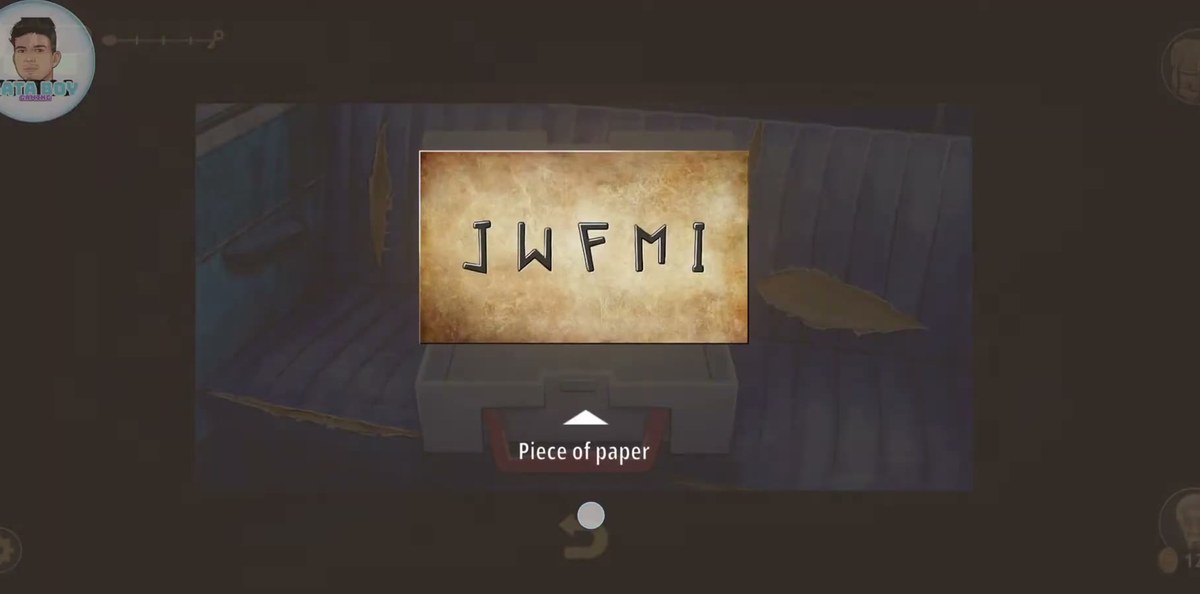
Take the piece of paper out of the crate in the yard: it reads JWFMI. Enter those five letters on the trailer door lock. It is not a word, so stop trying to guess one.
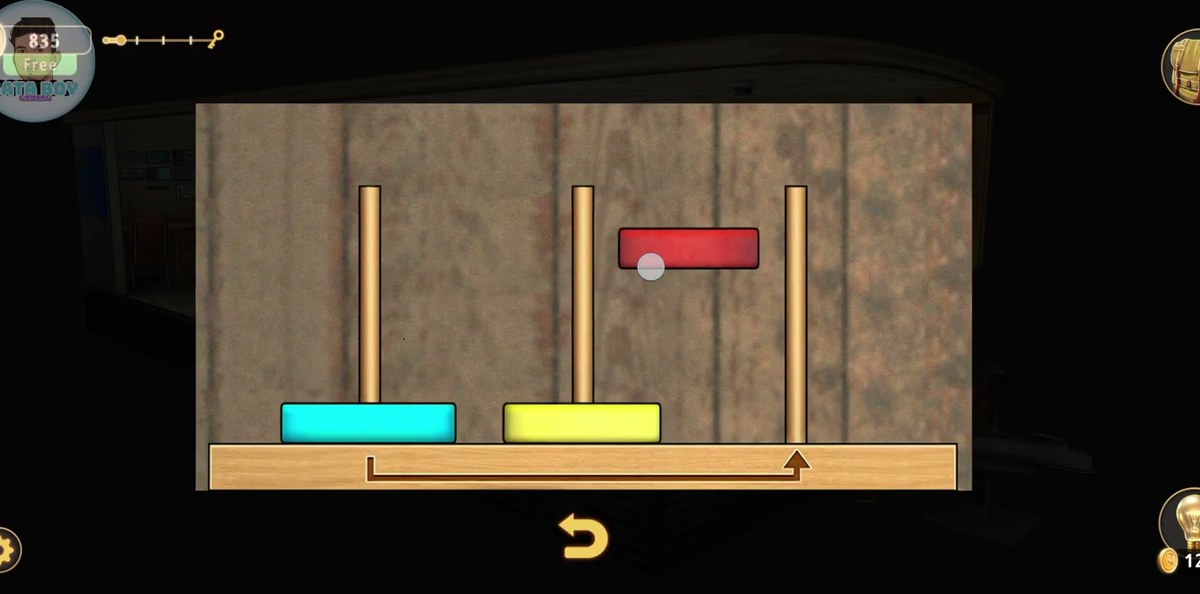
Inside the trailer, solve the three-peg ring puzzle on the shelf. It drops a golden key and opens the drawer underneath.
Work the trailer's other boards. The octagonal node board, the licence-plate wall, the emblem board, the tread tray. And pick up the wrench, the sandpaper and the rust remover as you pass them.
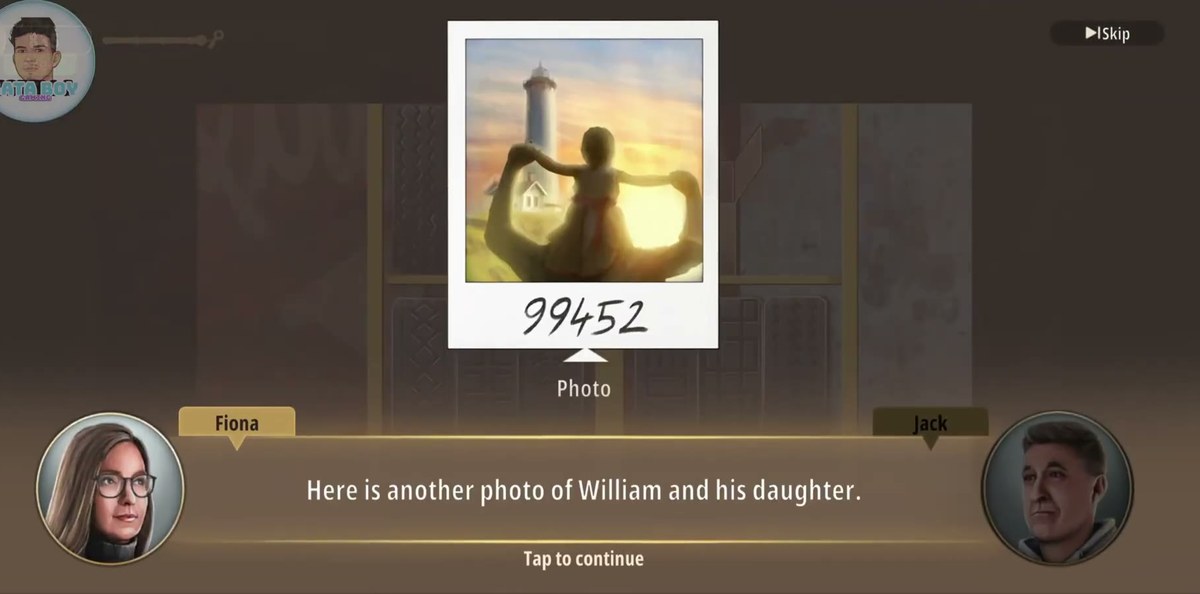
Near the end, Fiona hands you a polaroid with 99452 written on it. That is the yellow keypad panel: it opens a tray with four crane parts.
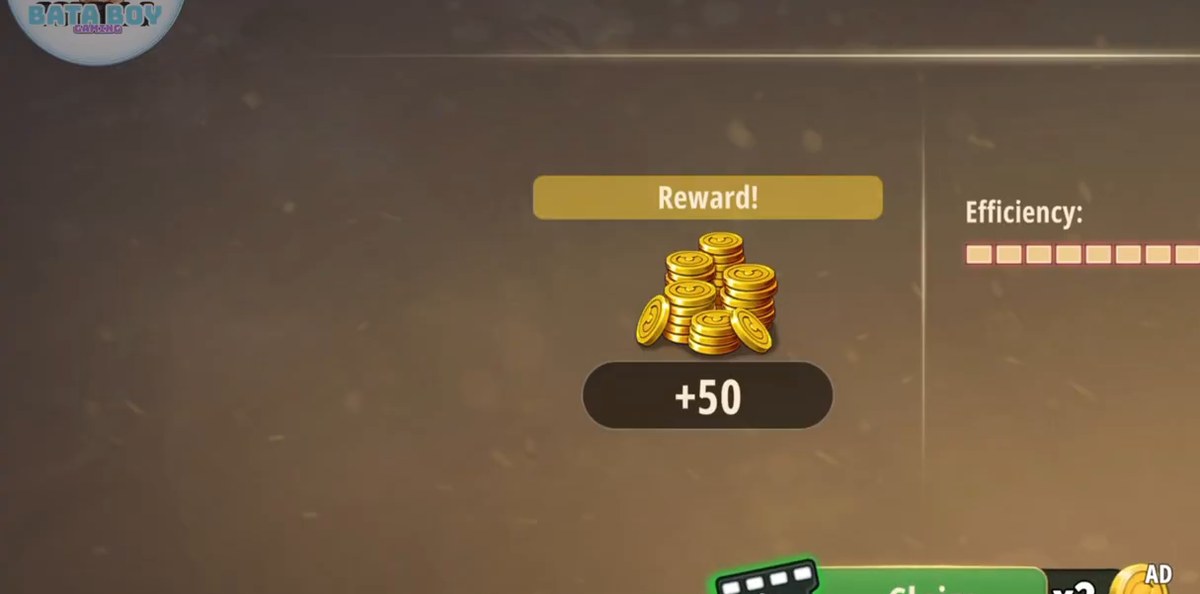
Assemble the crane. That unlocks the yard's interactive spots, and the bolt cutters are among them. Pick them up and cut the chain on the EXIT barrier. Reward: 50 coins.
What this level actually is.
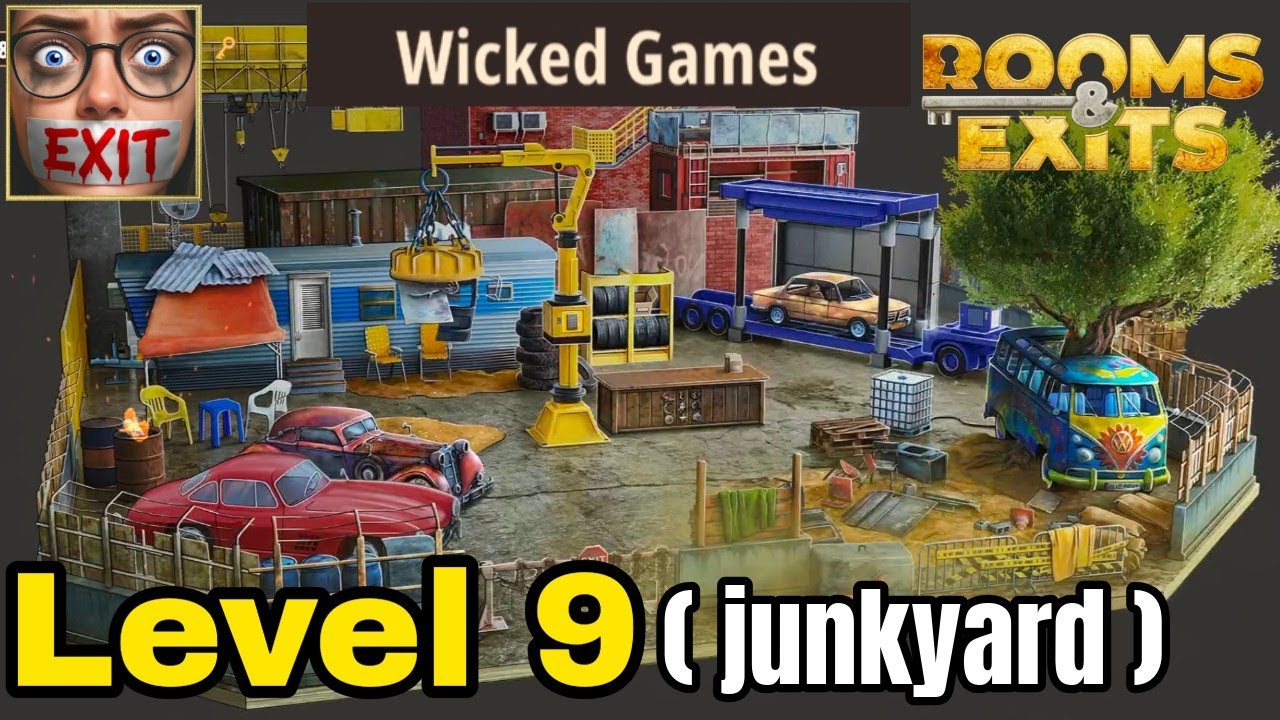
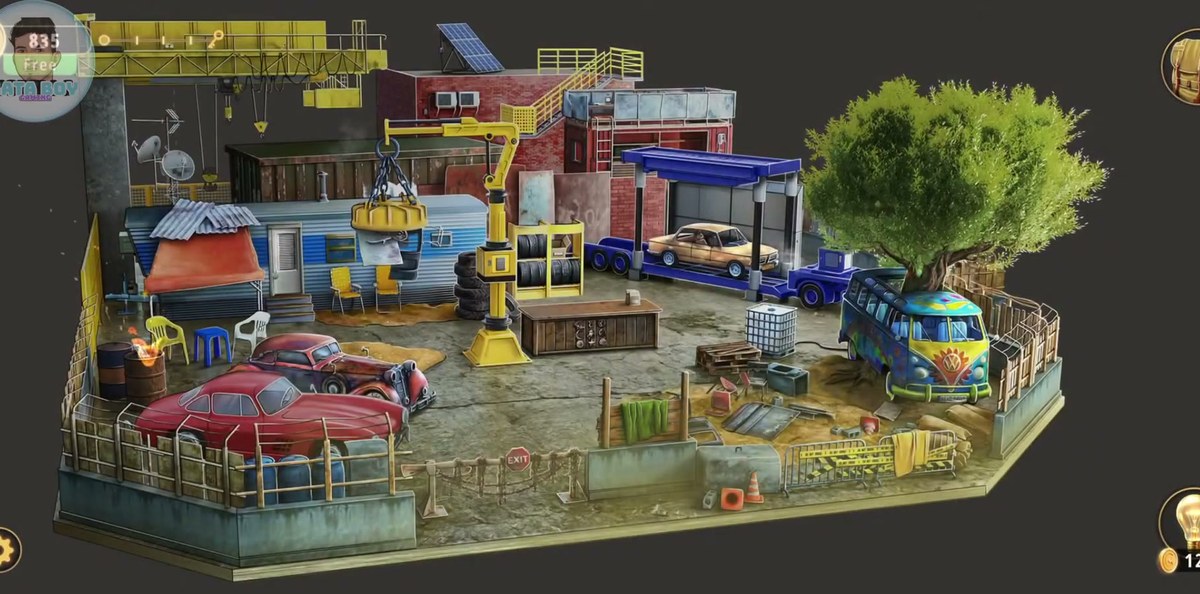
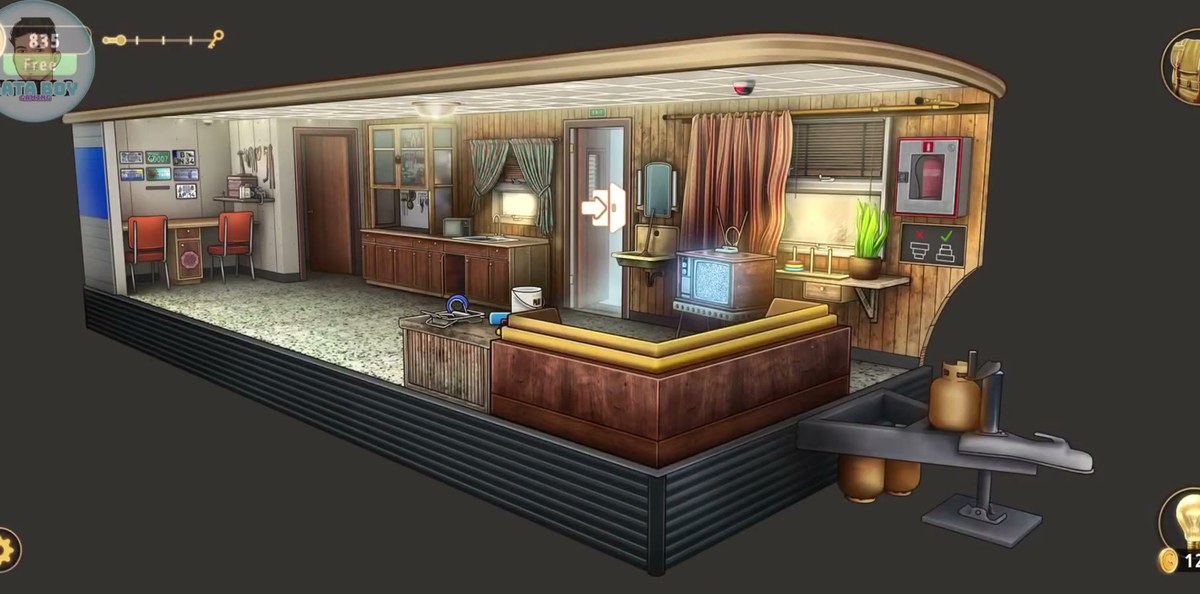
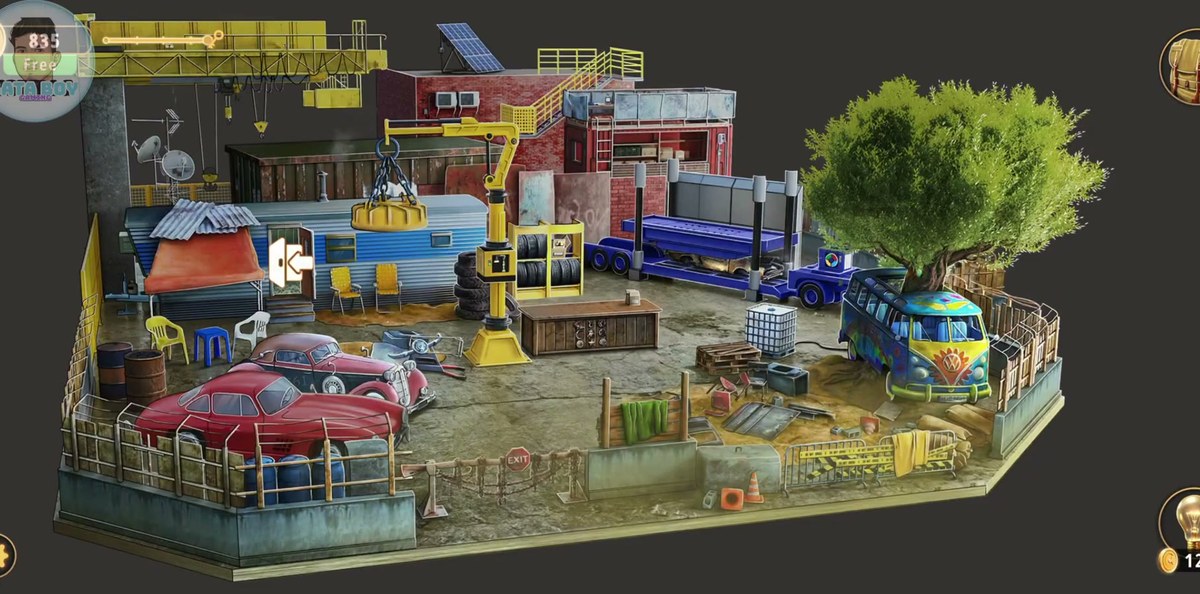
Junkyard is one outdoor diorama and one building. The diorama is a scrapyard: a blue and white striped trailer sitting on a raised slab, a gantry crane spanning the roof line above it, two red vintage cars behind a low fence, a car-carrier truck with a gold car chained to its bed, a brick workshop with solar panels, and a painted hippie van parked under the big tree on the right. The building is the trailer itself, and once you are through its door the level stops being one room and becomes four.
The yard: the overview screen you start on. Almost everything here is scenery until you find the two interactive panels; the maze and the crane both live out here.
The study, immediately left of the trailer door. A desk with two orange chairs, a wall of collected licence plates, and a cabinet of tools.
The kitchen, in the middle. Counters, a sink under a plaid curtain, paint cans on the floor, and the cabinet the wrench comes out of.
The living room, on the right. An L-shaped sofa with yellow cushions, a coffee table with the octagonal board on it, a CRT television, and the wall the fire extinguisher is mounted on.
The thing that makes Junkyard harder than it looks is that it has no single chain. Level 4 gave you a classroom and a corridor and a clear order of operations; here you get a locked trailer door, and behind it five boards that all look equally important and none of which tell you what they are for. Our recording spends roughly six and a half minutes inside, and about a third of that is backtracking between the trailer and the yard.
One warning before the steps: Junkyard keeps handing you tools. Sandpaper, a wrench, rust remover, a brush loaded with paint. And never once tells you what any of them is for. The wrench is the one that matters, because it opens the blue panel out in the yard. Our recording also uses the brush on the dark vintage car behind the fence. What the sandpaper and the rust remover are for never becomes clear in the footage, so this page is not going to invent a use for them; if you are stuck, the odds are you have missed a board, not a tool.
Step by step.
Step 1 · 0:12The yard is the map, not a puzzle
The camera opens on the whole scrapyard, and it is worth the ten seconds it takes to read it. Clockwise from the trailer door: the gantry crane and its hook, a stack of satellite dishes, the brick workshop with two solar panels bolted to its roof and a yellow stair up the side, the car-carrier with a gold car on the bed, the hippie van under the tree, and. Dead centre, between two red-and-white striped posts. The chained EXIT barrier. That barrier is the last thing you touch in the level, not the first, so ignore it for now; everything you need is on the left half of the screen.
Step 2 · 0:18The steering maze on the yard panel
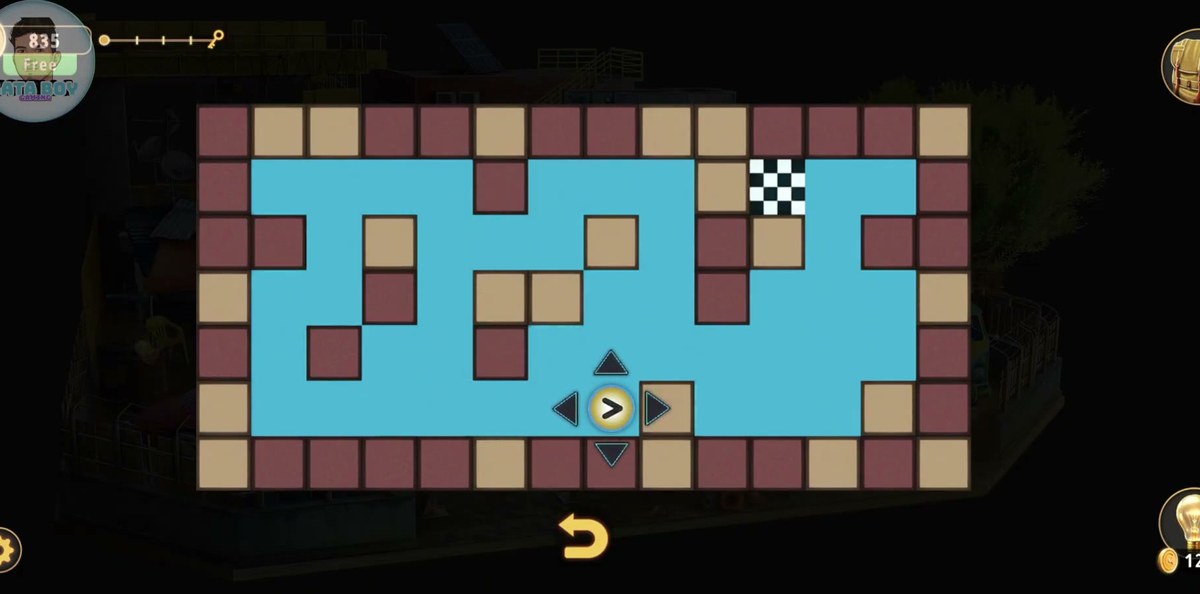
One of the panels out here opens onto a grid maze rather than a keypad. Brown squares are walls, the pale blue squares are the path, and you steer a small arrow with four direction buttons around a centre pad. The goal is the black-and-white checkered square in the top right. There is no timer and no penalty for bumping a wall. You just reverse and try the other lane. Which makes this the friendliest puzzle in the level and a good place to warm up.
Step 3 · 0:36The piece of paper: JWFMI
The clue that unlocks the trailer is lying in an open crate on the ground, and it is the single most missed object in the level. Players walk past it because it looks like litter. Pick it up and the camera gives you the paper full screen: five letters, J W F M I, in a stencilled font. Write it down. The inventory entry is also called "Piece of paper", which tells you nothing, so photograph the screen if you are playing on a phone you cannot alt-tab out of.
Step 4 · 0:48The five-column letter lock on the trailer door
The trailer door is a carved wooden panel with five vertical columns of letter tiles. Each column scrolls on its own through the alphabet, and the centre row is highlighted in teal. That highlighted row is the code you are building. Set the five columns to JWFMI and the door releases; in our recording it opened the moment the last column landed on I, with no separate confirm button to press.
This is where most players stall. The lock looks like it wants a word, so people try YACHT, JUNKYARD, FIONA and anything else the level has shown them. It does not want a word. It wants the five letters off the paper, in the order the paper prints them, and the paper is outside on the ground.
Step 5 · 1:18Inside the trailer
The door swings and the game cuts to a cross-section of the trailer, which is the level's real map. Study on the left with the licence-plate wall and two orange chairs; kitchen in the middle with the paint cans on the floor and an EXIT arrow over the door; living room on the right with the yellow sofa, the coffee table and the CRT. Both interior doors have orange arrows once you are inside, and they all lead back out to the yard. This trailer is one room split into three, not a corridor into somewhere else.
Step 6 · 1:24The three-peg ring puzzle. And the key it drops
On the shelf in the trailer, next to a wooden drawer, sits a small three-peg puzzle with three rings: cyan at the bottom, yellow in the middle, red on top, all on the left peg. It reads like the Tower of Hanoi, but with three rings there is nothing to work out. A handful of moves gets them across. Solve it and two things happen at once: a golden key appears on the shelf beside the puzzle, and the drawer below slides open.
Step 7 · 1:42The open drawer, and the sandpaper in it
The drawer the ring puzzle released is not empty. Inside is a sheet of red sandpaper, labelled "Sandpaper" when you pick it up. It goes into the inventory and stays there. This is the pattern for the whole middle of the level: the trailer keeps giving you objects and the game never tells you what any of them is meant to touch, so pick everything up and keep moving.
Step 8 · 1:48The octagonal board on the coffee table
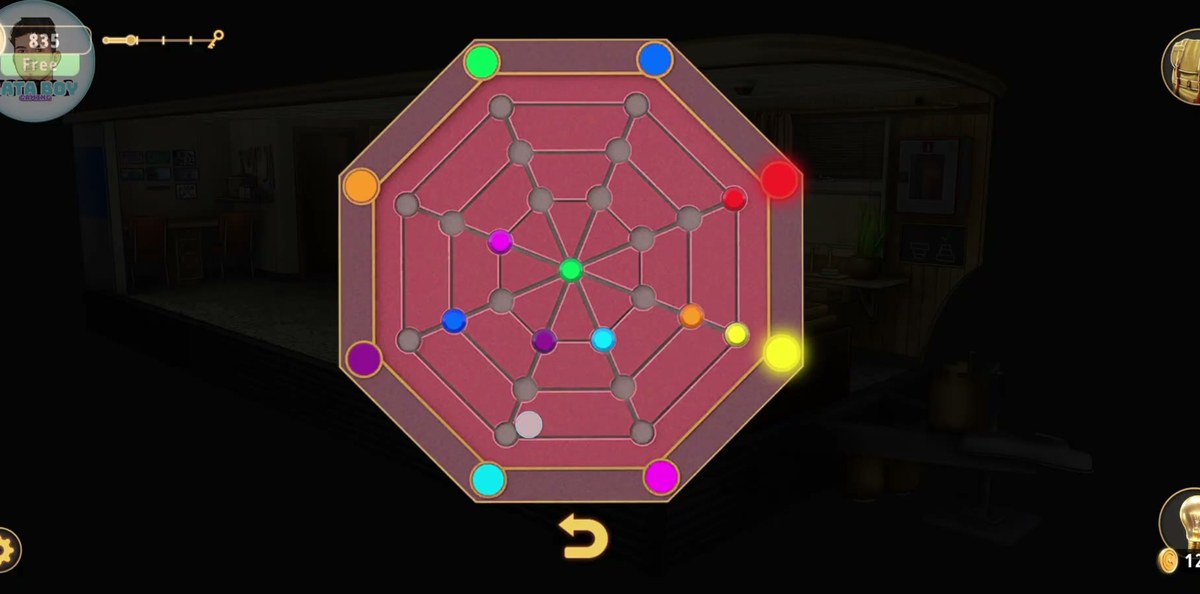
The living room's coffee table holds an octagonal board: eight coloured nodes around the rim. Green, blue, red, yellow, magenta, cyan, purple and orange. A handful of smaller coloured nodes inside, and a web of grey paths joining them. It is a connect-the-colours board, and it takes the longest single stretch of the recording: roughly forty seconds of tapping in silence. We are not going to pretend we know what it gates, because our footage never shows what changed afterwards; if you are hunting for the thing that unlocks the next area, this board is the most likely candidate and the one worth doing first.
Step 9 · 2:42The wrench, and the blue panel it opens
There is a tools cabinet in the trailer. Spray bottles, a red can marked HEET, screwdrivers, pliers, a green power tool on the bottom shelf. And the useful thing in it is the wrench. Take it outside. The blue steel panel in the yard is bolted shut, and until you have the wrench the game floats a small wrench icon over the panel's corner to tell you so; use it and the panel opens onto the dial underneath.
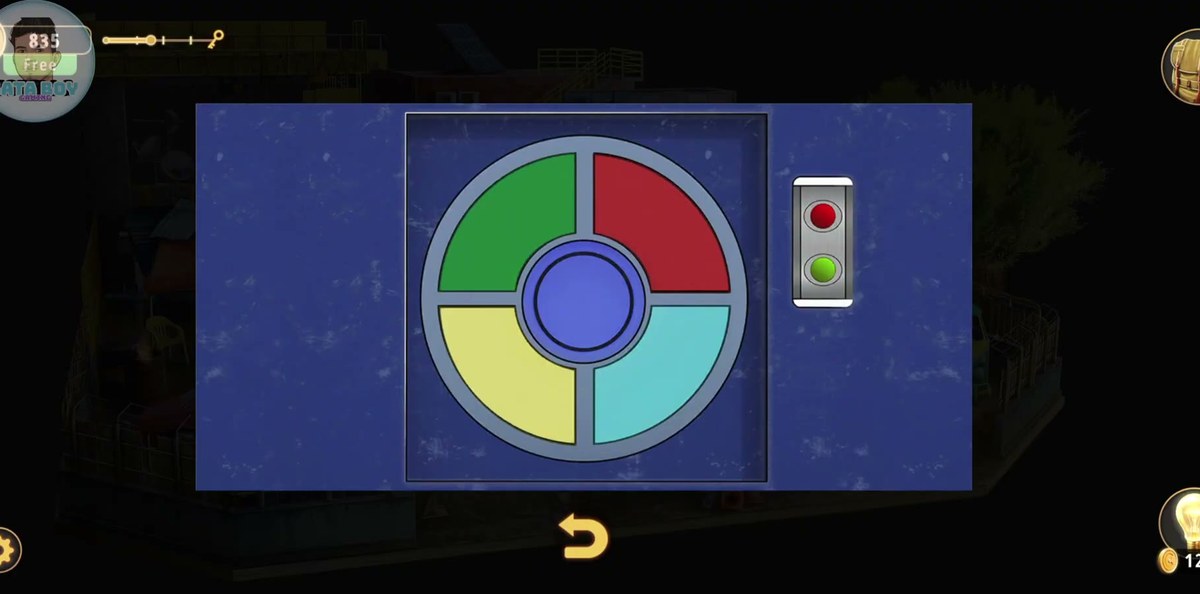
Step 10 · 3:00The four-segment dial
The dial is one circle cut into four quadrants. In the state our recording left it, green top-left, red top-right, yellow bottom-left, cyan bottom-right. With a plain blue button at the centre and two indicator lights on the panel beside it, one red and one green. The quadrants rotate and the lights respond, and that is the entire readout the game gives you: no numbers, no key, no diagram anywhere in the level that matches it.
We are not printing a colour order for this one. Our recording shows the lights on at 3:16 and off again at 3:32, and the two frames disagree about which quadrant was selected when they flipped. Printing a guess here would cost you more time than it saves, so treat this as the level's honest hard puzzle: rotate a quadrant, watch the lights, keep the arrangement that lights both.
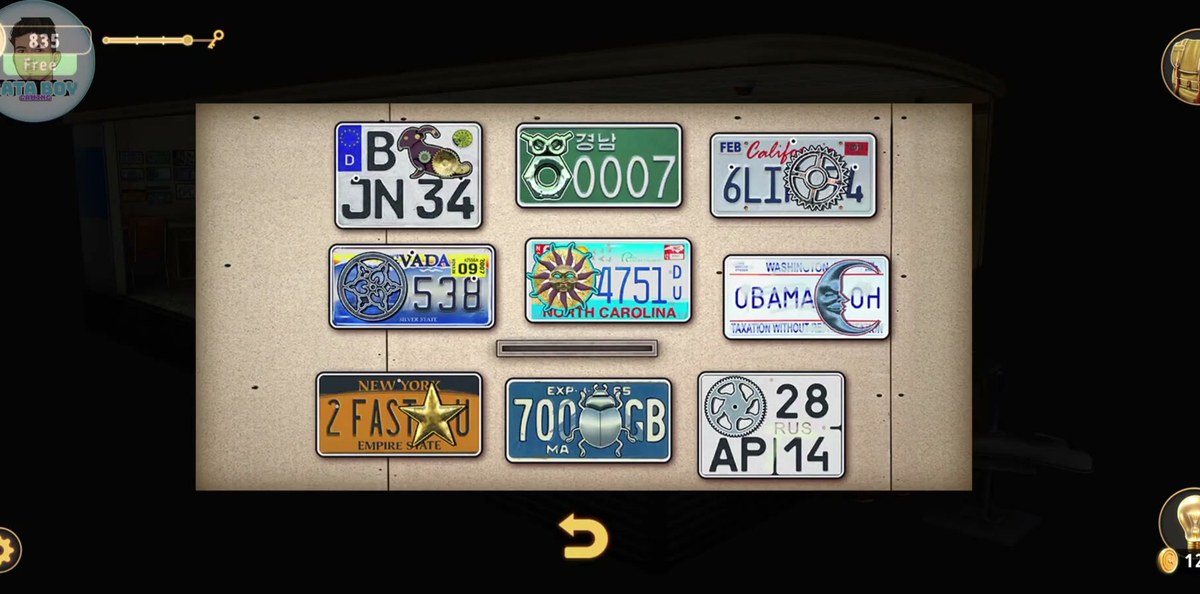
Step 11 · 4:24The licence-plate wall
The study wall is a collector's board with ten slots and, in our recording, nine plates on it. Half of them are jokes and half are real state designs: a German B JN 34, a Korean 경남 0007, a California plate starting FEB, a Nevada 538 reading SILVER STATE, a North Carolina 4751, a Washington OBAMA OH stamped "taxation without representation", a New York 2 FAST reading EMPIRE STATE, a blue plate with a beetle on it, and a Russian 28 … AP 14. The single empty slot is the interesting part, and the one thing the recording never resolves is which plate the game wants in it.
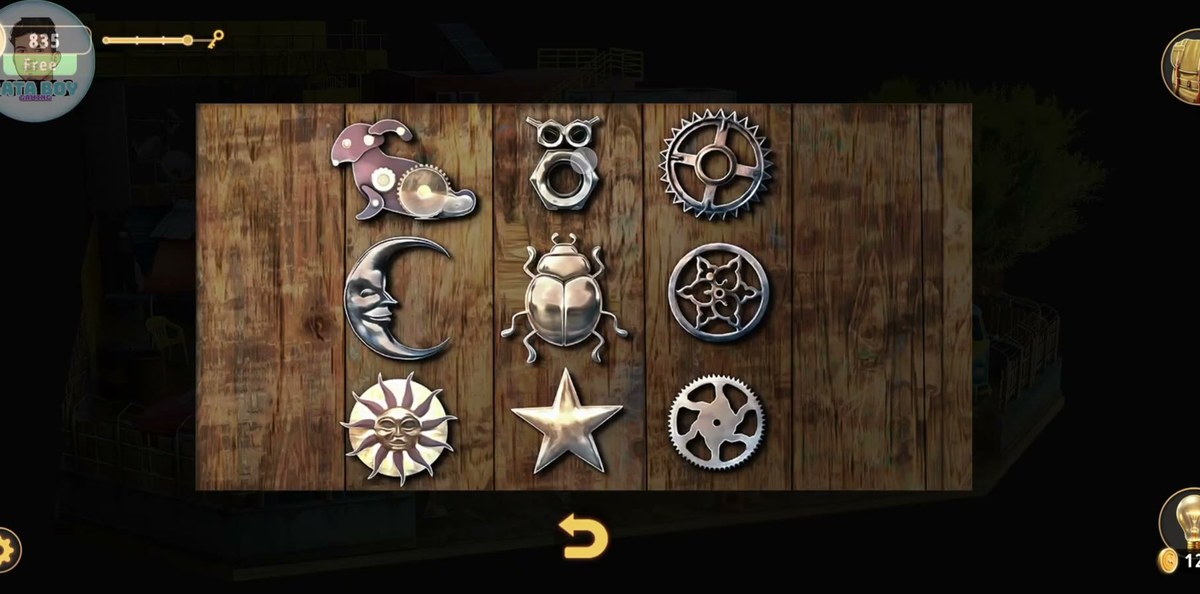
Step 12 · 4:54The emblem board
Somewhere in the trailer there is a second collector's board: a plain wooden plank with a set of cast-metal emblems laid out in it. An owl made of a nut and bolts, a gear, a crescent moon with a face, a beetle, a sun, a five-pointed star, a few shapes that are harder to name. Same rules as the plates: it looks like a display, and it is not. Our recording opens it, looks at it and moves on without anything obvious changing, so if a lock in this level refuses to open and you have already done the trailer door and the yard dial, this board is the next thing to work.
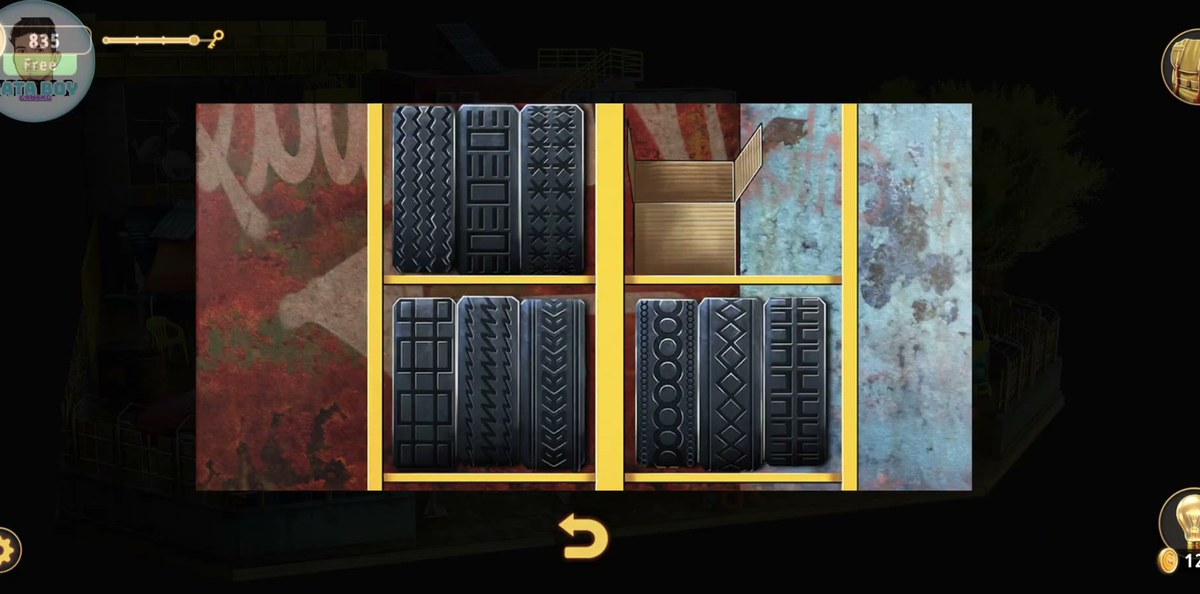
Step 13 · 5:24The tread tray
A yellow-framed tray holds eight compartments in two rows of four, and seven of them are filled with black rubber tiles, each stamped with a different tyre tread: a zigzag, a row of circles, chevrons, a diamond lattice, interlocking U shapes, a wavy tread and a fine square grid. One compartment is empty. This is the level's tidiest puzzle. The shapes are unambiguous, you can read them off a single screenshot, and there is exactly one hole to fill.
Step 14 · 6:06The polaroid: 99452
The level's last clue is not a puzzle at all, it is a cutscene. Fiona hands over a polaroid of William and his daughter at a lighthouse, and handwritten on the white border underneath the photo is a five-digit number: 99452. This is the only place in Junkyard where that number appears, and it is not repeated anywhere in the inventory, so write it down before you tap through the dialogue. Jack gets a line in the same exchange; the two of them talk over the top of the photo, which is why the number is easy to tap past.
Step 15 · 6:18The yellow keypad: 99452
The yellow box beside the crane is a keypad cabinet with a green digital display, a standard 3×4 pad, and two indicator lights stacked on its left side, green above red. Type 99452. The display fills digit by digit. At 6:18 the display reads 99 and both lights are lit, which is the point where players who have not written the number down start guessing at the last three.
Five digits, not four. If the panel keeps rejecting your code, count what you typed. The common failure here is dropping the second 9 and entering 9452 from memory.
Step 16 · 6:24Assemble the crane
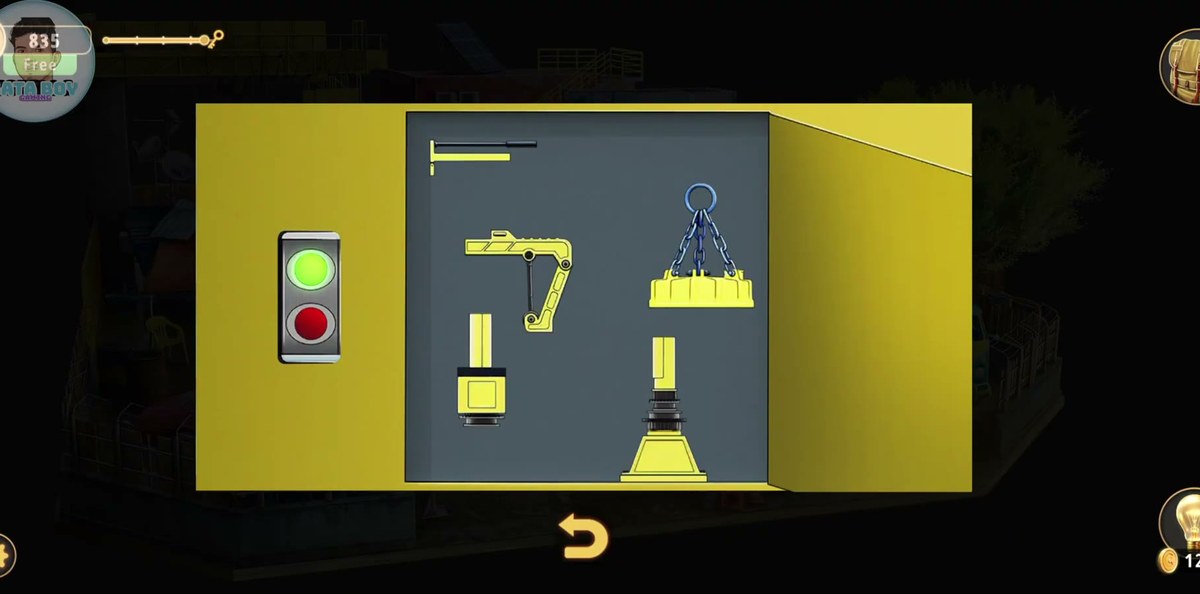
The keypad does not open a door, it opens a parts tray. Inside are four yellow pieces: a T-shaped boom section, a jointed grabber arm, a base with a vertical shaft, and a flat circular electromagnet on blue chains. Drag them together into one working crane. Base first, shaft into the base, boom onto the shaft, magnet hanging from the boom tip. The traffic-light indicator on the left of the tray shows green while the assembly is valid.
Step 17 · 6:41The crane goes up, and the yard opens
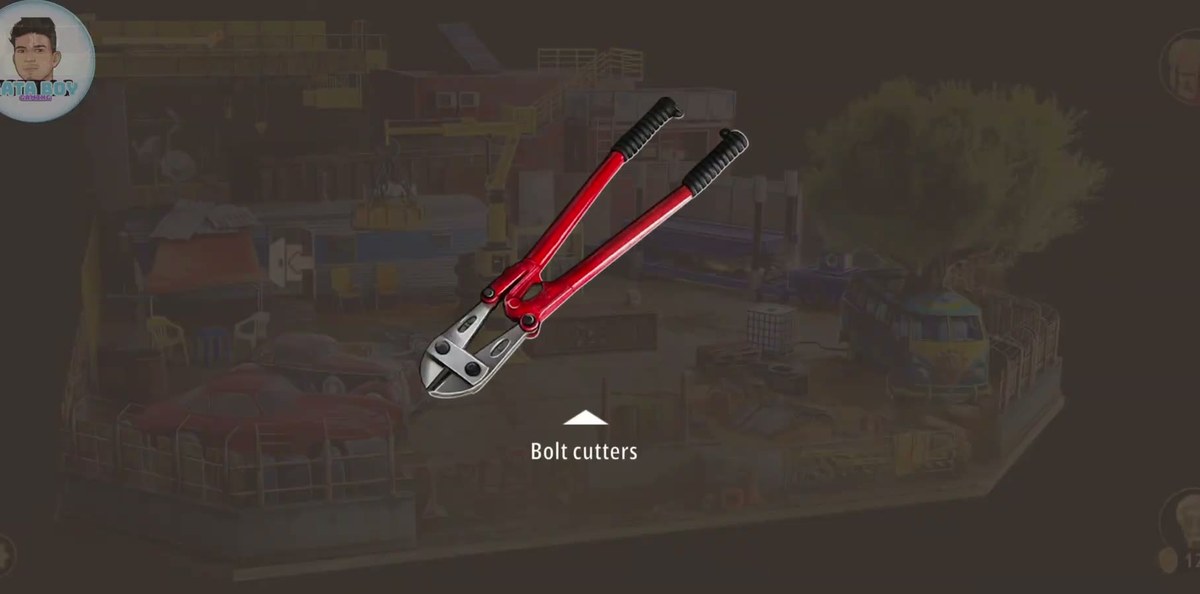
Back outside, the finished crane stands over the trailer roof with its electromagnet hanging on blue chains. And the yard that looked like scenery for six minutes is suddenly covered in sparkles: the workbench, the hydraulic lift, the tire rack, the flatbed's load, the tree. Among them is the pair of bolt cutters, which the game labels "Bolt cutters" when you take it. We cannot point at the exact sparkle, because the recording jump-cuts straight from the crane being assembled to the pickup, but the gate is clear: the bolt cutters come after the crane, and they are the tool the exit wants.
Step 18 · 6:49Cut the chain and finish
The EXIT barrier in the middle of the yard. Two red-and-white striped posts with a STOP sign and a chain slung between them. Is the way out. Use the bolt cutters on the chain. There is no walk-through animation to follow: the recording cuts from the barrier straight to the reward screen, which lands +50 coins with the efficiency bar at full. That is the whole of Level 9.
The letter lock. Everyone tries to spell something. The answer is JWFMI, off a piece of paper that is lying in a crate on the ground outside. Not on the trailer, not in the inventory. If you did not pick the paper up, the lock is unsolvable and nothing on screen tells you why.
The trailer itself. For the first minute the trailer reads as scenery. The door only becomes interactive once the lock is off it, and the interior camera is a cut, not a walk. If you are hunting for a corridor, you will not find one.
The octagonal board. It is the longest puzzle in the level and the one with the least feedback. Forty seconds of tapping with no sound cue is normal here; do not assume you have broken it.
The four-segment dial. Two unlabelled lights are the only feedback the game gives you. There is no matching diagram on the plate wall, the emblem board or the tread tray. We checked.
The yellow keypad. The code is five digits and it is printed on a polaroid, not carved anywhere in the world. Miss the photo and the panel is a guessing game with 100,000 combinations.
The last step. Players finish the crane and then wander the yard looking for a door. The exit is the chained barrier in the middle of the yard, and the bolt cutters you pick up after the crane goes up are what open it.
Chapter 1 levels.
Chapter 1 · Wicked Games11 of 11 with full written steps · 11 with a video
JWFMI. It is written on a piece of paper lying in a crate in the yard, and it goes into the five-column letter lock on the trailer door. It is not a word, so there is nothing to guess.
What is the code for the yellow keypad panel?
99452. The five digits are written on the white border of the polaroid Fiona hands you near the end of the level. The panel is the yellow box beside the crane, and entering the code opens a tray of crane parts.
Where do you get the bolt cutters?
In the yard, once the crane is assembled. Our recording picks them up at 6:43, right after the crane goes up, and the item is labelled "Bolt cutters" on pickup. The frames either side are a jump cut, so we cannot point at the exact spot. But they are the tool the exit wants.
How does the Junkyard level end?
Cut the chain on the EXIT barrier in the middle of the yard with the bolt cutters. In our recording the level completed right after that, and the reward screen gave 50 coins.
Is there a timed puzzle in Junkyard?
Nothing in our recording of Level 9 ran on a clock. The yard maze, the ring puzzle, the dial and the tread tray all wait for you. A change from the timed arcade maze in Level 4.
 GridPaw
 Shikaku
 Akari
 Kakuro
 Nonogram
 Nurikabe
 Pictomino
 KenKen
 Binary
 Star Battle
 Hashi
 Slitherlink
 Murder Sudoku
 Meowdoku
 Crazy Cleanup