 GridPaw
 Shikaku
 Akari
 Kakuro
 Nonogram
 Nurikabe
 Pictomino
 KenKen
 Binary
 Star Battle
 Hashi
 Slitherlink
 Murder Sudoku
 Meowdoku
 Crazy Cleanup
Rooms & Exits Chapter 1 Level 6 Walkthrough: Amusement Park
The two numbers you need in Amusement Park:
- 1496 : the four-digit keypad on the blue ticket machine (north-east corner).
- 20 / 67 / 81 : the three photo strips in the booth, typed into the panel on top of the strength tester.
Everything else is a puzzle with no code: the light board, the carousel, the duck gallery, the candy cart, the strength test itself, the bumper-car grid and the ring toss.
What Level 6 actually asks of you
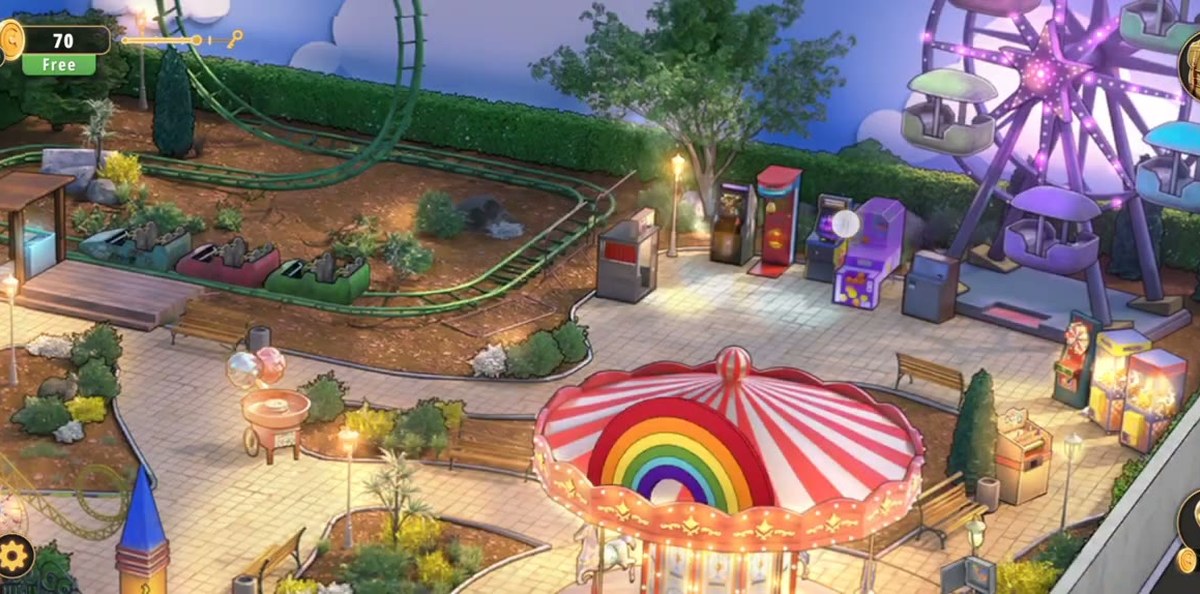
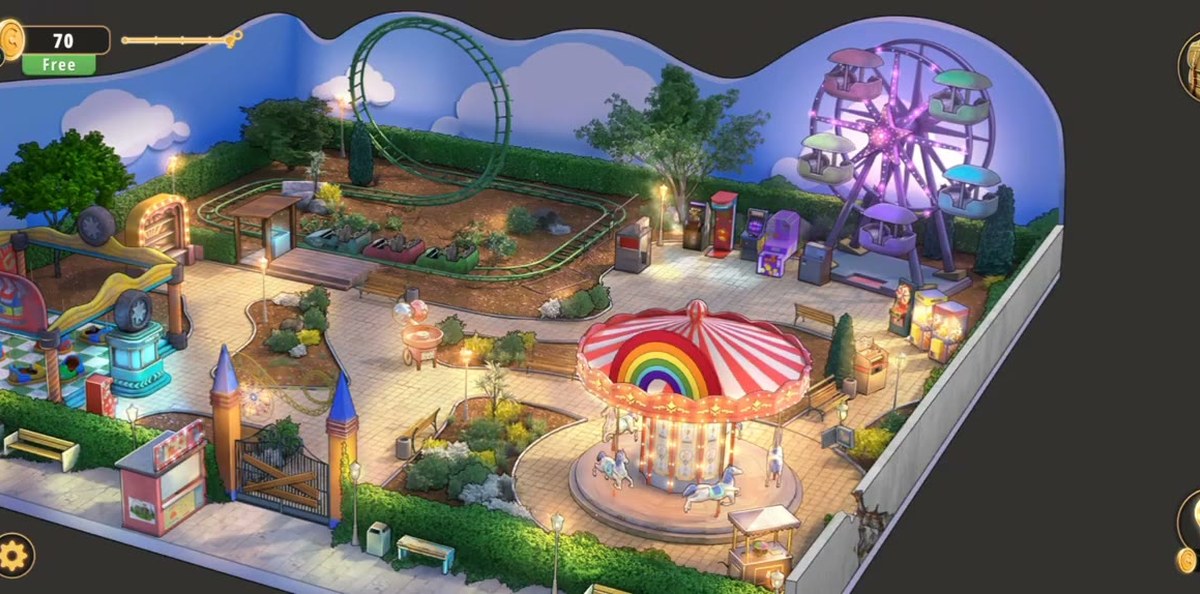
Levels 1-5 of Chapter 1 hand you a chain of small rooms. Amusement Park breaks that pattern on purpose: it opens on one wide isometric view of a park at night, with only the carousel lit, and every attraction in view is a separate lock. You can cross the park in any direction, and the recording does exactly that . it doubles back several times because the object it needs was on the other side of the fence.
What holds the level together is a short chain of hand-offs. Fixing one attraction gives you a tool, and the tool is what the next machine is waiting for. There are three of those hand-offs in this level and they are the only places people get stuck:
- The blue ticket machine in the north-east corner takes a code and pays out a token.
- The photo booth gives you three two-digit numbers, and those numbers are the combination of a completely different machine . the strength tester.
- The key that the strength tester pays out is not for a door. It opens the red arcade cabinet standing next to it.
Once you know those three links the park collapses into a straight line. Without them the level looks like a dozen unrelated mini-games, which is exactly why it feels longer than it is: the recording clears it in 5 minutes 6 seconds.
Park map, in words
The park is roughly square. The carousel sits in the foreground, facing you. The Ferris wheel and the roller coaster frame the north and west sides. The duck shooting gallery and the cotton candy cart are mid-park, and the arcade corner : blue ticket machine, control panel, strength tester, red cabinet, ring toss board . is the east and south-east side. Almost everything mechanical that needs a number is in that arcade corner, so if a step below says “east side”, that is where you will spend the second half of the level.
Step by step: Amusement Park
You arrive at the gate looking at the whole park at once. Nothing is interactive except the things that are lit, and at this point that is the carousel in the foreground and nothing else. This is not a bug: the lights are a progress meter for the level. Do not wander the back fence looking for a hidden door . the only lit thing is the thing you are meant to touch.
Watch: 0:06
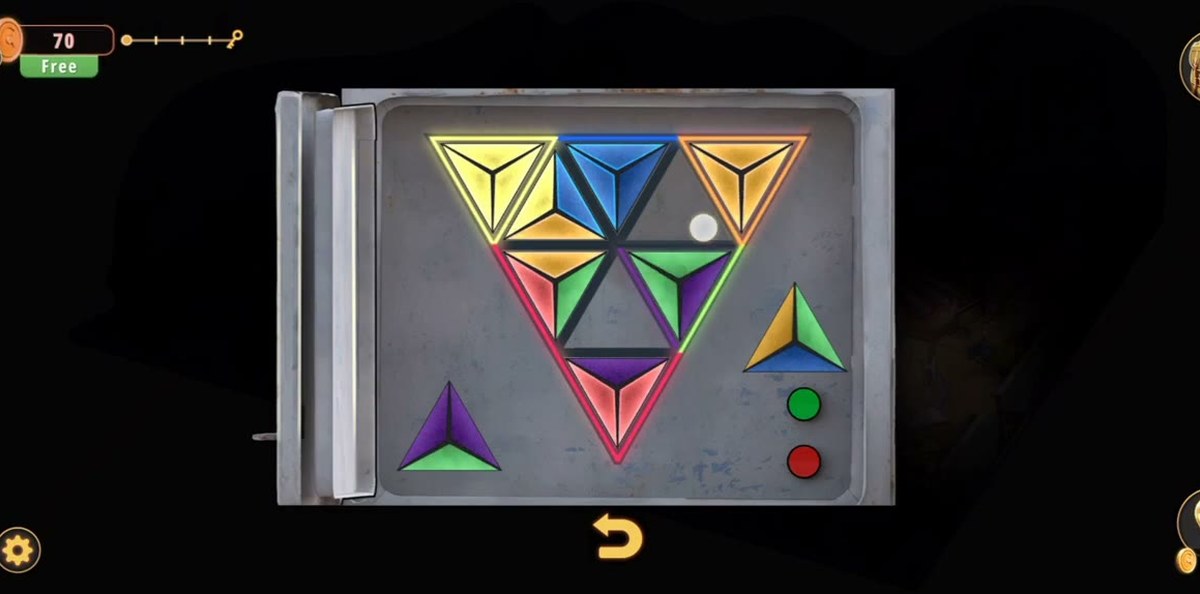
The first lock is a board of triangular tiles arranged around a hub, each tile in one of several colours. Tap a segment to rotate or swap it into place; the board lights up when the colours line up into a continuous ring. There is no number here and no timer . it is a pure arrangement puzzle, and it is worth doing first because finishing it is what brings the park up.
At 0:41 the board is complete, and the moment it is, the whole park switches on: the Ferris wheel, the coaster and the booths all light at once. That is your signal that the level proper has started.
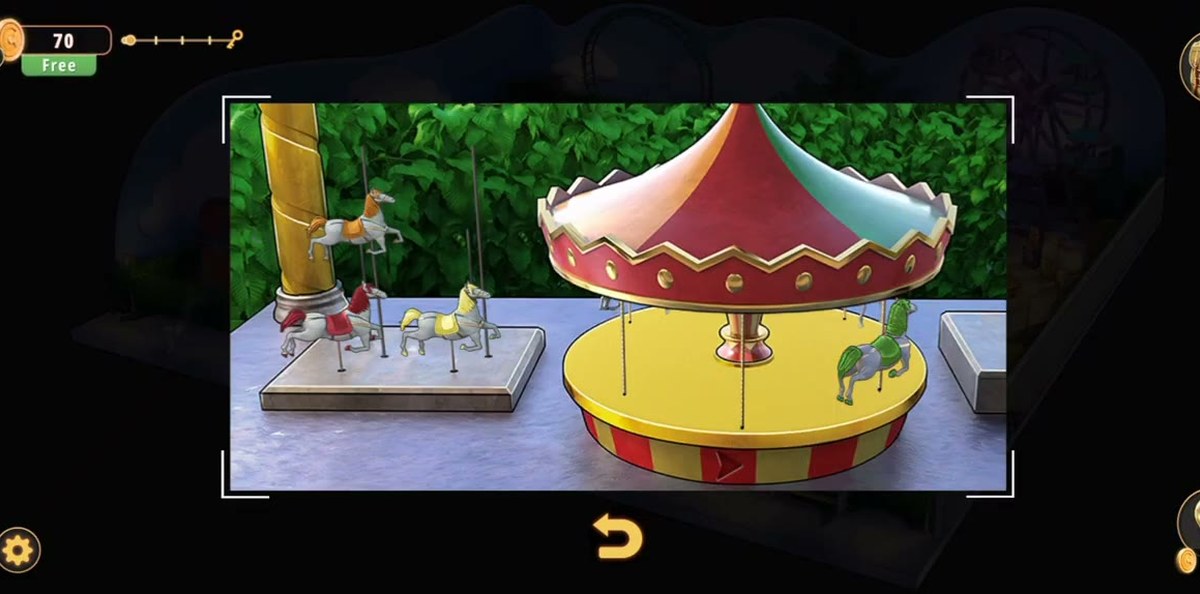
The carousel is missing most of its animals. Beside it stands a rack of spare horses . blue, orange, green, red and yellow . while only the purple one is already mounted on the platform. Tap a horse to lift it, then tap an empty pole on the carousel to hang it.
There is no order to respect, and the carousel does not need to be full: the recording mounts the blue one, then the purple position, then the red one, and the ride starts turning at 0:59. The horses you leave on the rack stay there, which is why clips of this level look inconsistent . different players hang different horses.
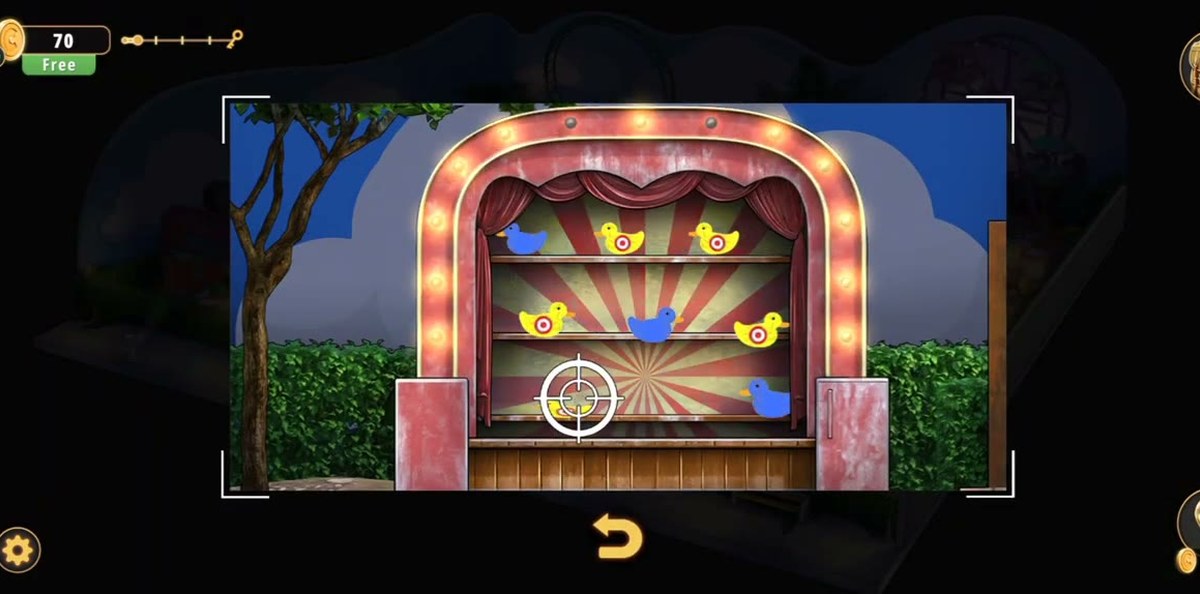
The shooting gallery booth holds ten ducks on rails against a striped blue backdrop. Six are yellow with a bullseye printed on the body; four are blue and have no target on them. Only the yellow ones are targets . the blue ones sit there to make you mis-tap.
Work along the rails and hit the six yellow ducks. When the last one goes down the booth pays out, and this is also where the crowd animation starts, so the park begins to feel alive rather than staged.
Watch: 1:02
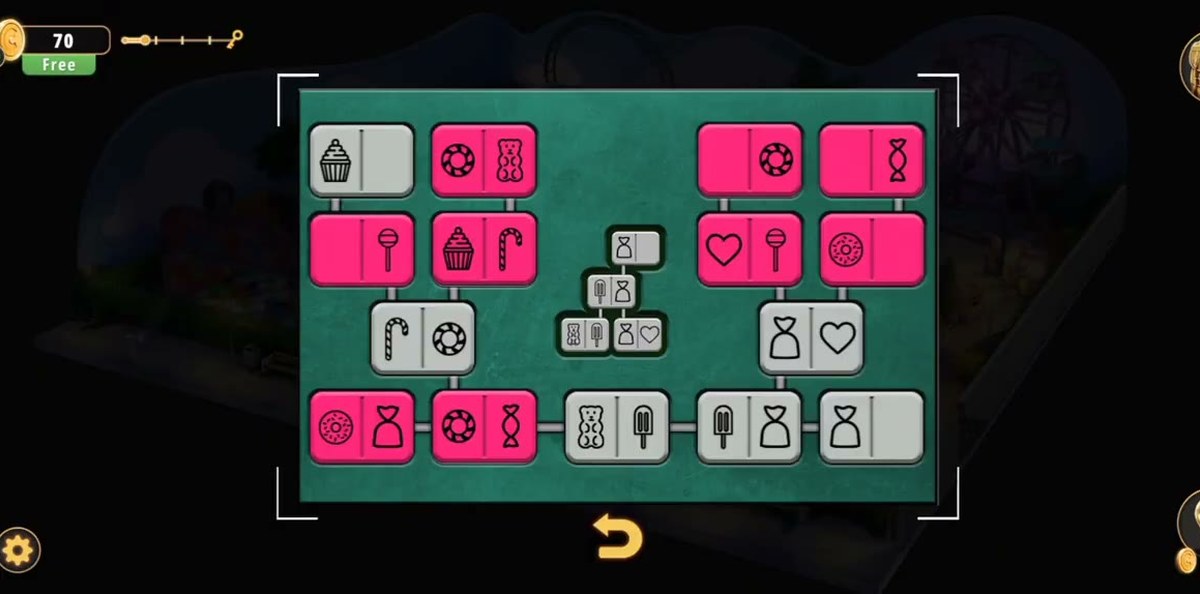
The cotton candy cart has a panel of candy-themed tiles on its side . domino-shaped pieces carrying sweets rather than pips. Several tiles are lit pink, which marks them as the ones you have to move. Tap a tile and it changes state; the panel is solved when the marked pieces have been rearranged into the pattern the cart wants.
This is the longest single puzzle in the level if you approach it by trial and error, because there are eighteen tiles. The trick is to work from the ends of each row inward rather than tapping around at random . it is the same shape of puzzle as the light board in Step 2, just laid out as a grid instead of a ring.
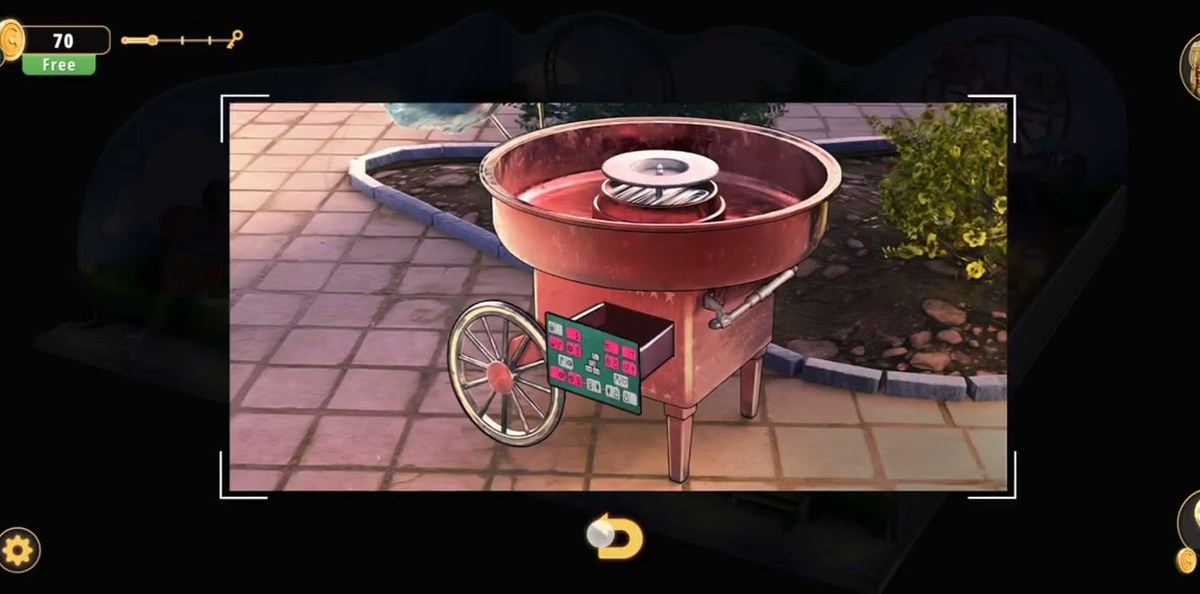
When it clears, the cart's own four-digit counter stops rolling and settles on a real number at 2:01. Do not write it down: nothing in the park accepts it, and the only keypad in the level is the blue ticket machine in Step 7. Players who note the cart's number spend a while hunting for a lock that takes it.
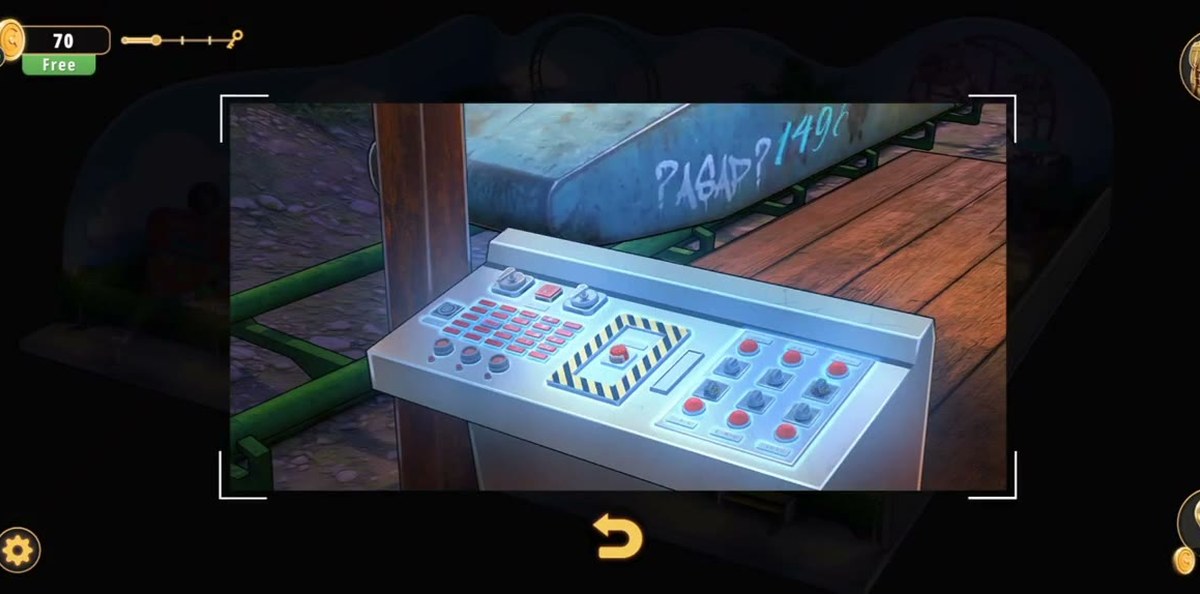
On the east side there is a control console for the rides: a slant-top box with a row of labelled buttons and a small display. Working the buttons brings the coaster and the wheel up, but the console is not itself a code lock . nothing gets typed into it.
What matters is the blue steel structure directly behind it. There is a scrawled four-digit number painted on the panel, and it is the only place in the park where a code is written down. Read it before you walk away: the blue ticket machine you need it for is three steps that way, and coming back for it is the single most common backtrack in this level.
Watch: 2:10
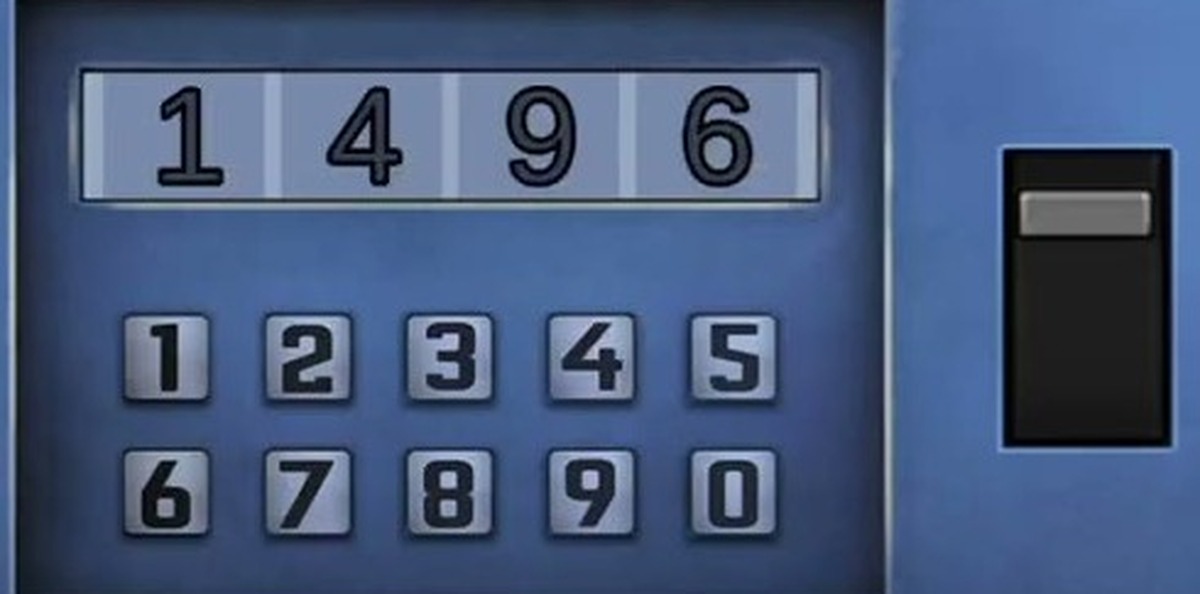
The machine is a blue cabinet with a card slot, a wide semicircular tray at waist height and a keypad under a four-slot display. Tap the display to start, then type 1496 : the digits fill one slot at a time, left to right, and the panel does not reset if you tap a wrong key, so you can always check the display against what you meant to type.
The code itself is the number scrawled on the ride structure from Step 6. There is no arithmetic to do, no card to collect and nothing else in the park that feeds this keypad . if 1496 does not open it, you are standing at the wrong cabinet.
When the code is right the tray swings open and a purple Coin drops into it at 2:36. Take it: the coin is a physical inventory item, it shows up in your bag, and it is the only thing in the level that the pay-to-play machines will accept.
With the coin in the bag, the arcade corner opens up. The prize wheel beside the counter is twelve segments . a JACKPOT, a LOSE and ten cash values running from $100 up to $1000 . and it takes the coin through its slot and spins when you pull the handle beside it. The recording feeds the coin in at 2:41 and the wheel turns.
Treat this as a bonus, not a step you have to clear. The wheel is a chance machine: it has no solvable state, it cannot fail the level, and everything else in the park is reachable without it. If you are following this walkthrough for speed, spinning the wheel is the one thing you can skip entirely.
Watch: 2:41
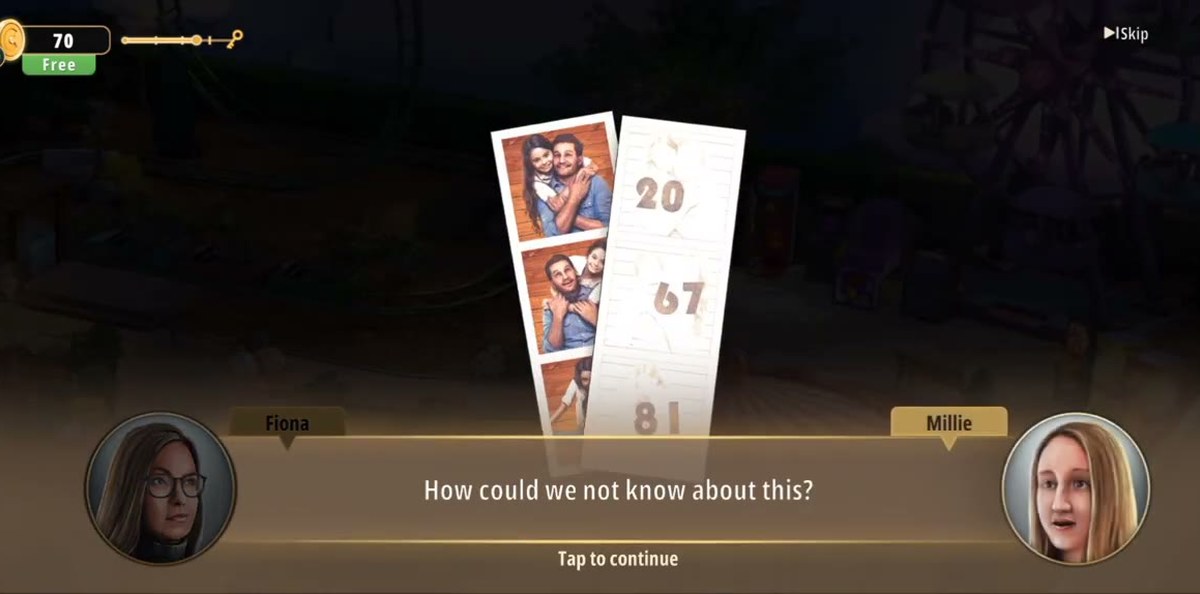
The photo booth is the one attraction in the park that looks broken: it tells you something is missing and refuses to do anything. It is not a puzzle you fix . it is a clue you read. Pinned inside are three photo strips, and each strip carries a two-digit number: 20, 67, 81, in that left-to-right order.
Write these down before you leave, and note the order. This is the only place the three numbers appear together, and the machine that wants them is not in this booth.
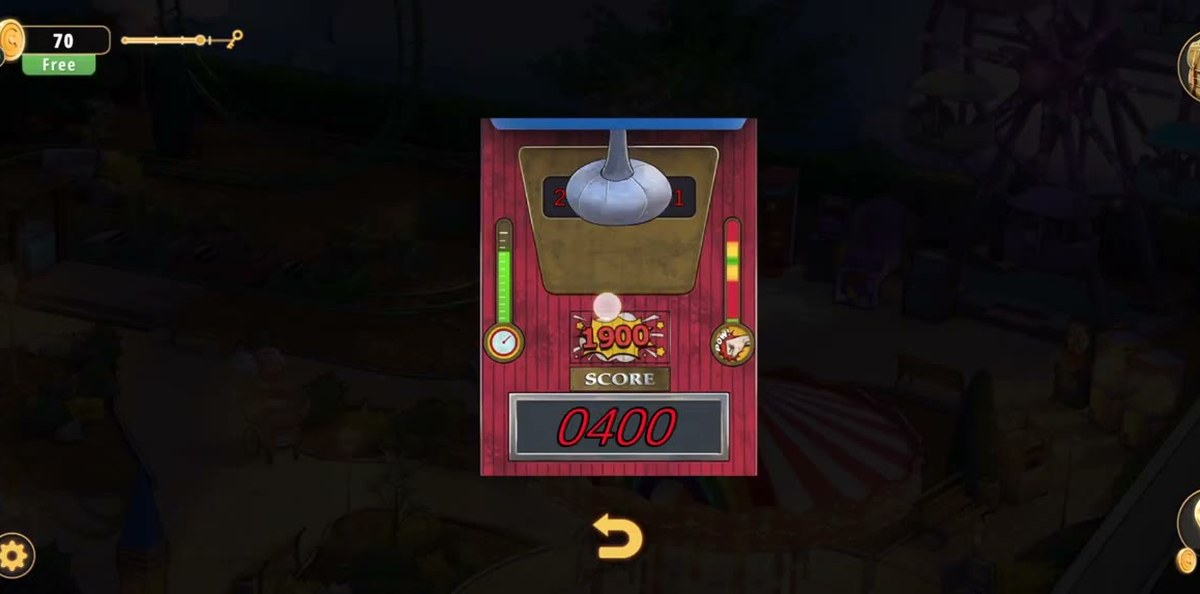
The strength tester is the tall red booth with a punching bag hanging in the middle and a score display under it. Across the top sits a panel of three two-digit fields . the combination lock of this level, and the reason the photo booth exists. Tap the panel, then set the fields to 20, 67 and 81.
That done, the bag goes live. Hit it. Each hit drives the score up and there is no aim or timing to learn: the bag animates, the display climbs, and you keep hitting until it tops out. The recording clears 400 on the way up and lands on 2000 at 3:52, which is the number the machine is calibrated for.
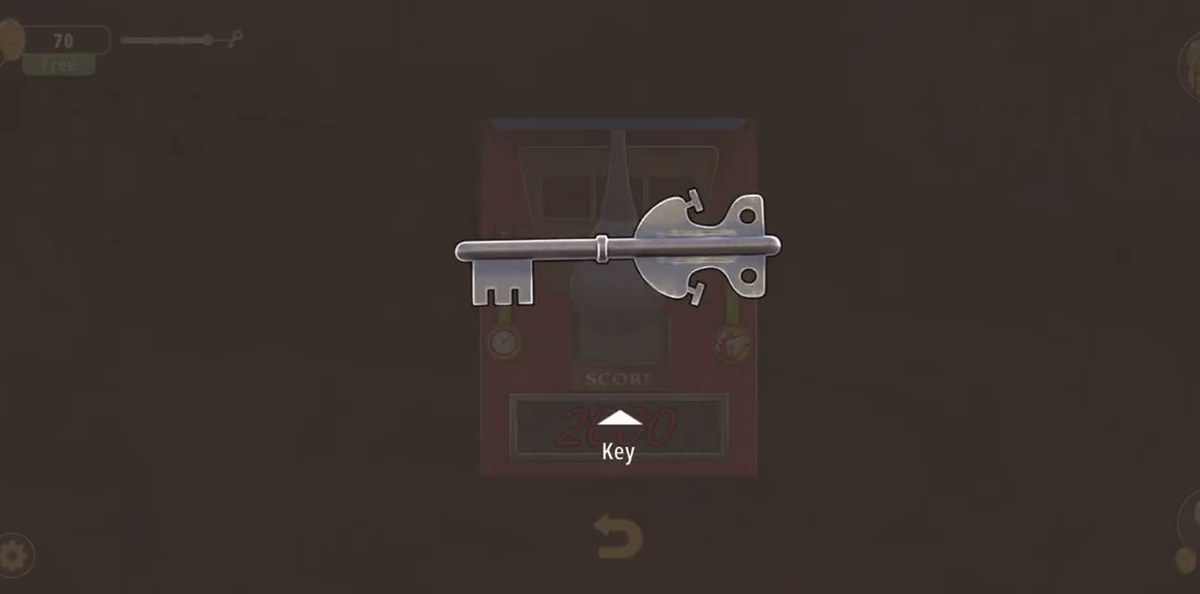
At 2000 a silver Key is dispensed and hangs in front of the booth at 3:54. Take it. It is not a door key . there is no locked door anywhere in this park . and that is exactly what sends people back and forth across the level looking for a gate.
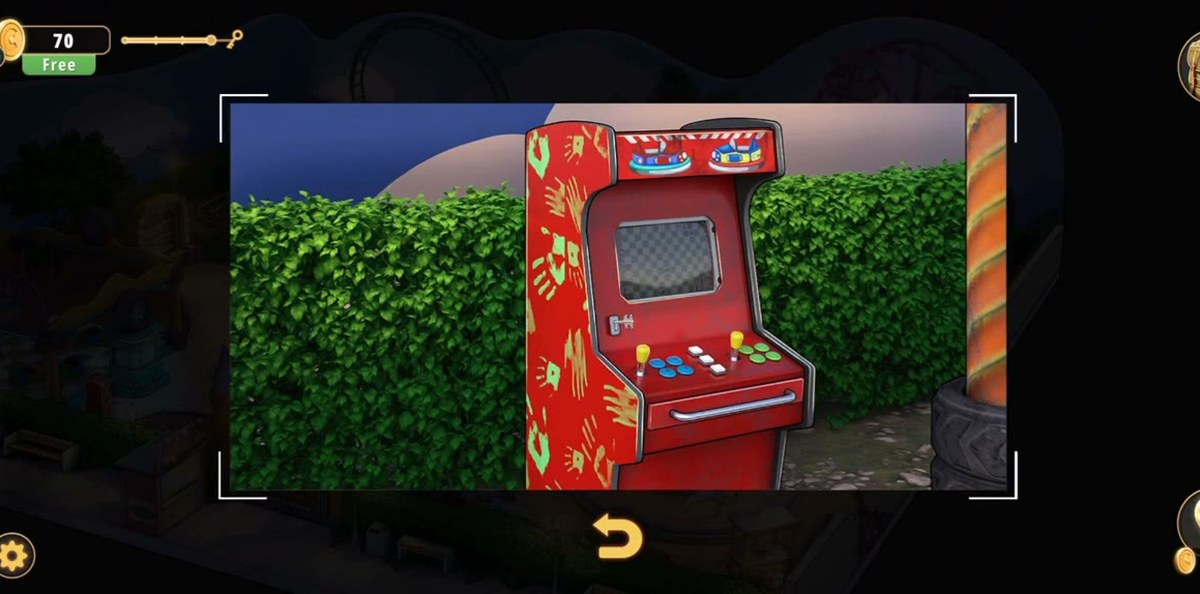
The red cabinet next to the strength tester has a keyhole straight through the middle of its front panel and a bumper-car marquee above it. Use the Key on the keyhole and the cabinet opens onto its own screen.
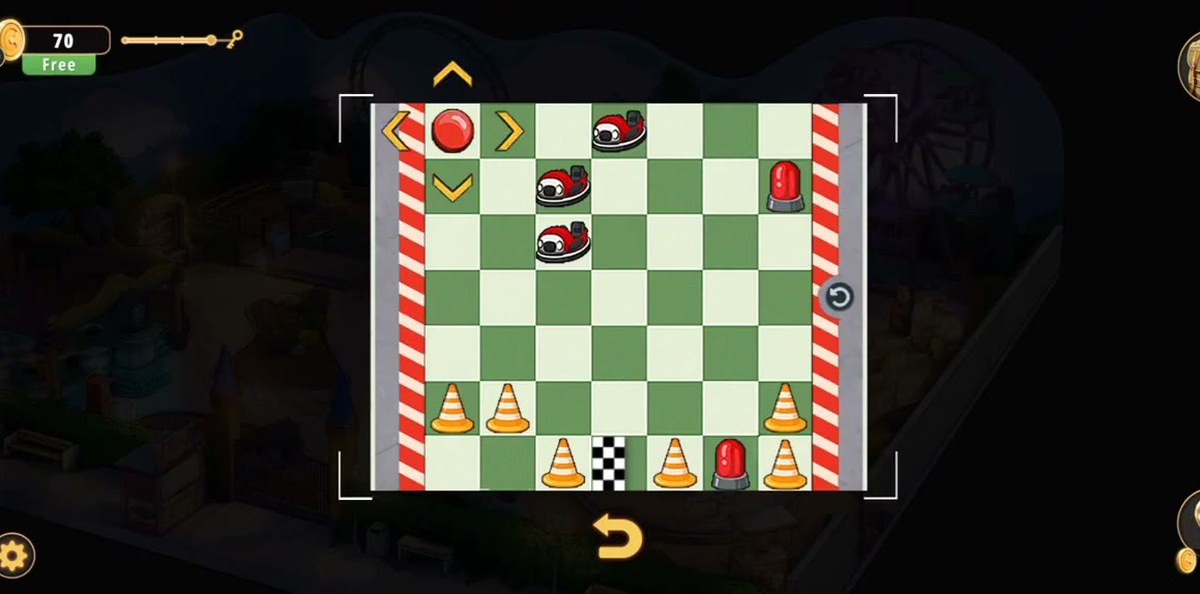
What is inside is a six-by-six grid . a top-down bumper-car floor. Arrow buttons push the cars around and each move slides them along their row or column, the way a slide puzzle moves. The goal is to get every car off the floor, and the puzzle does not time out, so you can undo a bad push by pushing the car back the other way.
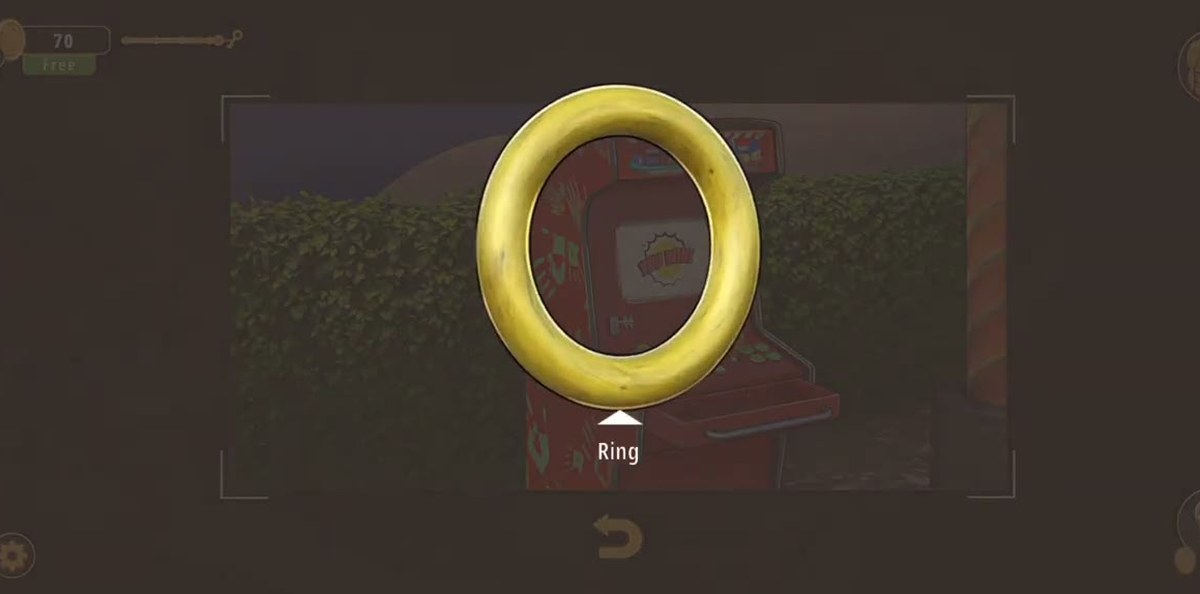
Clear it and the cabinet drops out a Ring at 4:45. This is the last item the level gives you, and it is a prize you have to go and use, not a tool.
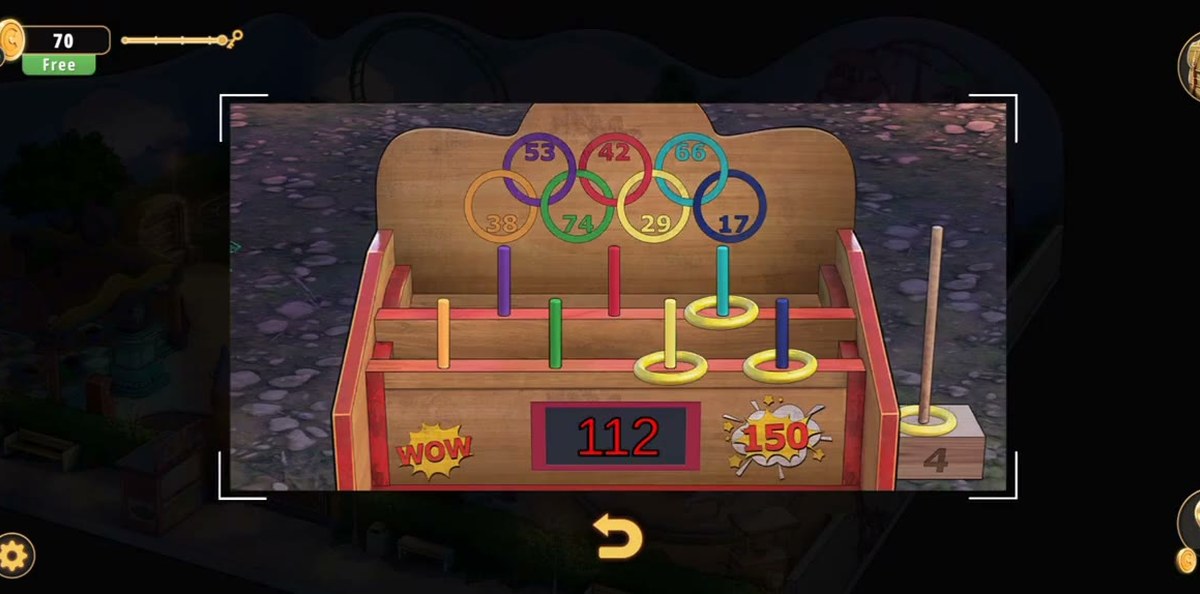
The last board in the park is a ring toss: a row of pegs holding rings with numbers on them, a score readout at 112 and a target of 150 at the top. You are twenty-eight points short and you have four rings in hand when the board opens.
Hang the rings on the pegs whose numbers close the gap. Each ring carries its own number and the readout re-totals after every placement, so you can watch the score move as you go. In the recording the board goes over the line at 5:03, the game plays its WOW animation, and the level closes with the park fully lit at 5:06.
The two numbers, and the three that are not numbers
Amusement Park is a five-minute level with exactly two things worth writing down. Everything else on this page is about knowing which machine to walk to next.
The 1496 keypad is a four-slot display with a twelve-key pad underneath, and the code is the same four digits scrawled on the blue ride structure behind the control console. It pays out the coin, and the coin is only good for the pay-to-play boxes . the prize wheel and the strength tester's own coin slot. Nothing else in the park reads it.
The 20 67 81 panel is three two-digit fields set across the top of the strength tester, and the numbers come from the three photo strips in the photo booth. Set all three in left-to-right order and the punching bag becomes usable. This is the one code in the level that is easy to get wrong: three separate fields, none of which is written on the machine itself . all three come from the photo booth, so a player who skips that booth ends up staring at a panel with nothing to put in it.
Where people get stuck
- The key does not open a door. There is no locked gate anywhere in Amusement Park. The silver key from the strength tester goes into the keyhole in the middle of the red arcade cabinet's front panel. People walk the whole perimeter with it before trying the cabinet.
- The photo booth looks broken. It says something is missing and does nothing when tapped. It is a clue holder, not a puzzle . read the three strips and leave.
- The prize wheel is a trap for completionists. It takes the coin, it spins, and it can lose. It is not on the critical path, and you do not need a second coin to finish the level.
- Only lit things are interactive. Before the light board is solved the park is dark and half the props do not respond at all. If a machine is dead, check whether the park is lit yet rather than hunting for a missing item.
- The ring toss is the exit, not a side game. When the board opens at 112 against a target of 150 you are one placement away from finishing the level. Do not walk away from it looking for a tenth machine.
Notes on this walkthrough
Every timestamp on this page is the second the action happens in the recorded run embedded at the top, and the screenshots are frames from that same run. Codes were read off the game's own displays rather than copied from another guide: 1496 was confirmed digit by digit off the keypad display and again off the graffiti it mirrors, and 20 / 67 / 81 was confirmed off the photo strips and then again off the strength tester's panel once the fields were filled.
Two things this page deliberately does not claim. First, the exact number of hits the strength test takes: the display passes through several values on the way up and there is no fixed count we could verify, so the only figure printed is the target, 2000. Second, a fixed order for the attractions . the park lets you cross it in any direction, so treat the step numbering as the recording's route rather than the game's gating.
Chapter 1 levels.
FAQ.
What is the keypad code in Rooms & Exits Chapter 1 Level 6?
1496. It goes into the four-digit keypad on the blue ticket machine in the north-east corner of the park, and the same number is painted on the blue ride structure behind the control console next to it.
What are the three numbers in the photo booth?
20, 67 and 81, left to right. They go into the three two-digit fields across the top of the strength tester, not back into the photo booth.
How do you get the key in Amusement Park?
Set the strength tester's panel to 20 / 67 / 81, then hit the punching bag until the score reads 2000. The silver key is dispensed at that point.
What does the key unlock?
The red arcade cabinet beside the strength tester. Its front panel has a keyhole in the middle; the key opens the cabinet and the bumper-car grid inside pays out the Ring you need for the final ring toss board.
How long does Level 6 take?
About five minutes. The recorded run this page is built from finishes at 5:06; the two long stretches are the eighteen-tile candy panel and the six-by-six bumper-car grid.
Do I have to spin the prize wheel?
No. The wheel takes the coin from the ticket machine and it can land on LOSE, but nothing in the level depends on it. It is the one optional machine in Amusement Park.