 GridPaw
 Shikaku
 Akari
 Kakuro
 Nonogram
 Nurikabe
 Pictomino
 KenKen
 Binary
 Star Battle
 Hashi
 Slitherlink
 Murder Sudoku
 Meowdoku
 Crazy Cleanup
Rooms & Exits Chapter 1 Level 10 Walkthrough: Train Station
Nothing in this level is a code you have to crack. You are given the note, the slot number, the chest code and the cup order. The work is in matching each one to the right object.
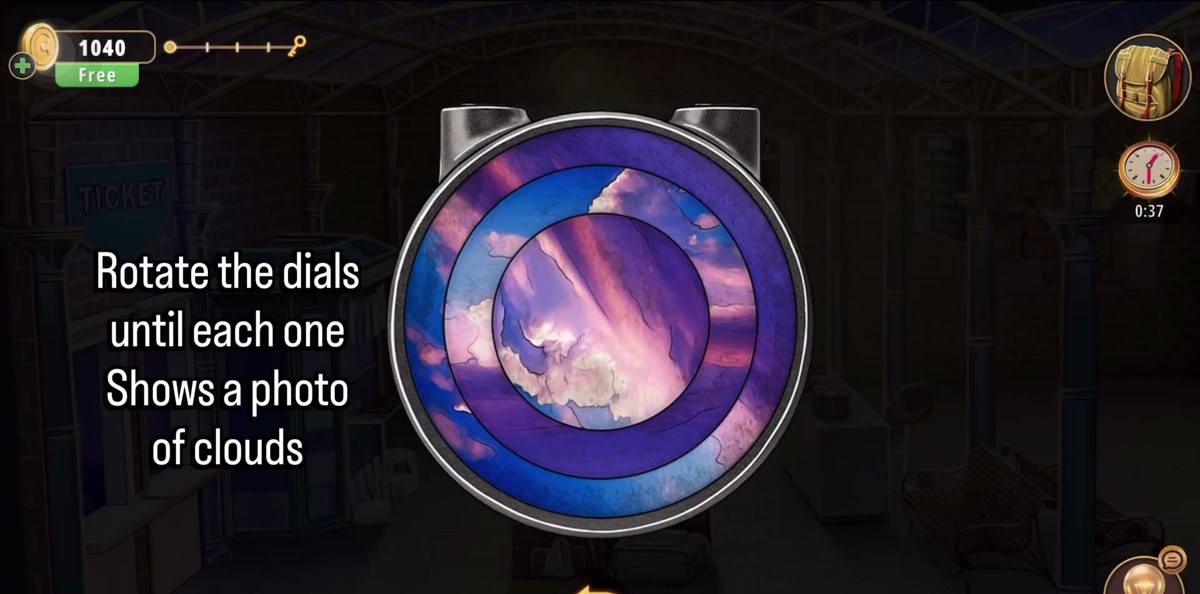
- Three cloud dials on the suitcase: rotate each ring until the sky pieces line up.
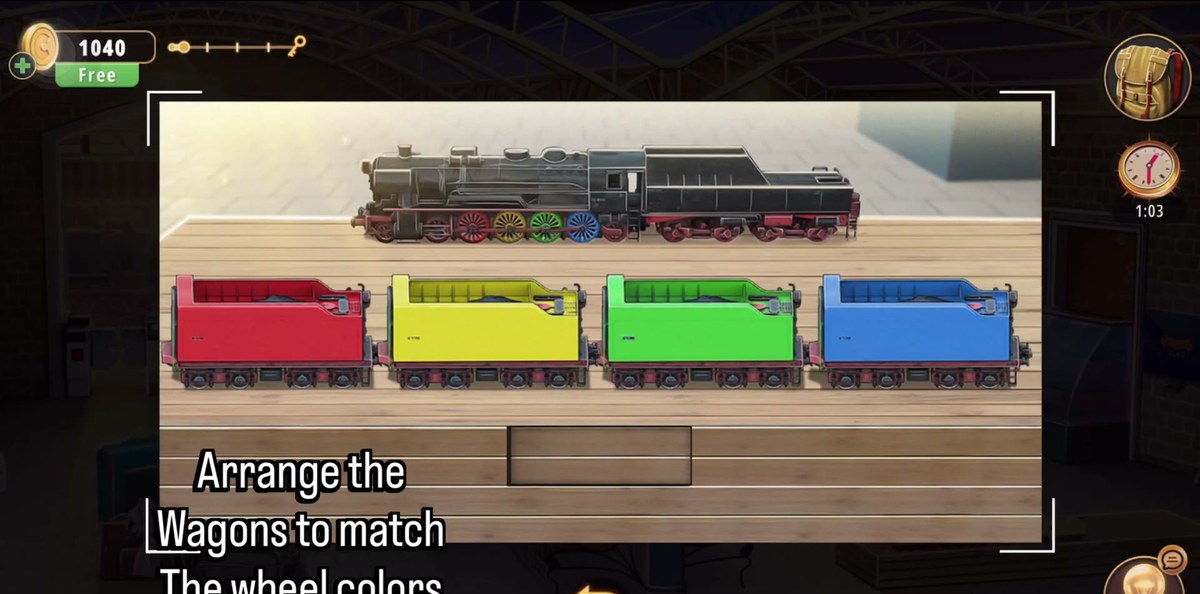
- Drag the wagons into the order of the locomotive's wheels: red, yellow, green, blue.
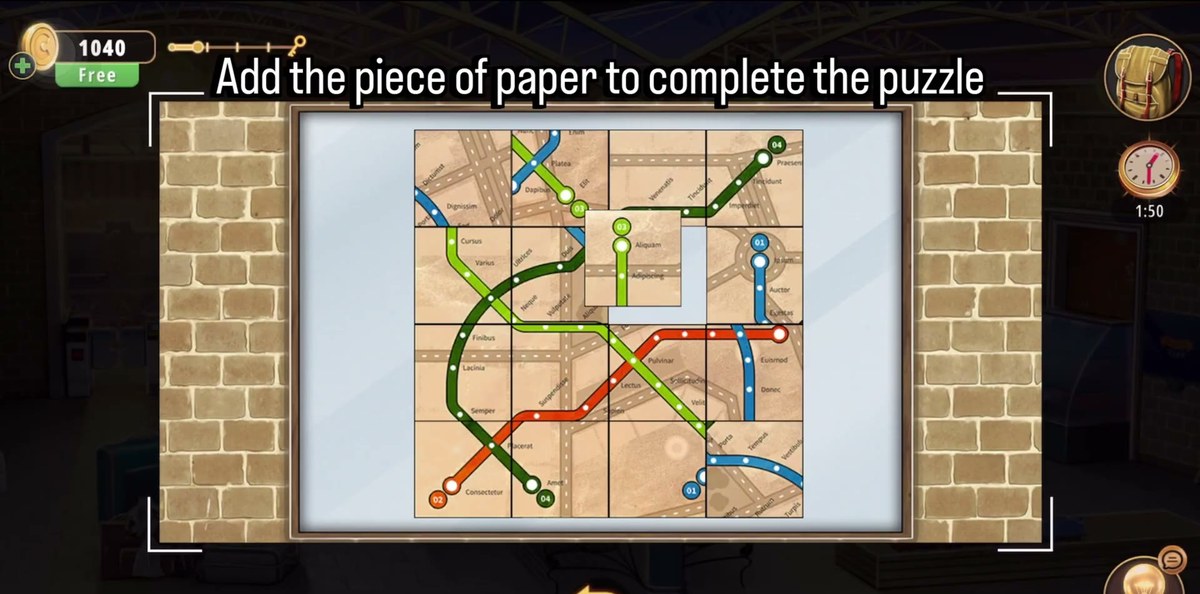
- Finish the metro map with the missing square, then read the note it gives you.
- Departures board: Jubilee 10:15, Northern 08:57, Piccadilly 13:36: the other three rows are already correct.
- Vending machine: dollar bill, then 51 → newspaper. Sort the six papers by date.
- Chest keypad: 77059 → cup + paper. Order the cups exactly as the paper shows.
- Use the shelf key on the ticket machine, print the ticket, then walk through the exit gates.

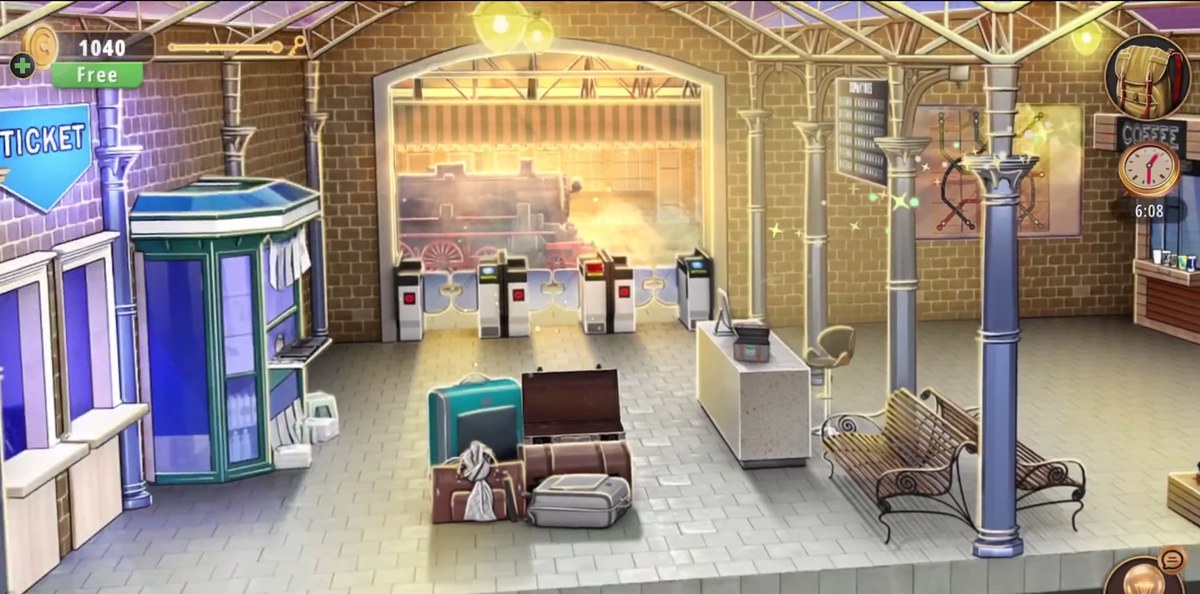
What this level actually is.
Train Station is one big concourse with a platform at the back, and unlike the classroom in Level 4 it never splits you into separate areas. Everything you need is visible from the middle of the floor: two ticket booths on the left, a coffee stand and a food kiosk on the right, a vending machine beside them, a heap of luggage in the centre, the departures board on the wall, the framed metro map next to it, and the turnstiles at the back with a steam locomotive on the other side.
What makes it feel longer than it is: the room gives you four pieces of paper before it gives you a single lock to use them on. A note with seven times, a slab of a metro map with a square missing, a fast-food menu card and a crumpled sheet with five coffee cups printed on it. If you burn them into your memory by name instead of by what they look like, half the level solves itself. The note only ever talks about the board, the menu only ever talks about the sandwich, the cups sheet only ever talks about the shelf.
There is no timer anywhere in Train Station. The only thing that can cost you real time is treating the seven-line note as seven board entries, which is the single mistake this page exists to prevent.
Step by step, in the order the room hands it to you.
The timestamps below are the recorded playthrough, so you can scrub the video above to the same second if a written description is not enough. Steps are numbered by the order the puzzle becomes available, not by the order of the room's furniture.
Start with the luggage in the middle of the concourse. One suitcase has a dial lock made of three concentric rings, and the objective line tells you exactly what to do: rotate the dials until each one shows a photo of clouds. Each ring carries a slice of sky, and the slices only work one way. Turn the rings until the cloud photo reads as one continuous picture rather than three offset pieces. There is no hidden number here. It is purely a picture-alignment lock, which is why people walk past it looking for a three-digit code that does not exist.
The wagon track starts a wagon short: three wagons are sitting in a row with an empty position at the end, and the prompt at 0:16 points you at the loose one. This is the quiet trap of the level. The row looks like a tidy little train, so players start dragging wagons around and conclude the puzzle is broken, when in fact a colour is missing from the set and no arrangement of three wagons can match four coloured wheels. Collect the wagon first, then start sorting.
The instruction is short: arrange the wagons to match the wheel colors. Above the track stands a small steam locomotive with four large driving wheels, and those wheels are the answer key. Read them left to right and you get red, yellow, green, blue. The wagons never start in that order, and the swatches printed under the instruction repeat the same four colours, so you can check an arrangement without counting wheels again.
It is a straight re-sort, not a rotation puzzle: drag a wagon to a position and it swaps with whatever is there. In the recording it took two swaps to reach the target, and the row locks the moment the last colour lines up.
On the wall, next to the bench, hangs a framed metro map split into square tiles, with three or four coloured lines threading through it and exactly one socket left empty. The prompt is literal: add the piece of paper to complete the puzzle. That piece of paper is the slab you lift from the wall map early in the level, and it is a map fragment, not a note. It has the red and green line segments on it that fill the gap.
Do not confuse it with the second piece of paper you will be handed much later, the one with five coffee cups printed on it. Same label in the inventory, completely different job. In the recording the player finishes the map at about 1:28 and the frame closes into place.
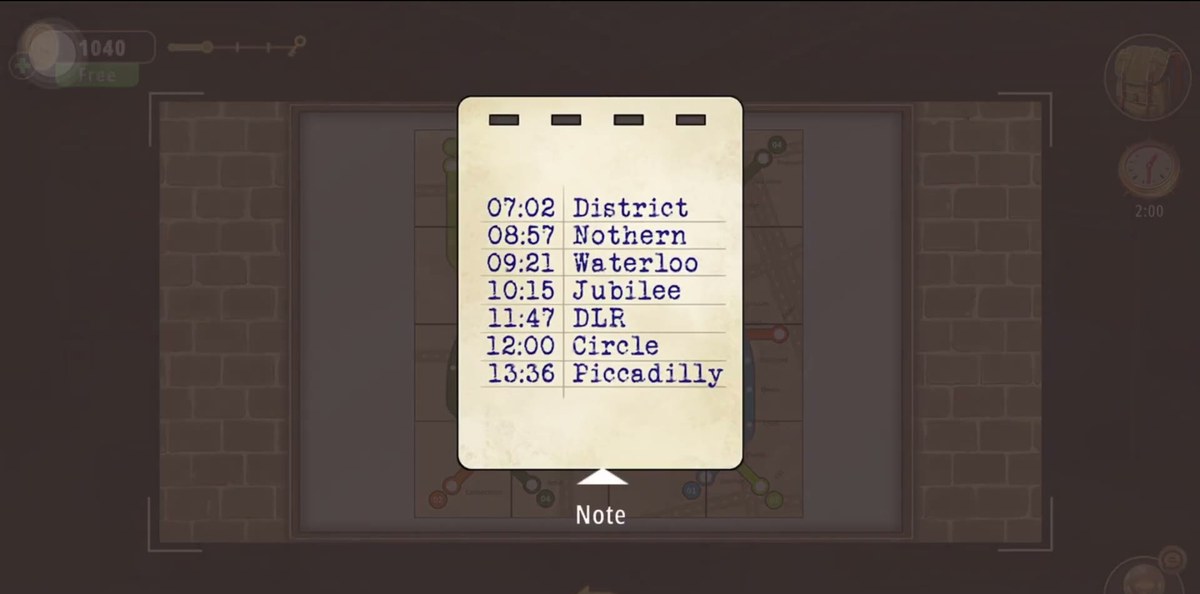
Completing the map produces a handwritten note listing seven times against seven Underground line names. Copy it down or photograph it, because you will be matching it against a board that has a different set of lines:
| Time on the note | Line on the note | Does it appear on the board? |
|---|---|---|
| 07:02 | District | no. A decoy |
| 08:57 | Nothern | yes. This is one of the three fixes |
| 09:21 | Waterloo | no. A decoy |
| 10:15 | Jubilee | yes. This is one of the three fixes |
| 11:47 | DLR | no. A decoy |
| 12:00 | Circle | no. A decoy |
| 13:36 | Piccadilly | yes. This is one of the three fixes |
The game spells Northern as “Nothern” on the note. That is the game's typo, not a different line, and it is not a clue. Do not go looking for a fourth line called Nothern on the board.
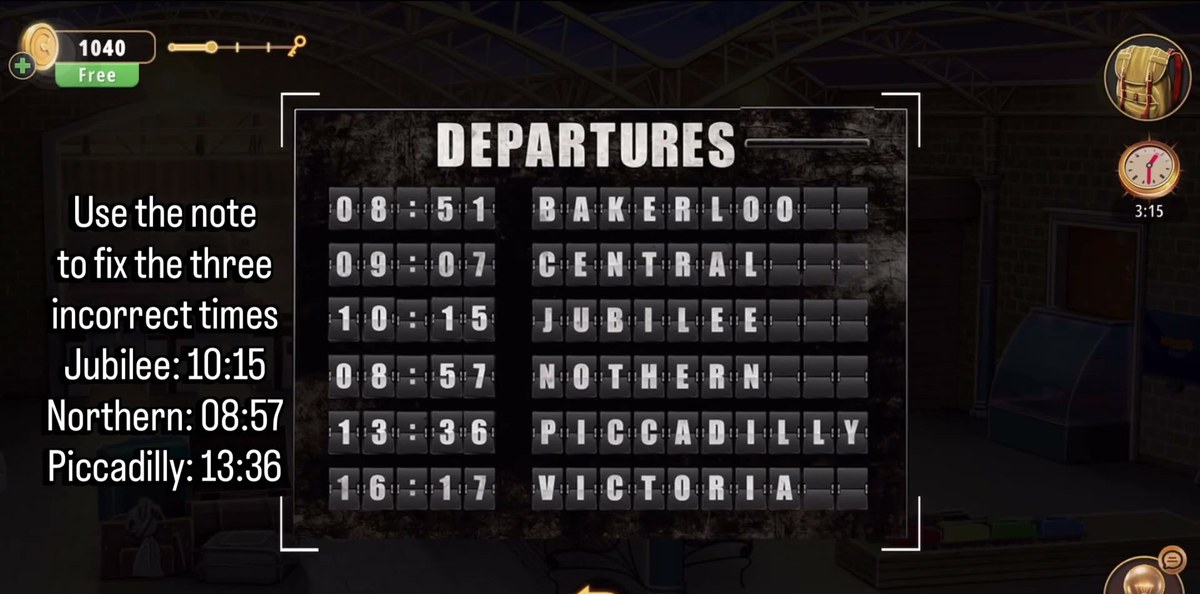
The board on the wall lists six departures. The instruction is to use the note to fix the three incorrect times, and that word “three” is the whole puzzle. It tells you the note has decoys in it. Four of the note's seven lines (District, Waterloo, DLR, Circle) are not on this board at all. Three are, and those three are wrong:
| Row on the board | Line | Action |
|---|---|---|
| 08:51 | BAKERLOO | leave it |
| 09:07 | CENTRAL | leave it |
| 10:15 | JUBILEE | set it from the note |
| 08:57 | NORTHERN | set it from the note |
| 13:36 | PICCADILLY | set it from the note |
| 16:17 | VICTORIA | leave it |
So Jubilee has to read 10:15, Northern 08:57 and Piccadilly 13:36. Bakerloo, Central and Victoria are not in the note and must stay as printed. Changing them because they look “out of order” is the most common way to stall here, since the board will not accept a row that nothing in your inventory can justify.
Once the times are right, a dollar bill is stuck across the board's rows and the objective switches to collecting it. Pick it up. It is the only currency in the level that does anything, and it goes straight into the vending machine two paces to the right.
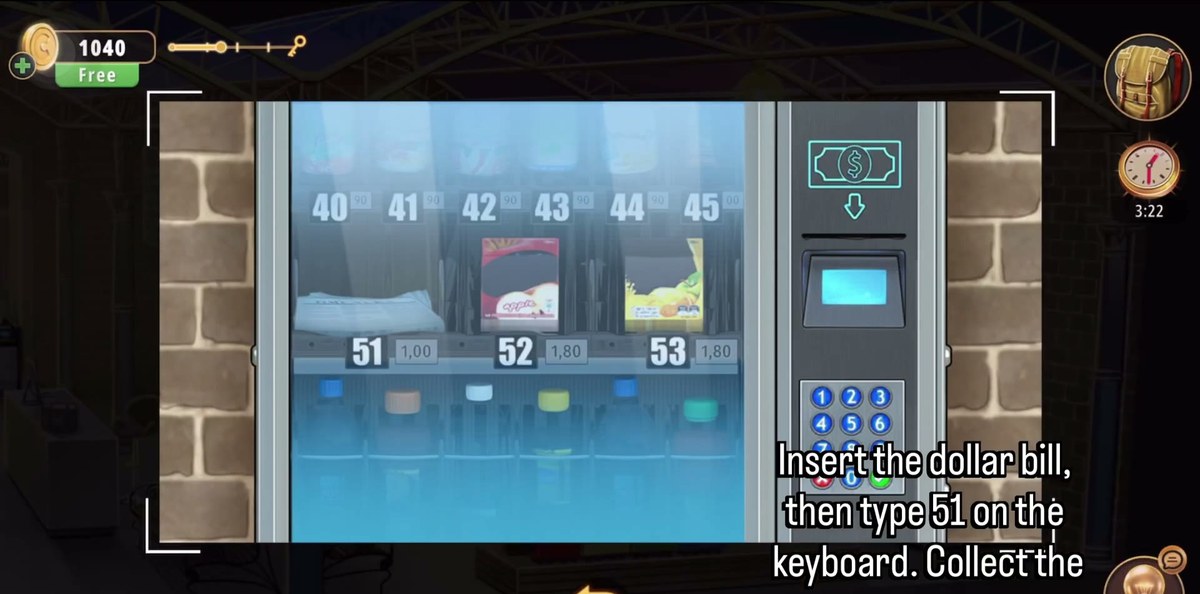
The machine beside the food kiosk has a numbered grid behind glass. The objective spells the whole thing out: insert the dollar bill, then type 51 on the keyboard. Slots run 40 to 45 along the top shelf and 51, 52, 53 along the bottom, and the newspaper you just saw on the stand sits in 51. Feed the bill in, tap 5 then 1, and take the paper that drops.
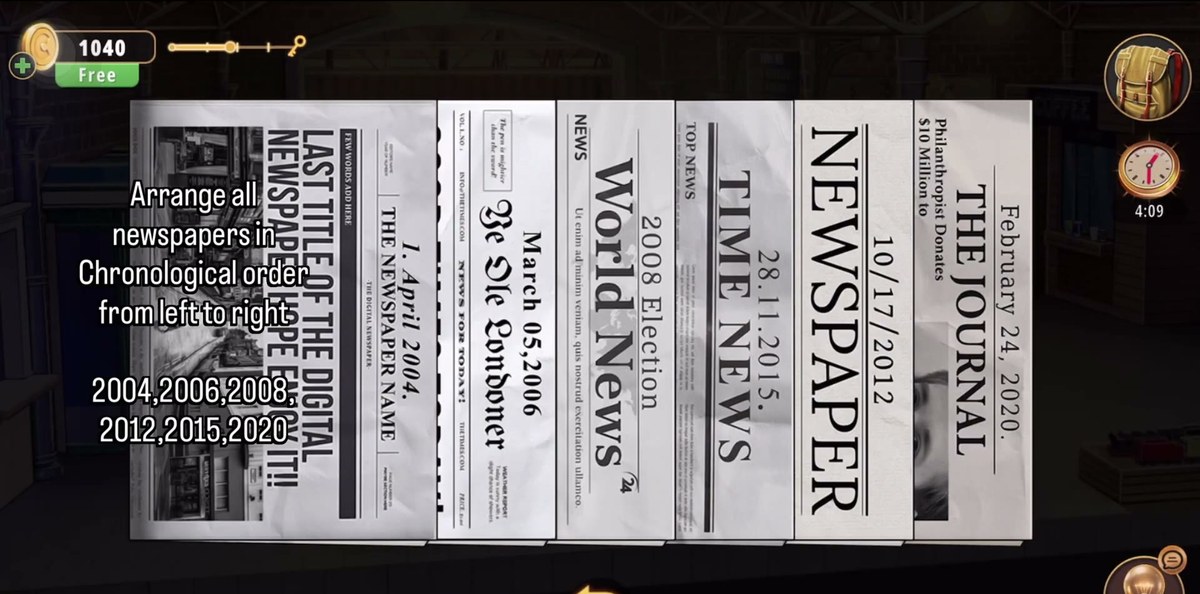
The stand holds six newspapers, and the instruction is to arrange all of them in chronological order from left to right. Two of them are already in the wrong places, and they are next to each other, which is why the stand looks “almost right” and refuses to accept a swap anywhere else:
| # | Newspaper | Date printed on it |
|---|---|---|
| 1 | THE NEWSPAPER NAME | 1 April 2004 |
| 2 | De Londoner | March 05, 2006 |
| 3 | World News | 2008 election edition |
| 4 | NEWSPAPER | 10/17/2012 |
| 5 | TIME NEWS | 28.11.2015 |
| 6 | THE JOURNAL | February 24, 2020 |
In the recording, the TIME NEWS from 2015 is sitting before the 2012 paper. Swap those two and the row locks; everything else is already chronological. Sort by the printed date, not by how worn the paper looks. The props are aged inconsistently and the 2020 paper is the cleanest of the six.
Finishing the stand gives you the sandwich menu card.
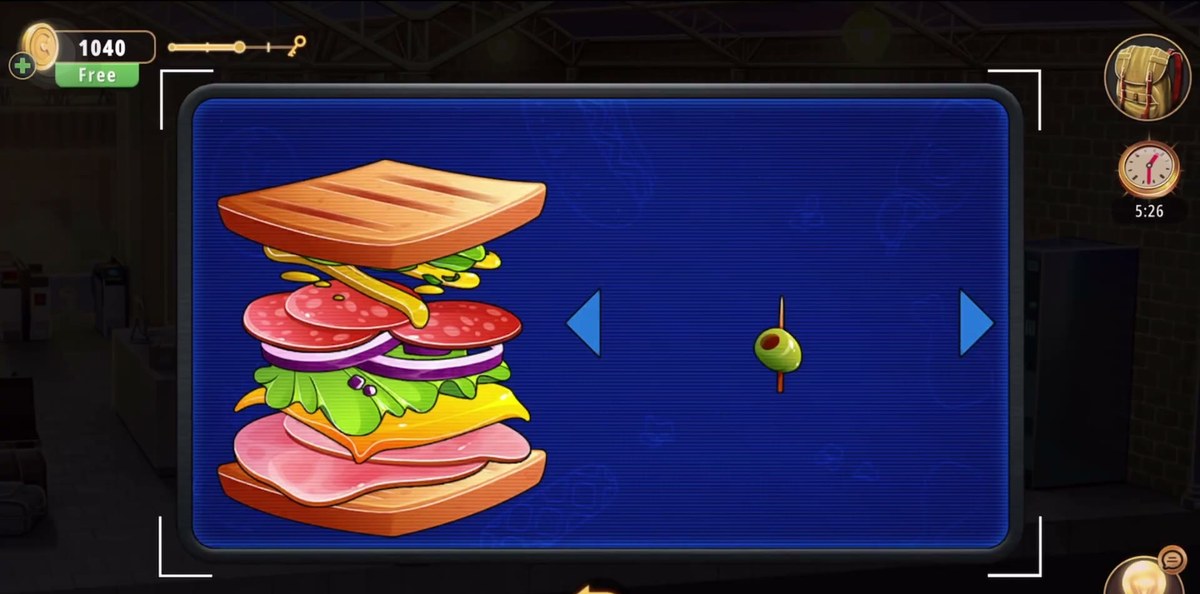
The menu card is a picture of a finished sandwich, and the screen that opens is a build station: a stack in the middle, arrows on either side to page through ingredients, and a stray olive on a skewer sitting off to the right. Add the layers in the same order the card shows until your stack matches the picture, then place the olive on top with the skewer.
The card's stack reads, bottom to top: toasted bread, ham, cheese, lettuce, red onion, salami, a squiggle of mustard, top bread, olive on a toothpick. What we are not printing is the exact order of the two middle layers beyond that: two independent reads of the build screen disagreed about whether the cheese sits above or below the ham, so trust the card in your own inventory rather than this paragraph for those two steps. Everything else on the card is stable across both reads.
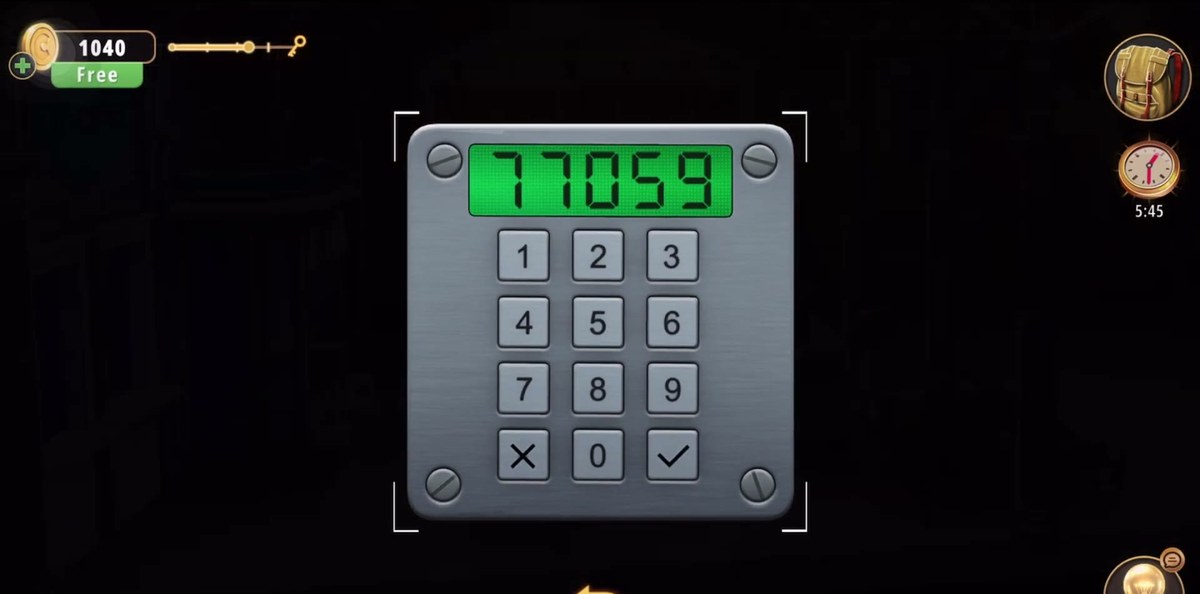
A chest appears on the counter with a keypad on the front, and the game hands you the code outright. It is printed on the blue card and repeated in the objective line, so there is nothing to deduce. Enter 77059.
Inside the chest are two items, and both matter: a paper cup, and a crumpled piece of paper with five cup designs on it. Take the paper even though it looks like scrap. It is the answer key for the next puzzle, and it is easy to close the chest without registering it.
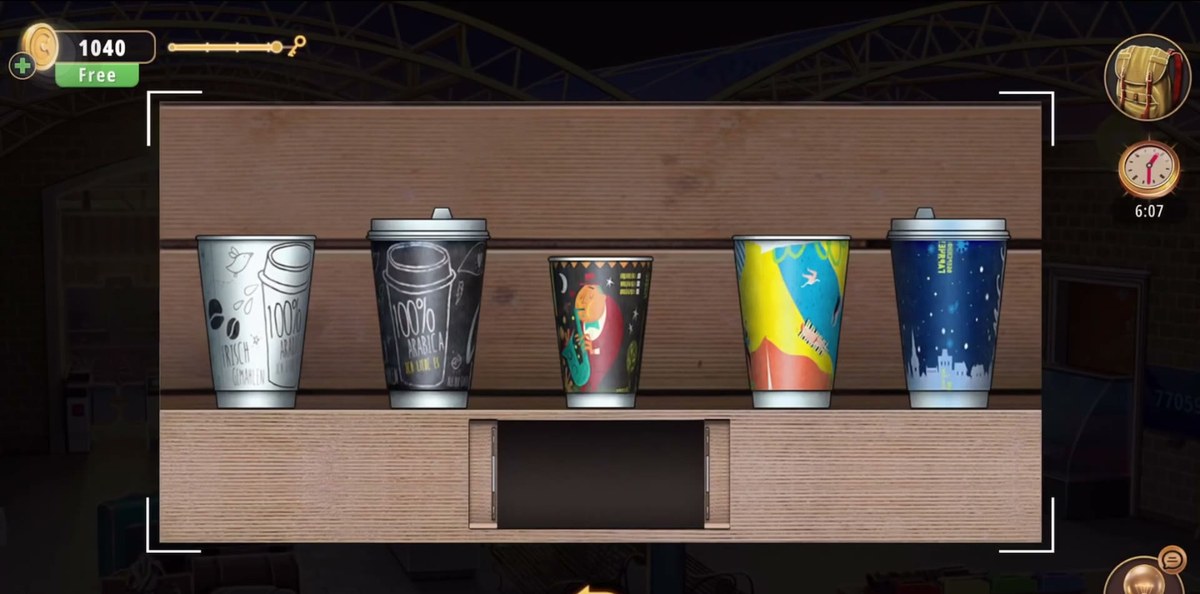
The coffee stand's shelf holds five paper cups in a row, and the crumpled sheet from the chest shows the same five designs in the order they belong. Identify each cup by its artwork rather than by colour alone. Two of the five are black, and swapping them is the mistake that eats the most time here:
| Slot | Cup to place there |
|---|---|
| 1 | White cup, hand-drawn coffee cup with beans and the words FRISCH GEMAHLE(N) |
| 2 | Black chalkboard cup, white outline of a cup, 100% ARABICA |
| 3 | Black jazz cup, cartoon player in a red suit with a saxophone |
| 4 | Yellow and blue abstract cup with a small white bird |
| 5 | Dark blue cup, snowy night skyline |
In the recording the shelf starts with the white cup, then the snowy-city cup, then the chalkboard cup, then the yellow abstract cup, then the jazz cup. Getting to the order above is a series of straight swaps. The two black cups trade places with the snowy-city and jazz cups around them. When the row matches the paper the shelf unlocks and a key drops into the drawer underneath.
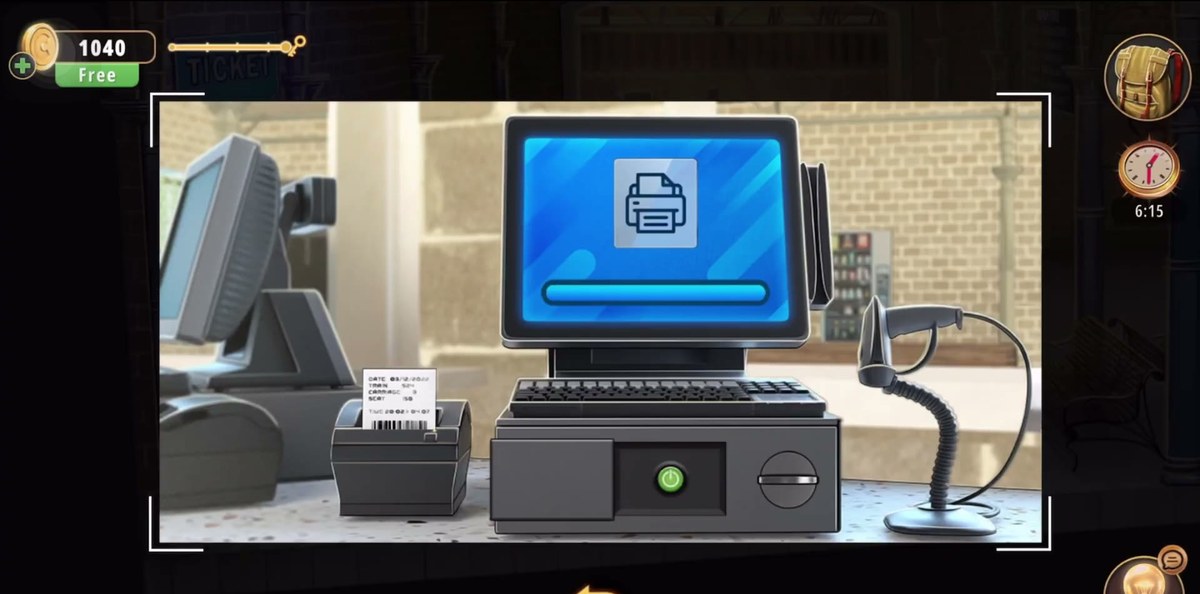
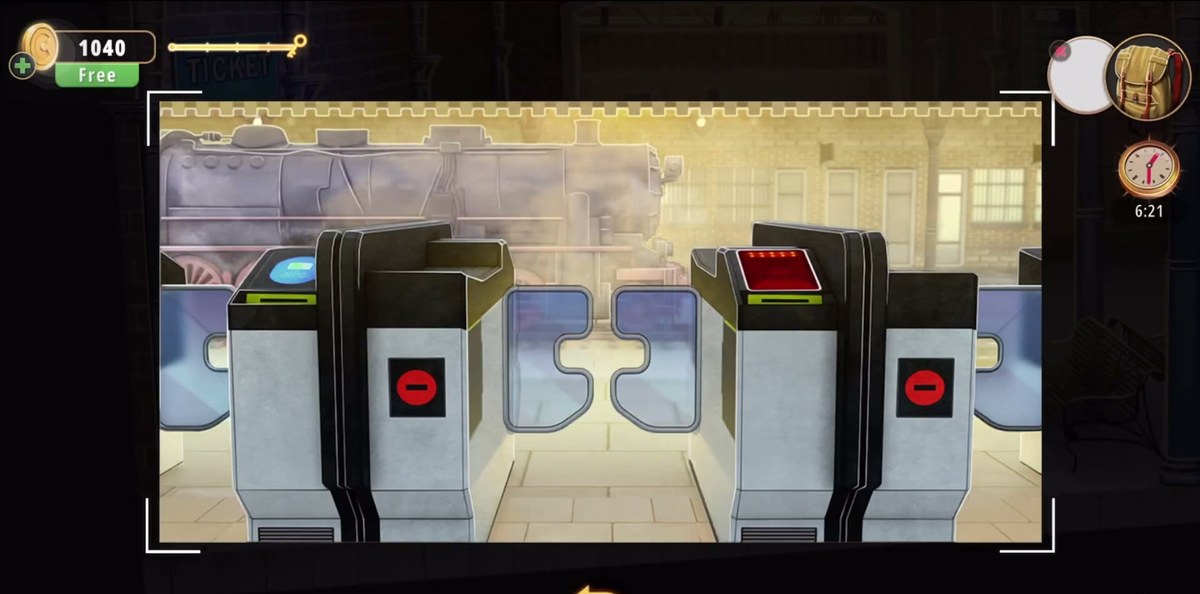
Take the key from under the shelf to the ticket counter on the left. It opens the terminal behind the desk, the screen shows a document icon with a loading bar, and a printed ticket feeds out of the small printer beside the monitor. Collect it. This is the item the exit gates are waiting for.
The fields we could read twice on the ticket: date 03/12/2022, train 524, time 20:02 > 04:07. Carriage and seat are printed too small in the recording to hold up a second read, and we would rather leave two fields blank than publish numbers that send you to the wrong platform. They are not needed for anything in the level.
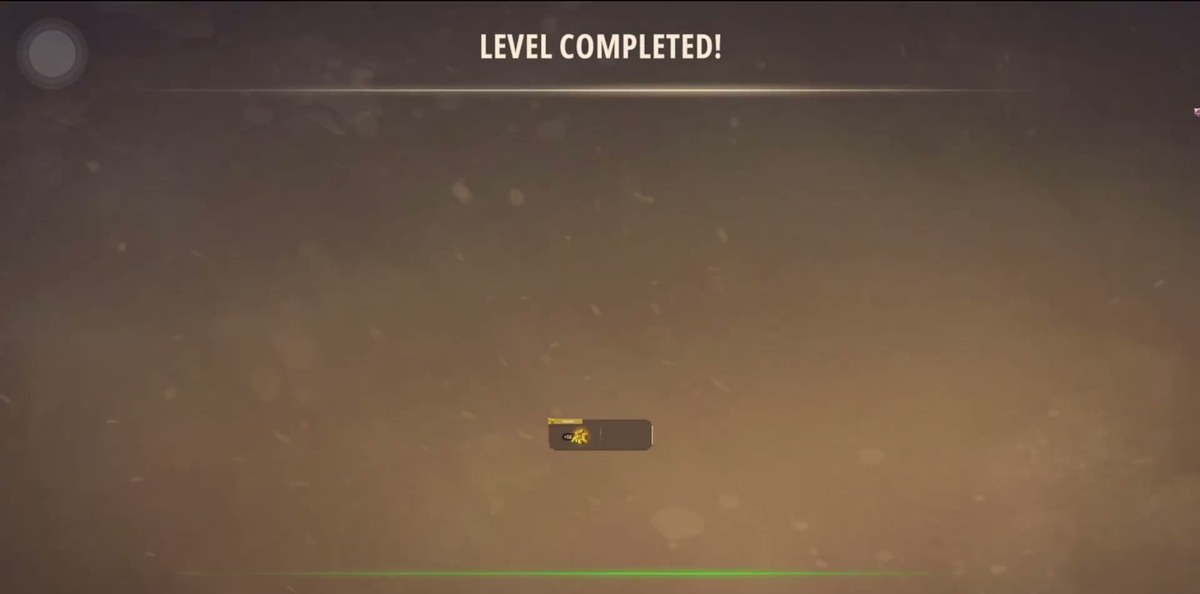
Walk back to the three turnstiles under the arch and the exit marker appears between the gates. With the ticket in your inventory, step through and the level completes: the results screen reads LEVEL COMPLETED! with a +10 reward chip and a green progress bar along the bottom of the screen at 4:23.
If the gates will not open, the ticket is the only thing that matters. Not the sandwich, not the bowl of olives, not the coffee cups. The level never asks you to use the dollar bill anywhere except the vending machine, so a bill still in your bag at this point means you skipped step 8.
Everything at a glance.
One table for the seven inputs the level actually asks for, in case you are stuck on the last lock and do not want to re-read the walkthrough:
| Lock | What it wants | Where it comes from |
|---|---|---|
| Suitcase dials | Aligned cloud photo | Picture only. No code |
| Wagon board | Red, yellow, green, blue | Locomotive driving wheels |
| Metro map | The missing square | Map fragment from the wall |
| Departures board | Jubilee 10:15 · Northern 08:57 · Piccadilly 13:36 | The seven-line note |
| Vending machine | 51 | Dollar bill from the board |
| Chest keypad | 77059 | Given on screen |
| Cup shelf | White → chalkboard → jazz → abstract → snowy city | Paper inside the chest |
Where this level actually goes wrong.
Four failure points account for nearly every stall in Train Station, and none of them is a puzzle you have to be clever to solve.
The note is not a checklist for the board
Seven times, six board rows, and the instruction says “three incorrect times”. Players who try to make the board match the note line by line start hunting for a District row that does not exist. The note is a lookup table you cross-reference, not a list to copy wholesale.
Two different pieces of paper, same name
The map fragment and the cup sheet are both labelled as a piece of paper in the inventory. One fills the metro map at 0:36, the other answers the coffee shelf at 4:00. If the cup shelf will not accept anything, check that you opened the chest properly and took the paper out of it. The map fragment is spent by then and will not do.
The wagon row starts short, and it is not obvious
Three wagons in a row, one empty slot at the end, and a locomotive with four coloured wheels. Until you take the loose wagon the game offers you at 0:16, the row cannot be completed, and dragging the three you have around will never satisfy four colours. Two swaps finish it once the set is whole.
The two black cups
On the cup shelf, the chalkboard cup and the jazz cup are both black with white artwork. Sorting them by “the black one” will get you one right and one wrong. Match the artwork: the chalkboard cup has the coffee-cup outline with the words 100% ARABICA, the jazz cup has the saxophone player in the red suit.
Frequently asked.
What are the three wrong times on the departures board in Level 10?
Jubilee must read 10:15, Northern 08:57 and Piccadilly 13:36. The other three rows on the board, Bakerloo 08:51, Central 09:07 and Victoria 16:17, are already correct and must not be touched.
What does the note in the Train Station level say?
The note lists seven times: 07:02 District, 08:57 Nothern, 09:21 Waterloo, 10:15 Jubilee, 11:47 DLR, 12:00 Circle and 13:36 Piccadilly. Only three of those line names appear on the departures board, so only three rows need changing.
What is the vending machine code in Level 10?
Insert the dollar bill you take off the departures board and type 51. Slot 51 holds the newspaper, which you need for the newspaper-sorting puzzle on the stand.
What is the code for the chest in Train Station?
77059. The game shows it on a blue card and repeats it in the objective line, so there is nothing to decode. The chest holds a paper cup and a crumpled piece of paper with five cup designs on it.
How do you order the five cups on the shelf?
Match the paper from the chest: white coffee cup, then the black chalkboard cup, then the black jazz cup with the saxophone player, then the yellow and blue abstract cup, then the dark blue snowy city cup. A key drops into the drawer under the shelf.
How long is Chapter 1 Level 10 and does it have a timer?
The recorded run finishes in about four and a half minutes with no timed puzzle anywhere in the level. Nothing in Train Station punishes you for standing still and reading the board.
Stuck in the room after this one?
All Rooms & Exits walkthroughs · Chapter 1 Level 4: Classroom
Every solution on the site is transcribed from a recorded run of the current build, not from another guide.
Train Station sits in Chapter 1 of Rooms & Exits and is roughly a four and a half minute room once you know the order. If you are playing a build released after this recording, the numbers on the departures board are the most likely thing to have been reshuffled. The structure of the puzzle, three rows in and three rows out, has been stable across every version we have checked.