 GridPaw
 Shikaku
 Akari
 Kakuro
 Nonogram
 Nurikabe
 Pictomino
 KenKen
 Binary
 Star Battle
 Hashi
 Slitherlink
 Murder Sudoku
 Meowdoku
 Crazy Cleanup
Rooms & Exits Chapter 1 Level 8 Walkthrough: Log Cabin
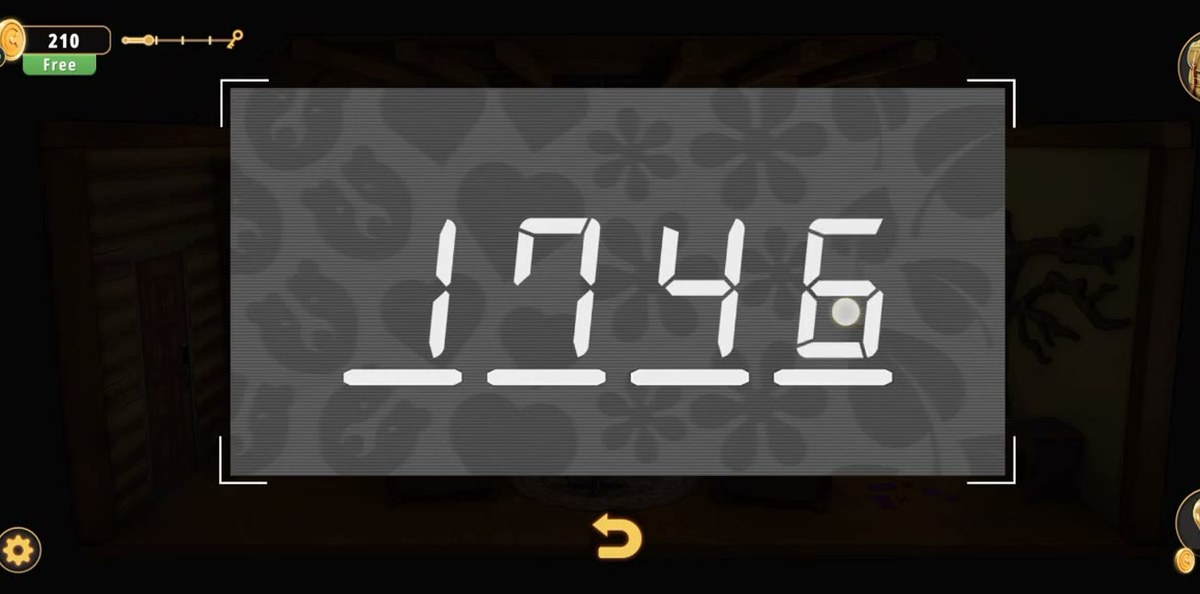
Log Cabin is one room with two collection sets and two codes. The codes are 1746 (the laptop on the desk) and 358429 (the door keypad at the very end).
- Laptop on the desk by the window: set the four-digit display to 1746.
- Collect as you go: 8 stained glass pieces and 5 coloured tiles. Both sets are needed for the last two puzzles, so do not walk past a piece on the floor.
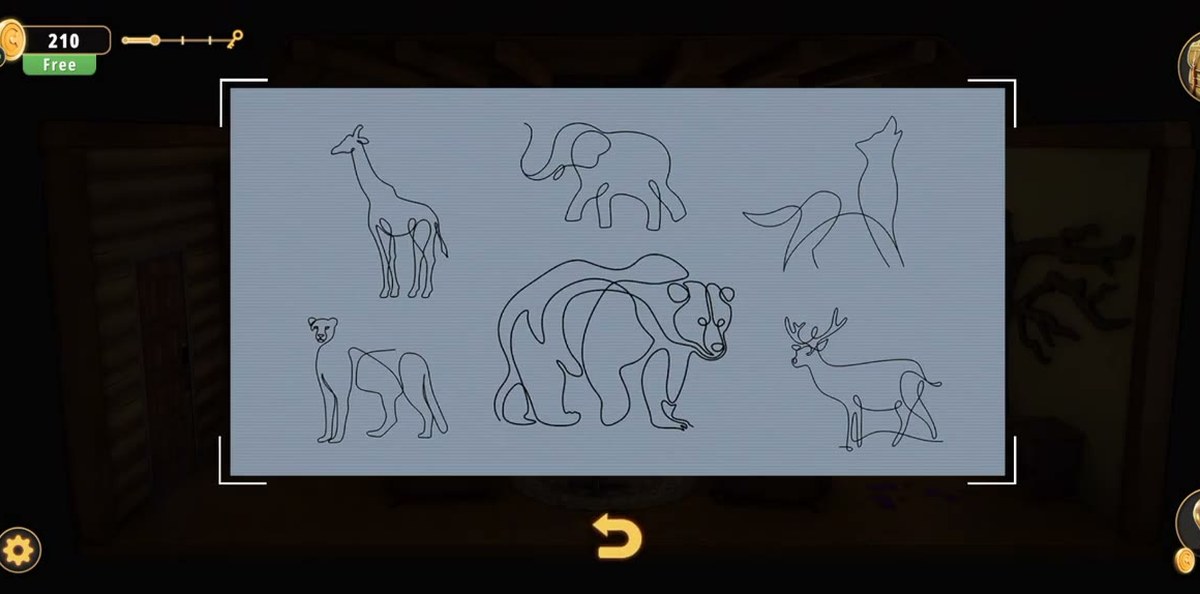
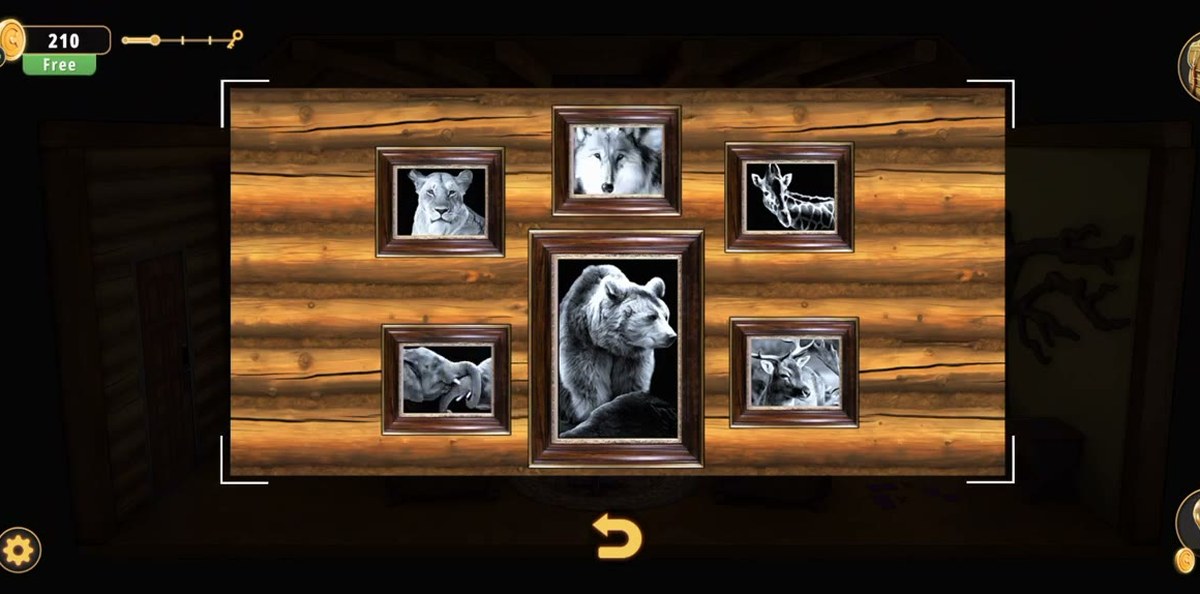
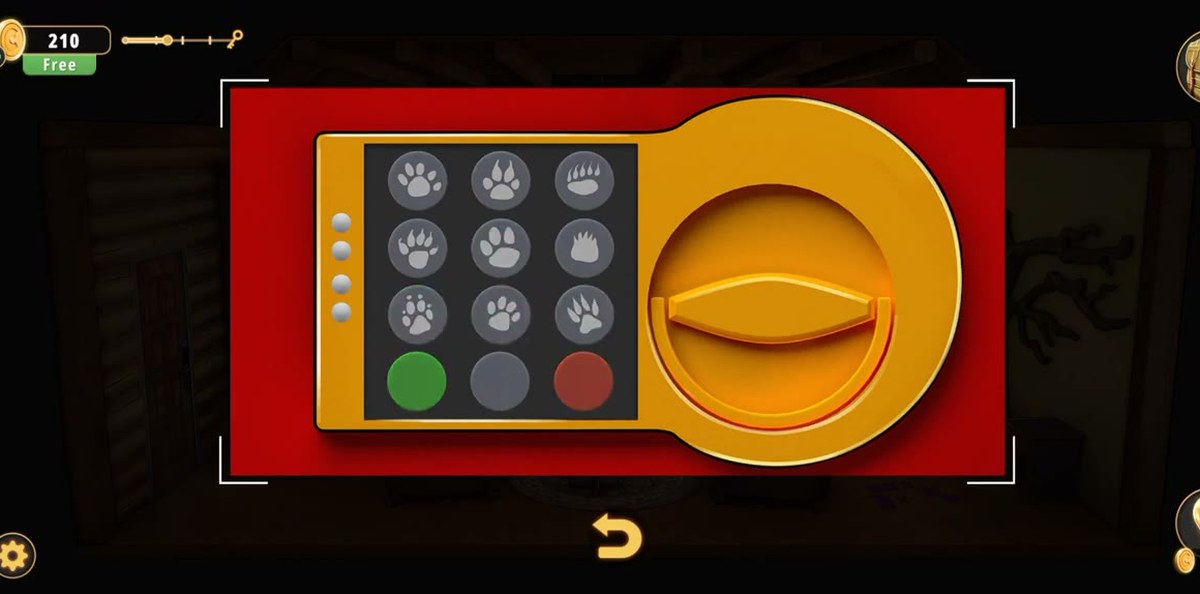
- Six black-and-white animal portraits on the wall right of the fireplace hide a red safe with twelve paw-print buttons. The sheet of animal outlines you find at 0:40 is the only animal list in the room.
- Desk drawer: four paw prints on a white strip, tapped in order.
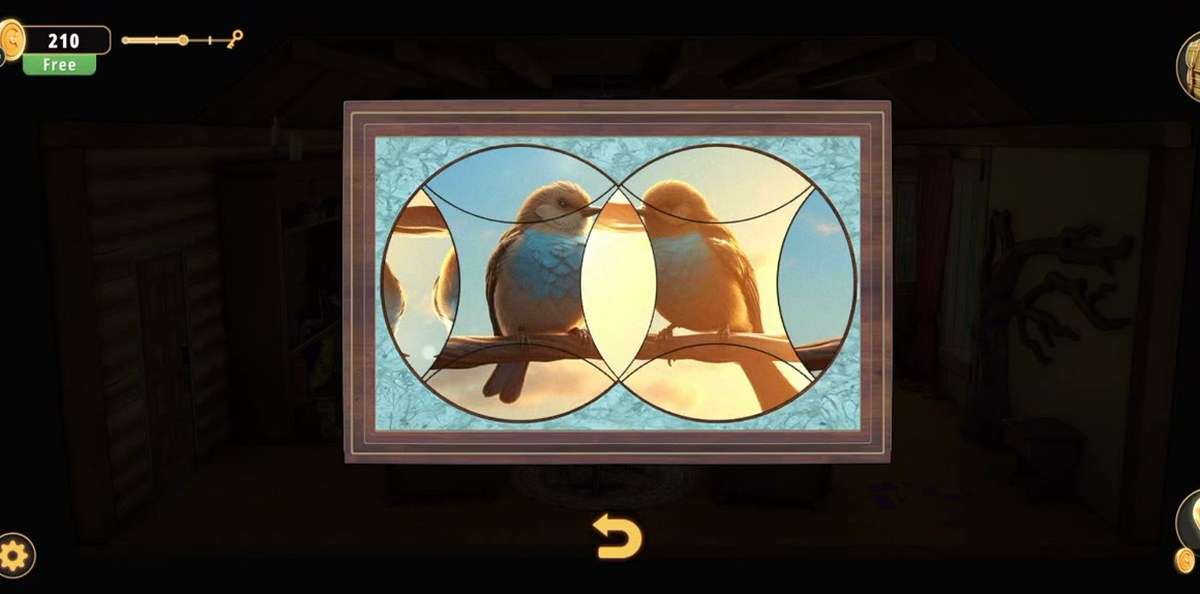
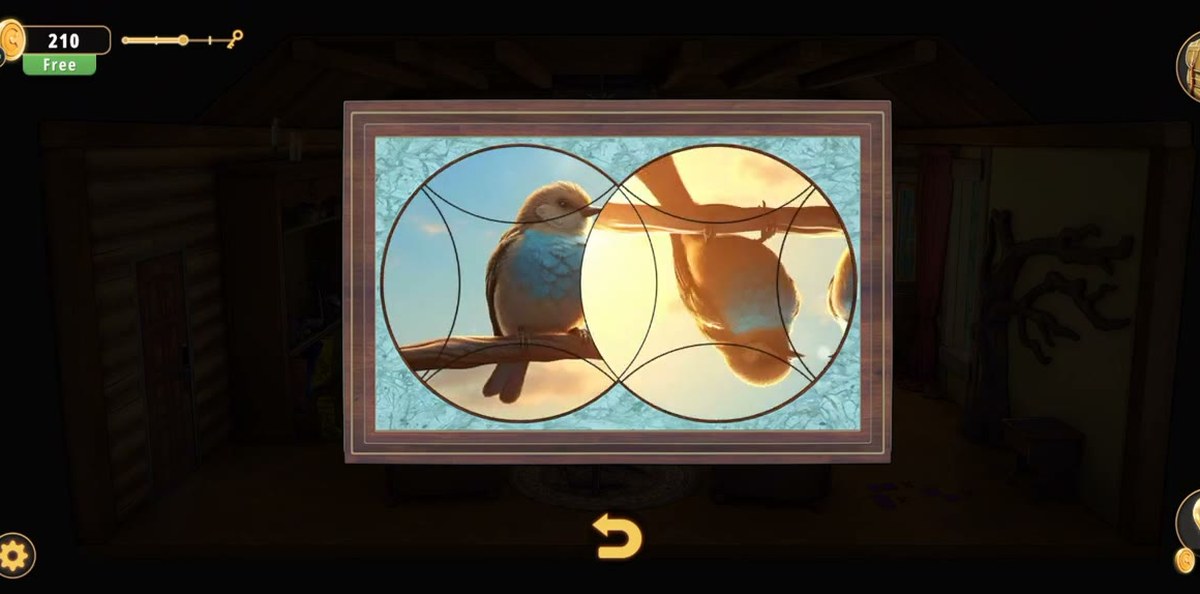
- Solve the circular bird window (it gives the hammer), use the hammer, take the key, finish the 4×4 tile board, then fill the hexagonal glass panel.
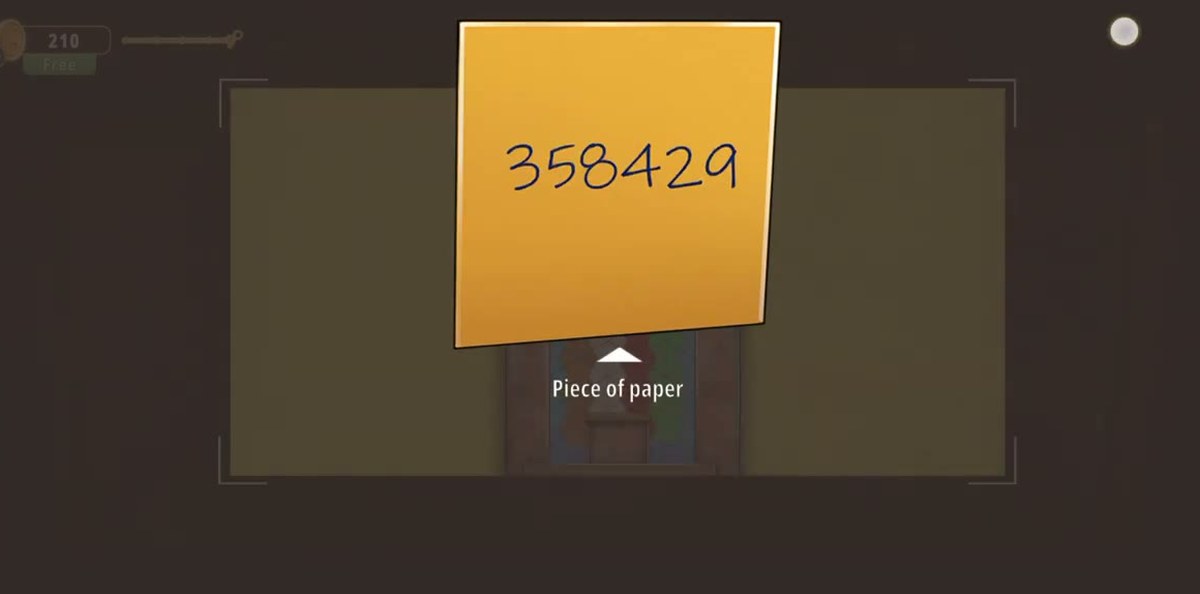
- The piece of paper at the end reads 358429. Type it on the six-digit keypad and the door opens.

What this level actually is.
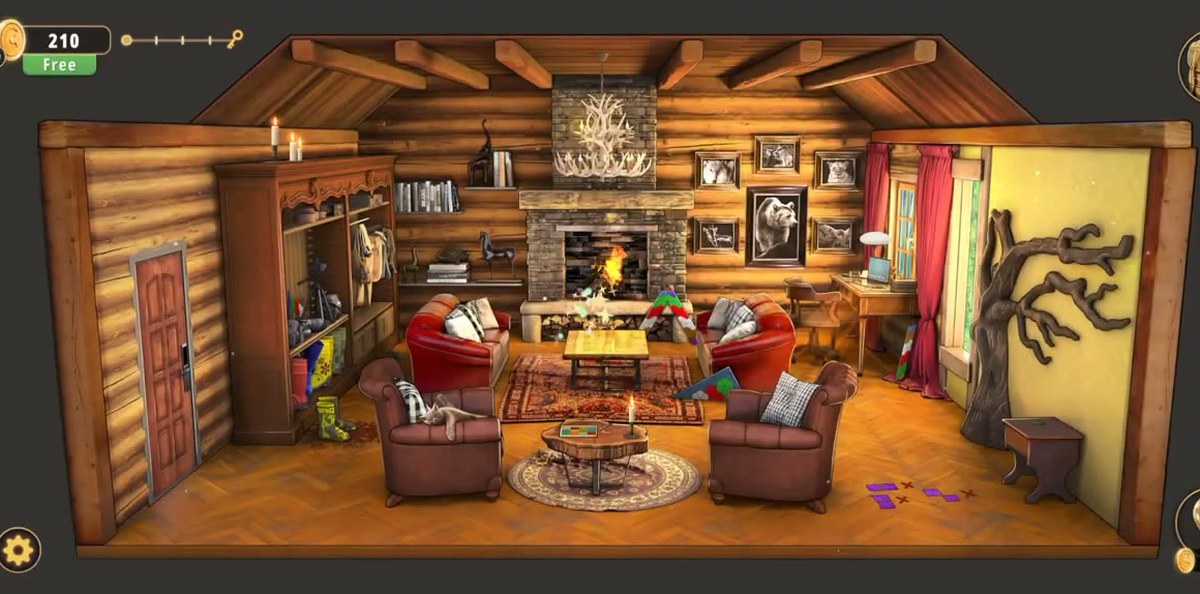
Log Cabin is the first level in Chapter 1 that is a single room. No corridor, no second area, no walking between scenes: the fireplace, the sofa, the desk and the door are all inside one cut-away cabin, and the camera never leaves it. That is the good news. The bad news is that everything is layered on top of everything else, so the level looks finished long before it is.
There are four things to keep in mind before you touch anything:
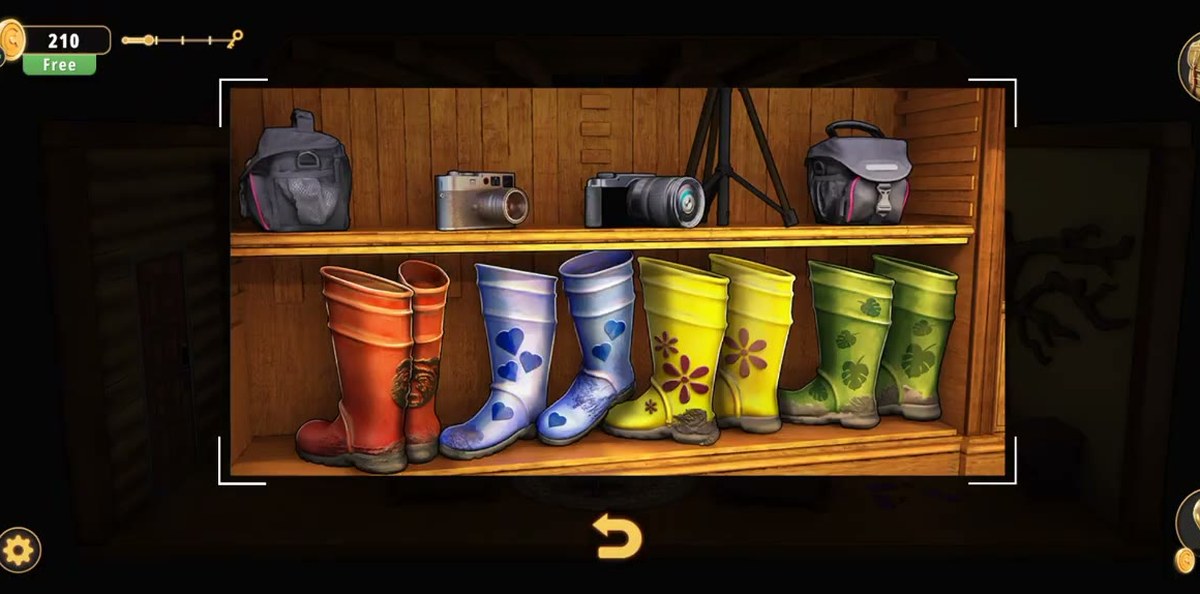
- One room, five work surfaces. The tall cabinet on the left (boots and cameras), the coffee table in the middle (a small tile board), the wall right of the fireplace (six animal portraits), the desk by the window (a laptop), and the tree-branch sculpture on the far right wall (a keyhole).
- Two collection sets, not one. Eight stained glass pieces and five coloured tiles run as separate counters in your bag. They finish at 2:46 (tiles, 5/5) and 3:22 (glass, 8/8) and they unlock the two hardest puzzles.
- Two codes, both given to you late. The laptop wants 1746; the exit door wants 358429. Neither is written anywhere near the lock that uses it.
- No timer, no hearts, no fail state. Nothing in Level 8 punishes a wrong answer beyond a red flash, so there is no reason to rush a puzzle you have not understood.
The reason players stall here is almost never a hard puzzle. It is that the room gives you two of everything. Two counters, two keypads, two animal clues. And the game never says which one belongs to which lock.
Step by step.
The order below is the order the recording actually played the level in, not a theoretical optimum. Where the recording backtracks, the step says so. Timestamps are links into the video at the exact second.
1746 is the number this level hinges on, and it is also the easiest number in the level to misread. On that seven-segment font a 7 reads like a 0 and a 6 reads like a 3: we had machine text recognition insist on 1043 and 1045 off the same frame, while two high-zoom reads of the lit segments said 1-7-4-6. The segment map won. 1746. If your display refuses it, check the second digit first.
That is the trap of Level 8. The safe is not behind a hidden switch or a puzzle you can skip. It is behind the largest picture on the wall, the one you are most likely to read as set dressing. If you have been staring at a room with nothing to do, you have not pressed the bear.
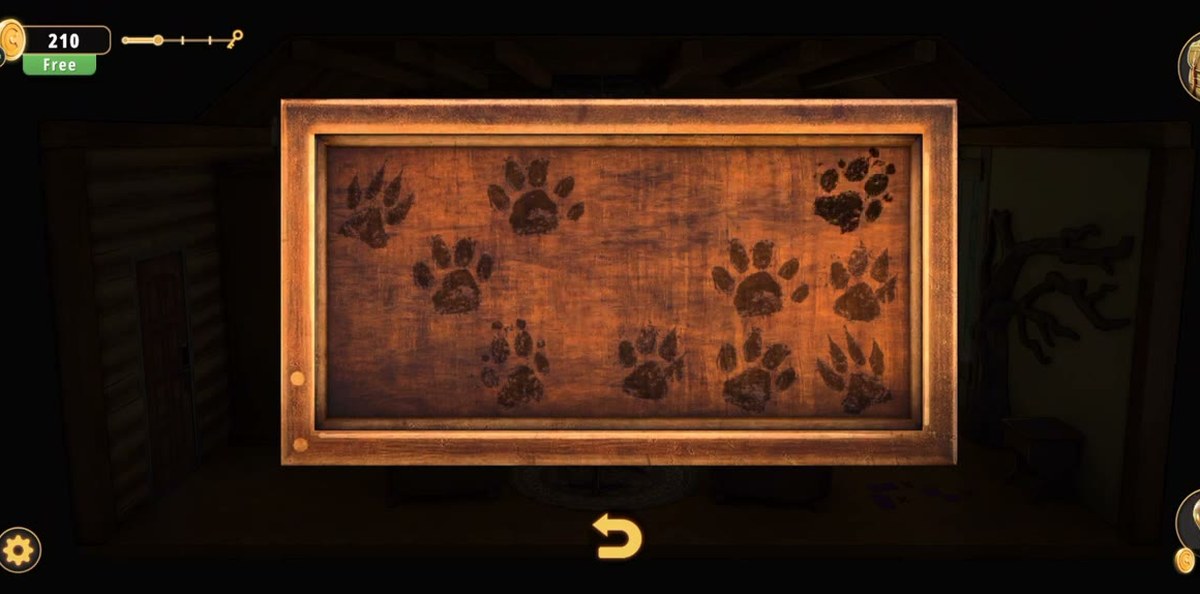
Order matters. The drawer strip at 1:14 is the only ordered set of prints in the room, so if you are guessing, you are guessing at something the level already told you. The recording has the safe open by 1:42 and the wooden panel beside it open by 1:45; two compartments, one after the other.
Work from the centre outward. The recording takes eighteen seconds here (1:51 to 2:09) with no backtracking, which is what a centre-out order looks like; hunting randomly on a rotating ring puzzle is what turns it into ten minutes.
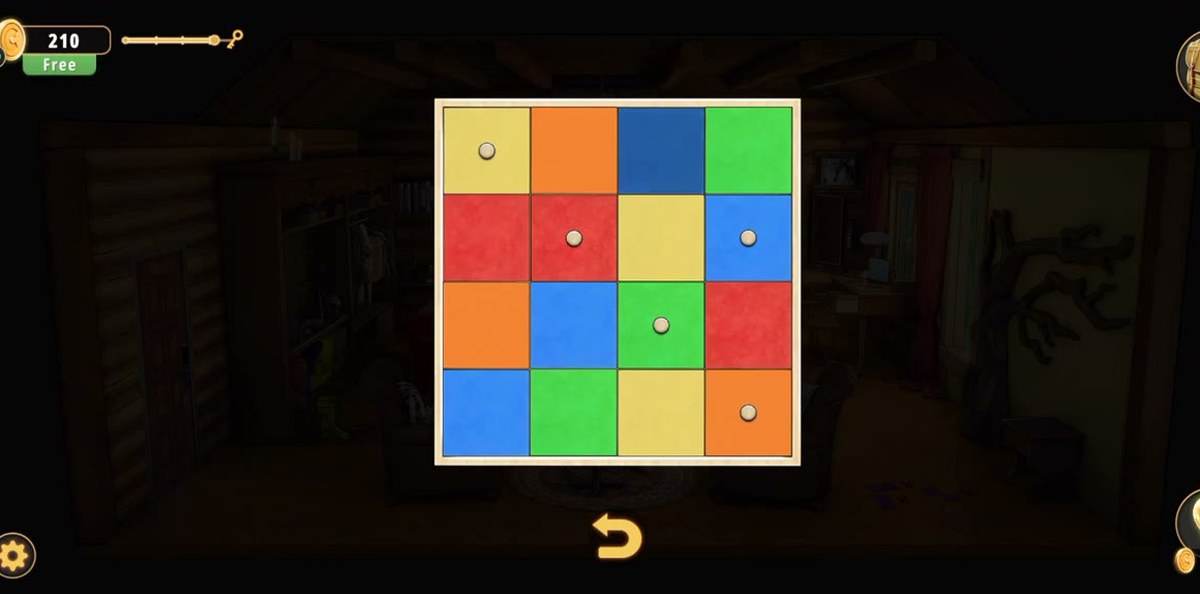
The recording spends twenty-five seconds swapping tiles and the board locks at about 3:13. Watch the dotted squares, not the whole grid: the five marked positions are the only ones that have to change, and the other eleven are there to make the board look like a bigger problem than it is.
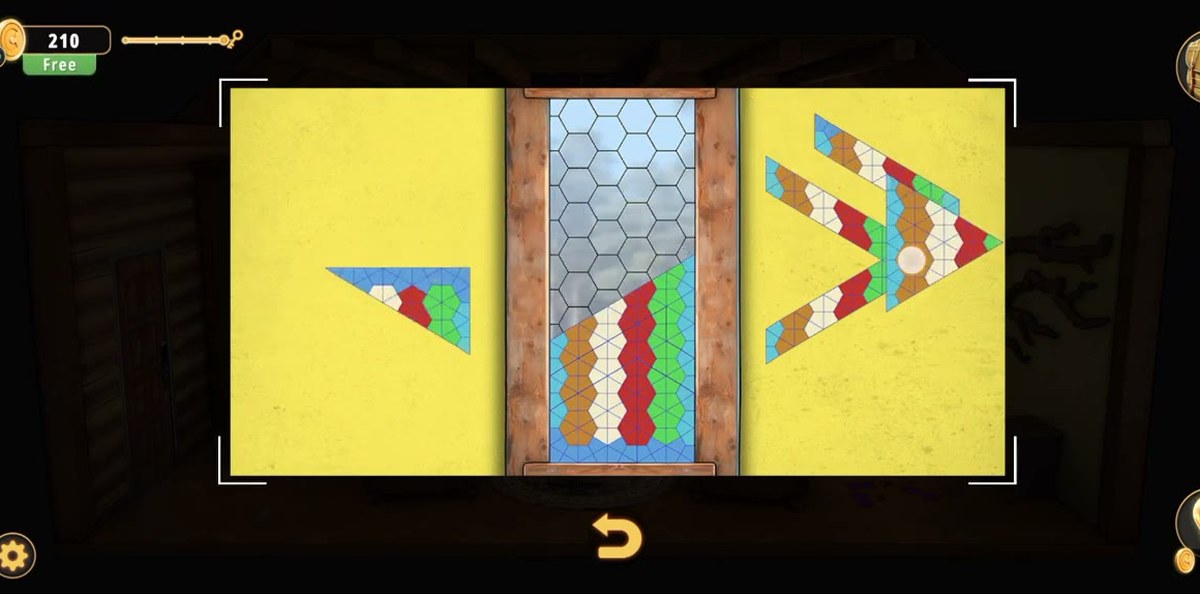
This is the longest single stretch in the level: 3:27 to 4:55, about eighty-eight seconds of continuous work. Nothing else in Log Cabin takes that long, so if you have been at this for two minutes and it still looks half empty, you are not stuck. You are on pace. Fill from the bottom of the frame upward, because the bottom rows are the ones the panel pre-fills and the empty sockets at the top are what you are actually matching.
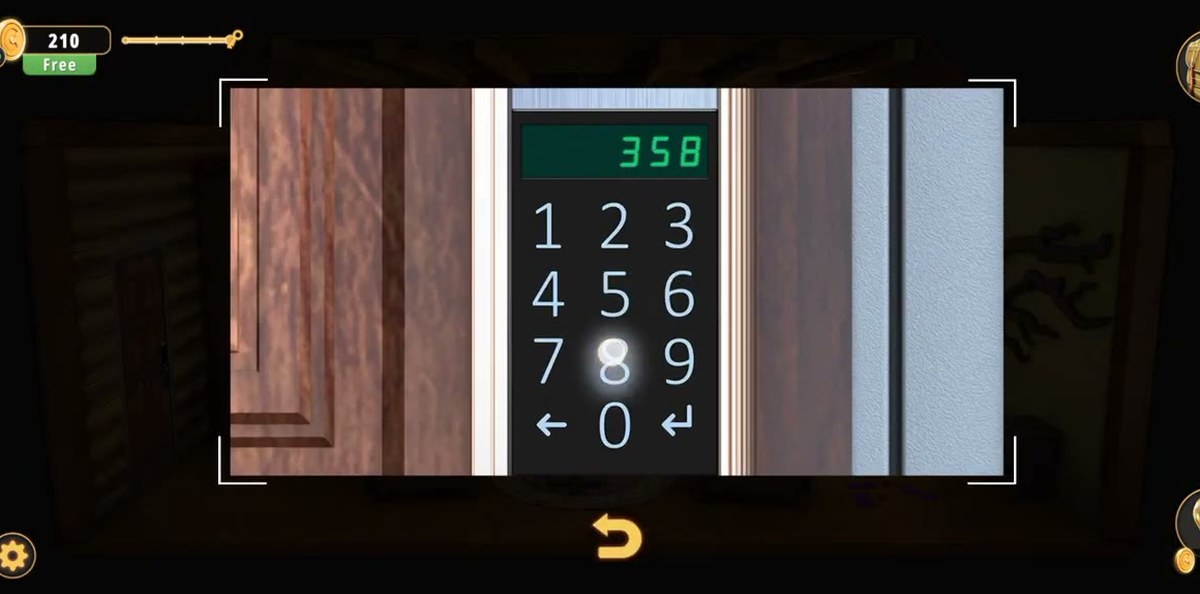
Do not overthink this number. It is not a cipher, not a date, and not the laptop code with two extra digits; it is a six-digit door code that goes in exactly as printed. It is also the number this page checks hardest: the same six digits were read off the paper at 4:59 and off the keypad display at 5:07 by two different readers, and both agreed.

The two numbers, and what they open.
Log Cabin uses two keypads and they are not interchangeable. Getting them the wrong way round is the single most common way to waste five minutes in this room.
| Lock | Code | How it reads on screen |
|---|---|---|
| Laptop on the desk, under the window (0:25) | 1746 | Four digits, seven-segment font, starts at 0000 |
| Keypad beside the door, after the last puzzle (5:05) | 358429 | Six digits, green display above a 1–9/0 pad, printed on the paper at 4:59 |
Everything else in the room is a physical puzzle: frames to press, rings to turn, paw prints to tap, tiles to swap, hexagons to drag. There is no third code, and the red safe takes paw prints rather than digits, so no combination you find written anywhere goes into a numeric pad except these two.
Why the two collections matter.
Two counters run in parallel in your bag, and the game is not generous about telling you which is which. They are the reason Log Cabin feels unfair: you can solve four puzzles, be missing one piece, and have no idea what you are missing.
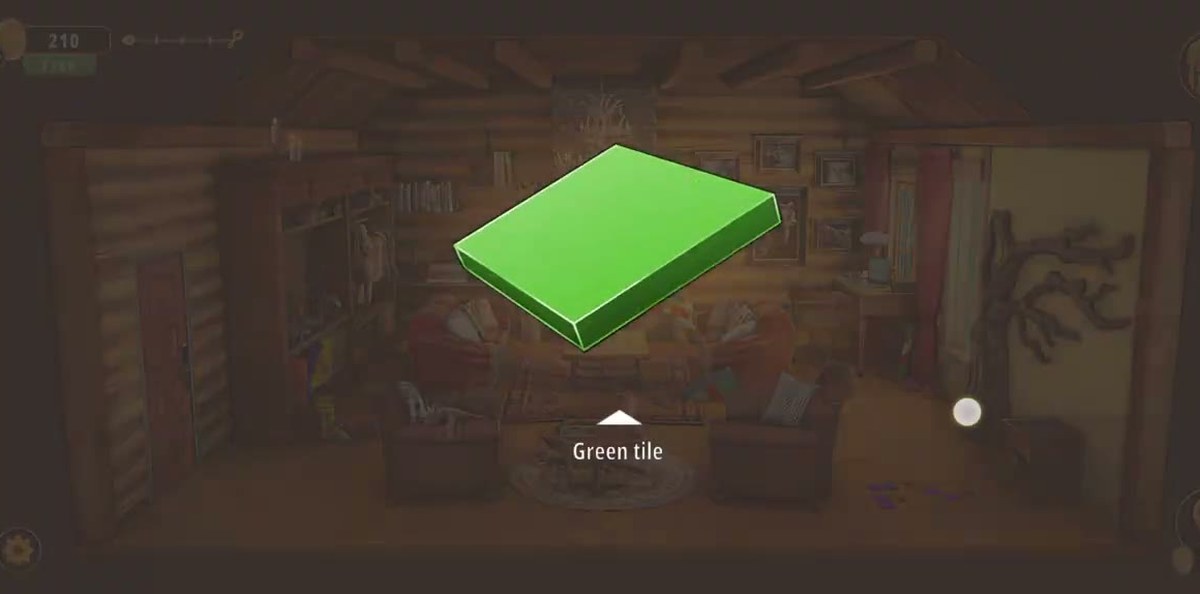
- Five coloured tiles: Green tile at 0:06, Blue tile at 1:34, Orange tile at 2:30, and two more picked up along the way. The counter hits 5/5 at 2:46 and the 4×4 board on the coffee table opens two seconds later.
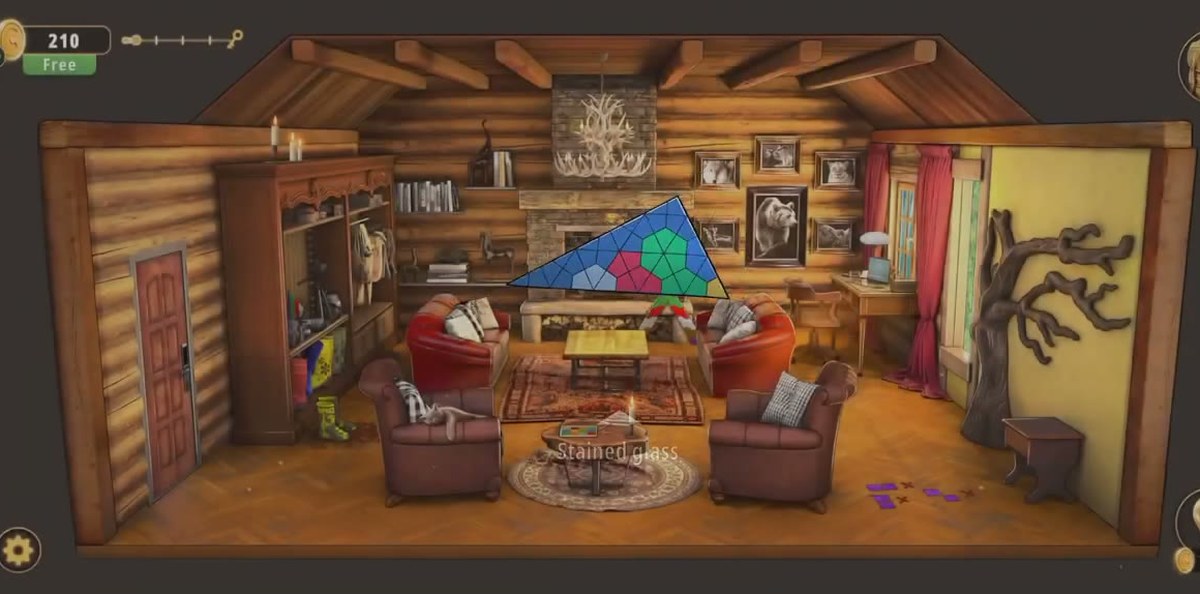
- Eight stained glass pieces: the first at 0:09, then more at 1:43, 2:40 and 3:16. The counter hits 8/8 at 3:22 and the hexagonal panel arrives at 3:27.
So the sequence is honest if you read the bag: tiles first, glass second, door last. If you are standing in front of the big yellow panel at 7/8, the missing piece is somewhere you have already been. Open the bag, check whether it says 7/8 or 8/8, and only then go looking.
Where people get stuck.
- The wall of portraits looks like set dressing. Six black-and-white animal photos above a sofa read as atmosphere, and the largest one. The bear. Is the frame that hides the safe. Press the pictures. All of them.
- Two animal clues that look like one puzzle. The sheet at 0:40 lists the same six animals as the wall, so players assume it is the answer key and try to read an order into it. It is a list, not a code: no numbers, no arrows, no handwriting. What it establishes is that the six animals are the point of the wall.
- The laptop's font. A seven-segment 7 looks like a 0 and a 6 looks like a 3, which is how a four-digit code turns into a five-digit-looking one. It is 1746: four digits, second digit a 7, last digit a 6.
- The hammer has no visible target. Every other tool in the room is used on something that looks locked. The hammer is used on stonework around the fireplace, so if you are carrying it and nothing responds, tap the stone, not the furniture.
- The tile board looks bigger than it is. Sixteen squares, five dots. The eleven undotted squares are noise; the puzzle is the five marked ones.
- Two keypads, two different answers. 1746 is the laptop. 358429 is the door. Typing the laptop number into the door pad does nothing at all, and there is no error message to tell you why.
What this page could not verify.
Where 1746 comes from. Our recording sets the display and moves on, so the display took it, but the camera never shows the clue that produced that number. No note, no clock, no watch face on screen at that moment. Treat 1746 as a verified input, not a solved derivation.
The paw-print sequence on the red safe. The drawer strip is clearly the ordered clue and the safe clearly takes it, but the recording taps fast enough that we cannot read which print went in which position. We are not printing a four-print order we cannot see: a wrong sequence costs a reset, and a guessed order is worse than none.
What the safe actually contains. The bag is never opened at that moment, so we cannot say whether the safe gave a stained glass piece, a tile or the key. The counters move around that point, which is why this page describes the compartments and not their contents.
That the hexagonal panel is built from the eight glass pieces. The timing (8/8 at 3:22, panel at 3:27) makes it the obvious reading and the panel is a stained-glass window, but the game never says the words out loud. If you have 8/8 and the panel still will not respond, that assumption is where to look first.
Chapter 1 levels.
FAQ.
What is the code for the door at the end of Log Cabin?
358429. It is written on the piece of paper you pick up at the very end of the level, after the last puzzle is solved, and the six-digit keypad beside the door takes it.
What is the four-digit code on the laptop in Level 8?
1746. The laptop on the desk by the window shows 0000 when you open it; the recording sets it to 1746 and the display takes it. We read the seven-segment digits twice at high zoom because OCR tends to confuse 7 with 0 and 6 with 3 on that font.
How many stained glass pieces and tiles are there in Log Cabin?
Two separate collections: eight stained glass pieces, which reach 8/8 at 3:22, and five coloured tiles, which reach 5/5 at 2:46. They feed the two last puzzles, not the door.
What is behind the animal portraits in Log Cabin?
A red safe with twelve paw-print buttons, green and red buttons underneath them, and a gold dial on the right. Solving the wall opens the compartment; the safe itself opens after the paw-print sequence from the desk drawer.
Does Log Cabin have a timed puzzle?
No. Nothing in Level 8 is on a clock. The longest single puzzle is the hexagonal glass panel in the last third, which took the recording about ninety seconds.
Previous room: ← Level 7. The Game Night Agency
Next room: Level 9. Junkyard →