Unofficial fan-made guide. Not affiliated with Webelinx Games, the developer of Rooms & Exits: Escape Room Games.
Rebuilt frame by frame from a recorded playthrough of the current build. Lighthouse is the last room of Chapter 1 and the only one in it with two floors: you can see both from the spiral staircase, and the whole level is a loop between them. Our recording clears it in 12:51 of in-game time, which makes it the longest room of the chapter.
Chapter 1 · Wicked Games11 of 11 with full written steps · 11 with a video
Quick answer
The last lock is the bomb on the man upstairs, and the answer is a colour pairing, not a number. There is no keypad anywhere in Lighthouse.
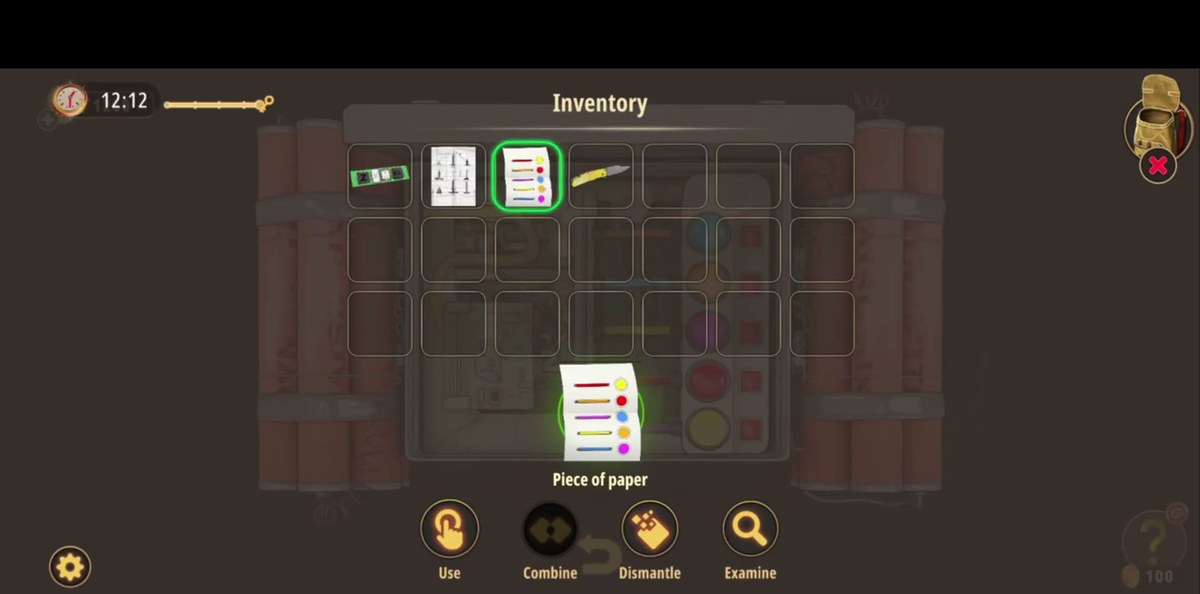
Open the Piece of paper in your inventory. It is a wiring table: five fuses on the left, five dots on the right.
Read the rows: red → yellow, orange → red, purple → blue, yellow → orange, blue → pink.
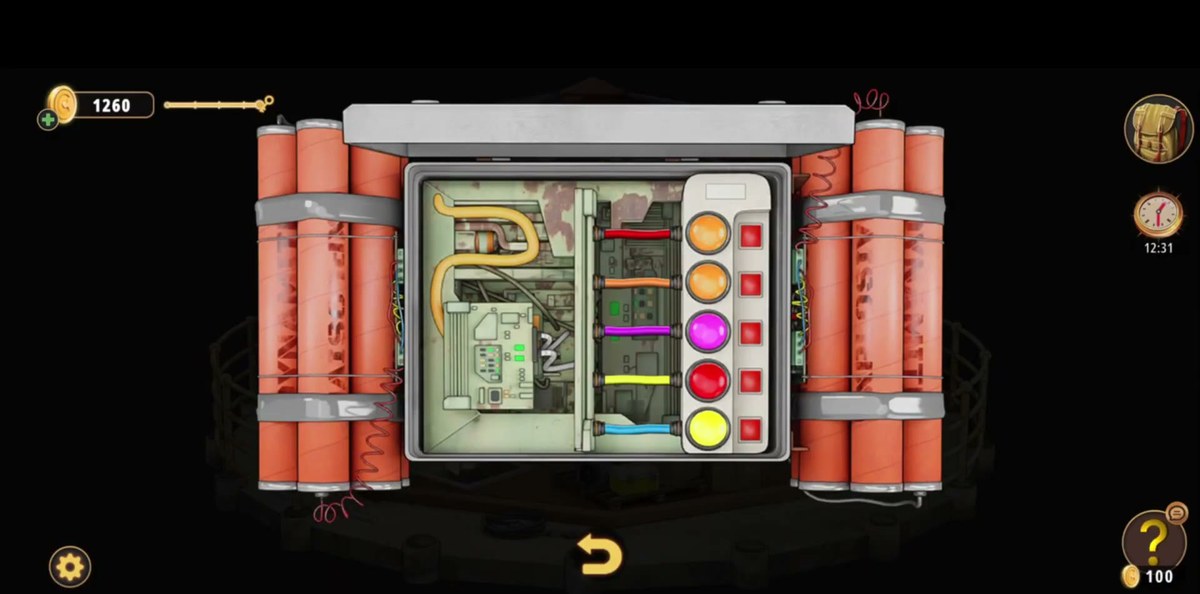
On the bomb panel the five wires hang in exactly that order, so the five round buttons want yellow, red, blue, orange, pink from top to bottom.
Everything else in the room feeds the way there: the four-colour cable board, the lettered books, the 3x3 candle shelf and the node board.
Finishing it closes Chapter 1. Lighthouse is room 11 of 11.
What this level actually is.
Lighthouse is two rooms stacked on top of each other, and the game opens in the wrong one on purpose: you start in the lantern room, standing next to a man who cannot tell you what he needs.
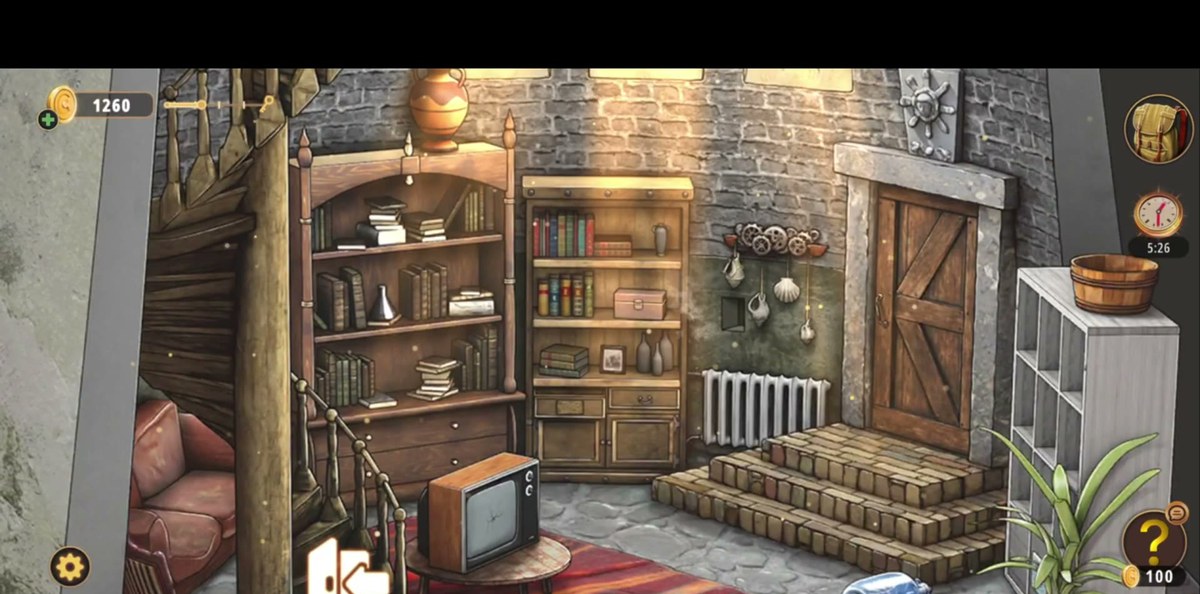
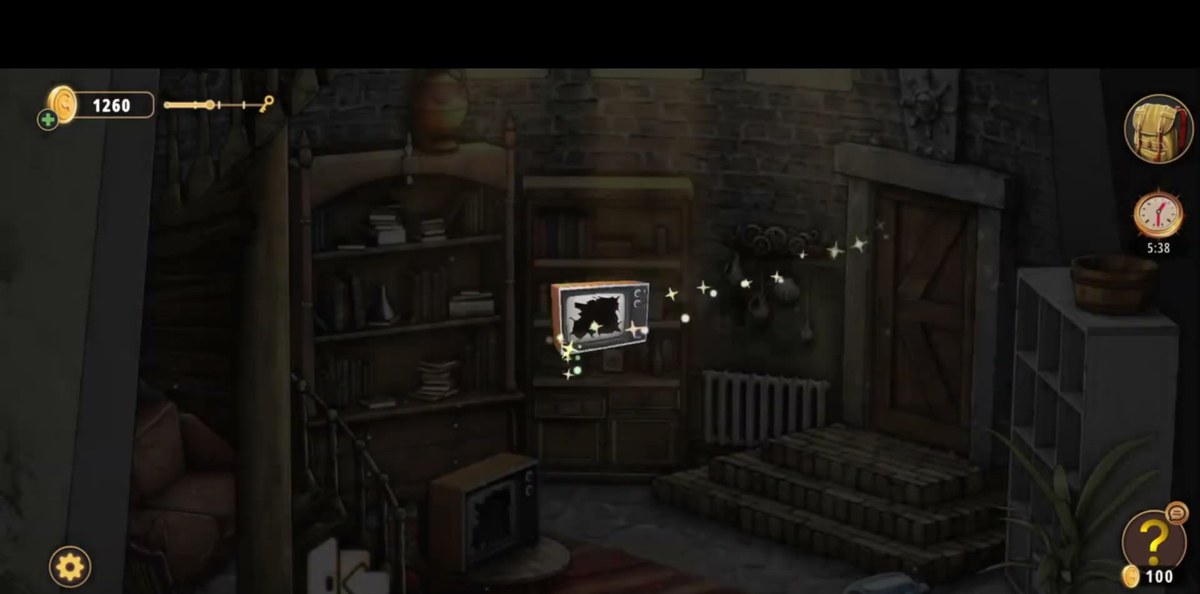
The living quarters: a round stone room with a spiral staircase, a bookshelf, a sofa, a small television, a white 3x3 shelf unit of candles and a chest. Almost every clue in the level is in here.
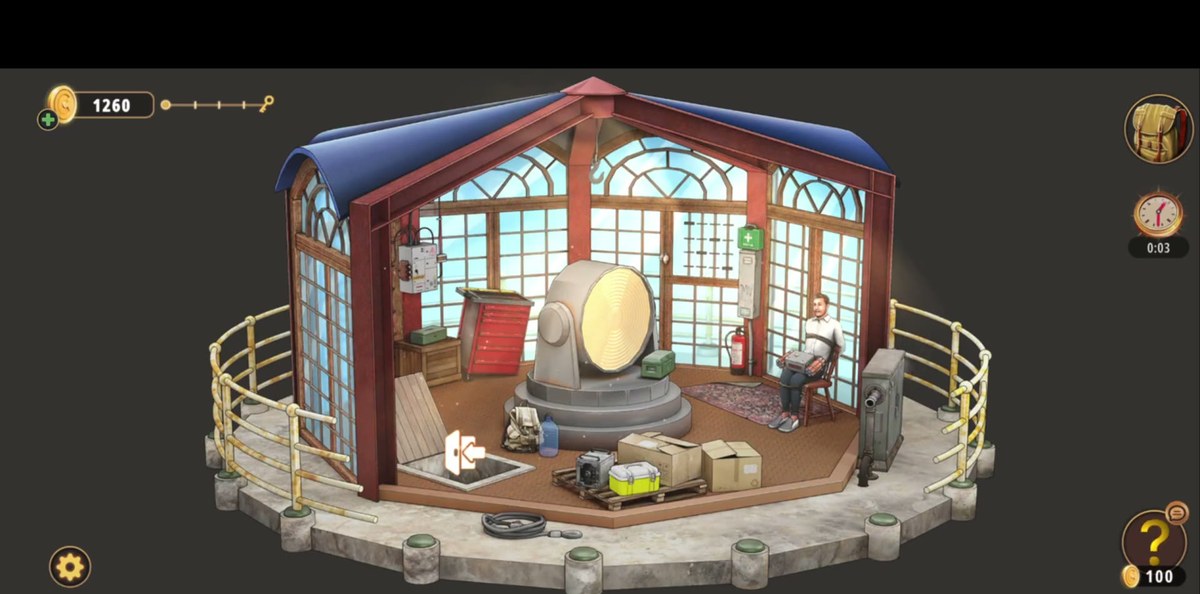
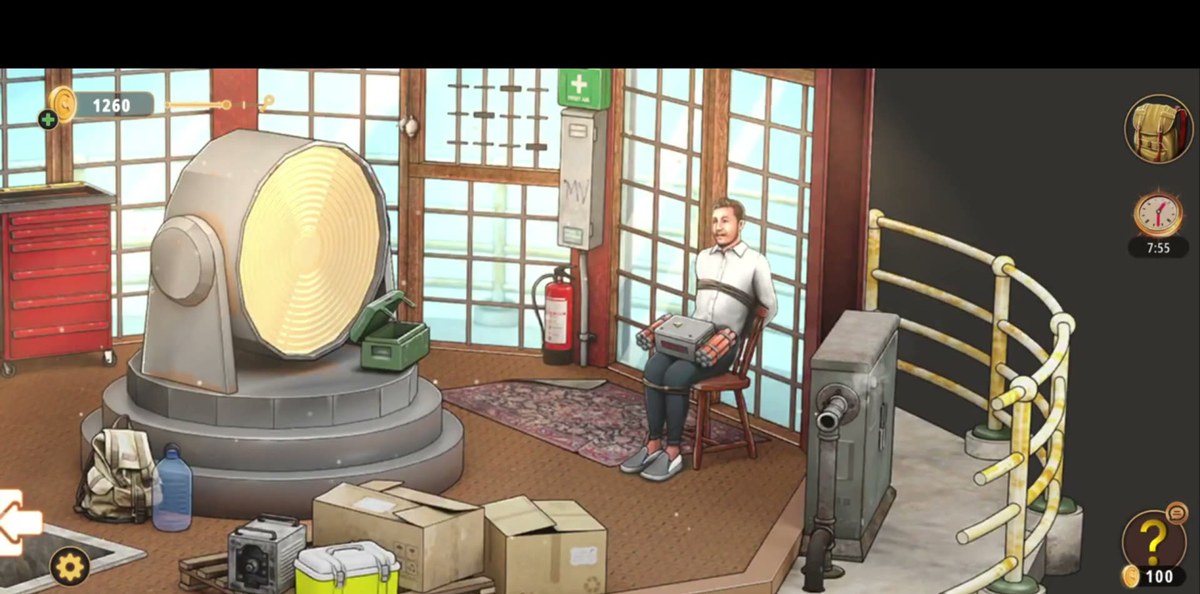
The lantern room: the glass floor at the top: multi-pane windows all round, the big lamp mechanism in the middle, a red tool chest, crates, a first-aid kit and a man tied to a wooden chair with dynamite and a grey device strapped to him.
The man is the reason you are here and the room wants you to think he is a countdown. He is not. Nothing in Lighthouse fails you, there is no restart screen, and the display on his chest is not a clock you race. Players who sprint between the two floors looking for a code lose more time than the room actually takes. Our recording spends twelve minutes and change and most of that is reading, not reacting.
The shape of the level is a single loop. The living quarters hand out items and patterns; the lantern room consumes them; and the last thing you touch, the defusal panel on the bomb, is opened by an item you picked up downstairs and probably never examined. That is the whole trick.
Step by step.
Step 1 · 0:12Two floors, two jobs
The level opens upstairs. Windows on every side, the big lamp housing in the middle, crates and a tool chest against the wall, and a man tied to a wooden chair with a grey device and bundles of dynamite strapped to him. Tap him once: the close-up is your goal for the next twelve minutes. There is nothing to solve in this room yet. Everything the man needs is one floor down, through the hatch by the spiral staircase.
Step 2 · 0:48The living quarters, swept once before you touch anything
Go downstairs and do a lap without solving anything. Four things matter and three of them look like furniture: the bookshelf with a row of decorated volumes, the little television on the sideboard, the white 3x3 shelf unit of candles next to the sofa, and the chest in the middle of the floor. The potted plant is not decoration either. Lifting items here costs nothing and the level never punishes a wasted tap, so take the lap: several of these are locked until something else in the room is done, and knowing which is which saves you a second pass.
Step 3 · 1:12The four-colour cable board
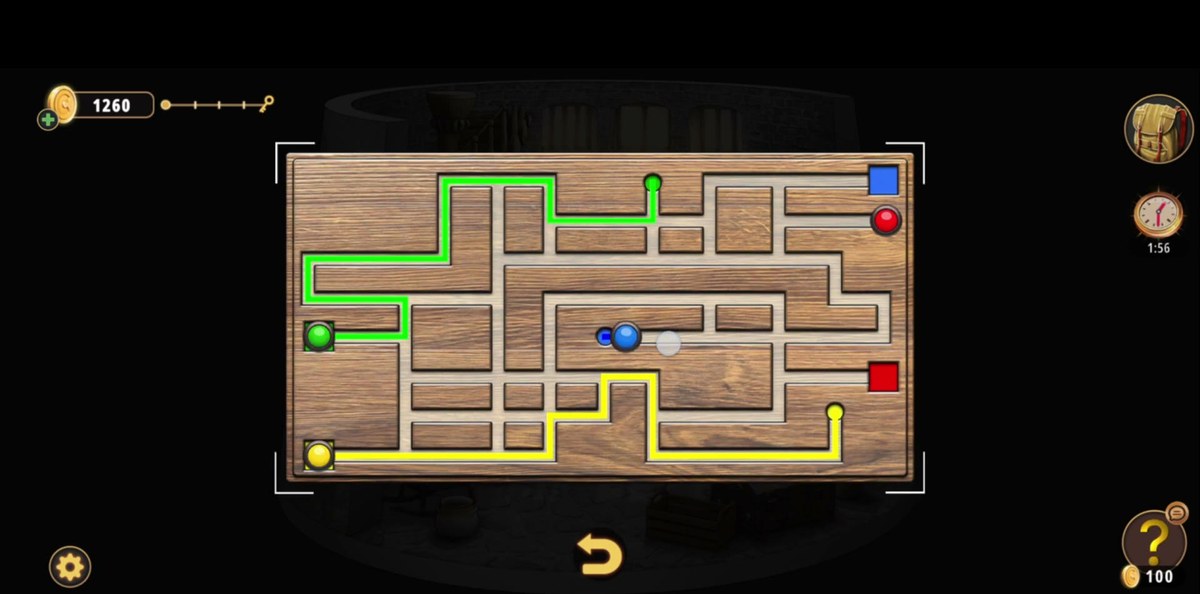
A wooden board in a white bracket frame, with channels carved into it and four coloured pairs on it: a dot and a matching square for each colour. Drag a path from each dot through the channels to its own square. The channels are shared and the paths cannot cross, so the first colour you draw decides how much room the others have left. This is the one puzzle in the level where a wrong start is worth undoing rather than pushing through. Our recording does them one at a time and the board clears in about a minute.
Step 4 · 2:36Wheel and Handle. Two items that are one item
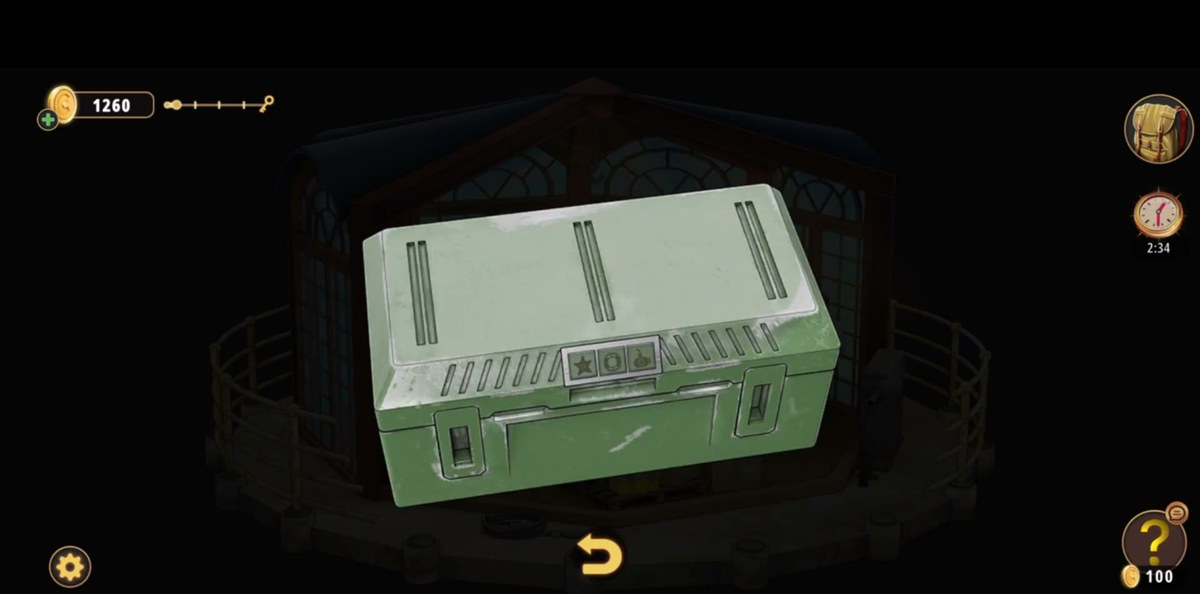
Two pickups in a row, both named on screen: a Wheel and a Handle. Both are taken in the lantern room, next to the red tool chest, and our recording walks them straight back to that chest. Nothing in the level names the target, so if you are hunting for where they go, the chest is the first thing to try. A wheel and a handle that arrive together on a wheeled chest is not a coincidence.
Step 5 · 3:30The three-slot icon panel
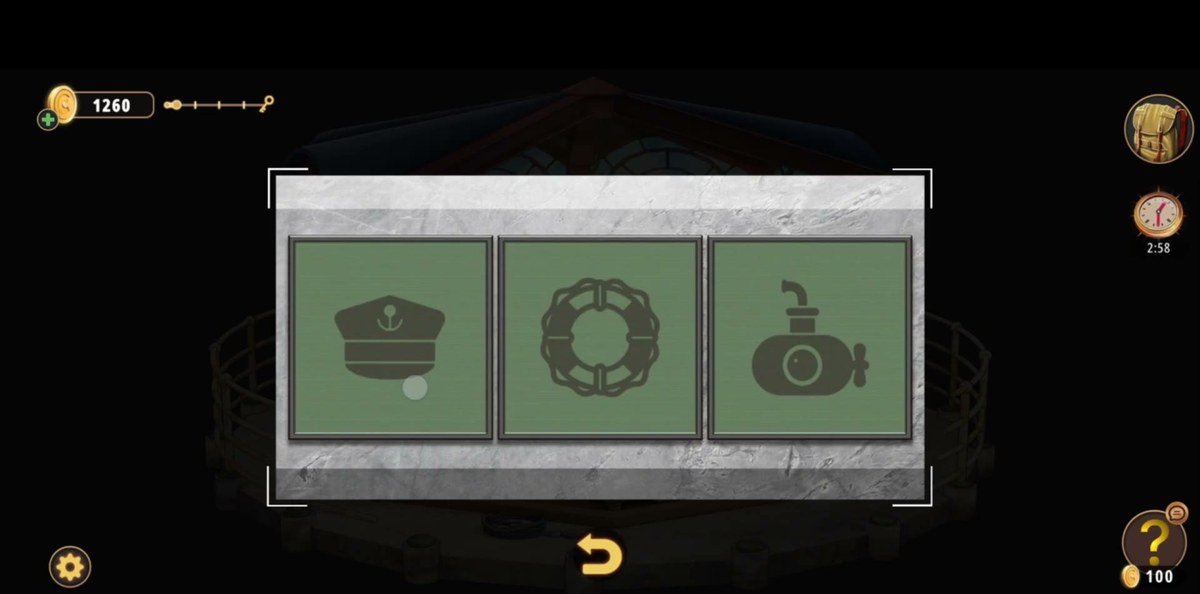
A grey panel with three square windows in it, each showing one carved icon: a captain's hat, a lifebuoy, a submarine. Tap a window and the icon in it changes, which is the whole mechanic. This is a set of three reels, not a lock. Our recording cycles the windows a few times before the panel releases, so the icons are not fixed to their slots. The trap is that all three start on plausible nautical icons, which makes the panel look finished the first time you find it.
Step 6 · 3:42Candle and Lighter
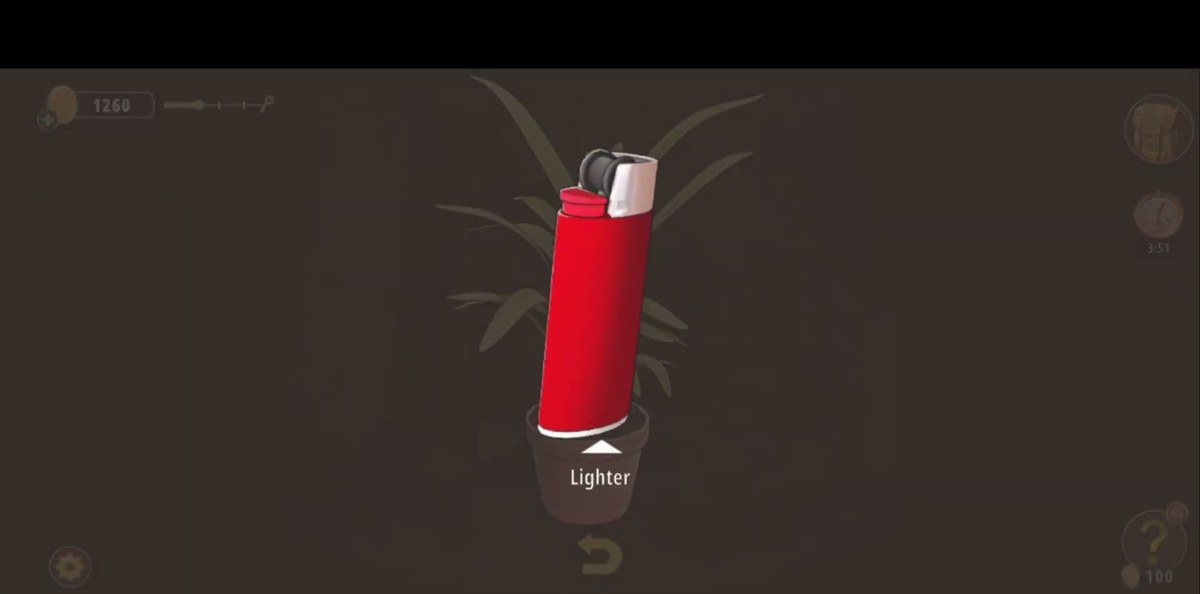
Two more named pickups, and this pair is a construction rather than a key: a Candle on a small round plate, and later a red Lighter by the plant. Where they are used is the candle shelf in the living quarters: our recording ends up back at that shelf with both in the bag, and the candles on it are burning from that point on.
Step 7 · 4:06The hanging panel
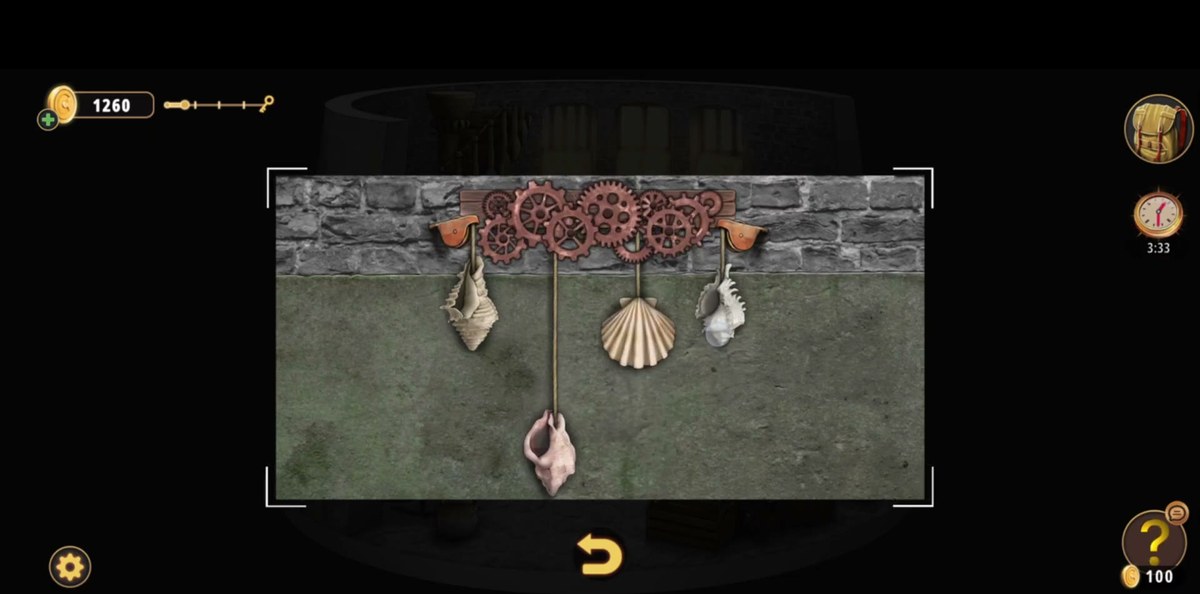
A horizontal bar with objects hung from it on hooks. A bell, shells, a small bucket. With gears at both ends. Our recording sets the row and the panel gives way immediately after. This is the puzzle people give up on because it does not look like a lock at all; it reads as a workshop rack. Treat the positions as a code: copy the order you saw, count from the left, and set each item by tapping it rather than dragging.
Step 8 · 5:42The row of lettered books
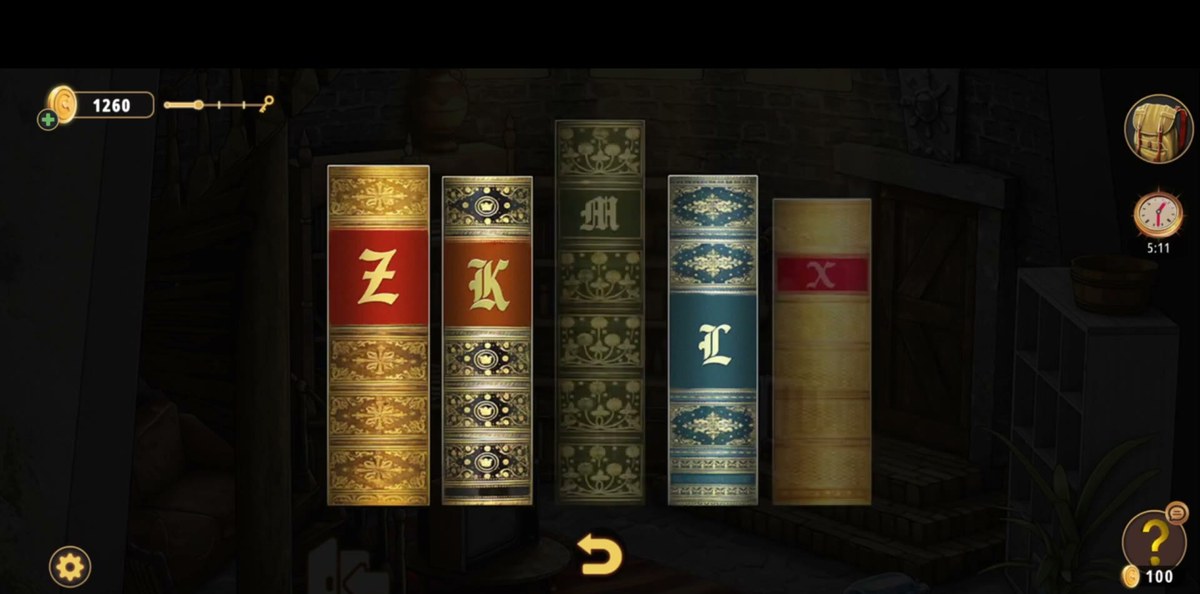
Five decorated volumes in a row on the shelf, one letter on each spine, in five different colours. Read them off the shelf in the order they stand and put that order into the lock they belong to. Two warnings. First, the letters are not a word you can recognise, so do not try to guess the answer from the letters. Copy the row. Second, our two passes over this shelf read the letters in different orders, and we would rather not hand you a five-letter string we cannot stand behind. Read the row on your own screen; the letters are large and there is nothing else competing for space.
Step 9 · 6:12The television and the 3x3 shelf unit
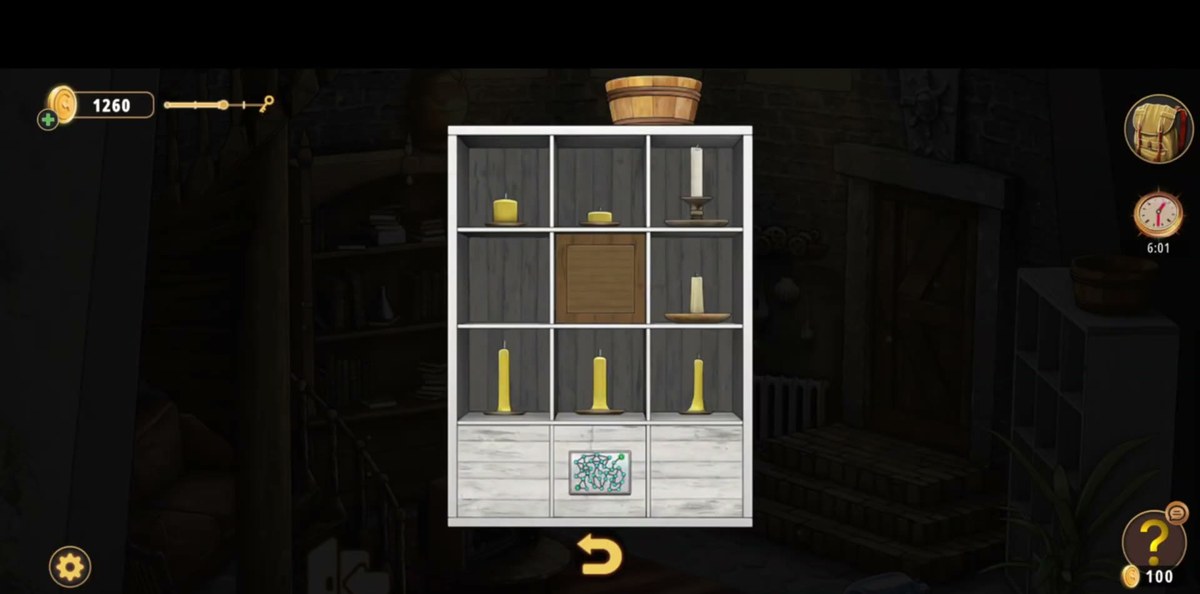
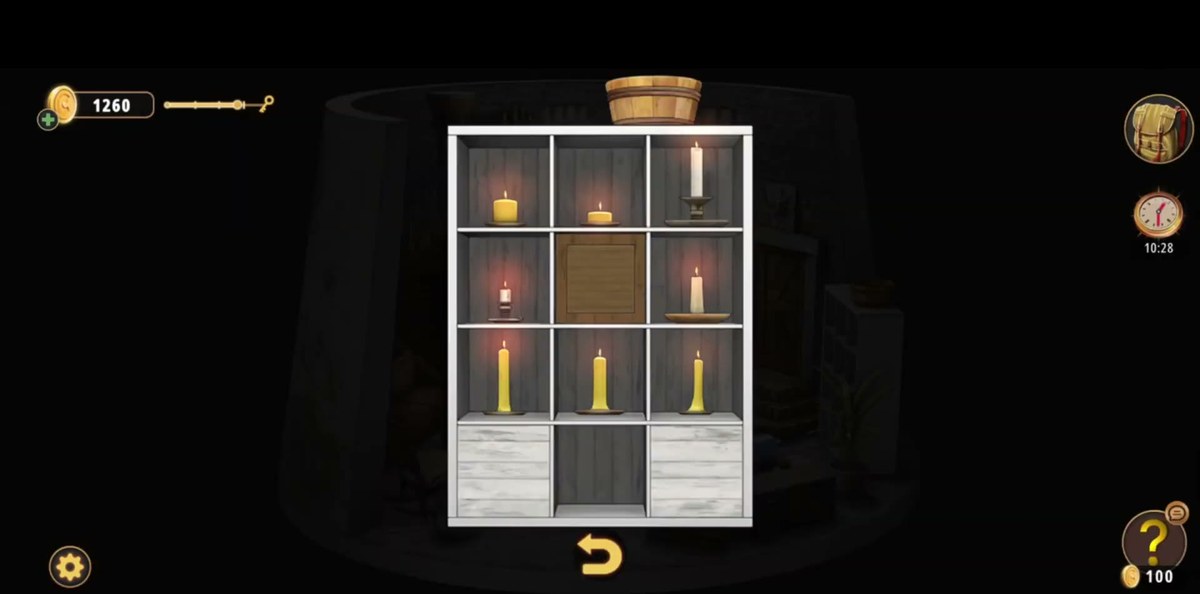
Two pieces of furniture on the same side of the living quarters that are easy to walk past. The small television on the sideboard is interactive. Tap it and the game gives you a close-up rather than a line of dialogue. The white shelf unit next to the sofa is a 3x3 grid of compartments, some of them holding candle-shaped objects, and it is the thing the candle you picked up two steps ago is for. Neither of them opens on the first visit; both come back later in the level.
Step 10 · 8:30The man, and the only written line in the level
Back up in the lantern room, the man tied to the chair gets his close-up and one line: "Please, help me, I'm so afraid!" That is the entire instruction the game gives you, and it is also the moment to actually look at what is strapped to him. A grey open-front device with a panel of coloured buttons and wires inside it, bundled with dynamite, and a red display above the buttons. The panel is the last puzzle in the level, and it is shut until you have the paper. If you came up here hoping to force it, you are one item short.
Step 11 · 10:06The node board
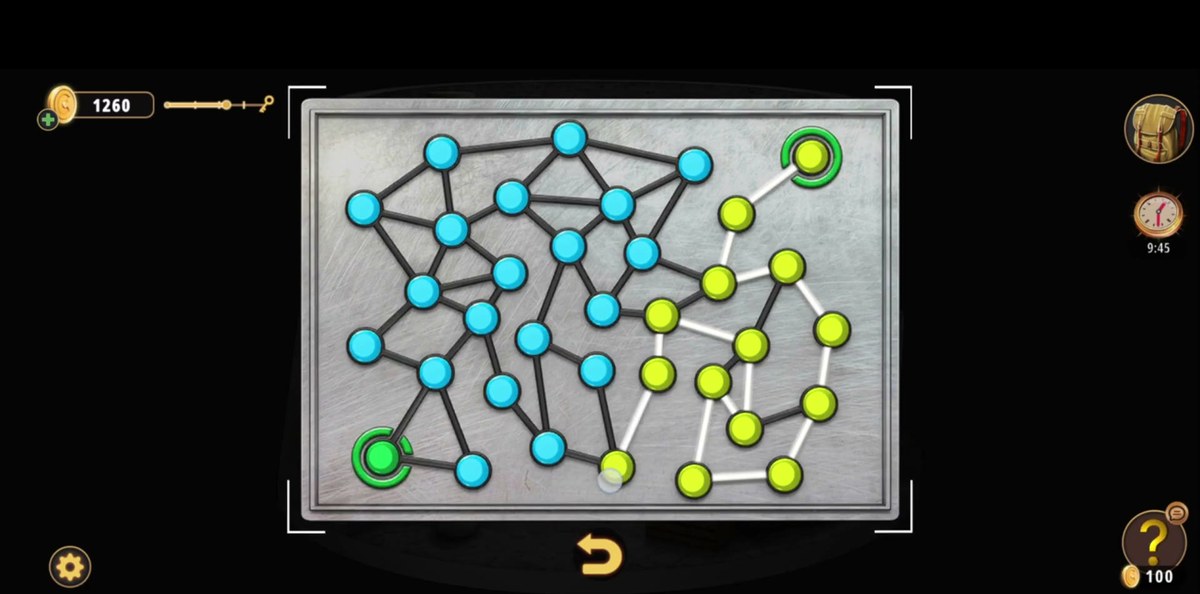
A metal-framed network of small nodes. Roughly three dozen of them. With two larger ringed nodes at opposite corners and no obvious order to follow. The job is to link the two ringed nodes through the network: you tap node by node and the ones you have taken light up, while everything untouched stays its original colour. In our recording the path is built one node at a time and the whole board flips green when the two ends finally connect. Everything you can see on the board is on the board; there is no external clue for this one, which is why it eats time.
Step 12 · 11:00The candle chart, and the shelf that answers it
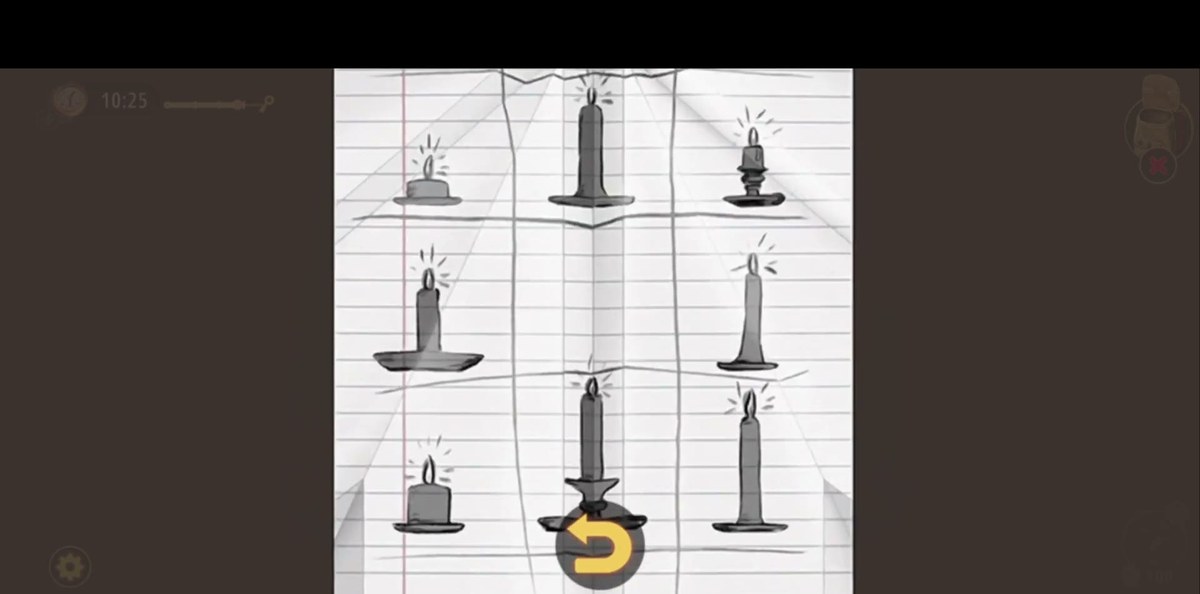
A 3x3 card of candle drawings. Nine cells, each one a different candle in a different holder. And then the white shelf unit again with the candle you carried down from the lantern room sitting in it. This is the step the whole candle-and-lighter thread has been pointing at. Our recording works the two together: the chart tells you what the shelf should look like, the shelf is where you build it. Once the candles on the shelf are lit, the room stops sending you back to it.
Step 13 · 12:36The Piece of paper. The answer to the whole level
The item you have been carrying since the living quarters, finally worth opening. It is a wiring table, drawn in two columns of five. On the left, five fuses. On the right, five dots. Each row pairs one fuse with one dot of a different colour, and that is the code for the bomb. Our two independent reads of this item agree row for row, and the fuse colours match the wires hanging inside the defusal panel exactly. Which is how we know the paper is a drawing of that panel and not a general hint.
red fuse
→ yellow orange fuse
→ red purple fuse
→ blue yellow fuse
→ orange blue fuse
→ pink
Step 14 · 13:08The bomb panel: five wires, five buttons
The panel inside the device on the man's chest. Left to right there are three things: five wire ends, five round buttons, five small square buttons. The wire ends hang in the same order as the fuses on the paper. red, orange, purple, yellow, blue: and the round buttons are what the dots refer to. So the buttons want, from top to bottom: yellow for the red fuse, red for the orange fuse, blue for the purple fuse, orange for the yellow fuse, and pink for the blue fuse. Our recording works them from top to bottom, one at a time, and the panel goes green on the last one.
Do not match a button to the wire beside it. The panel is laid out so that the button sitting next to a red wire is not the red one. The paper pairs each fuse with a different colour, and that is the whole puzzle. If you have been pressing buttons by the colour of the wire in the same row, nothing will happen no matter how many times you do it.
Step 15 · 13:38Level complete. And the end of Chapter 1
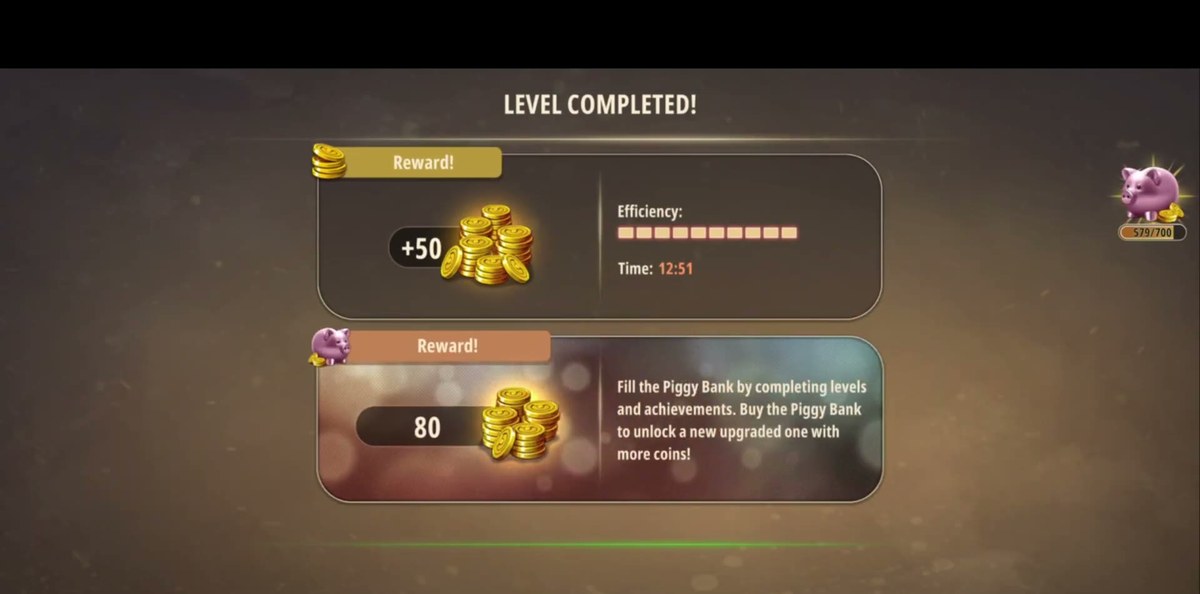
The panel clears, the close-up cuts back to the room, and the last dialogue plays out: "Quick! We can all leave now!" Then the summary: LEVEL COMPLETED!, +50 coins, efficiency 8 of 10, in-game time 12:51, and 80 coins into the piggy bank. Lighthouse is room eleven of eleven, so this is where Chapter 1, Wicked Games, ends. There is no epilogue screen and no cutscene gate. You get the summary, the Continue button, and the map.
They look for a keypad. Lighthouse has no digit code anywhere. Every lock is a path, a row of icons or the colour pairing, so searching the walls for four digits is searching for something the room does not have.
They read the paper as a drawing instead of a table. The five fuses on the left and the five dots on the right are a wiring diagram. If you only look at the fuses, the panel looks like it wants you to match colours that are already matched, and you press buttons for ten minutes with nothing happening.
They treat the man as a countdown. The device has a red display and he is visibly terrified, which reads as a timer. Nothing in this room fails you. Players who rush between the two floors lose more time than the room takes.
They leave the candle behind. The Candle and the Lighter are the two items in the level that look like set dressing, and the shelf they belong to is the one piece of furniture in the living quarters that stays inert until they arrive.
They stop at the panel. The defusal panel is the last puzzle, not the last action. Once the buttons are set, the close-up stays on the device until the dialogue plays out. Tap through it or you will sit in front of a finished puzzle wondering what else is missing.
Chapter 1 ends here.
Lighthouse is the eleventh room of eleven in Chapter 1, and the level summary is the only ending the chapter gets. No credits, no cutscene, no second door. If you have come this far in order, the earlier rooms are all written up on the hub: Chapter 1 level guides. Chapter 2 is not documented on this site yet; when it is, it will be built the same way, from recordings rather than from other guides.
One thing worth knowing before you move on: the level card prices Lighthouse at 15 energy and pays +50 coins, which is worth planning around if you are running the chapter on a budget.
Chapter 1 levels.
Chapter 1 · Wicked Games11 of 11 with full written steps · 11 with a video
How do you disarm the bomb in Rooms & Exits Lighthouse?
Use the Piece of paper in your inventory. It shows five fuses, each paired with a dot of a different colour: red with yellow, orange with red, purple with blue, yellow with orange, blue with pink. On the bomb panel the five wires hang in the same order, so the five round buttons want yellow, red, blue, orange and pink from top to bottom.
What does the Piece of paper in Lighthouse show?
Two columns of five. On the left are five fuses, coloured red, orange, purple, yellow and blue from top to bottom. On the right are five dots, coloured yellow, red, blue, orange and pink in the same rows. It is a wiring table, not decoration: each row pairs the fuse on the left with the button colour on the right.
How many levels are in Rooms & Exits Chapter 1?
Chapter 1, Wicked Games, has eleven rooms. Lighthouse is the eleventh and the last one; finishing it returns you to the level map and closes the chapter.
Does Lighthouse have a timer or a fail state?
No. The man tied to the chair is carrying dynamite and a display, which reads as a countdown, but the room never fails you. There is no restart screen and the puzzles wait for you. Our recording clears the level with an in-game time of 12:51.
Is there a number code in Lighthouse?
No. Lighthouse is the one Chapter 1 room with no keypad and no digit code. Every lock in it is either a path to trace, a row of icons to set or the colour pairing from the Piece of paper. If you are searching for four digits, you are in the wrong room.
 GridPaw
 Shikaku
 Akari
 Kakuro
 Nonogram
 Nurikabe
 Pictomino
 KenKen
 Binary
 Star Battle
 Hashi
 Slitherlink
 Murder Sudoku
 Meowdoku
 Crazy Cleanup